Classic vs arachne scarf seams
Hello all,
Clarifying question about how to change how the slicer slices. I have a thin wall that is supposed to work as a living hinge, as such I need to have this section be a continuous layer as seen in figure one. Figure two shows how most of the layers were sliced normally, with a gap in the middle that is causing the failure in the living hinge.
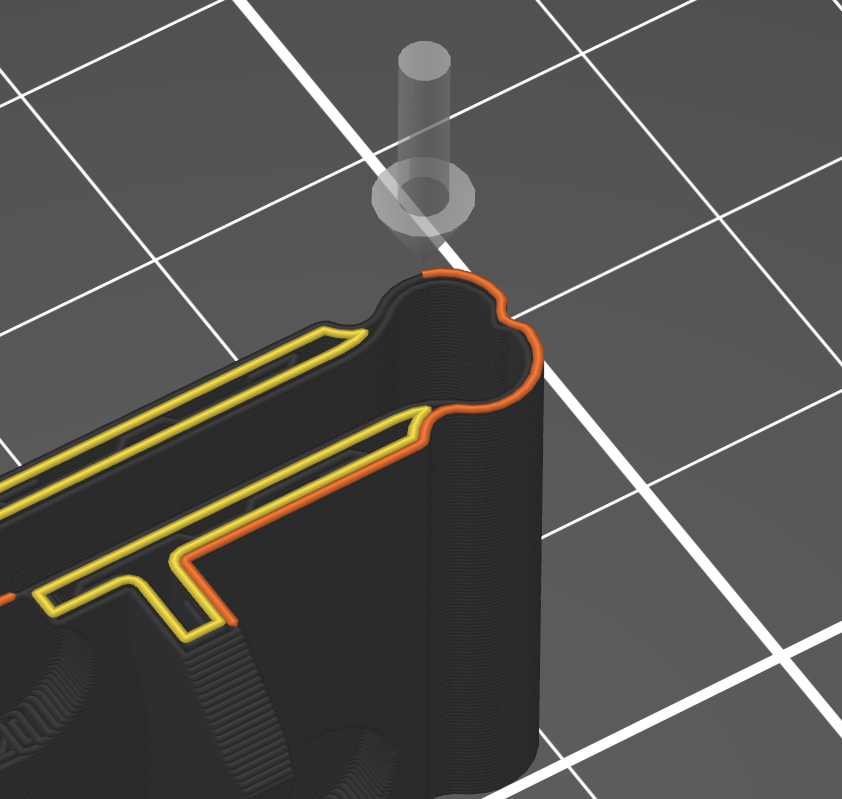
Figure 1: Example of how I need each layer, with a continuous run along the living hinge
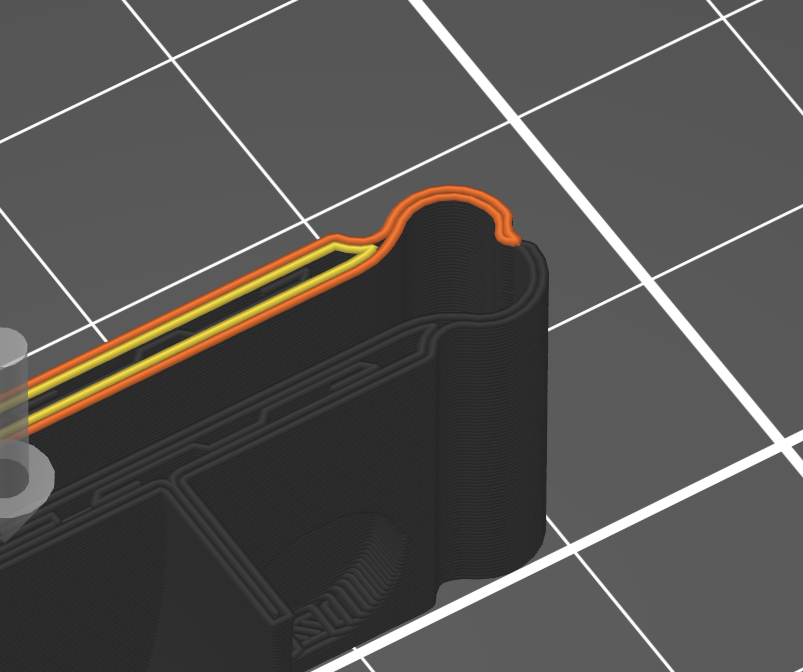
Figure 2: Example of how the living hinge is split, resulting in an ed print that isn't fused together.
I tried adjusting the seam settings in the slicer without success. Then I moved on to Scarf seams. Arachne didnt solve the issue but Classic did, specifically:
- Scarf joint placement (everywhere / Scarf start height 0% / Scarf joint length 20mm / Max scarf joint segment length 1mm / fill gaps / Perimeter generator Classic)
Two questions:
- One, is this the proper way to move the printers starting position on a print?
- Two, what is going on under the hood between classic and Arachne perimeter generation?
RE:
Did you try seam painting to force seams in specific region? https://help.prusa3d.com/article/seam-painting_168620
(this is similar to paint on supports, which describes it better how to use it https://help.prusa3d.com/article/paint-on-supports_168584 )
See my GitHub and printables.com for some 3d stuff that you may like.
RE: Classic vs arachne scarf seams
It's so sad to see this kind of post, my mentor made an entire video about this and how to control seams how to make seams invisible, the interest in this video was so low from the community, and the comments so poor that he removed the information from YouTube. I'm sad to tell you this, however I'm glad to be able to tell you that all you are asking for is possible in all current versions of prusaslicer from 2.4 alpha, to present, all you have to do is figure out how.
Regards
RE:
BTW for a 50 minutes or more prusa wouldn't let me post and would only show me this.