Change in diameter of print
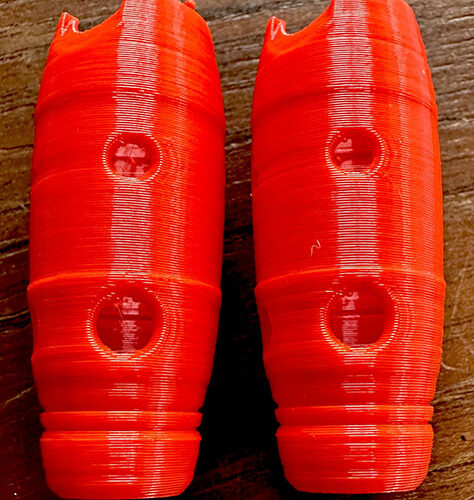
I have drawn a shape in Fusion 360 and printed successful versions at 100% and 75% scale. When I print a 50% copy, made by reducing in Fusion or in Prusaslicer, they come out flawed in the same way. Is there an explanation why these prints fail? The OD should be a smooth curve, but it has reduced diameter in the center that does not appear in the Prusaslicer preview.
RE: Change in diameter of print
Search for the term 'buldge' on the forum. Yes I know its not spelt correctly. There are pages and pages about this effect.
RE: Change in diameter of print
Thanks for the "heads up". I see I am late to the party. My shape has a 3 layer wall, and where the diameter changes, the slicer preview shows a color change from yellow to white. What does this indicate? It shouldn't be infill, because I have 4 perimeters.
If I choose a 60% scale instead of 50% the preview shows all yellow interiors. I'm trying to print one with Simplify3D now (I would hate to go back to this). When it finishes I'll try a 60% model and see if the buldges go away.
RE: Change in diameter of print
White is gapfill. You could try arachne if you aren't already as that should get rid of gapfill but nothing seems to be a sure fire thing to get rid of it. A lot of what you are picturing looks like plastic contraction. Which could be down to so many factors (or a combination).
Without seeing the project and being able to slice with exactly the same settings and run through the various preview options to get a better idea of what the slicer is doing its hard to tell for certain. Is it going at a different speed on those sections ? does that area get a different amount of airflow due to the duct design ? So many possibilities.
