Building raisers for support
So I'm trying to create a barely infilled box that will have supports on top of this in order to minimize the supports used. However, no matter what I do, the supports go through the box, thus making it worthless. I want to start the supports on top of the box so the supports only raise an inch or so. Is there a way to do this in PrusaSlicer 2.1.0
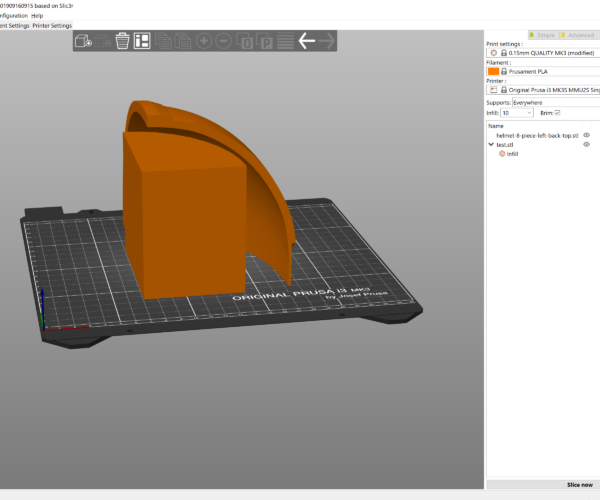
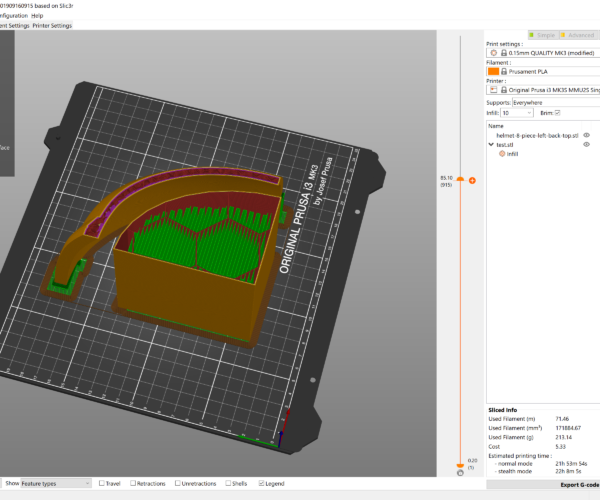
The first picture is of the models themselves before slicing. The semicircle underneath is my box that I want the supports to begin on top of. The second picture is the supports inside of the box that I want to get rid of, and have them start on top of the box instead.
Best Answer by Sembazuru:
@nathan-kearney117
I've found that Plicer doesn't always avoid (for example) object B when supporting object A (it seems to slice them separately). Even if you overlap two different objects looking carefully at the layer preview one will see that there will be a doubling up of plastic in the overlap.
The way to get around this in Plicer is to have a single "object" that is made of multiple parts. For your layout I would load the helmet piece stl. Then right click on it to add a part (load part). You can apply different settings for the individual parts (so you can decrease the infill from the test.stl part). This should force the supports for the inside of your helmet piece to be generated from the surface of the test.stl.
Granted, you still might be using more plastic in your test.stl part than the supports (usually those supports are intentionally underextruded a bit to make them weak for easy break-off). The filament usage stats after slicing will tell you if this technique will really save you plastic.
RE: Building raisers for support
It is possible to do this sort of thing as I use it when printing helmets to reduce the amount of support used inside. With a helmet I usually model a cylinder inside as a seperate model but the shape doesnt really matter except that the top of the inside model also needs to be printable.
Import them in as separate models and place the interior where it needs to be. You can then apply modifiers to the interior model to set number of perimeters and how much infill that uses so that its printable. The you add a support enforcer modifier such that it touches the exterior model where you want supports to be placed. If you size things correctly you should only get support between the 2 stl files.
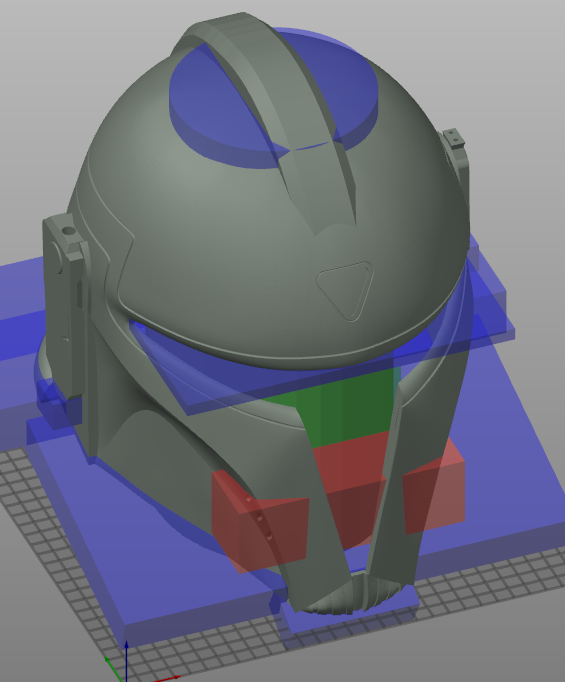
Ok heres a one of the helmets I did, it has the helmet stl and the interior support I modelled to go with it, you can see various support enforcers (blue)and a support blocker (in red)
Next here you can see the interior support. It was set to have 2 perimeters, no bottom layers and no infill.
The top flat section was actually printed with bridging. Theres was actually no droop even with the really long bridge lengths used (this was printed on a modified cr10 with much increased fans so can do 120mm long bridges no problem). This means no infill was required. Even if the bridge had drooped its on a throwaway part so it doesnt matter.
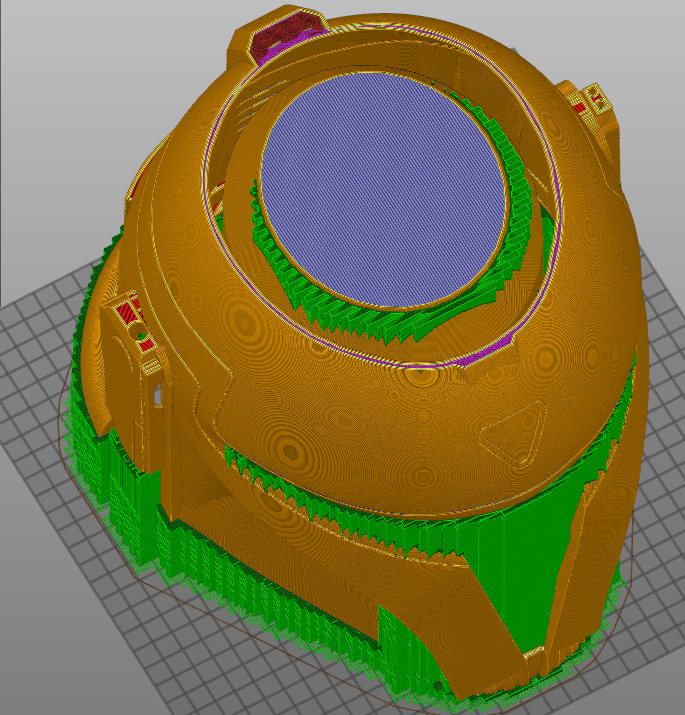
Here you can see the support being built up on top of the interior cylinder for the top of the helmet.
Sorry about the distorted images the forum seems to be squishing them
RE: Building raisers for support
So I set mine up the same way. The model is actually for the Mandalorian helmet. The helmet and the box are two separate pieces, with the box infill being around 2%. However, with supports everywhere and also with enforcers only, the supports go through the box, rather than between the two.
RE: Building raisers for support
@nathan-kearney117
I've found that Plicer doesn't always avoid (for example) object B when supporting object A (it seems to slice them separately). Even if you overlap two different objects looking carefully at the layer preview one will see that there will be a doubling up of plastic in the overlap.
The way to get around this in Plicer is to have a single "object" that is made of multiple parts. For your layout I would load the helmet piece stl. Then right click on it to add a part (load part). You can apply different settings for the individual parts (so you can decrease the infill from the test.stl part). This should force the supports for the inside of your helmet piece to be generated from the surface of the test.stl.
Granted, you still might be using more plastic in your test.stl part than the supports (usually those supports are intentionally underextruded a bit to make them weak for easy break-off). The filament usage stats after slicing will tell you if this technique will really save you plastic.
See my (limited) designs on:
Printables - https://www.printables.com/@Sembazuru
Thingiverse - https://www.thingiverse.com/Sembazuru/designs
RE: Building raisers for support
Yeah the interior support cylinder on mine is part of the same model as the helmet, so in the list view on the right under the same 'branch' rather than separate as that way as Sembazuru says slicer treats them as one for purposes of working out the slice.


