Adding more perimeters to one location only - Nicely?
Greetings!
I was wondering if it would be possible to add more perimeters to a location only instead of either the whole model or a height constrainer section?
The reason I'm asking is because of me using Heat Inserts every once in a full moon that require a certain wall thickness around them - Usually around 2-3mm which is like 5-8 perimeters and totally unnecessary for anywhere but the immediate area of the Heat Insert unnecessarily prolonging the print times of the entire height range of the Insert being up to 8mm high.
I tried adding a Shape Modifier to the area that increases the Perimeter count in that area but not only is it clunky AF but it also works like it cuts out the area of the Modifier out of the Model to add the additional Perimeters in the remaining hole and then adds the cut-out area back with its own Perimeters - Yea... Technically the area now has the number of Perimeters I want but its UGLY as hell to look at because of the seam between the two meshes which only gets worse if the hole is not at an X/Y/Z Planar Angle.
So yea... Is there a nice way to do this within PS 2.3.0 itself - Like to begin with making it easier to mark the area supposed to have more Perimeters by selecting the hole and well... Only having it generate more Perimeters without the Splitting apart of the Model and thus creating a seam between the parst?
RE: Adding more perimeters to one location only - Nicely?
Nope. That’s how modifier meshes function unfortunately.
RE: Adding more perimeters to one location only - Nicely?
As for the seam, would it work to use 100% infill around the hole as an alternative to extra perimeters?
RE: Adding more perimeters to one location only - Nicely?
Hi Marvin,
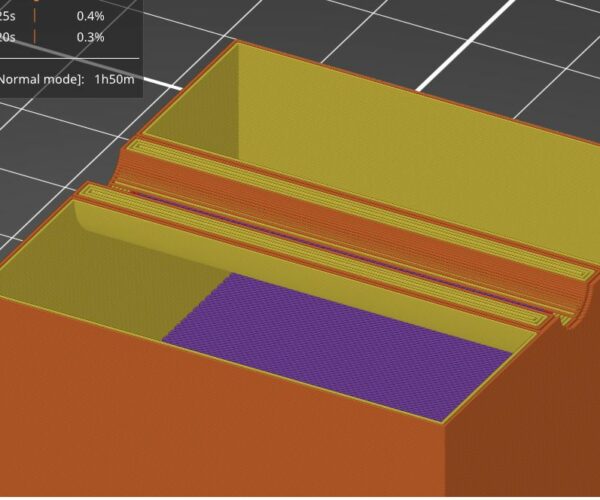
if your modifier mesh does not cut the external perimeters, the extra perimeters added by the modifier mesh are hidden on the surface of your model
for example I made a simple cube with a hole through it and added a modifier mesh which penetrated the exterior perimeters one one side but did not penetrate the exterior perimeters on the other
As you can see on the right hand wall, the extra perimeters do not show, whilst on the left they would show as normal
obviously I don't have access to your original model, so I cannot demonstrate it on your actual model,
50mm cube hole
I have enclosed a .3mf file for you to play with if you wish
regards Joan
I try to make safe suggestions,You should understand the context and ensure you are happy that they are safe before attempting to apply my suggestions, what you do, is YOUR responsibility.Location Halifax UK
RE: Adding more perimeters to one location only - Nicely?
@joantabb
Yeaa... It had crossed my mind while I was posting this thread that not intersecting the external perimeter may provide the desired result but that is still, like I said, kinda clunky if you're working at an odd angle since one cannot snap the Modifier Mesh to a given location. It also becomes a bit of a problem when the outside perimeter is a nonplanar shape which I recall being the case for the part I made ( a while ago... It just now found the motivation to ask about a solution 😉 )
Thanks for confirming my hunch about that! 😁
RE: Adding more perimeters to one location only - Nicely?
One thing you can do to avoid the hassle of manipulating/positioning meshes in PS is to Add them to your original model in cad. Then when you import the multipart model if you split to PARTS, the separate meshes stay where they are positioned as they are still part of the object. You can then select the extras and change their type from part to modifier and set the changes you want.
That way you are not limited to the basic shapes in PS and positioning them is as easy as your normal CAD process allows.
Although for the use case of adding extra perimeters for heat set inserts what you can also do is model in some very small voids around the holes. That way the slicer will add perimeters around those areas too. You do have to make sure that you edit Prusa Slicer slice gap closing radius setting though or depending on the size it might automatically close them up as sometimes happens with the smaller gap tolerance test models. It takes a bit of experimenting to get the size of the voids you need worked out but once you do its then easy to do them. No different than working out what actual hole size you need to model for a screw to make it print out that actual size in real life.