RE: Core One crash/restart
I had this issue as well. when the printer goes from rear right side to front left side, I notised that the left rear motor moves but the other one almost stay still, when the printer restarted like a power cut. Grounded the left rear motor, problem solved. I fastend a cabel on one screw that fastend the motor. and other side a random spot on the frame
RE: Core One crash/restart
I added the star washers to both my X and Y axis motor, verified I have continuity from the frame to each motor with a Fluke Voltmeter. I have been printing for over 10 days without the issue popping up.
RE: Core One crash/restart
I had two prints fail this weekend with a ton of travel and crashing. While I wait for my 3mm washers to arrive I cut a test lead up and that same print ran last night without issue. Seems like the answer. I’m going to set up my o-scope and try to measure this someday. 
RE: Core One crash/restart
I had two prints fail this weekend with a ton of travel and crashing. While I wait for my 3mm washers to arrive I cut a test lead up and that same print ran last night without issue. Seems like the answer. I’m going to set up my o-scope and try to measure this someday.
In my case I just scraped away some powder coating from around the screw hole. That was enough to get a decent ground connection.
RE: Core One crash/restart
I ran into this issue and fixed it with star washers as well. What's odd to me is how the printer ran fine for months after assembly and then suddenly started crashing almost every time I ran a print. I did just change the filament spool before that but it was a new spool of the same material I had already been using. Maybe the belt tension has changed over time which somehow leads to this problem happening more often or earlier in a print with diagonal movements?
RE: Core One crash/restart
Same problem here: sudden blackout of the machine during print while performing diagonal movements. Grounding the motor solved the issue for me as well (see image for the dirty hack 😉
Problem can be replicated by printing a flat square covering almost the complete bed. Error occurs at the first layer. I also tested printing a small square at each corner at the same time to test whether the motion to the edges of the print bed cause any problems. No problems here.
Belt tension has been configured using the app. Worked for me and prints look awesome. Seems like the grounding really does the trick. Thanks a lot for sharing this solution!
RE: Core One crash/restart
Hey all,
Firstly, I wanted to thank the people in this thread for discovering the cause of the rebooting problem. I'm sharing my experience with this issue and showing some photos of how I fixed mine just in case others run into the same problem. I did read all eleven pages of this thread and did see people asking for photos, and perhaps like me, it maybe isn't super clear which screws need to have the powdercoat removed, so I'll provide photos.
A bit of background: I had about 5 jobs on my preassembled Core One print just fine, some of them even using the full X and Y dimensions of the build area with no issues. Most of these projects weren't super complex, just caddies for things. Most of these projects had rectilinear features and most had rectilinear supports (one had grid supports I think) and so the printer was generally moving in one axis most of the time. All were printed with PLA with 0.15mm layer height.
Then a family member asked me to print this caddy for their bathroom:

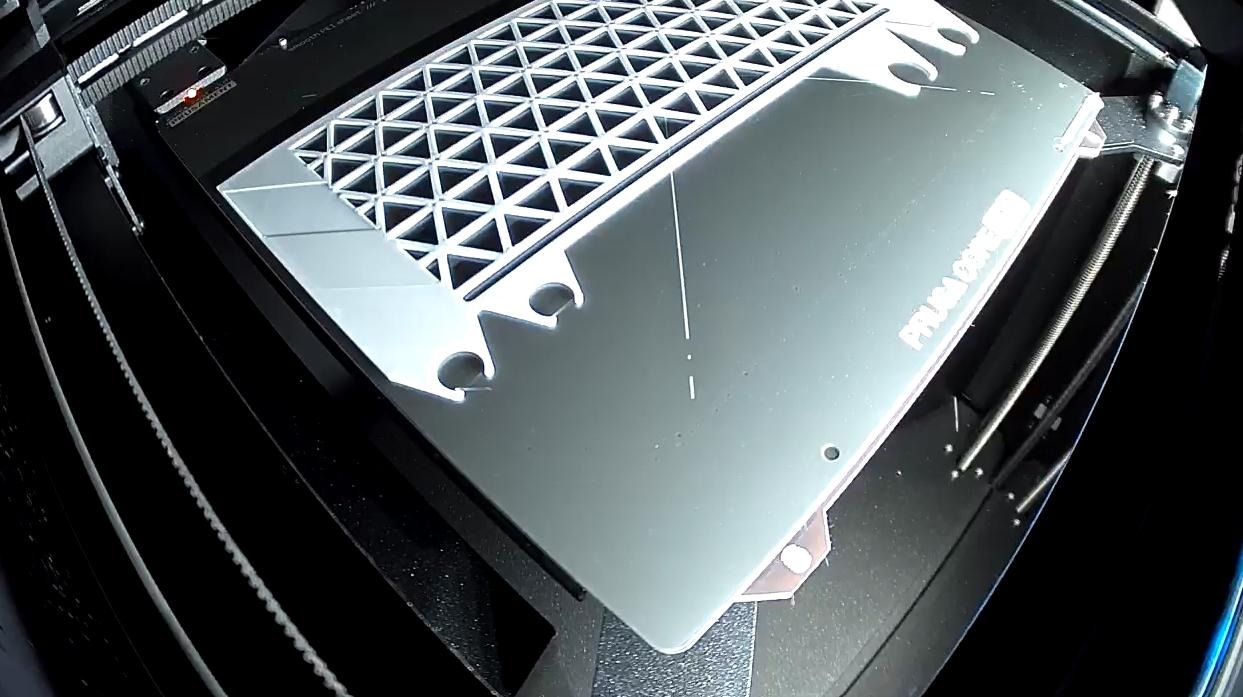
Prusaslicer sliced it in a way where pretty much most of the infill of the print is on the diagonals (e.g. using both X and Y motors at the same time). Even the thin bits at the front and back were infilled diagonally which resulted in a lot of sharp movements of both motors. This can be seen from a screenshot I took of the buddy camera below while it was printing (the image is of the successful one after I applied the powdercoat scrape mod):
I had multiple failures in printing this part. I tried at 0.15mm 30% infill twice, then 80% infill, then I tried 100% infill at 0.2mm layer height.
I was getting the dreaded rebooting with the 8 - 10 beeps every couple of layers. The machine would restart, go back to printing after a minute or two, but the material would gunk up in this period and it blocked the print head once which I cleared by heating the nozzle 20 degrees above PLA melt temp. When I tried at 0.2mm layer height and 100 percent infill, the machine eventually did finish the 18 hour job (in Stealth mode - I print everything in Stealth mode), but it finished it about 4 hours late due to all the restarting and the quality of the print was not fantastic due to the semi cooled plastic screwing with the consistency of the print. There were also a bunch of PLA guzzies sticking out of the side which I had to sand off.
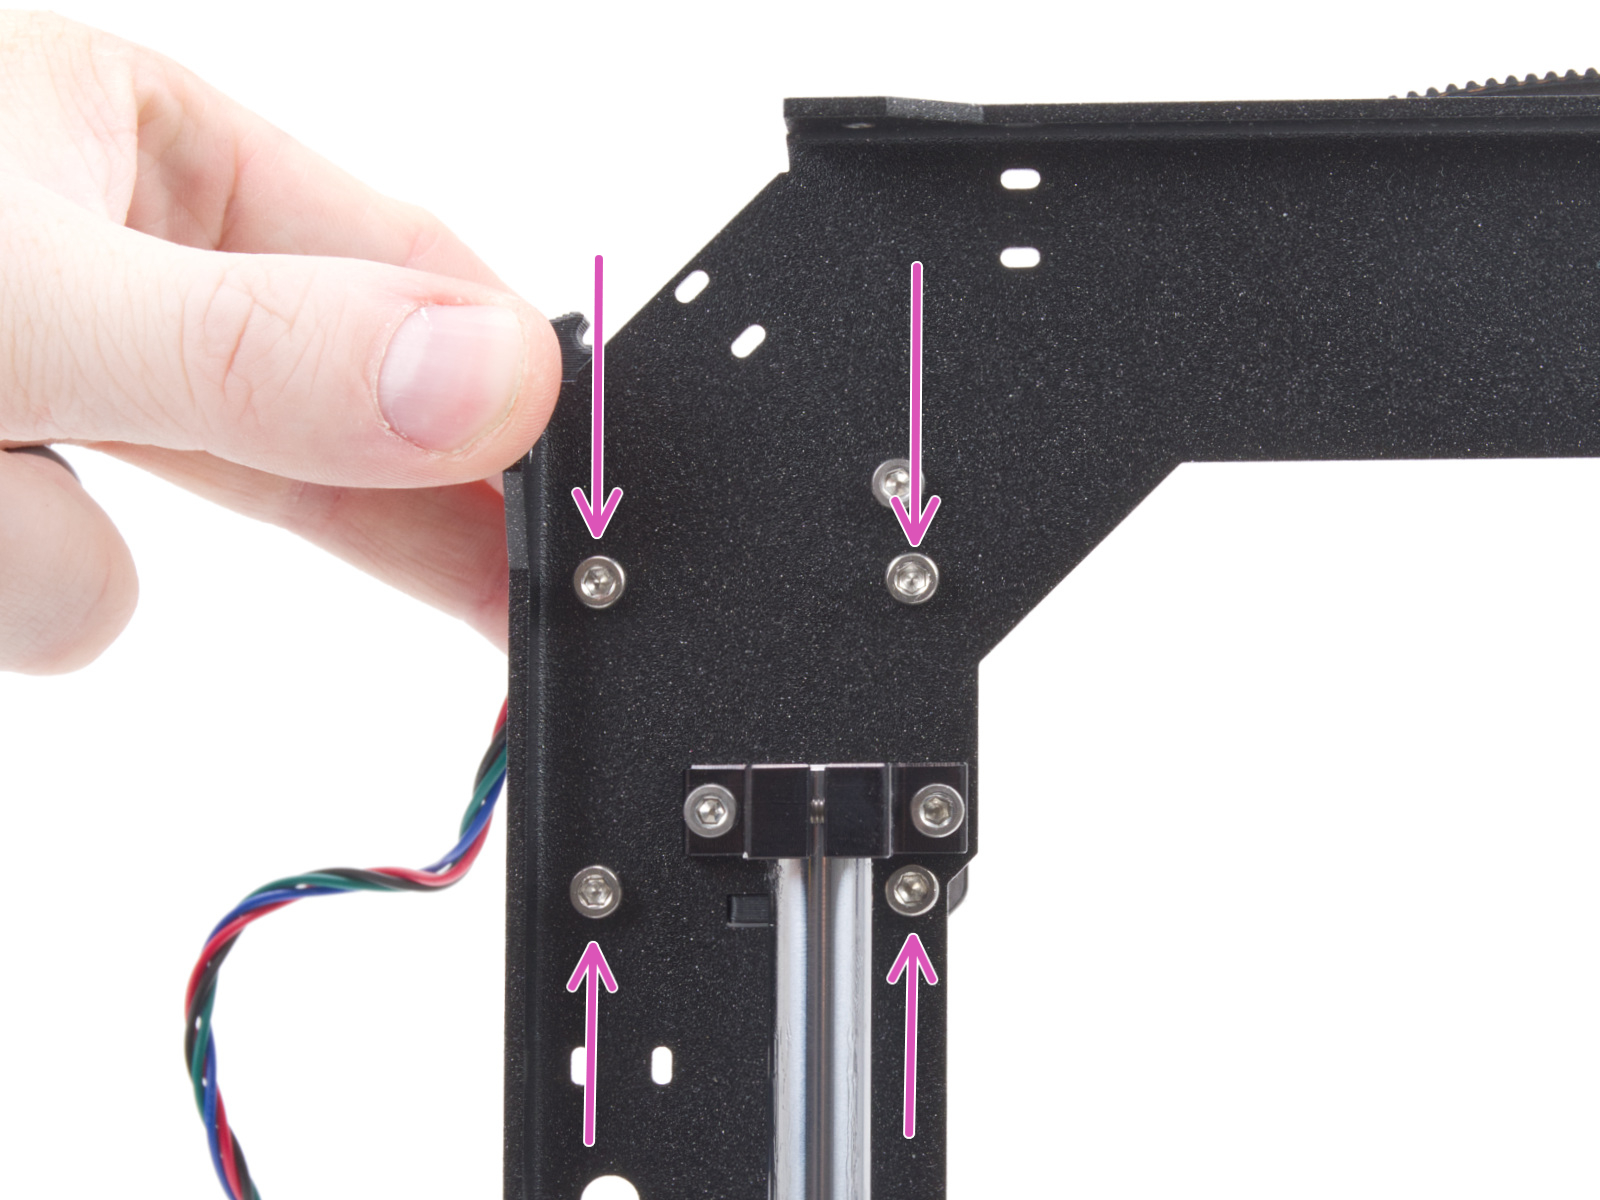
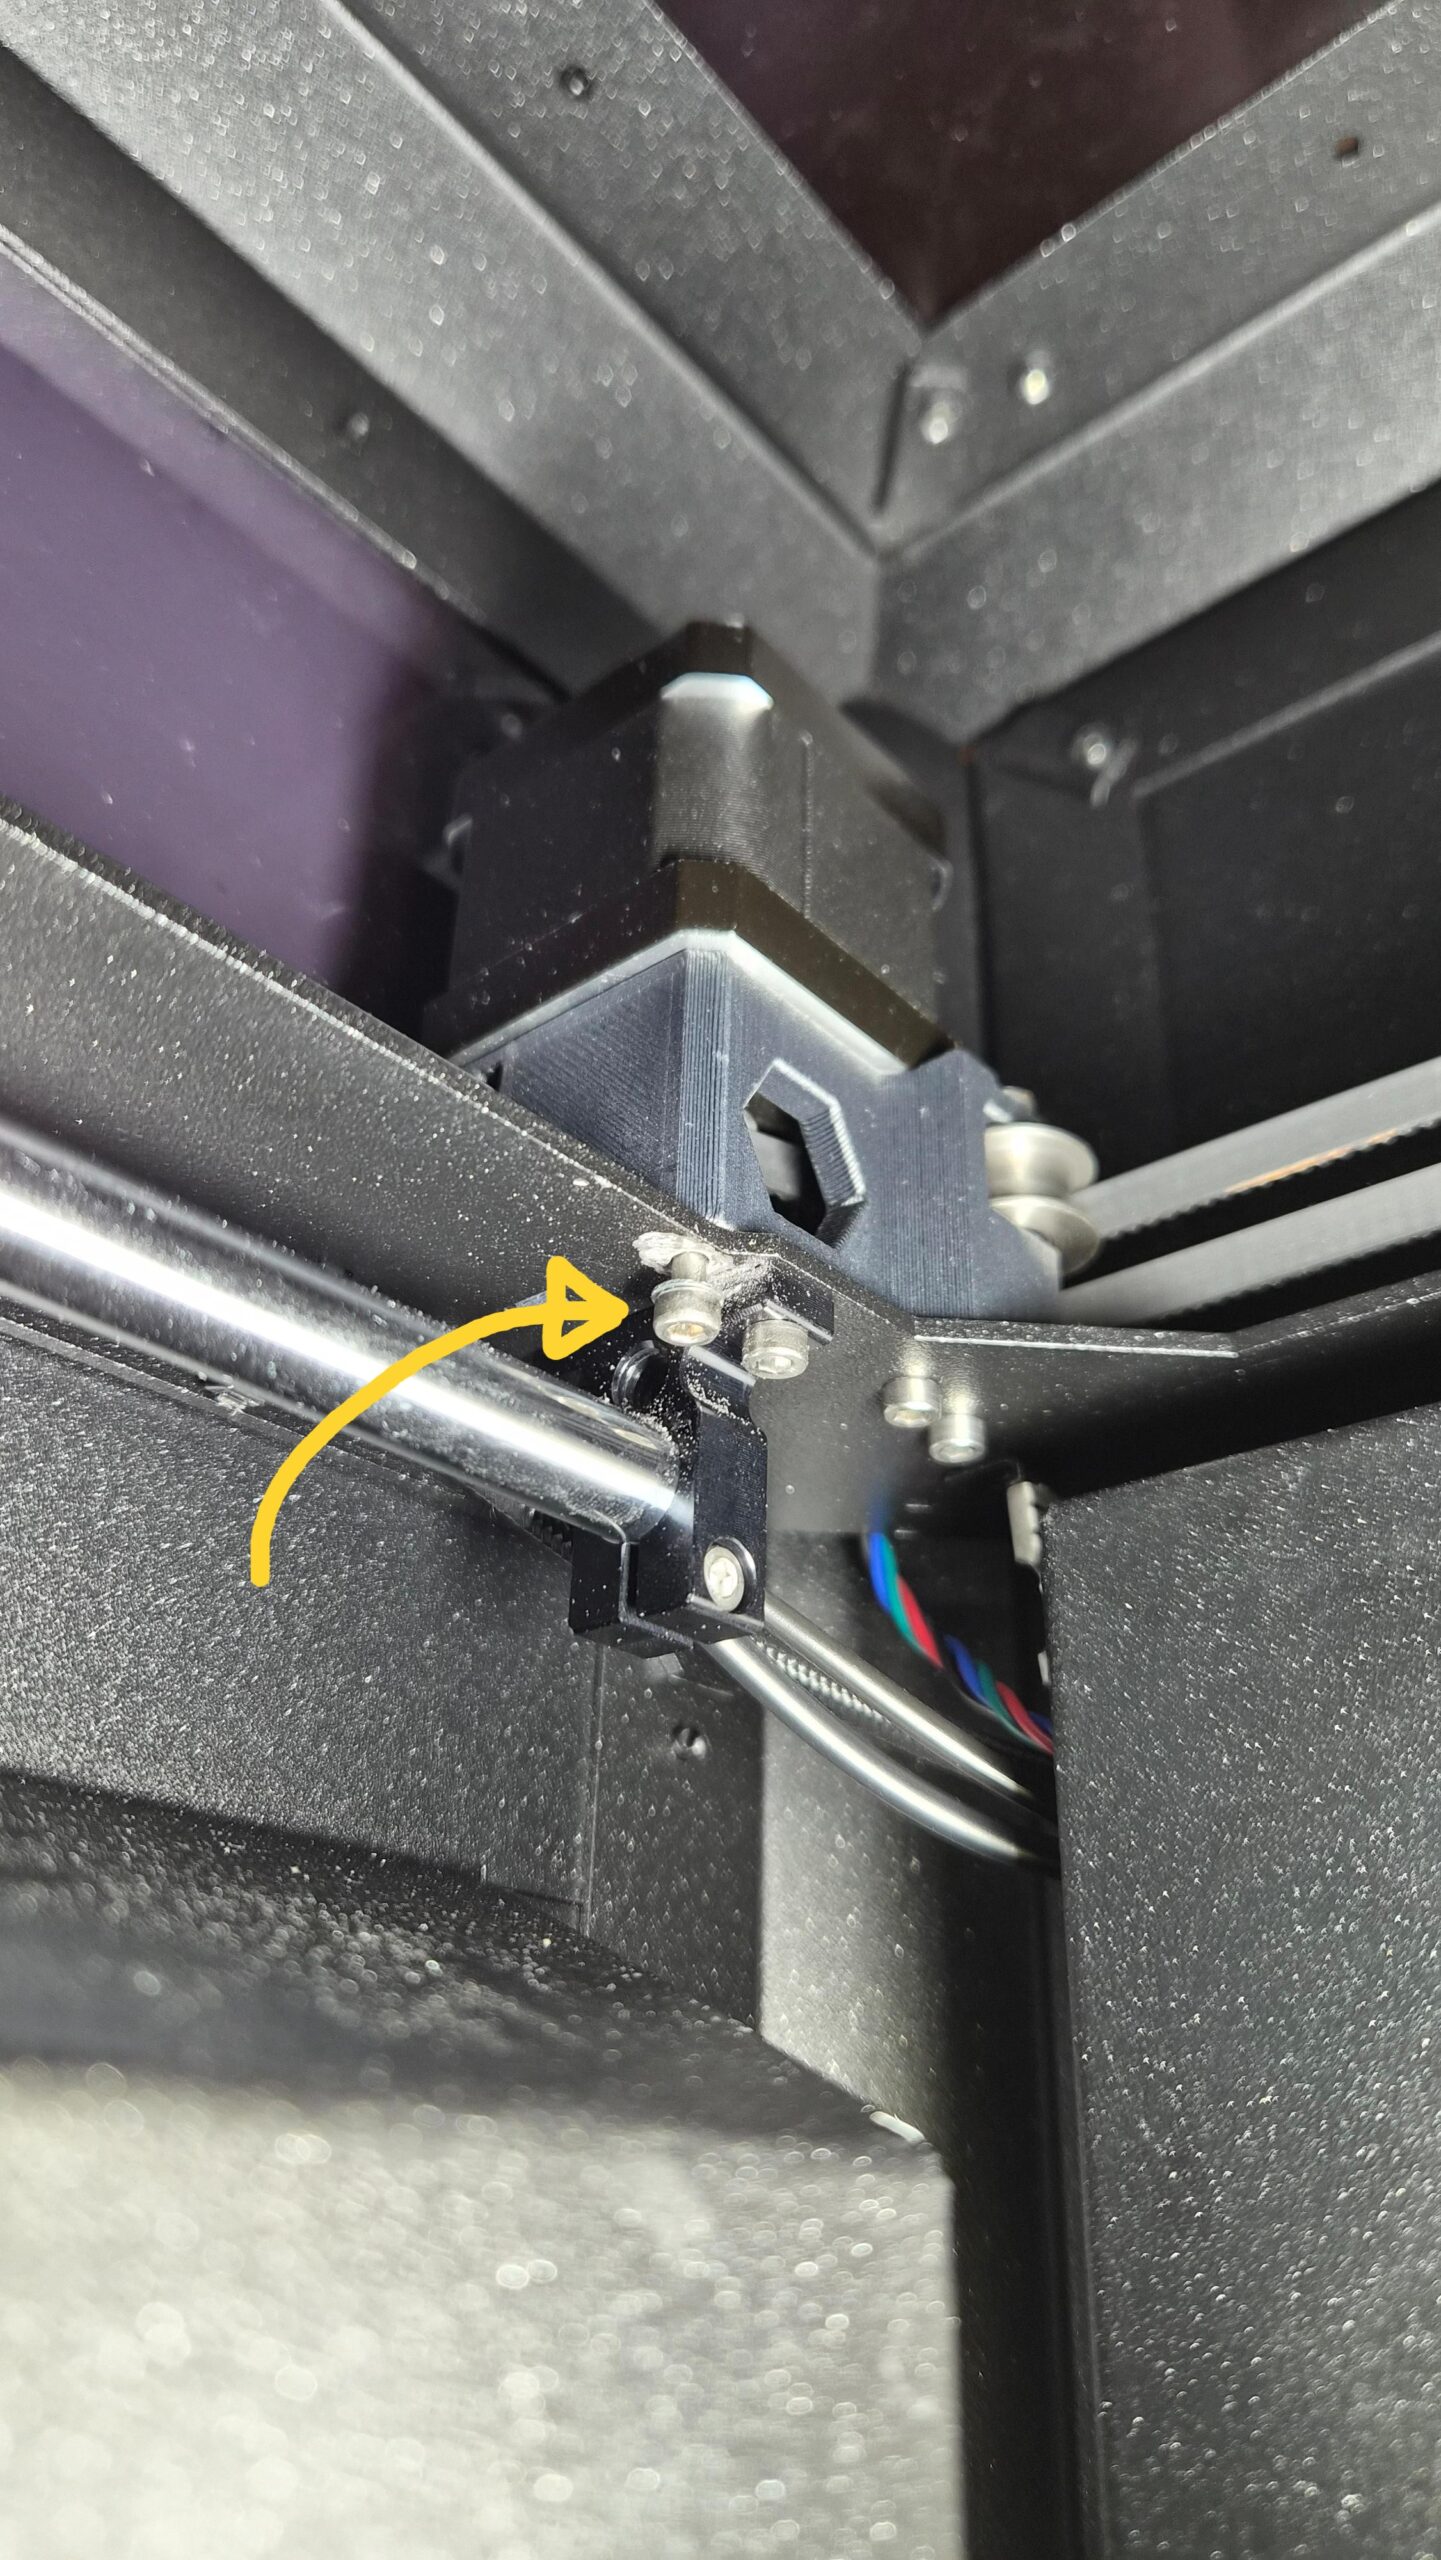
On one occasion during one of the failed prints I saw the red 'power panic' page, which made me think it had something to do with the electronics. I went searching online and found this thread thankfully. I don't have a multimeter, but I figured it was the problem described here - either the X or Y motor belts (or perhaps a combination of both) causing a build up in static. I also went looking in the Prusa construction manual to isolate which bolt holes had to be worked on on either side. Only one of these four bolts with the arrows below needs to have the powdercoat removed underneath it as all you're trying to do is to create a ground path:
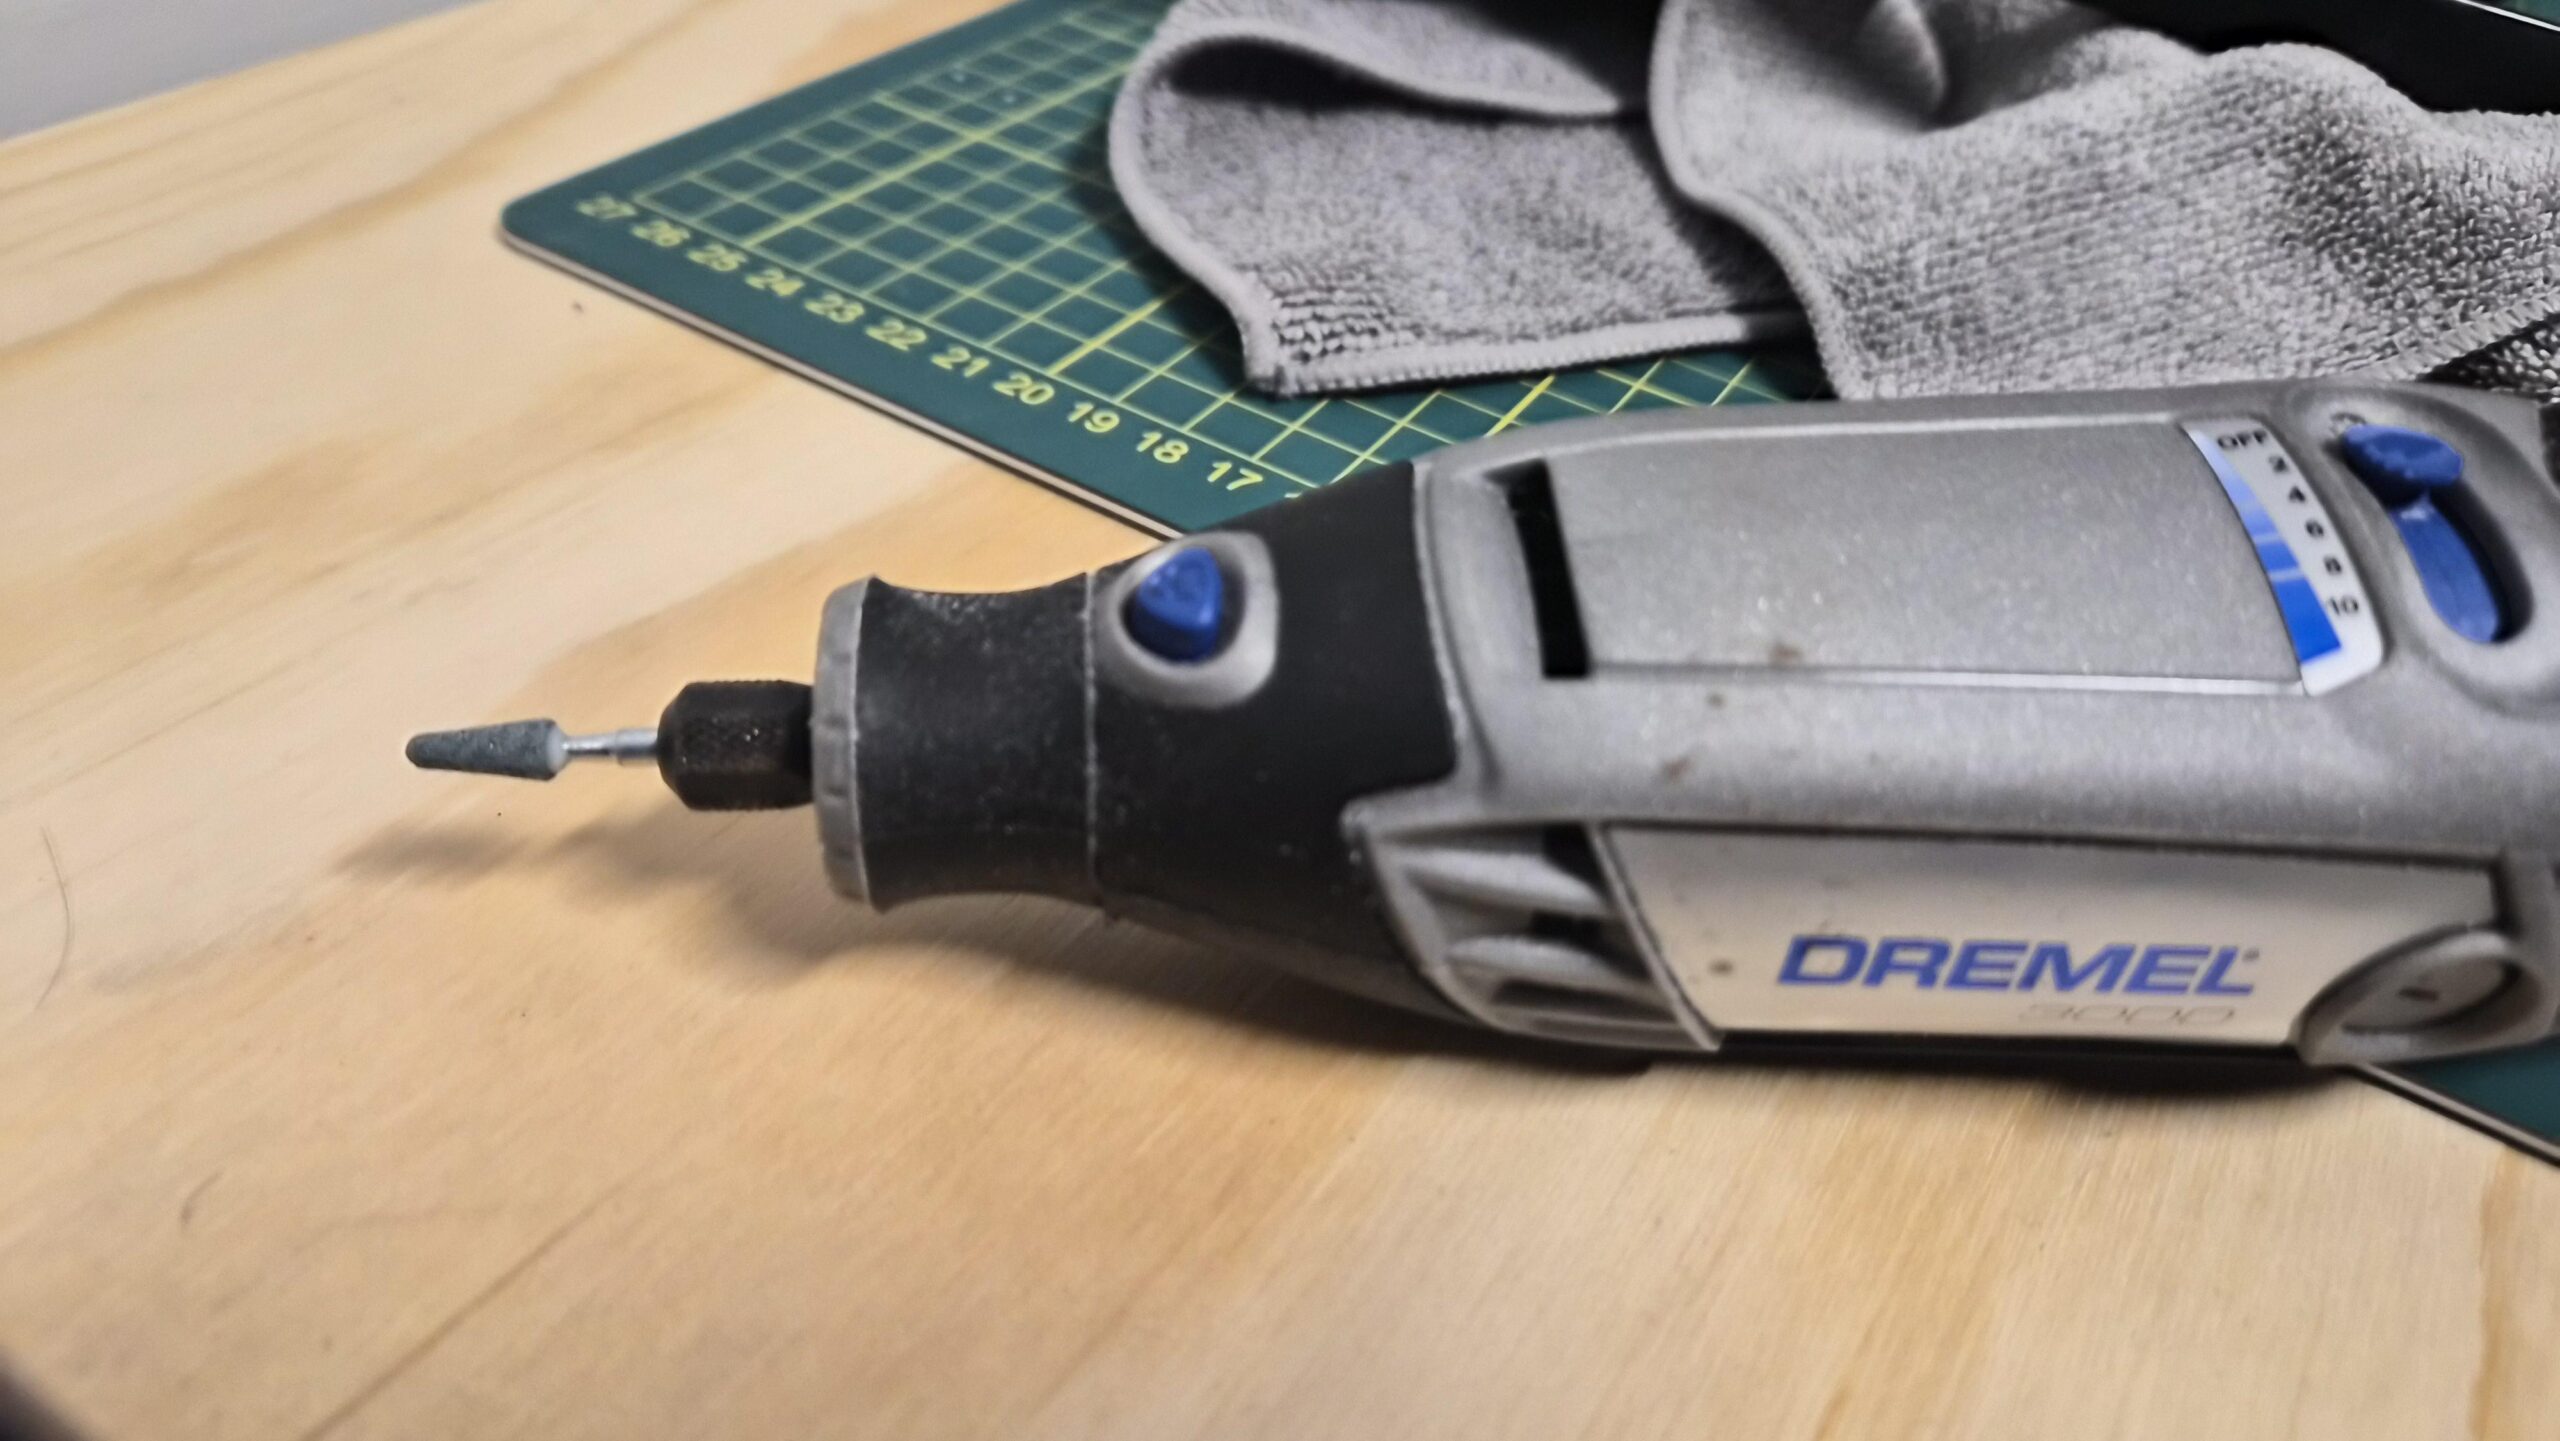
I took a trip down to the local Bunnings (hardware store) as I was looking for a little Dremel bit to scrape the powdercoat off. Strangely enough, the moment the helpful older chap heard I was trying to scrape off powdercoat around a drill hole, he exclaimed "Ah! You're trying to chase down a short." Bingo. In another conversation I had with a friend, apparently this is a common problem with powdercoated parts and automotive electronics - something is shorting and it's difficult to figure out what it is. Powdercoat is an insulator. This is the dremel bit I used to shave the powdercoat off:
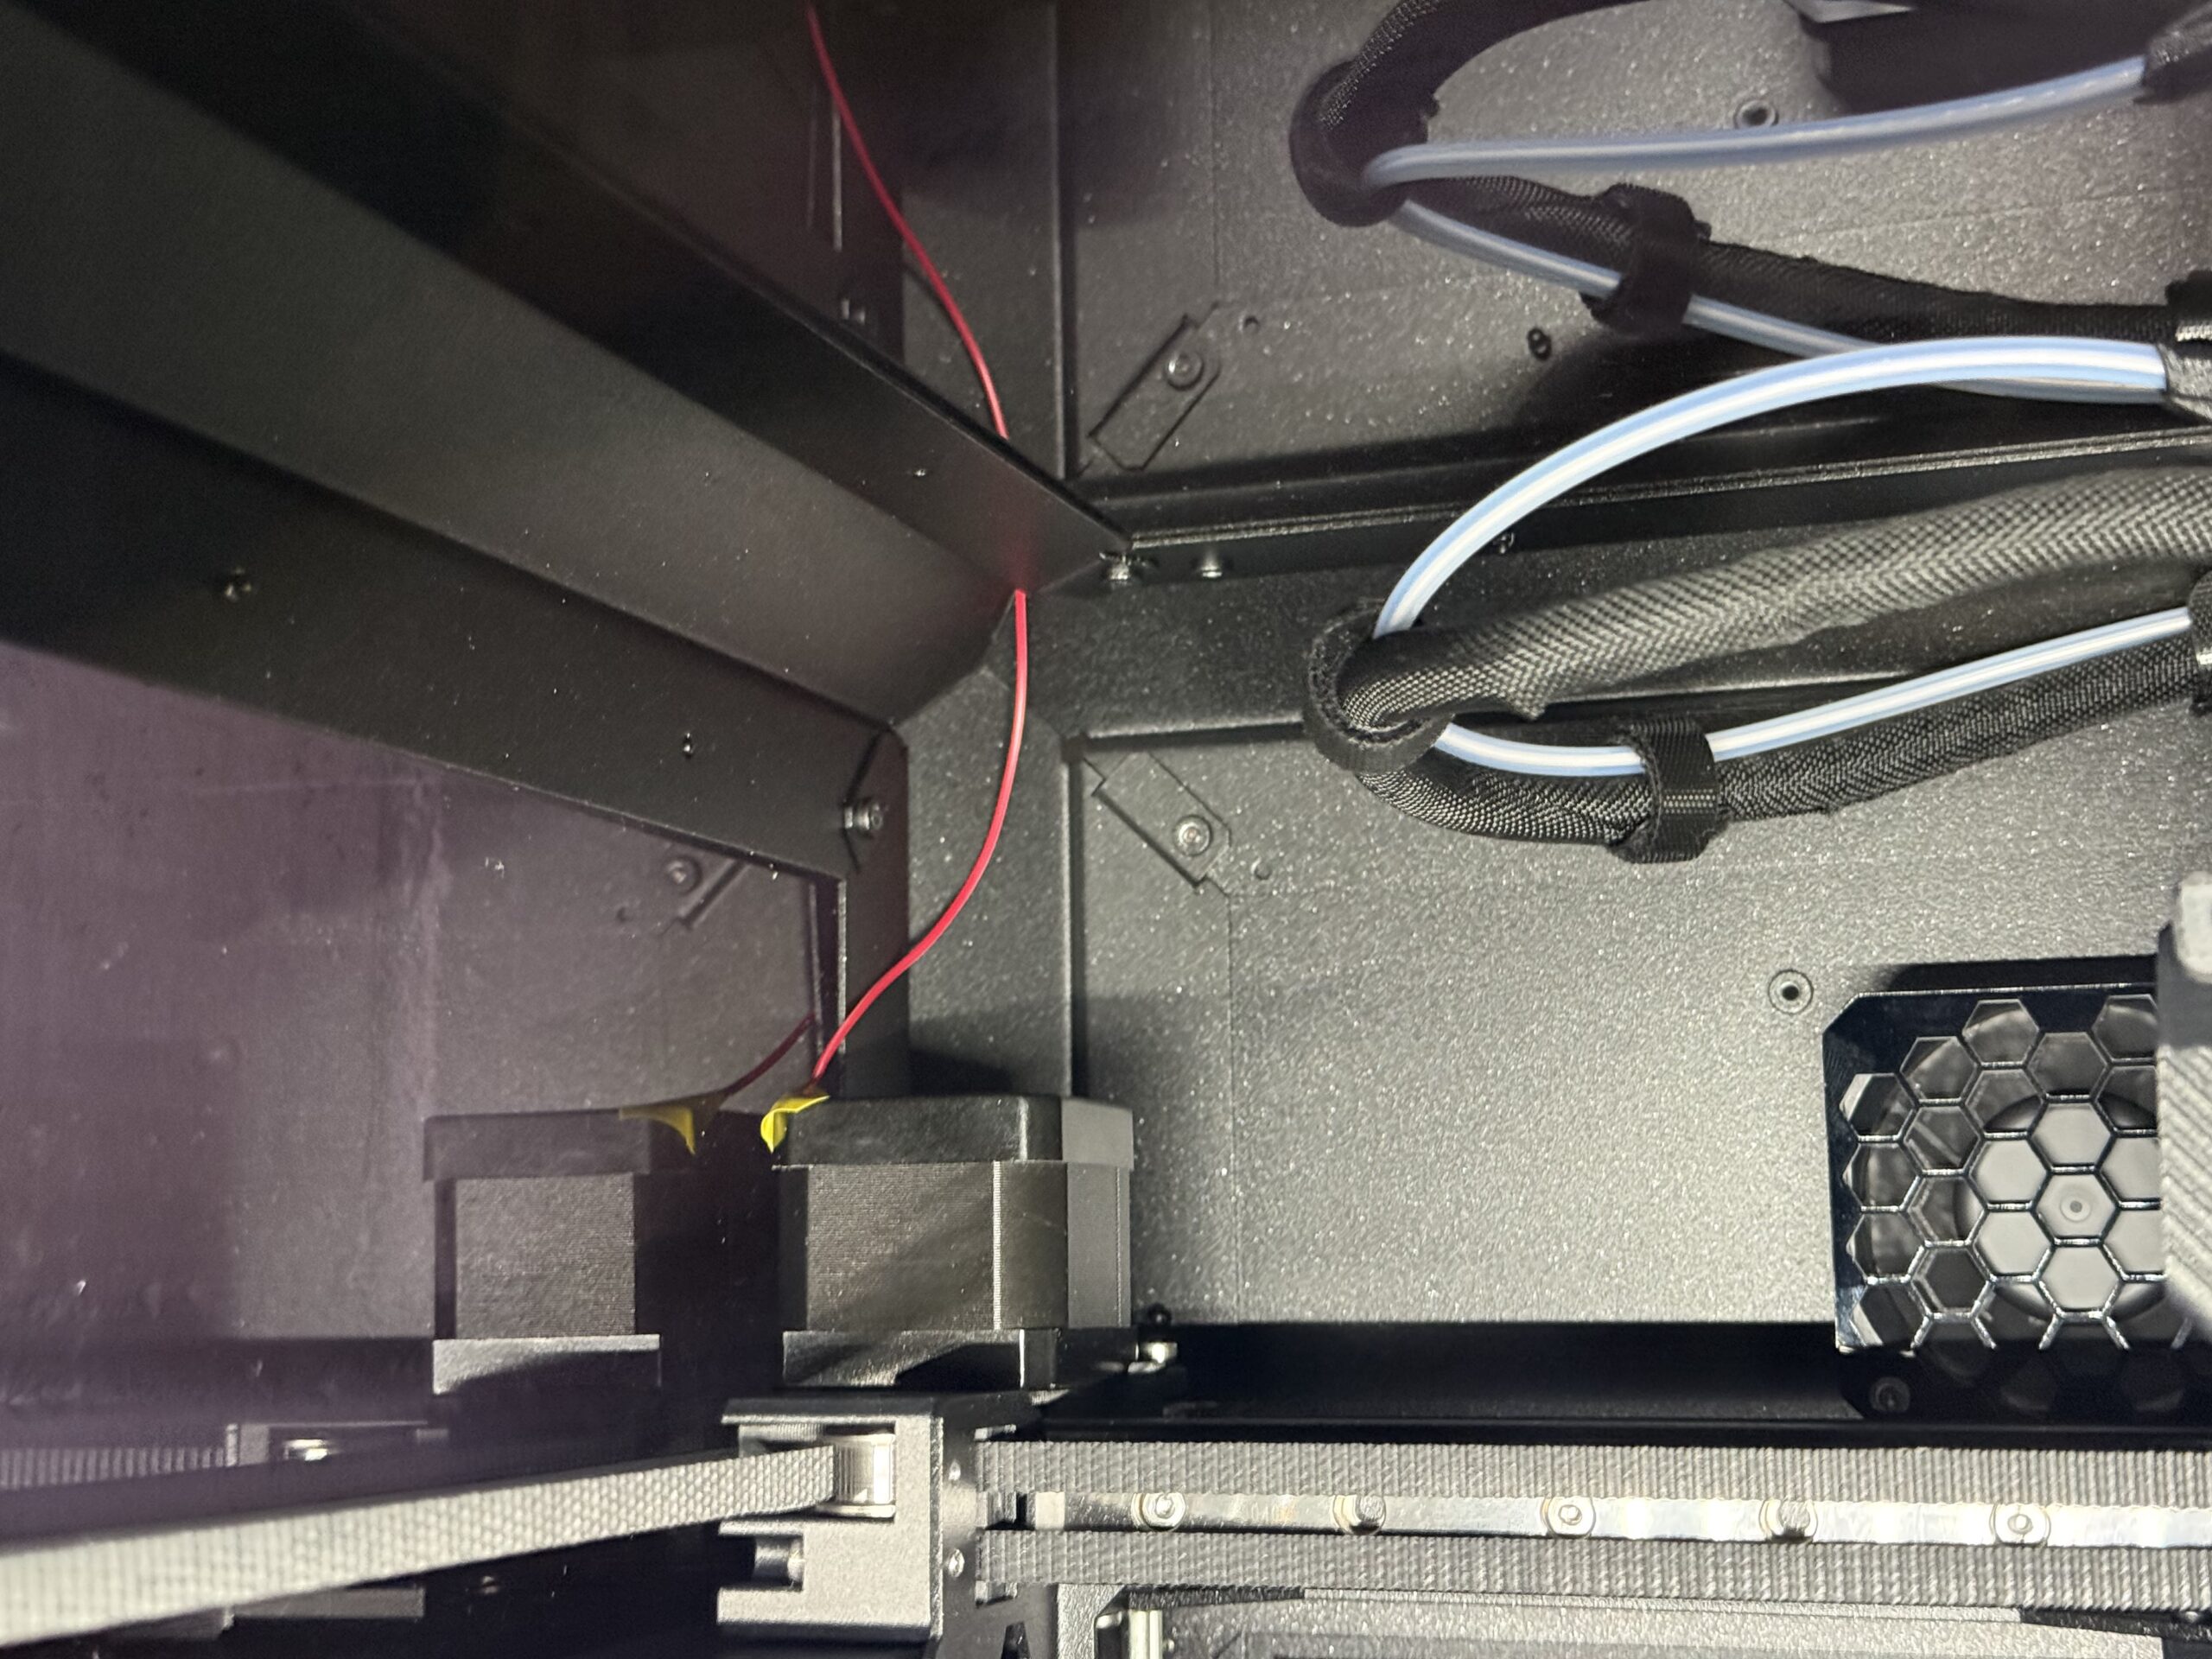
Here is the most accessible bolt on the left hand side of the Core One if you're looking at it from the front on the inside (shown after powdercoat removed and star washer attached). You can remove it with a small allen key, but be careful, it's a tedious process and the allen key likely will slip out of your hands, so have a magnetic-tipped thing (screwdriver) handy:
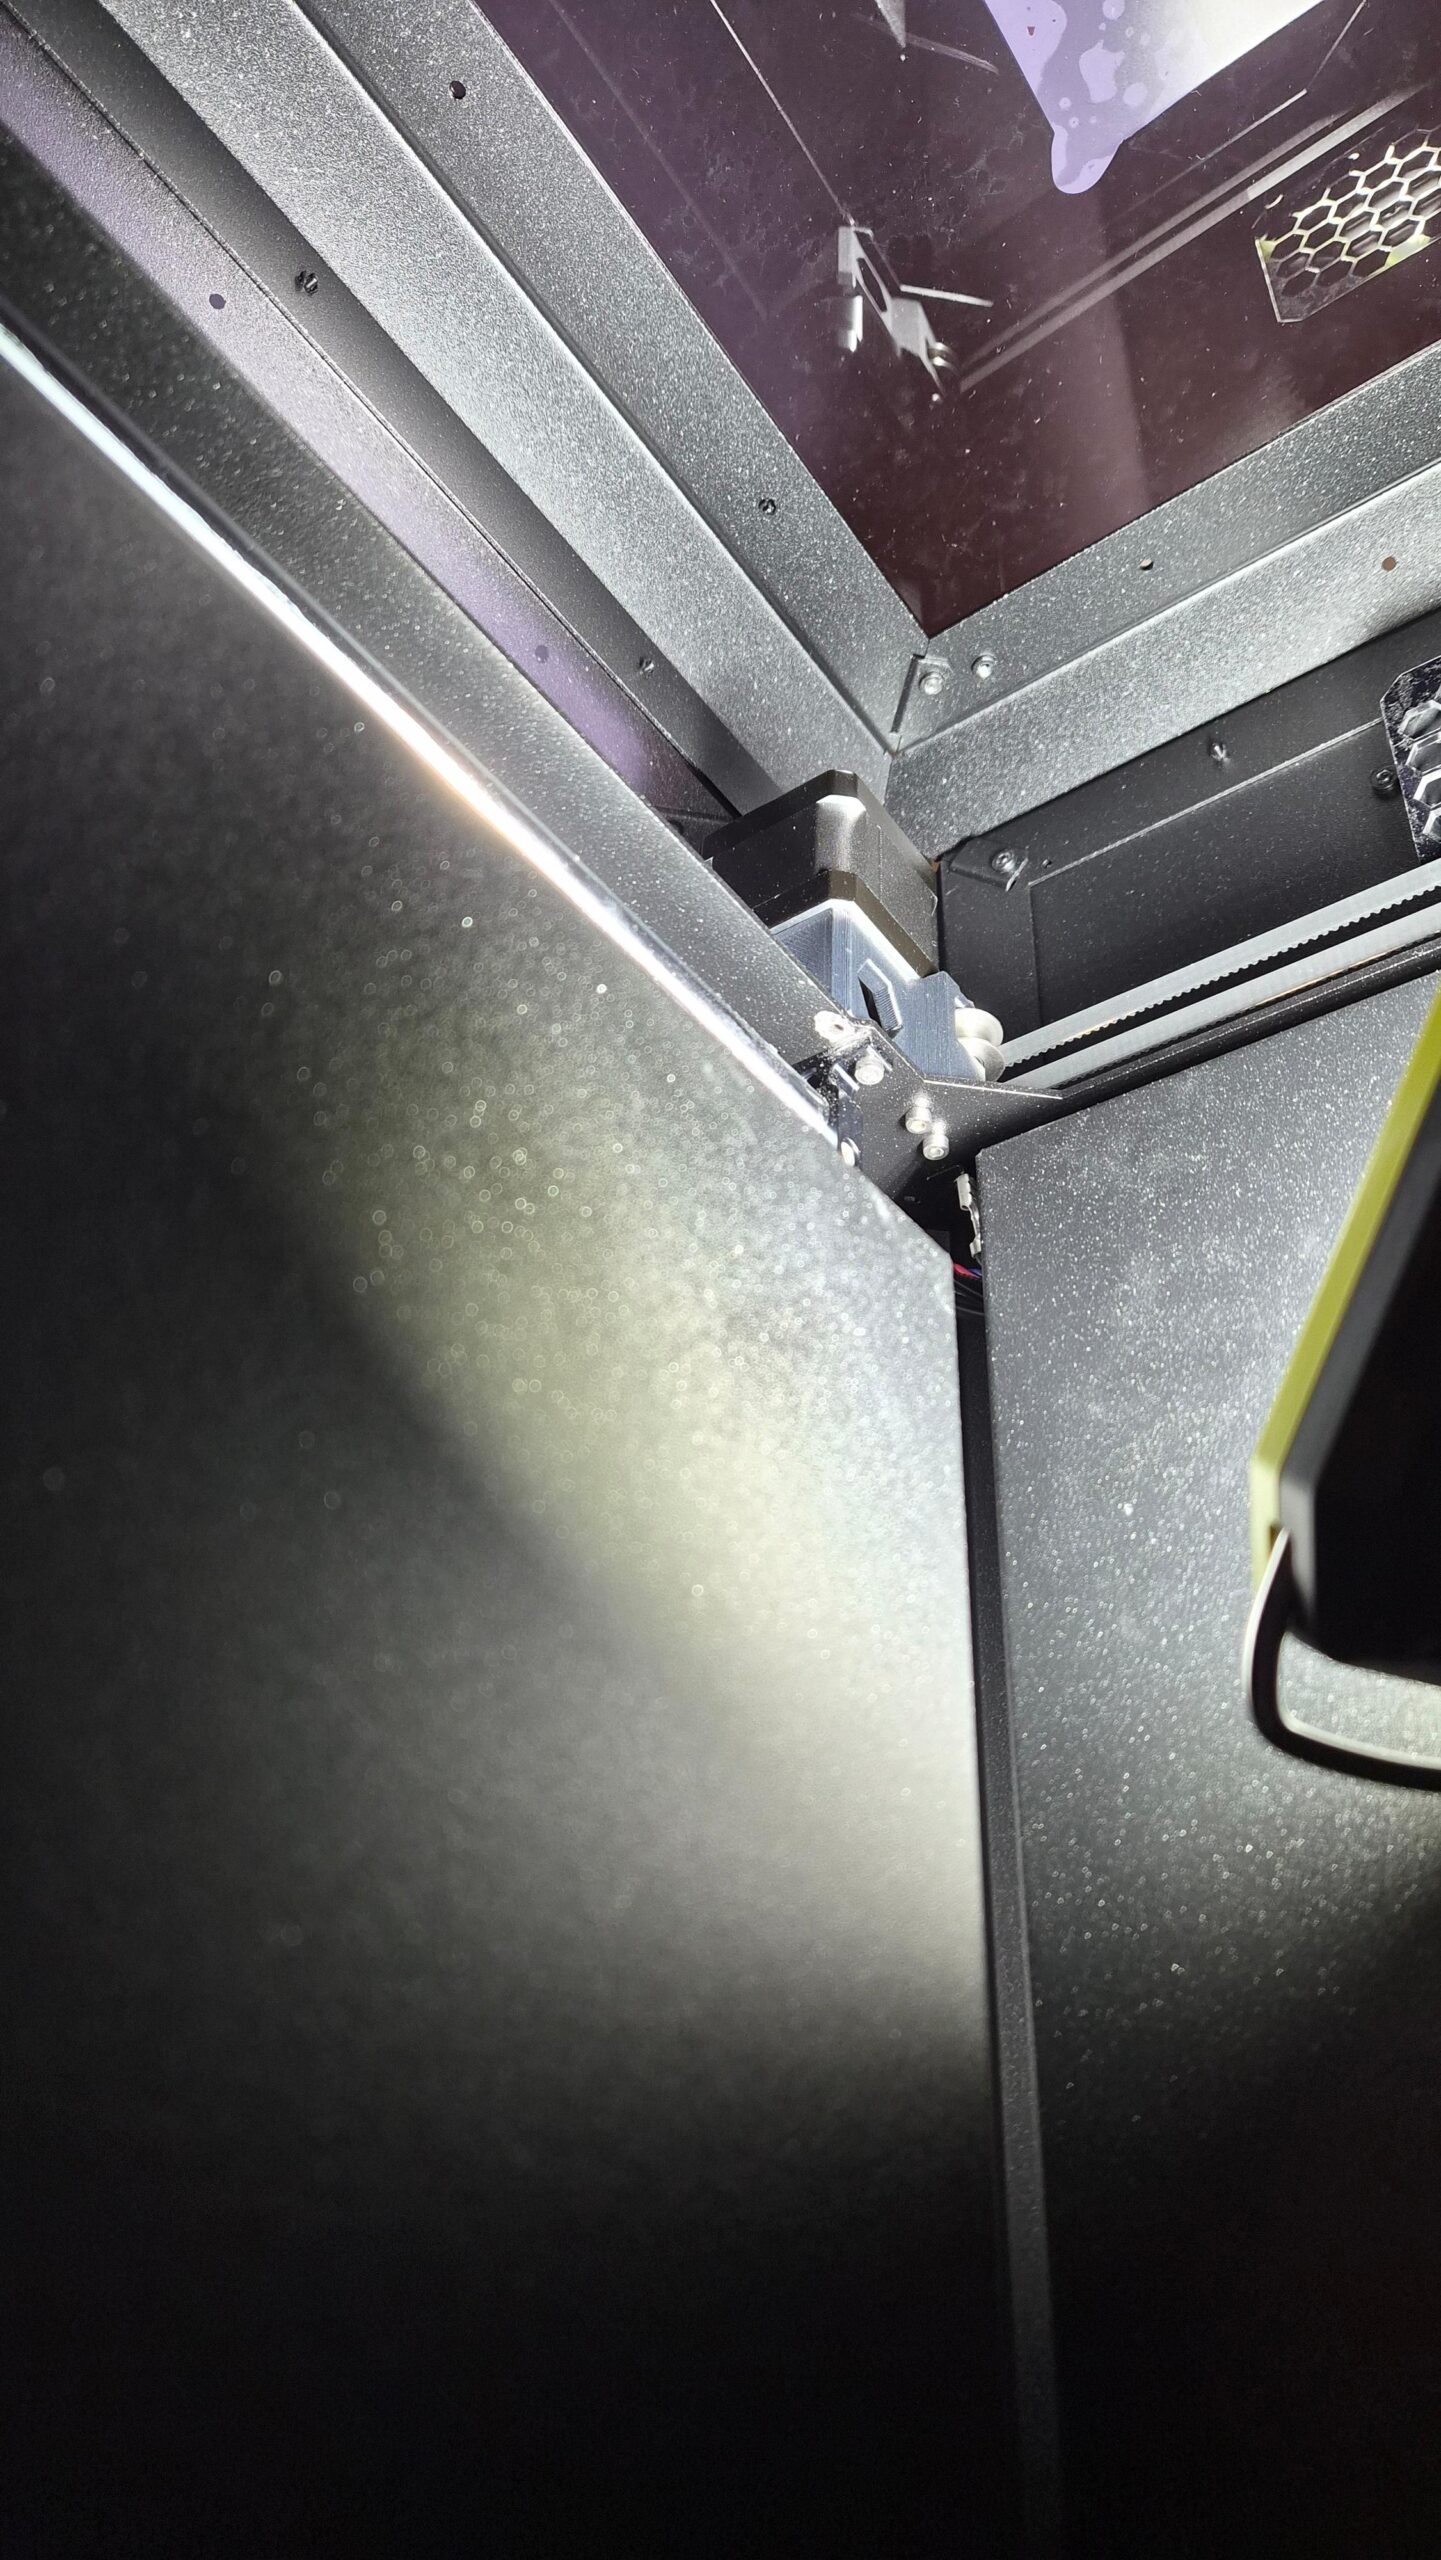
A slightly more zoomed out image showing the hole in relation to the rest of the body:
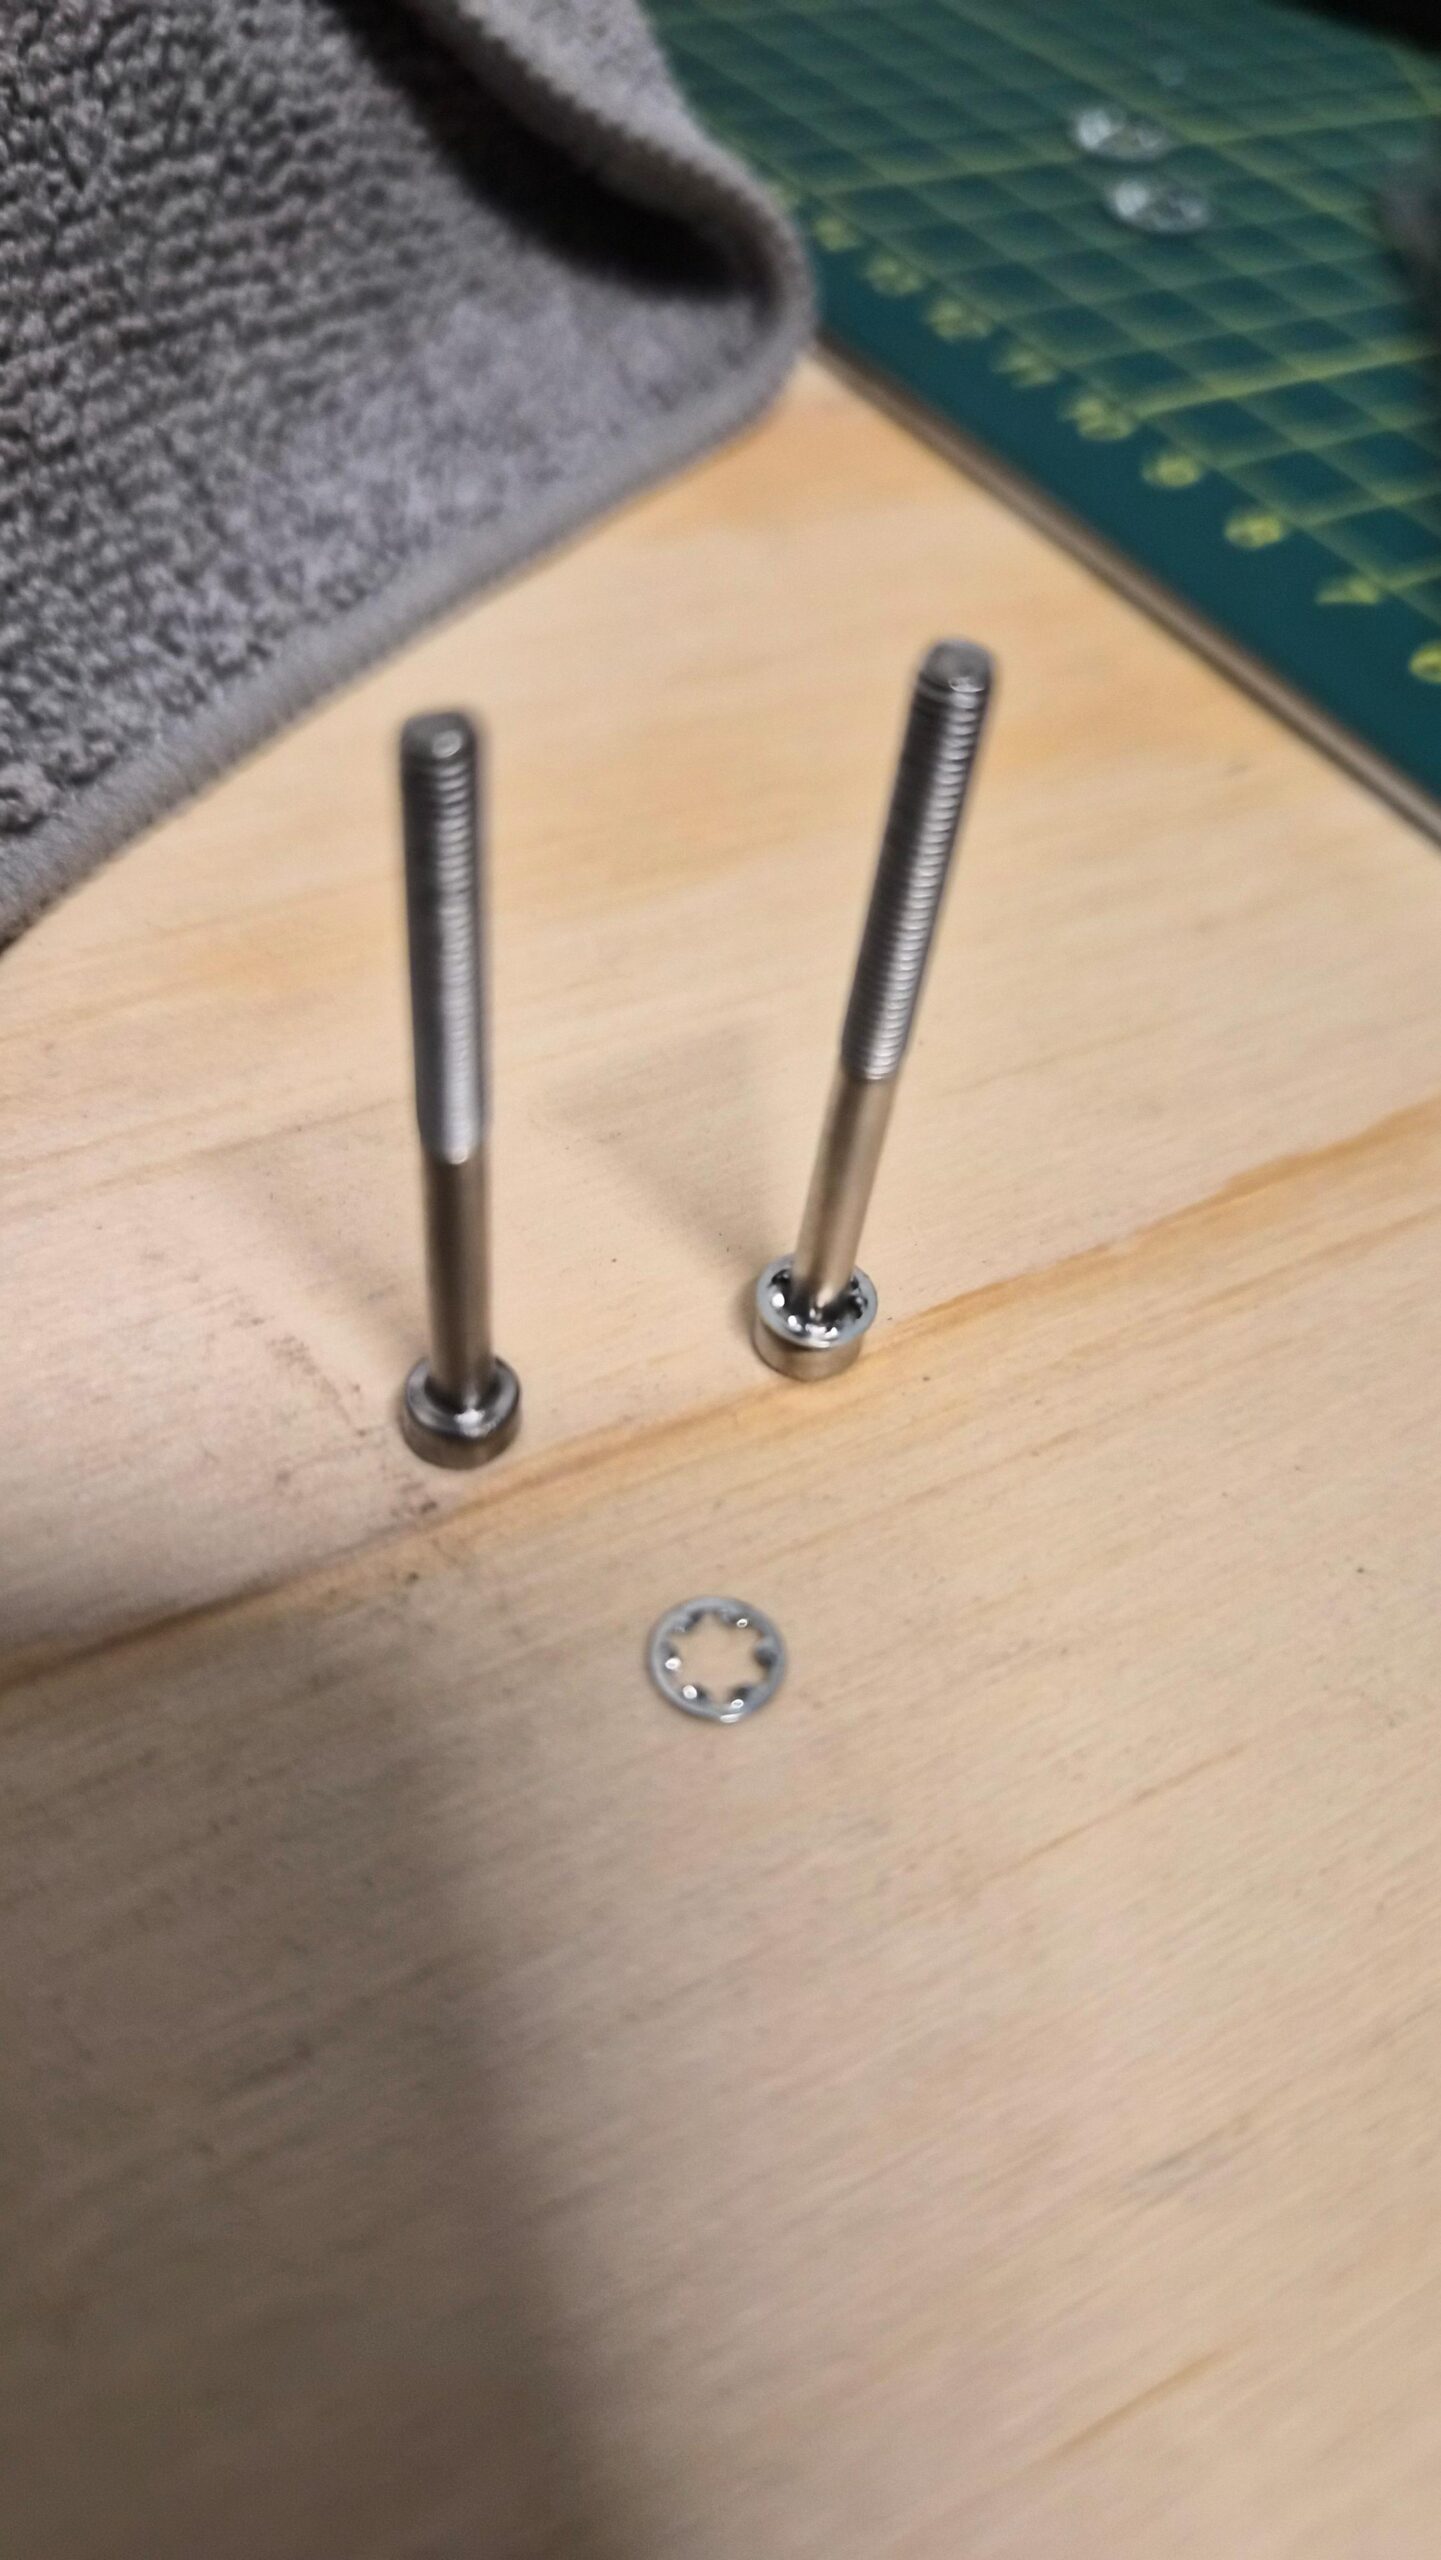
The bolts are pretty long - they attach into the motor (the top most black cube in the image above). I attached a zinc plated star washer as per recommendations:
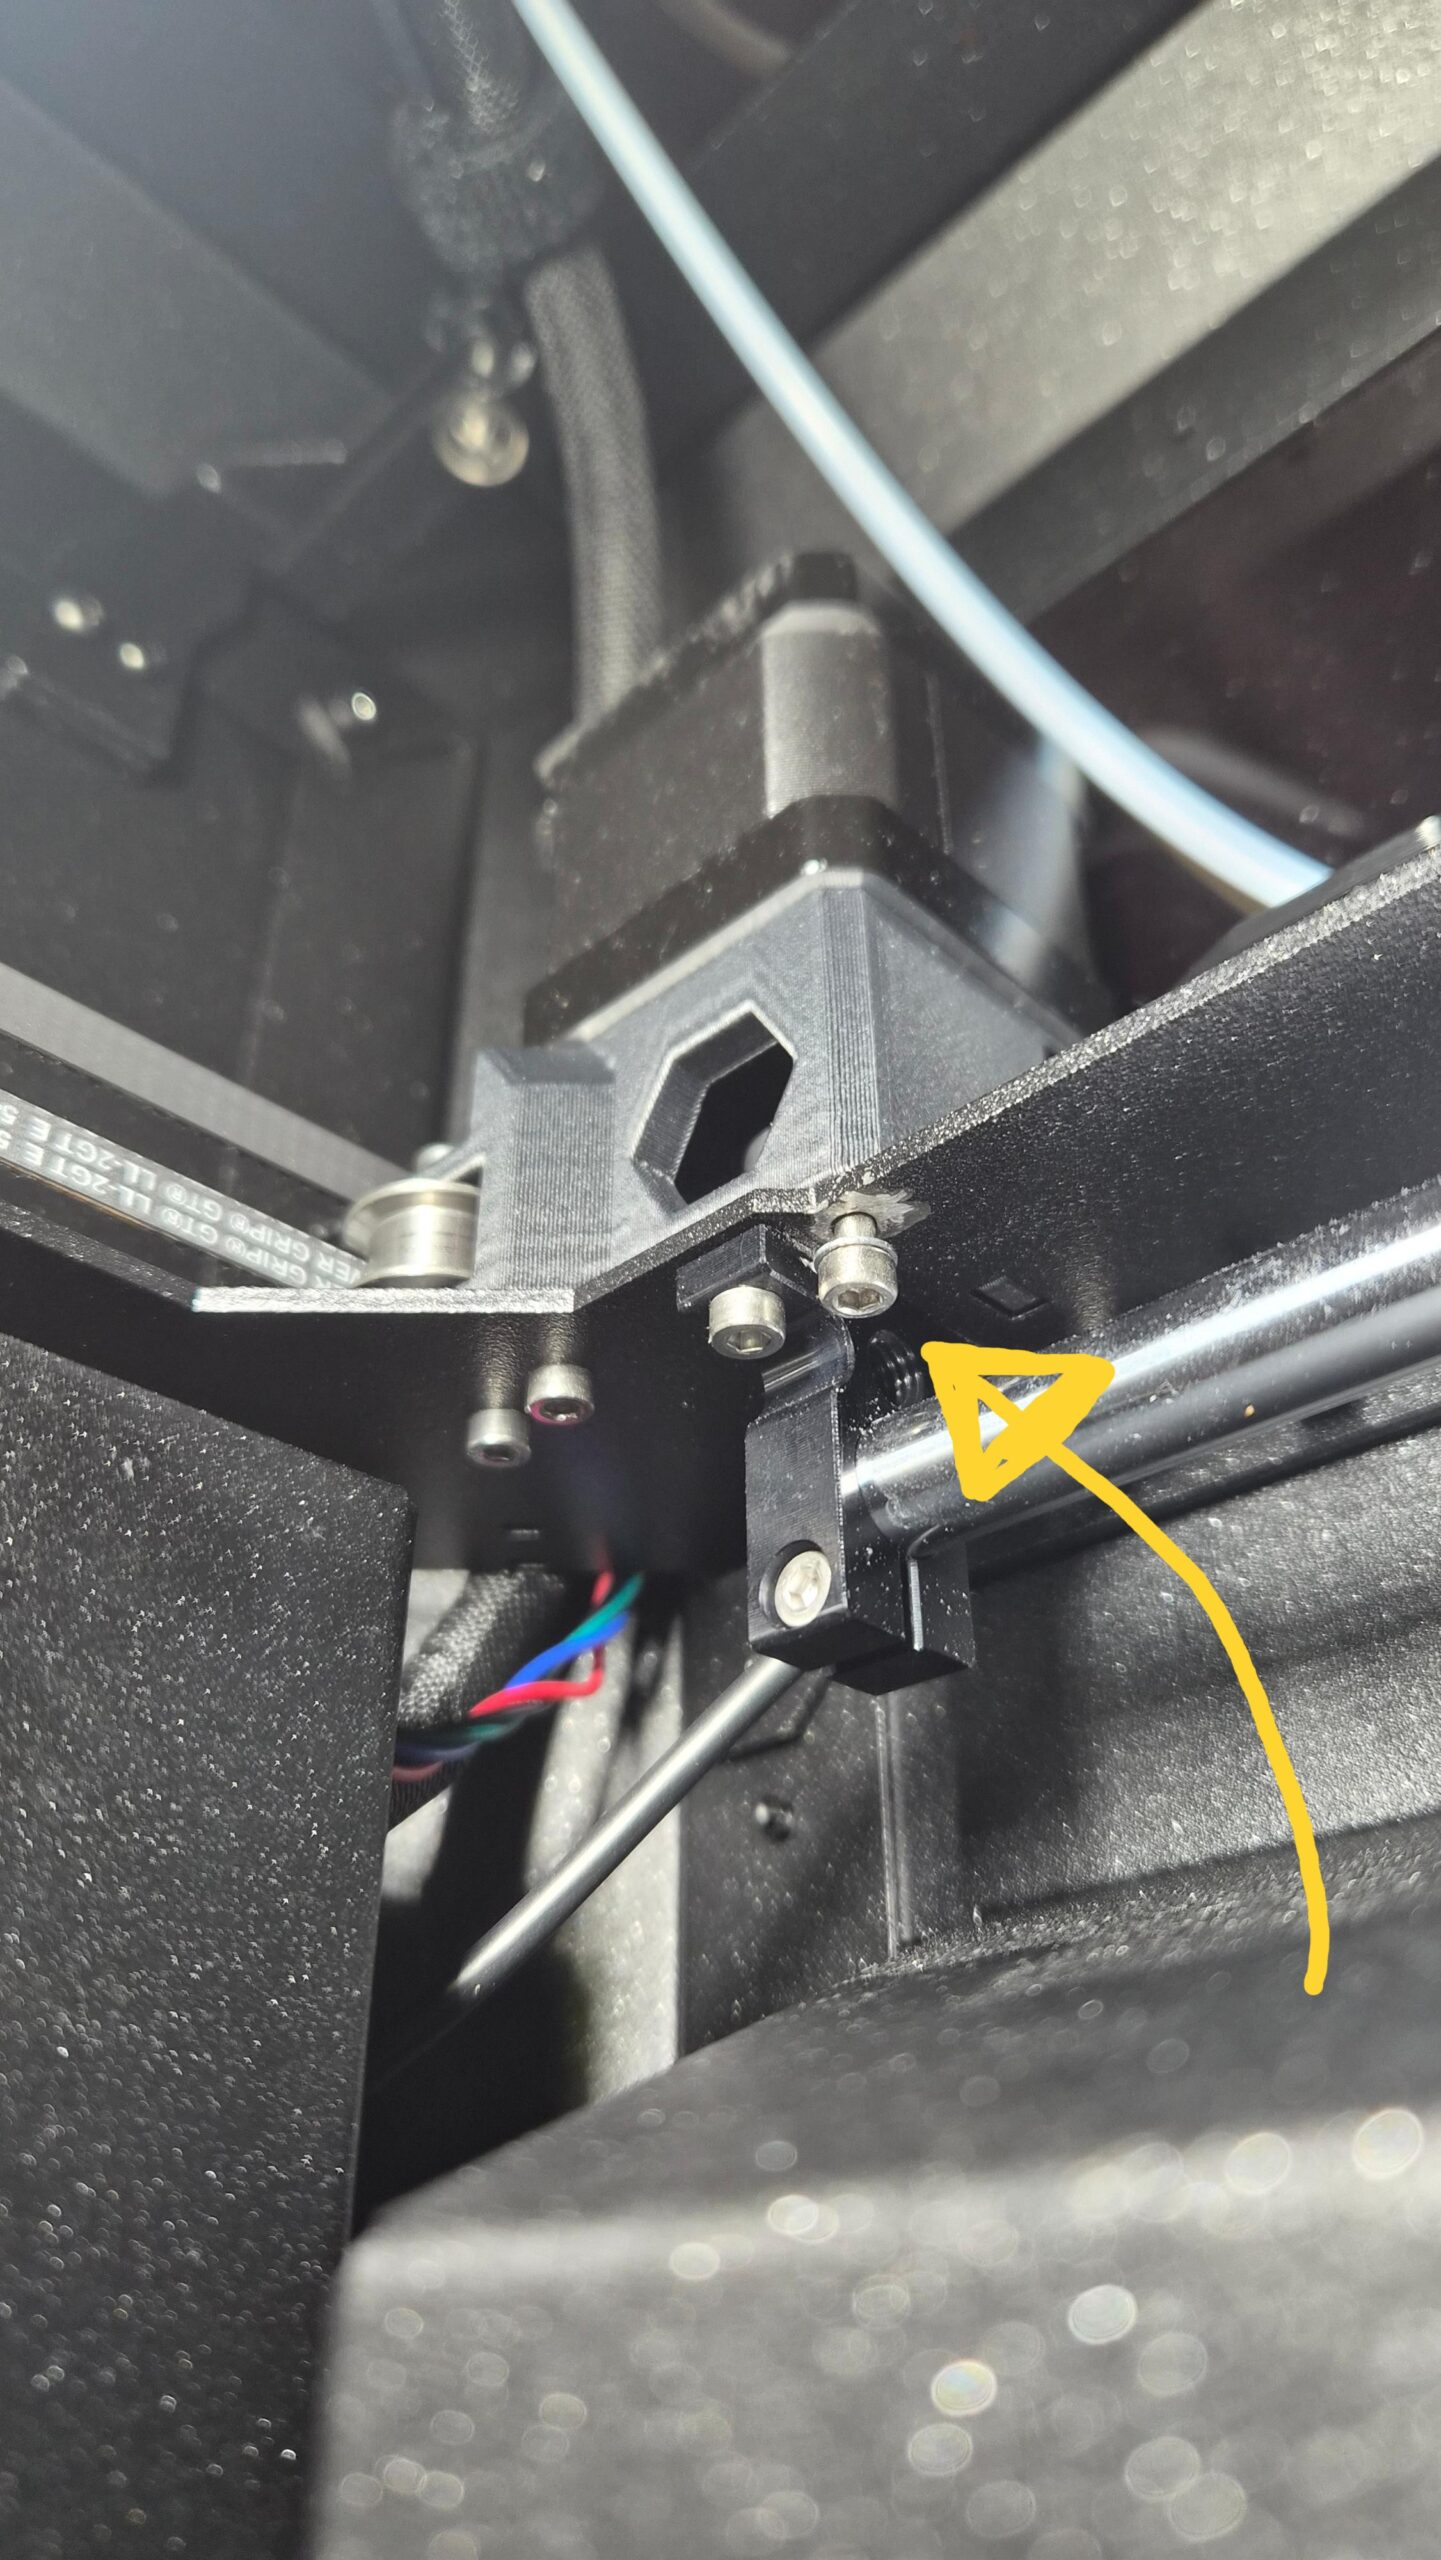
Here is an image of the bolt hole I worked on on the other side of the machine (the other stepper motor, once again with the powdercoat already removed and star washer inserted):
After doing this powdercoat scraping mod, I reprinted the exact same gcode with the exact same material and the print finished on time (indicating there was no hold up due to reboots). I watched the print through several phases of it and where it failed before, it sailed right on through without a hitch. Here is an image of the final print after the mod - it printed pretty much as good as I could hope for:

To be 100 percent transparent, I replaced the power cable and the extension cord to the printer at the same time I did this mod, so there is the possibility that one of those other things fixed it, but I'm just sharing what I did. Perhaps start with replacing those items first, and if that doesn't work, then you know...