Missing belt tensioner right
Hello everyone,
I'm assembling the kit for Prusa Core One+ and on Chapter 5 part 22 it's missing Belt tensioner right I have two belt tensioner left and I searched on all boxes.
What I have to do? Can I print that part with my other printer? This are the parts? https://www.printables.com/model/1167816-core-one-printable-parts/files#preview.file.o5EMR
It's my first Prusa and have everything on the table T_T

RE: Missing belt tensioner right
Just print a temporary part from the link above CORE One printable parts. It will be exactly the same as the one that was missing. Do not print it with PLA. Ideally PC-CF but ASA or PETG (temporarily) should do. Also, make sure not to forget to lubricate the screws. If you happen to have M3 brass inserts then there is a better alternative: CORE One belt-tensioner-pulley to take a threaded insert instead of the original square nut If not then just print the original to get you up and running.
RE: Missing belt tensioner right
Let's think about this for a minute. Reprint the part? How is he supposed to do that if he can't assemble the printer?????
Extra HAM (and eggs some say) Radio - N4MCC
RE: Missing belt tensioner right
Let's think about this for a minute. Reprint the part? How is he supposed to do that if he can't assemble the printer?????
Read it again. He has another printer…
RE: Missing belt tensioner right
I saw that, but the IRONY is screaming!
Extra HAM (and eggs some say) Radio - N4MCC
RE: Missing belt tensioner right
That's just the reprap philosophy. Same happened when I was building the MK4. I broke one of the Z-axis motor mounts. I printed a new one with my Ender 3. If the Ender 3 wasn't working my friend could have printed it for me.
So to the ironic part, you don't own another printer nor know anyone who does so how are you supposed to print the part? So Prusa would have just send you the part that they themselves printed.
The first thing I did when my core one was working was to print all of the critical spare parts. Basically anything in PC-CF.
RE: Missing belt tensioner right
I reprinted the part and finally mounted and installed!
It's printing 😀

Anyway I'll open a case to see if they can send me that part, I want 100% my original Prusa 😛
RE:
I reprinted the part and finally mounted and installed!
It's printing 😀
Anyway I'll open a case to see if they can send me that part, I want 100% my original Prusa 😛
That's awesome! Congratulations!
My advice is to pick up a roll of Prusament PC-CF (good luck finding it in stock though) and print this as a replacement: CORE One belt-tensioner-pulley to take a threaded insert instead of the original square nut otherwise, make sure you properly lubricate the screw that inserts into the square nut. Also, print a copy of the fan shroud as a spare part.
RE:
Hello @yamighor,
I had that exact problem. I contacted Prusa, they shipped me a new part. (E1R). Installation was (mostly) put on hold for four days.
SHORT TERM SOLUTION: What I did short term to push on past the problem was to modify the extra part to fit:
1: I observed the shape of the piece that was needed (E1R) was similar to the shape i had (E2L)
2: To modify it, I used a hacksaw to cut off the raised section on top so that it would lay flat.
3: I then flipped the piece over.
4: I then used a 7/16" drill out the three holes to make a counter sink sufficiently large to hide the bolt heads.
5: This revised piece is very similar in size and shape to the actual E1R piece.
6: It allowed me to continue the building process to complete the step and obtain the delicious Habro Bear Reward.
7: When the actual piece came in, it was very simple to swap out the jury rigged piece for the real piece.
SWAP:
1: Remove the three bolts holding the piece in place
2: Remove the belt tensioner assembly and bolt.
3: Put the belt tensioner assembly and bolt on the new piece.
4: Put the belt around the pulley
5: Mount the new piece to the frame with the three bolts.
PHOTOS: Comparing the shipped E1R to the modified E2L
1: BOTTOM
- Shows the (poorly) counter sunk holes.
.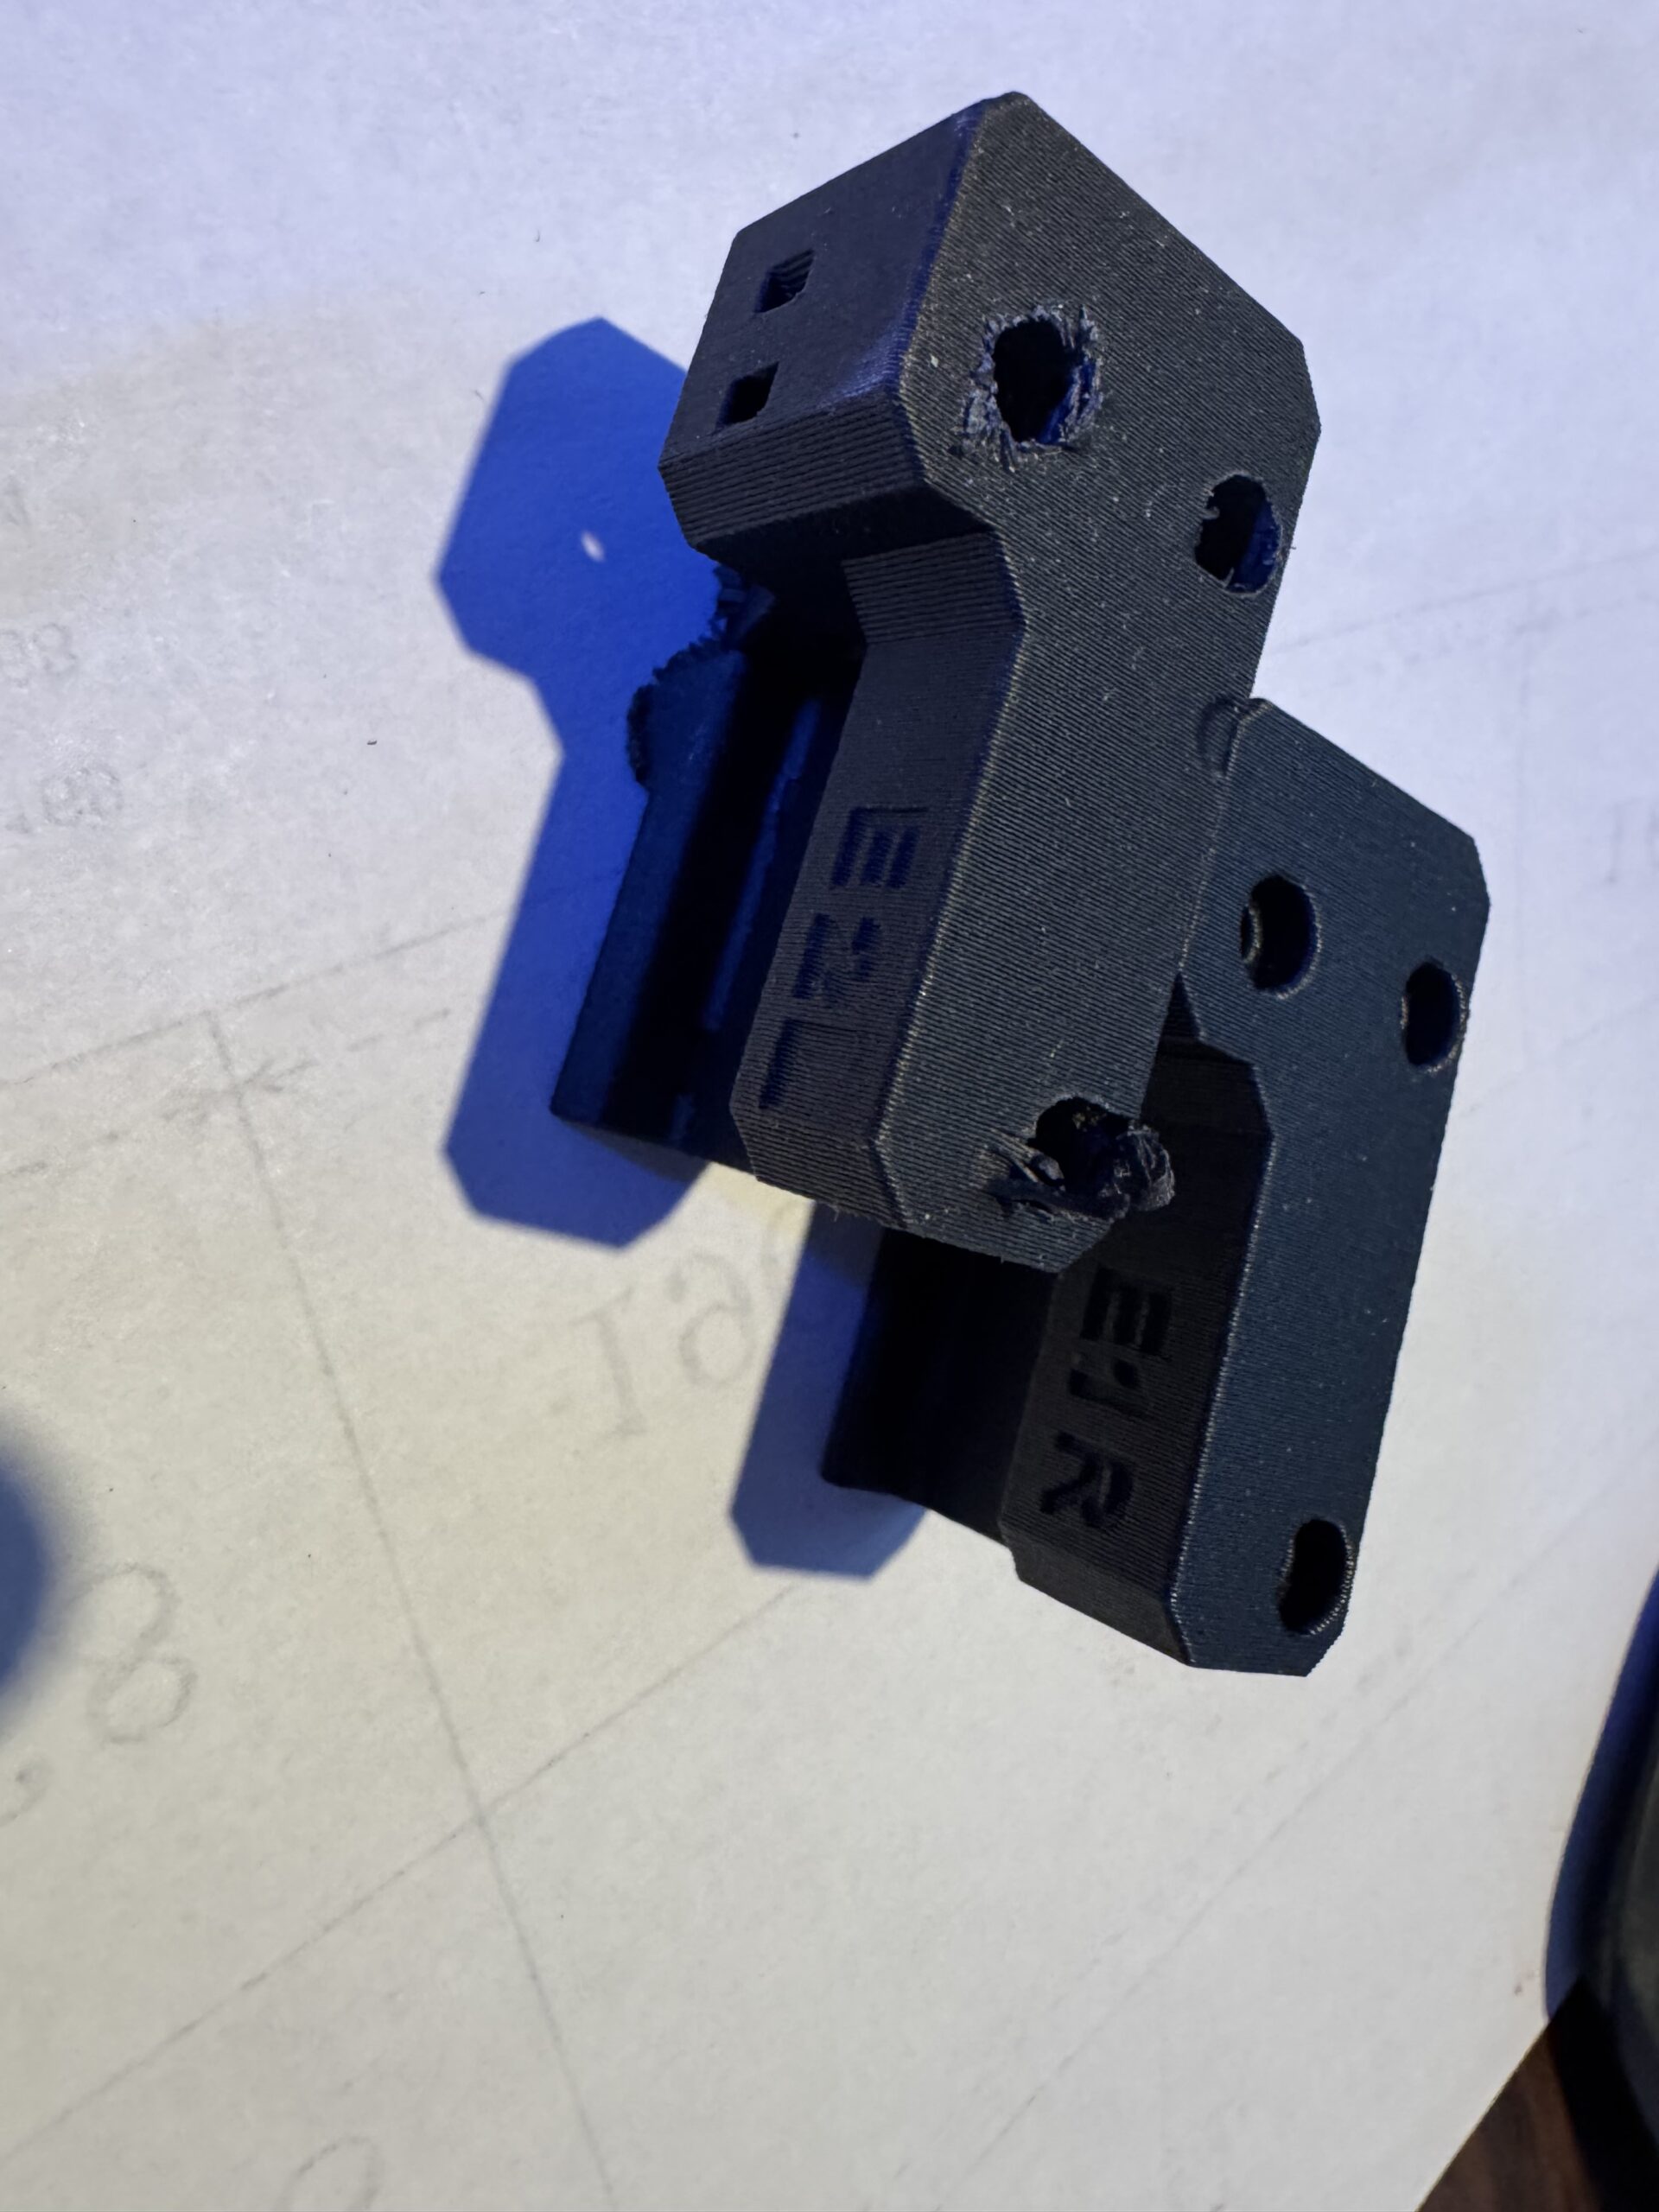
2: TOP
- Shows the bit that was sawn off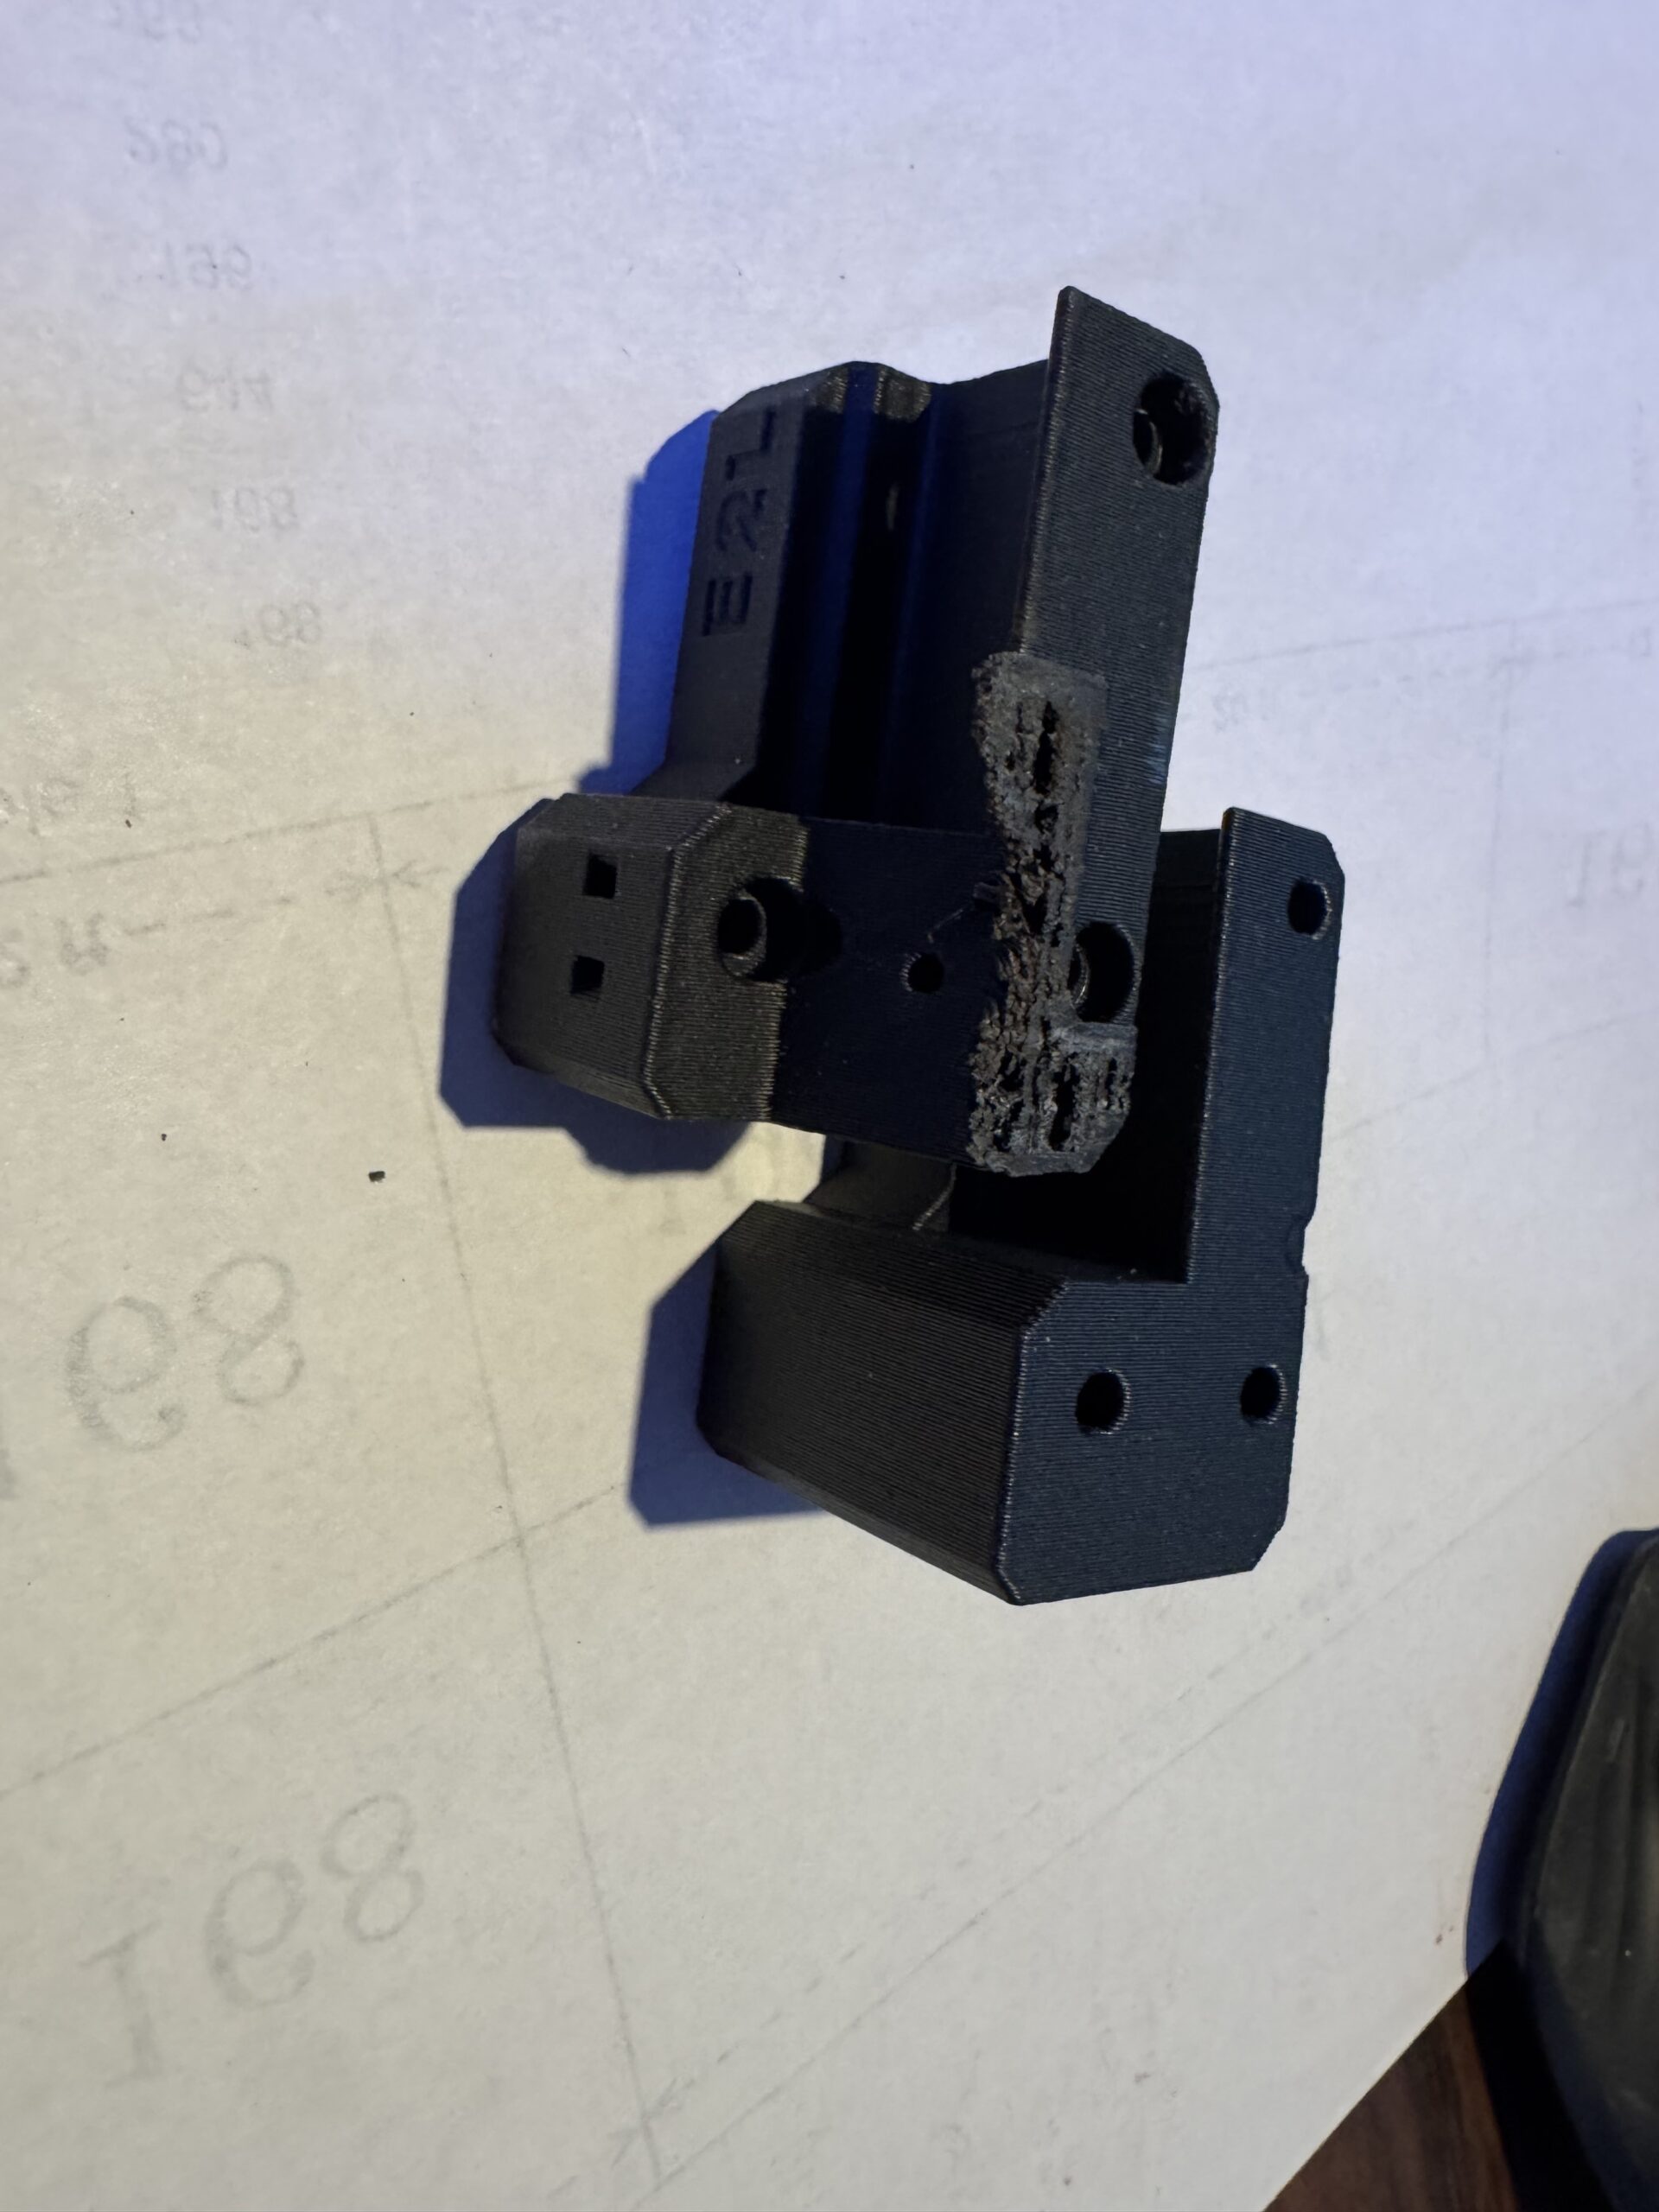
2: So
I have two belt tensioner left and I searched on all boxes. What I have to do? Can I print that part with my other printer?
RE:
Seems my printer is not working properly and it's exasperating when home calibration belt detaches from the nextruder holder and when not the Adjusting belt tension it's imposible to perform... I don't think it's because of that piece all this errors... And if it is it's the worst experience buying a printer... Missing that piece is making me crazy...
RE: Missing belt tensioner right
Seems my printer is not working properly and it's exasperating when home calibration belt detaches from the nextruder holder and when not the Adjusting belt tension it's imposible to perform... I don't think it's because of that piece all this errors... And if it is it's the worst experience buying a printer... Missing that piece is making me crazy...
It's not clear from your post, but you have reprinted and installed the missing belt tensioner, right? Even if it is not from the correct material and may show some long-term creepage, I agree that this should not get in the way of passing calibration.
Please take a deep breath, maybe take a break until tomorrow, and then approach this systematically. "Crazy" is not a good mindset for debugging a printer (or anything, for that matter). 😉 We can try and help you, but need clear information on what you are trying and what is happening:
- Do I understand you right that a belt end has slipped from the Nextruder, you re-installed it, not it no longer slips out?
- But now still cannot adjust the belt tension? In what way does your attempt to do it fail?
- Are you using the latest firmware 6.4.0 and following Prusa's current guide? Please start with the "quick gantry alignment" procedure on that page (yellow box, scroll a couple of pages down from the top).
Please answer the questions above, and we can take it from there.
RE:
Seems my printer is not working properly and it's exasperating when home calibration belt detaches from the nextruder holder and when not the Adjusting belt tension it's imposible to perform... I don't think it's because of that piece all this errors... And if it is it's the worst experience buying a printer... Missing that piece is making me crazy...
It's not clear from your post, but you have reprinted and installed the missing belt tensioner, right? Even if it is not from the correct material and may show some long-term creepage, I agree that this should not get in the way of passing calibration.
Please take a deep breath, maybe take a break until tomorrow, and then approach this systematically. "Crazy" is not a good mindset for debugging a printer (or anything, for that matter). 😉 We can try and help you, but need clear information on what you are trying and what is happening:
- Do I understand you right that a belt end has slipped from the Nextruder, you re-installed it, not it no longer slips out?
- But now still cannot adjust the belt tension? In what way does your attempt to do it fail?
- Are you using the latest firmware 6.4.0 and following Prusa's current guide? Please start with the "quick gantry alignment" procedure on that page (yellow box, scroll a couple of pages down from the top).
Please answer the questions above, and we can take it from there.
Yes, that's correct, I reprinted it while I'm waiting for the replacement.
Yesterday, I printed this:
In the middle made a perfect slice and keep printing. That made me remade the tension test.Performed the gantry alignment.Then followed the Prusa instructions to do the lights and vibrating stuff, but the frequencies made vibrate the opposite belt, or didn't vibrate.Making this the belt jumped.The second time was while making the home calibration.
Now I made sure the screw are tight, the official Prusa screwdriver overpassed. I've been printing benchy since then and now seems ok.Some quality doubts because I can appreciate not straight lines and ondulated surfaces (2 wall on slicer).
Also, when platform goes down at the end makes a dinosaur sound...
RE: Missing belt tensioner right
Take a deep breathe. Get PRUSA to send you the piece. Wait for it to arrive. Install the piece.
Assembling the Kit is an awesome experience. It takes time, skill and patience.
But the end result is worth it.
RE: Missing belt tensioner right
To hold the belt ends in the Nextruder mounting plate, the screws do not have to be extra-tight. It is not friction or clamping by the screw that holds the belt ends in place. Rather, it is the fact that the two ends of the loop face each other with the toothed sides. That will make the loops interlock in place. Only light pressure is needed to ensure that the loop does not open. -- If your belt ends should come loose again, revisit the assembly instructions and double-check that you are forming the loops correctly and threading them through the correct holes in the mounting plate.
Regarding the groaning Z drive, there are two things you can do:
(a) Move the heatbed all the way down. For each of the three black trapezoidal nuts which run along the lead screw, loosen the two M3 screws that hold the nut in place. That will allow the nuts to move to lateral positions which are in agreement with the bed position enforced by the smooth vertical rods. Then re-tighten the M3 screws -- do not overtighten them, you don't want to deform the black plastic nuts.
(b) Lightly grease the leadscrews with the grease that came with the kit.
RE: Missing belt tensioner right
Take a deep breathe. Get PRUSA to send you the piece. Wait for it to arrive. Install the piece.
Assembling the Kit is an awesome experience. It takes time, skill and patience.
But the end result is worth it.
Now with the belts reattached to the nextruder seems it's printing well. I'll wait for the replacement.
To hold the belt ends in the Nextruder mounting plate, the screws do not have to be extra-tight. It is not friction or clamping by the screw that holds the belt ends in place. Rather, it is the fact that the two ends of the loop face each other with the toothed sides. That will make the loops interlock in place. Only light pressure is needed to ensure that the loop does not open. -- If your belt ends should come loose again, revisit the assembly instructions and double-check that you are forming the loops correctly and threading them through the correct holes in the mounting plate.
Regarding the groaning Z drive, there are two things you can do:
(a) Move the heatbed all the way down. For each of the three black trapezoidal nuts which run along the lead screw, loosen the two M3 screws that hold the nut in place. That will allow the nuts to move to lateral positions which are in agreement with the bed position enforced by the smooth vertical rods. Then re-tighten the M3 screws -- do not overtighten them, you don't want to deform the black plastic nuts.
(b) Lightly grease the leadscrews with the grease that came with the kit.
I'll probably go with b as i can see there isn't grease. Also in the Knowledge Base they recommend it for the maintenance.
Thank you all for the help!
RE: Missing belt tensioner right
I'll probably go with b as i can see there isn't grease. Also in the Knowledge Base they recommend it for the maintenance.
You should really do (a) as well. When assembling the printer according to Prusa's instructions, the trapezoidal nuts are attached first, in some "random" positions. (There is quite a bit of play in their holes for the M3 screws.) Then, in a later step, the smooth vertical rods are jammed in, and force the heatbed into a lateral position. That may result in mechanical tension in the Z drive, especially in the lower bed positions where the lead screws cannot compensate by tilting sideways. Letting the trapezoidal nuts find consistent, tension-free positions is quick and may prevent noises or even step loss in the lower bed positions.
RE: Missing belt tensioner right
I received the piece a few days ago, and I've been printing. Logically, I feel a huge quality improve. I'll mark as solved, this post.
To let you know, I compared the printed piece with the official one, the dimensions don't match 🤣 and I can see it's a bit damaged.
Thank you all again 👏
RE:
I received the piece a few days ago, and I've been printing. Logically, I feel a huge quality improve. I'll mark as solved, this post.
To let you know, I compared the printed piece with the official one, the dimensions don't match 🤣 and I can see it's a bit damaged.Thank you all again 👏
If you print your own pieces you have to choose the filament carefully when not using Prusament. For example, if you were printing a larger piece like the fan shroud in ASA instead of Pruasment PC-CF or used a different vendor for the later, then you need to calibrate for the shrinkage as well as the extrusion multiplier or the self-printed part may not match up. Screw holes could be misaligned and/or too small to fit the screw, seems may not fit etc.