Assembled MK4s + enclosure = Remove PSU?
Dear all,
I bought a bundle with an assembled MK4/s and enclosure. Now I am at the step 55 of installing the PSU ( https://help.prusa3d.com/guide/4a-installing-the-printer-mk4-s-mk3-9-s_567325#567621).
It may sound like a silly question, but just to make no mistake and as it's not written explicitly: I do have to remove the assembled PSU from the printer even if it means to cut all the cable ties that hold the PSU cable in position on the printer, right?
Thx
RE: Assembled MK4s + enclosure = Remove PSU?
the PSU needs to be located outside the enclosure and the original wires are only just long enough to achieve that as standard
I think the Prusa instructions are close to Masochism. trying to juggle all of the parts inside and outside the enclosure, at the same time...
after a couple of instances of the initial build and subsequent maintenance I capitulated. I bought two extension power cables 

and used some crimp on connectors like this, to extend the power cables (Note, these cables are 14AWG which is bigger than the normal cables, in order to reduce power loss between the power supply and the printer.
I also needed to extend the Power Panic wires, so I found a polarised extension cable like this 
which I fitted, by cutting the existing wire and soldering the extension wire between the cut ends insulating the joints wit Heat shrink sleeving
I made the PSU end of the wiring, long enough, to reach from the back of the enclosure to the front of the enclosure, so that I could lift the lrinter out, before disconnecting the wires and I slid the wires into some braided sleeving which I had on hand from another project 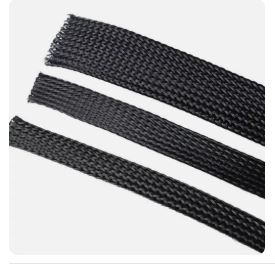
then I fitted the ends
for the printer end I used the remainder of the extension cables, again slid through some braded sleeving to put a short length from the controller board towards the PSU connector.
this left me with 2 XT60 connectors and one power panic cable connector on the end of the extension ftom the power supply, and the opposite connectors on the ends of the extension from the controller board, and now, I can fir the PSU to the outside of the rear of the enclosure with the wires feeding through the enclosure, and I can connect the printer easily, as I install it from the front...
NOTE all of these cables except the earth wire, are polarised. you must make sure that the red power wires go to the + terminals on the PSU and the Conroller and the Black power wires go to the - connectors the power panic wires must be connected so that the white wire at both ends i connected together and the black wire at both ends is connected together, and the earth wire must be connected to the earth terminals at both ends
I used this type of connector in the earth wire, to create an insulated connection and I obtained the green yellow wire from an old UK kettle lead (computer power cable
I hope this helps, regards Joan
I try to make safe suggestions,You should understand the context and ensure you are happy that they are safe before attempting to apply my suggestions, what you do, is YOUR responsibility.Location Halifax UK
RE: Assembled MK4s + enclosure = Remove PSU?
I used this official part on my 2 MK4S in Original Prusa Enclosures: https://www.prusa3d.com/product/psu-cable-quick-release-for-original-prusa-enclosure-mk4-s/
I also printed this cover for the connector: https://www.printables.com/model/315683-quick-release-psu-connector-cover
The quick release cable may be not the cheapest solution, but taking the printer out of the enclosure for servicing is very easy with it.
RE: Assembled MK4s + enclosure = Remove PSU?
@walter-layher, @joantabb, thank you both for your replies and detailed answers.
Meanwhile I realized that I was following an outdated version of the assembly guide 🙃
The current version 1.03 shows exactly the steps that need to be performed. Nevertheless, I will definitely use the quick release as suggested!!