Enclosure with all addons
Hello, I've just finished my enclosure with all addons installed. I'd like to describe my experience here for anyone interested.

Order and packaging
I've ordered Original Prusa Enclosure with all addons as a one order. I've paid almost the same price (minus 150) as for Prusa i3 MK3S+ Kit. Waited roughly 6 weeks to it's arrival. It arrived in two separate heavy boxes. There is really nothing I can complain about, maybe except the price but the quality is there.
Assembly
Well, this was a puzzle for professionals 🙂 My goal was to build it in one single "run" to avoid any disassembly for addons. So I've checked every assembly instruction for every addon and the enclosure itself beforehand to get an idea what I'm going to build and to make sure that I have everything missing printed out. I had to print transport handles and whole set of parts for the hinged lid.
Assembly itself took roughly 14 hours. I've checked all addon assembly instructions before each step and jumped to them when necessary. For example first thing I had to do was to prepare the printer, but as I have quick PSU cable release addon I had to also rework PSU cable wiring in that step. A small suggestion for everybody building this - install the transparent side panels as the last thing. It's much more easy to install addons and do cable management from opened sides.
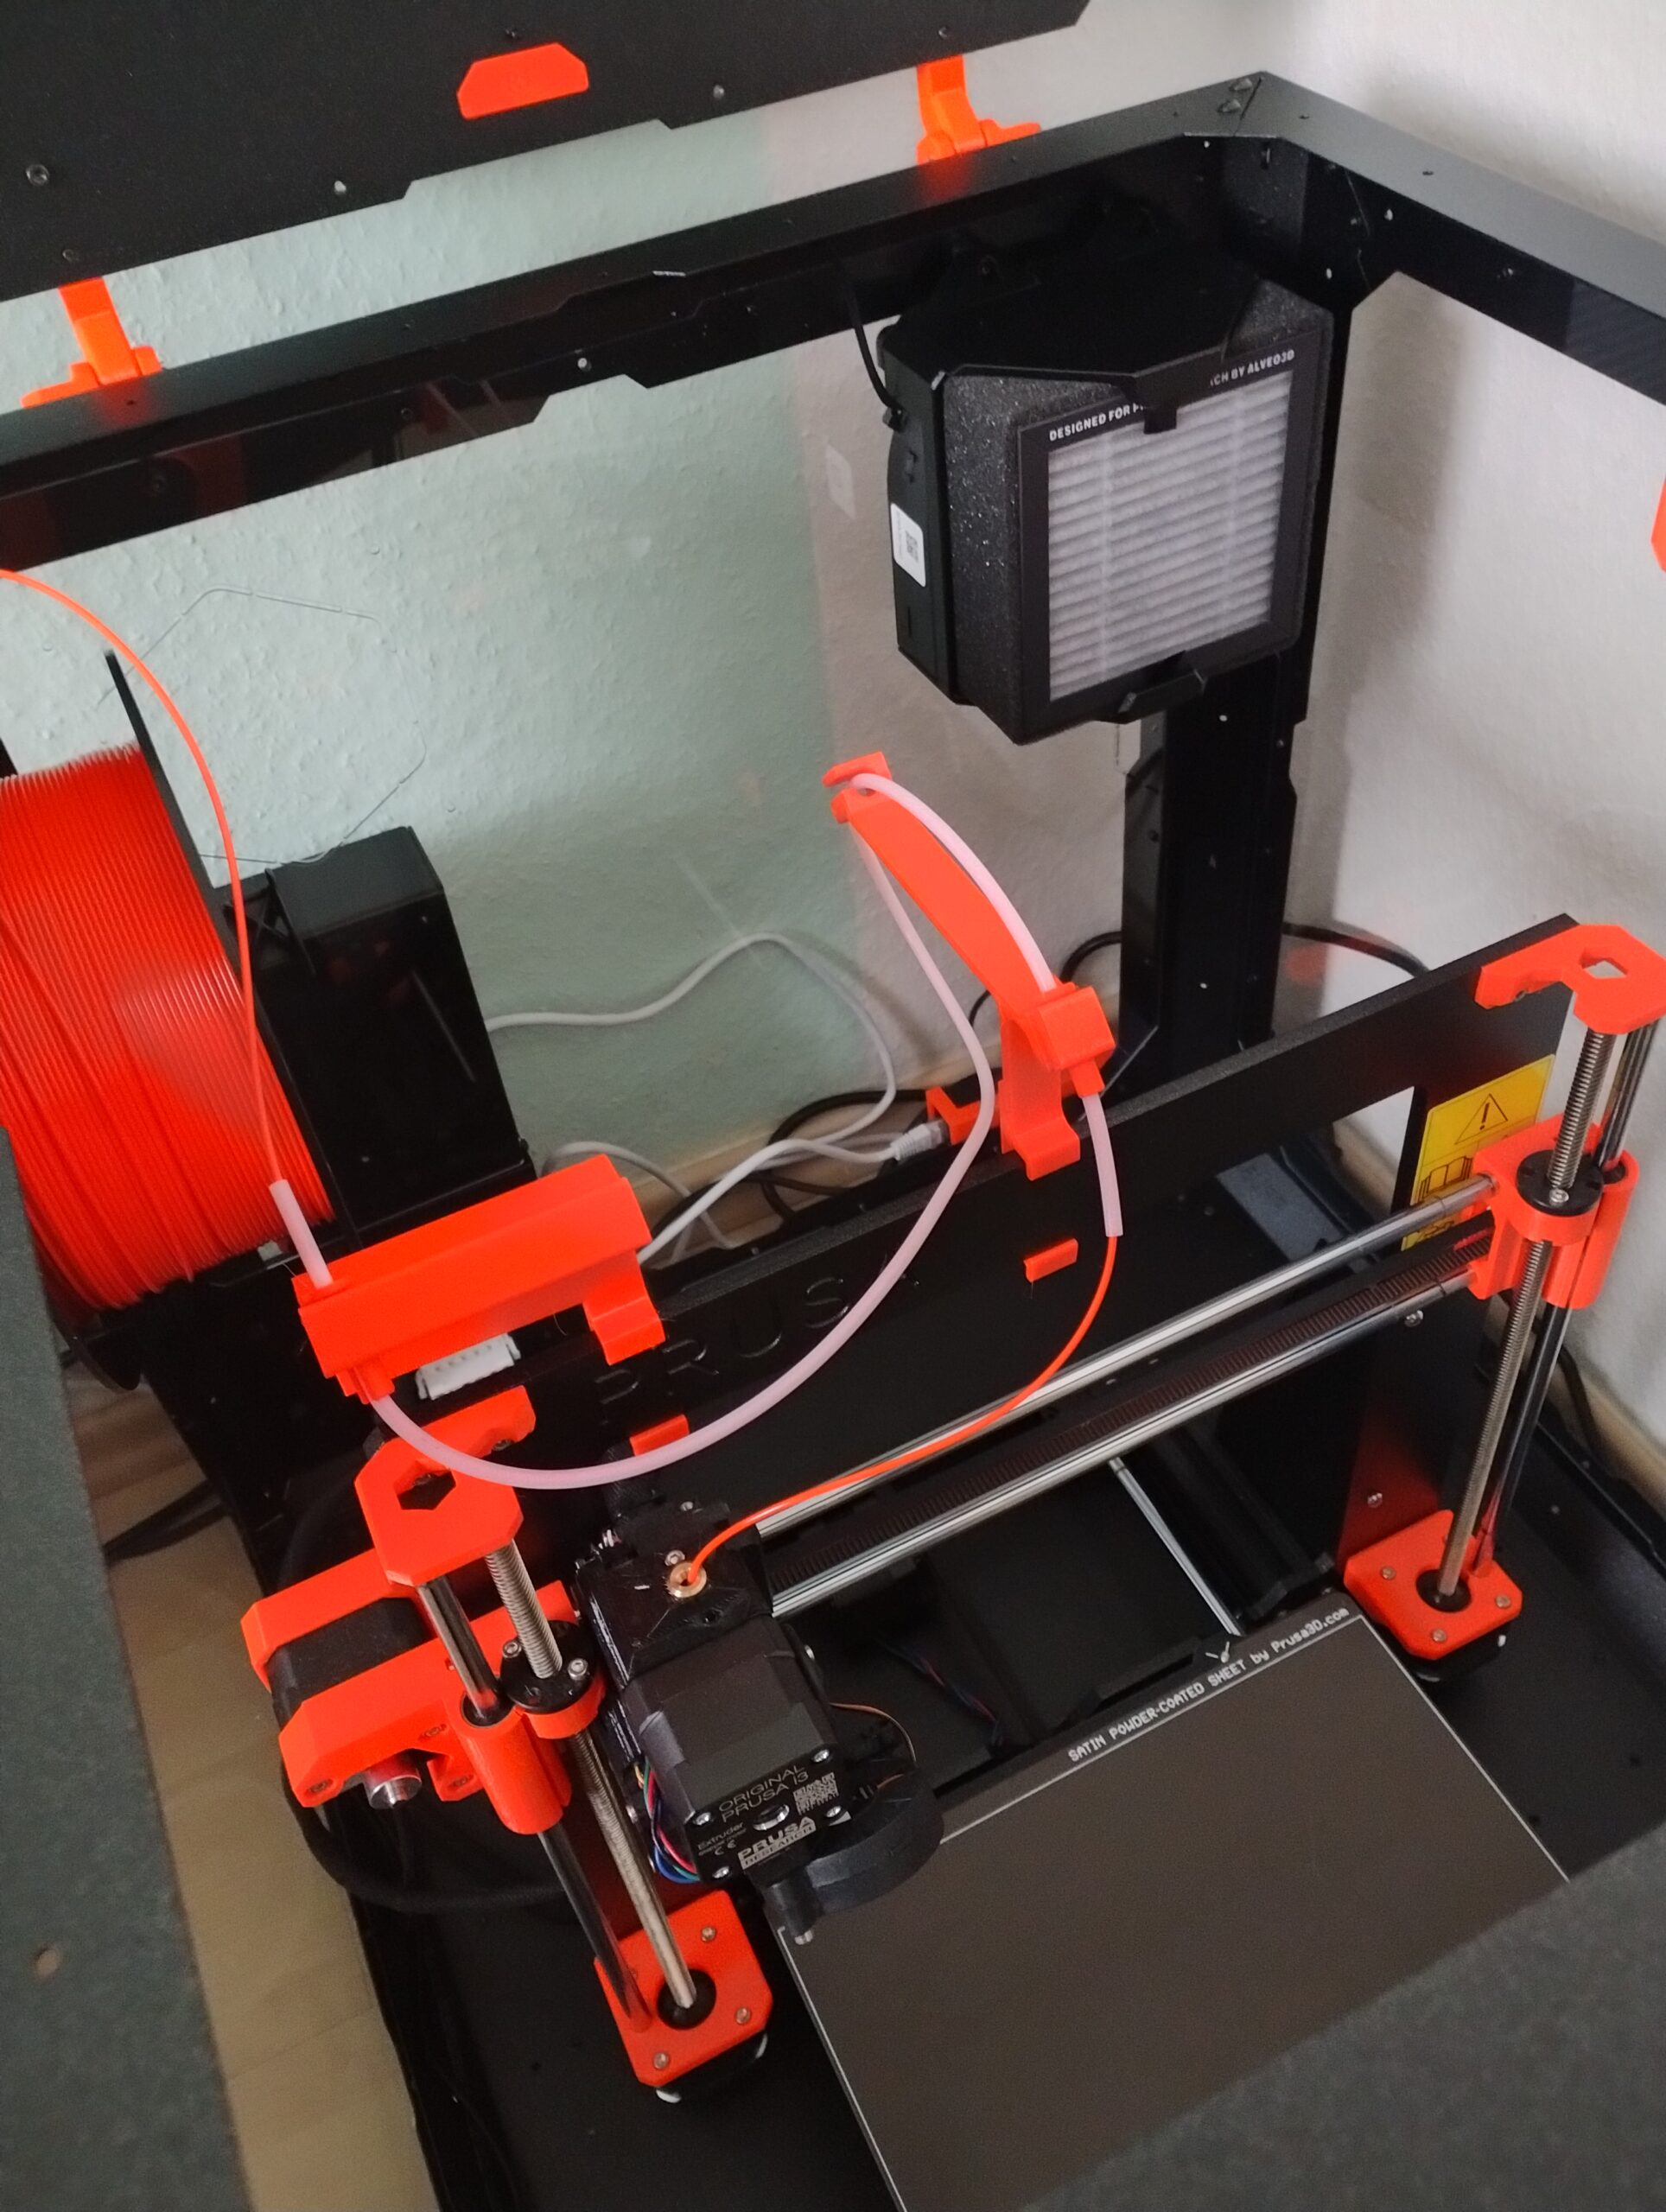
With all addons installed I couldn't install the PTFE guide because there was no good place for it. Besides I don't like the way it connects the printer to the enclosure and it's also making mid-print filament change harder.
Additional improvements
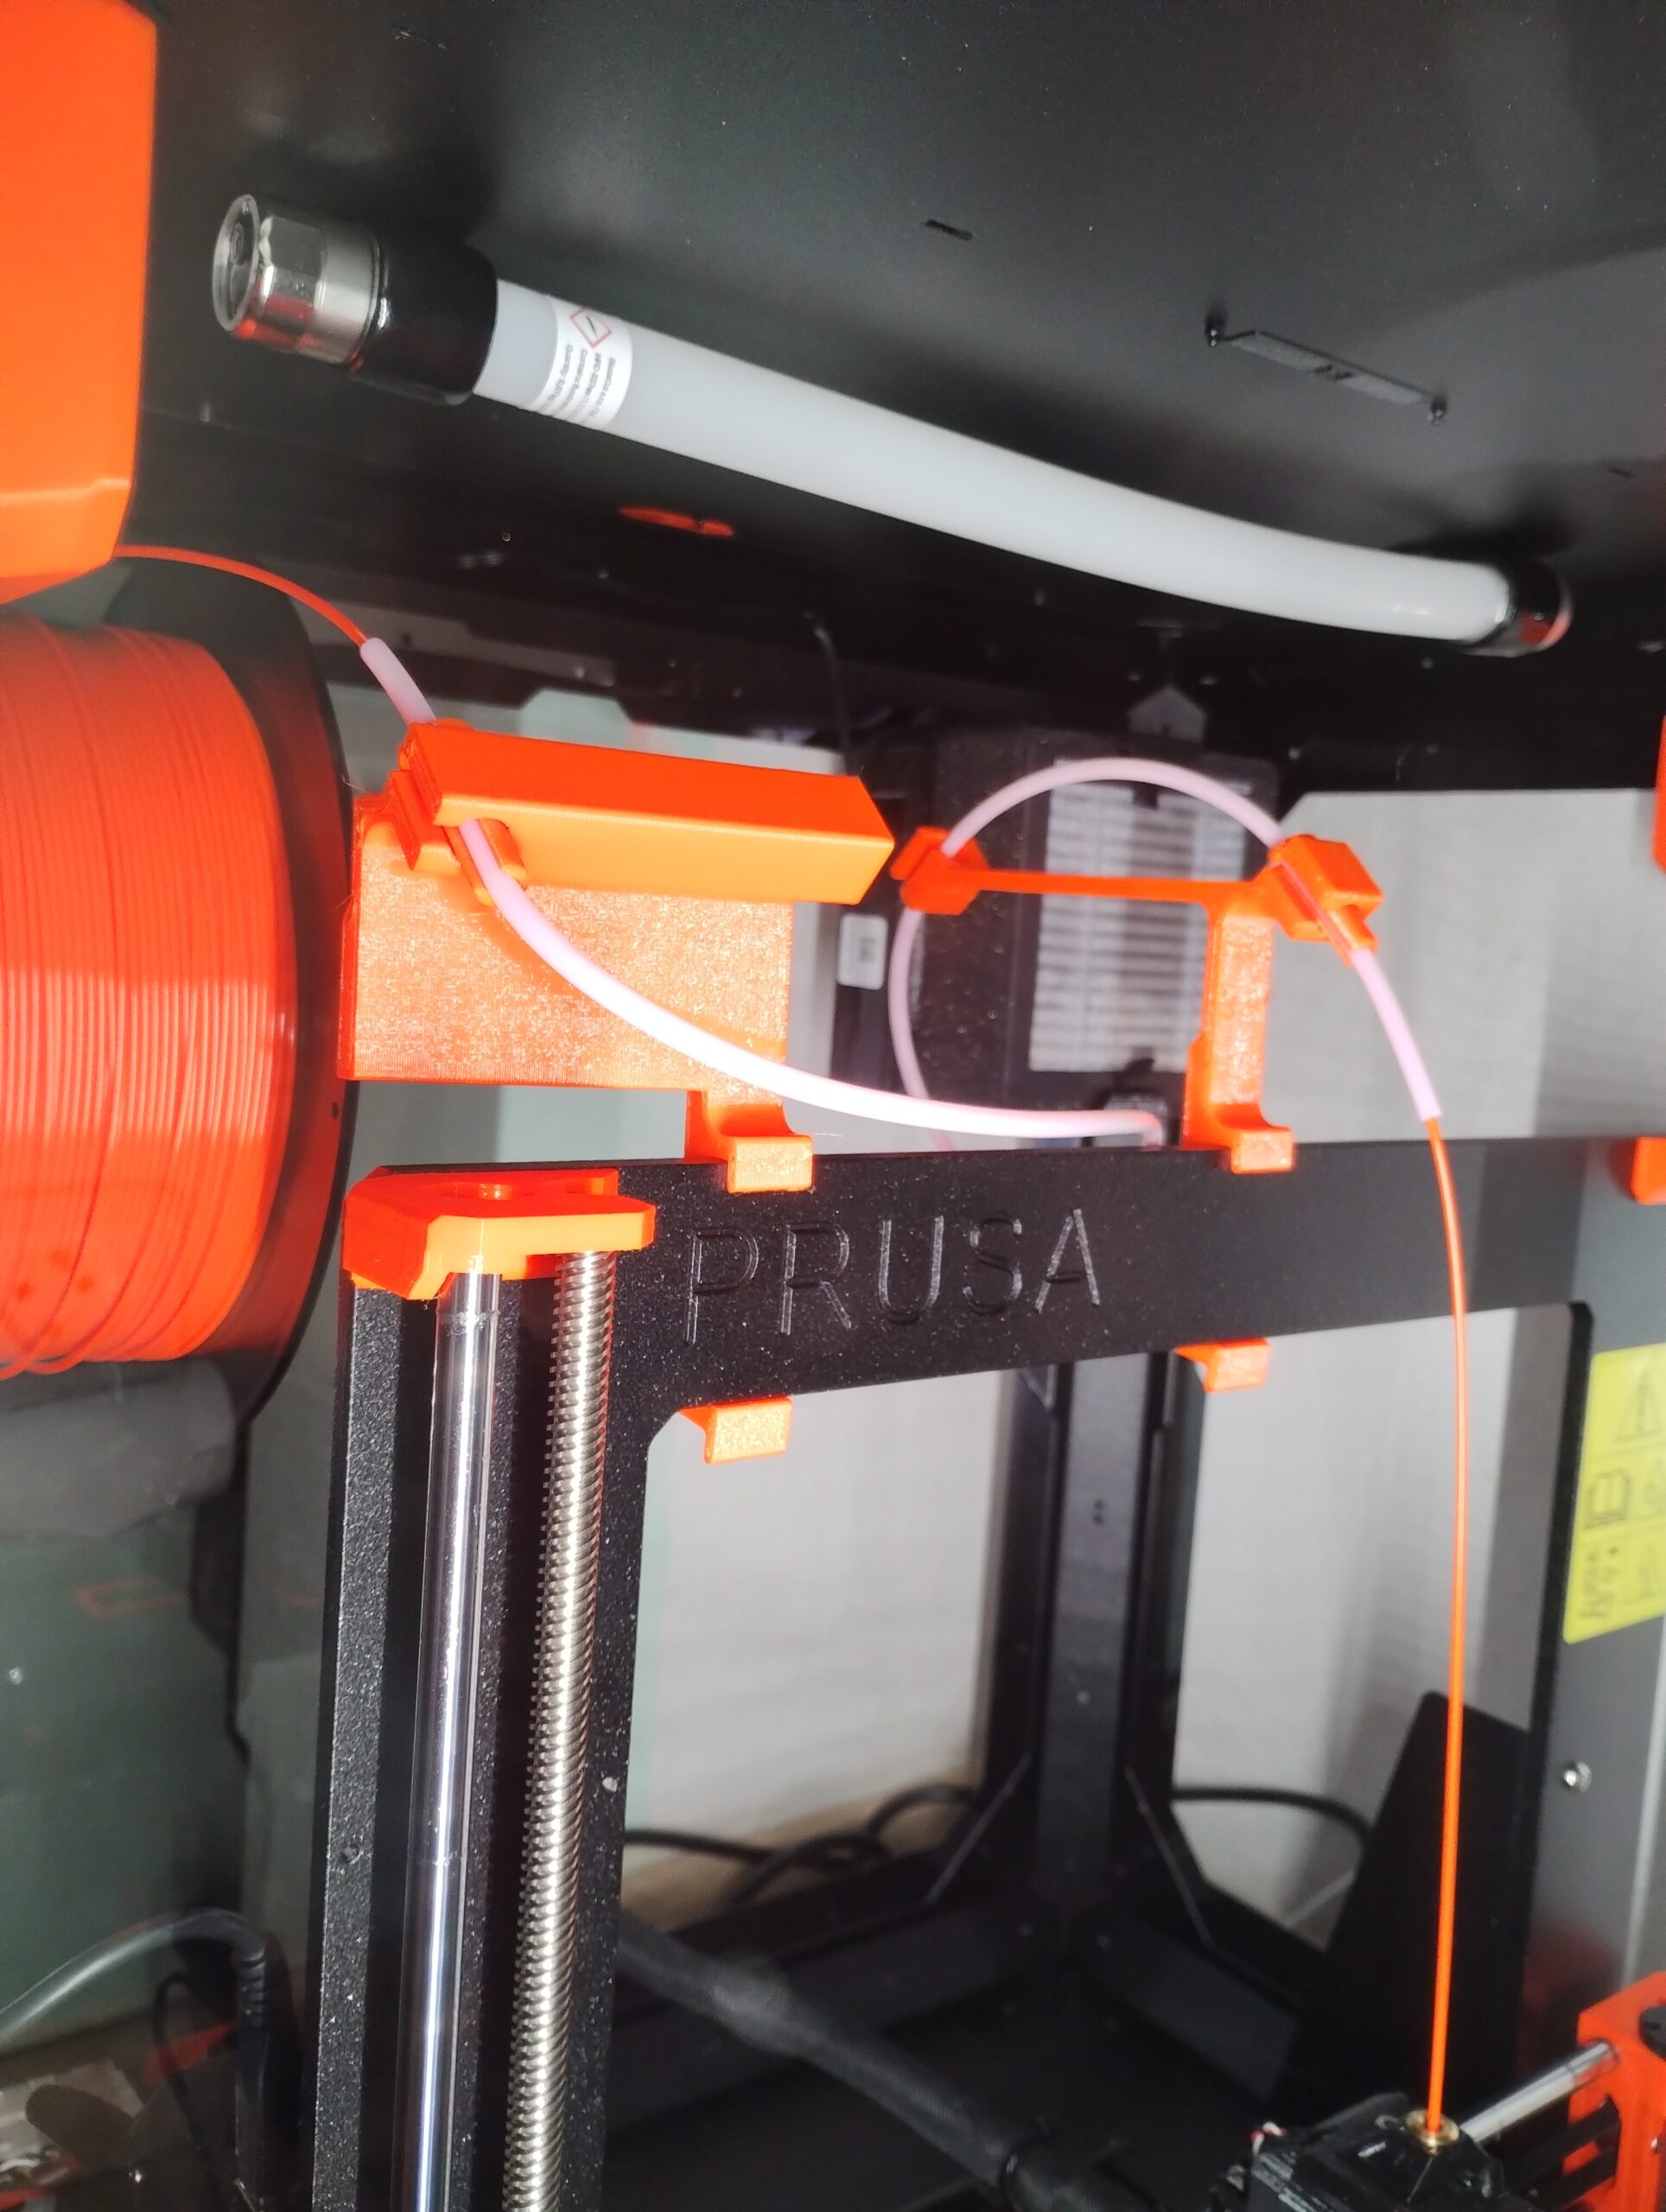
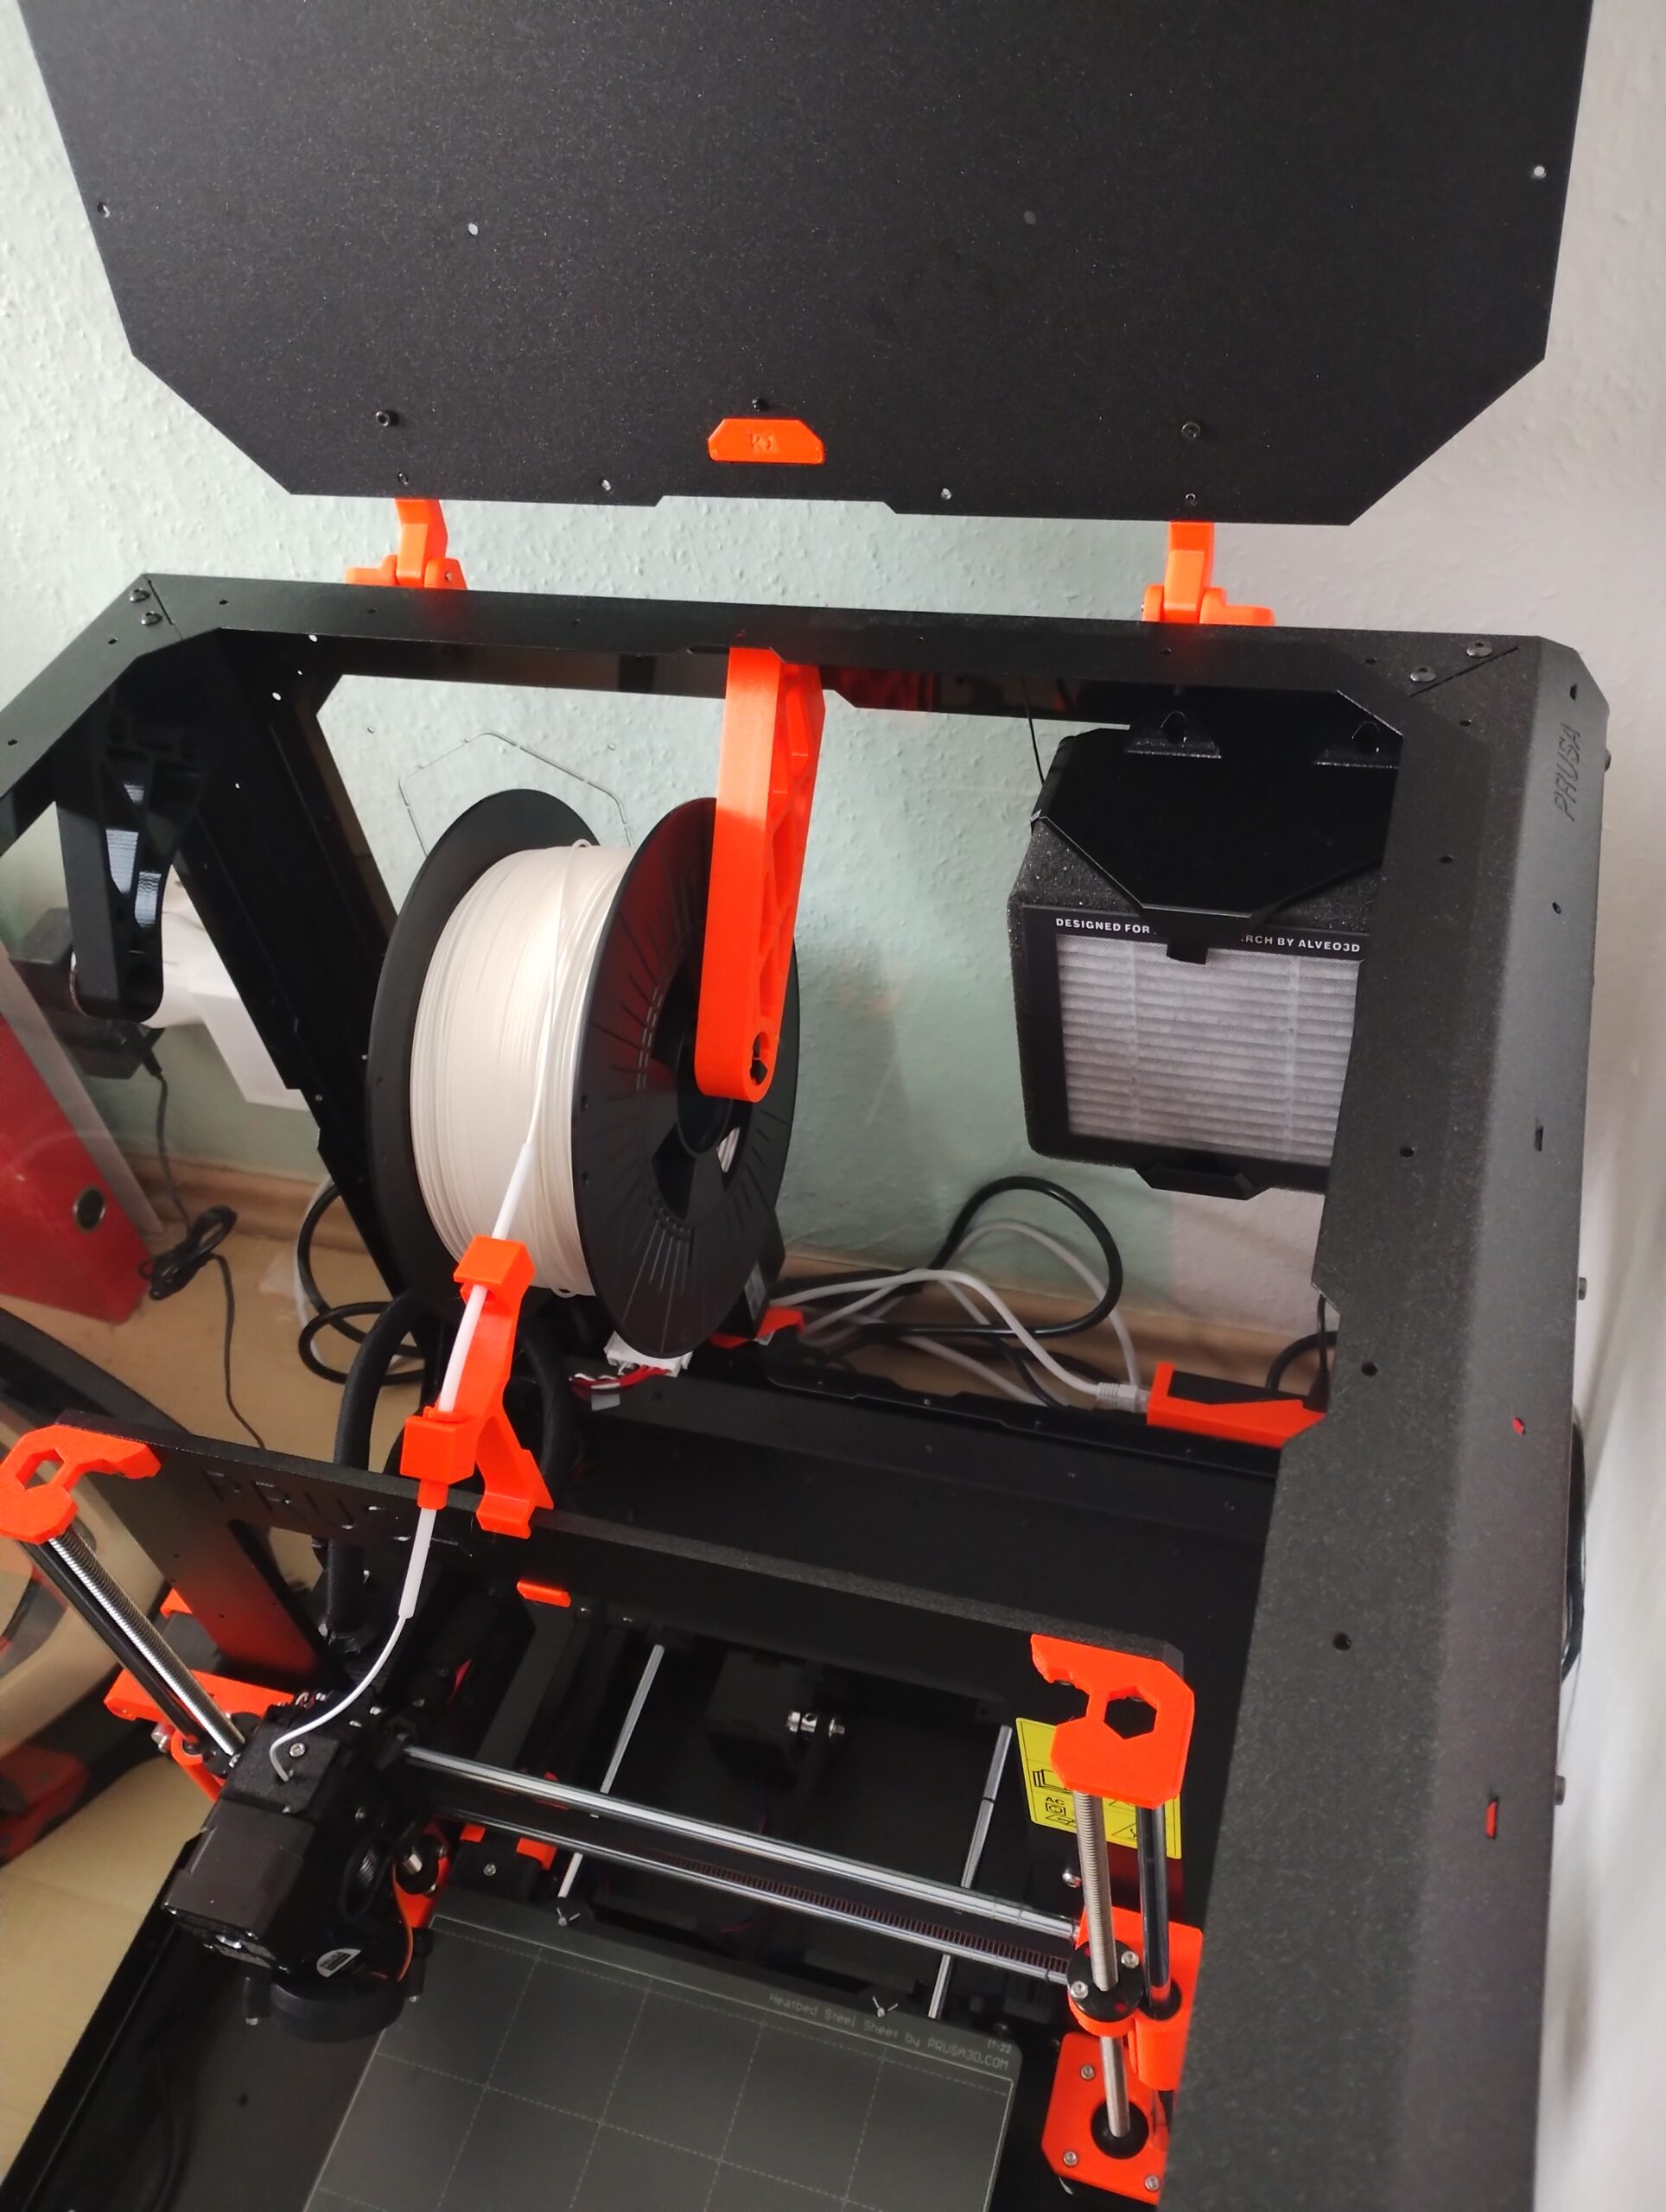
First thing I had to fix was the PTFE guide. I've printed one Filament guide V2 and also one quickly hacked version of it. With that I've attached the whole PTFE guide to the printer so it's not connected to the enclosure and it's easy to change filament in the middle of print.
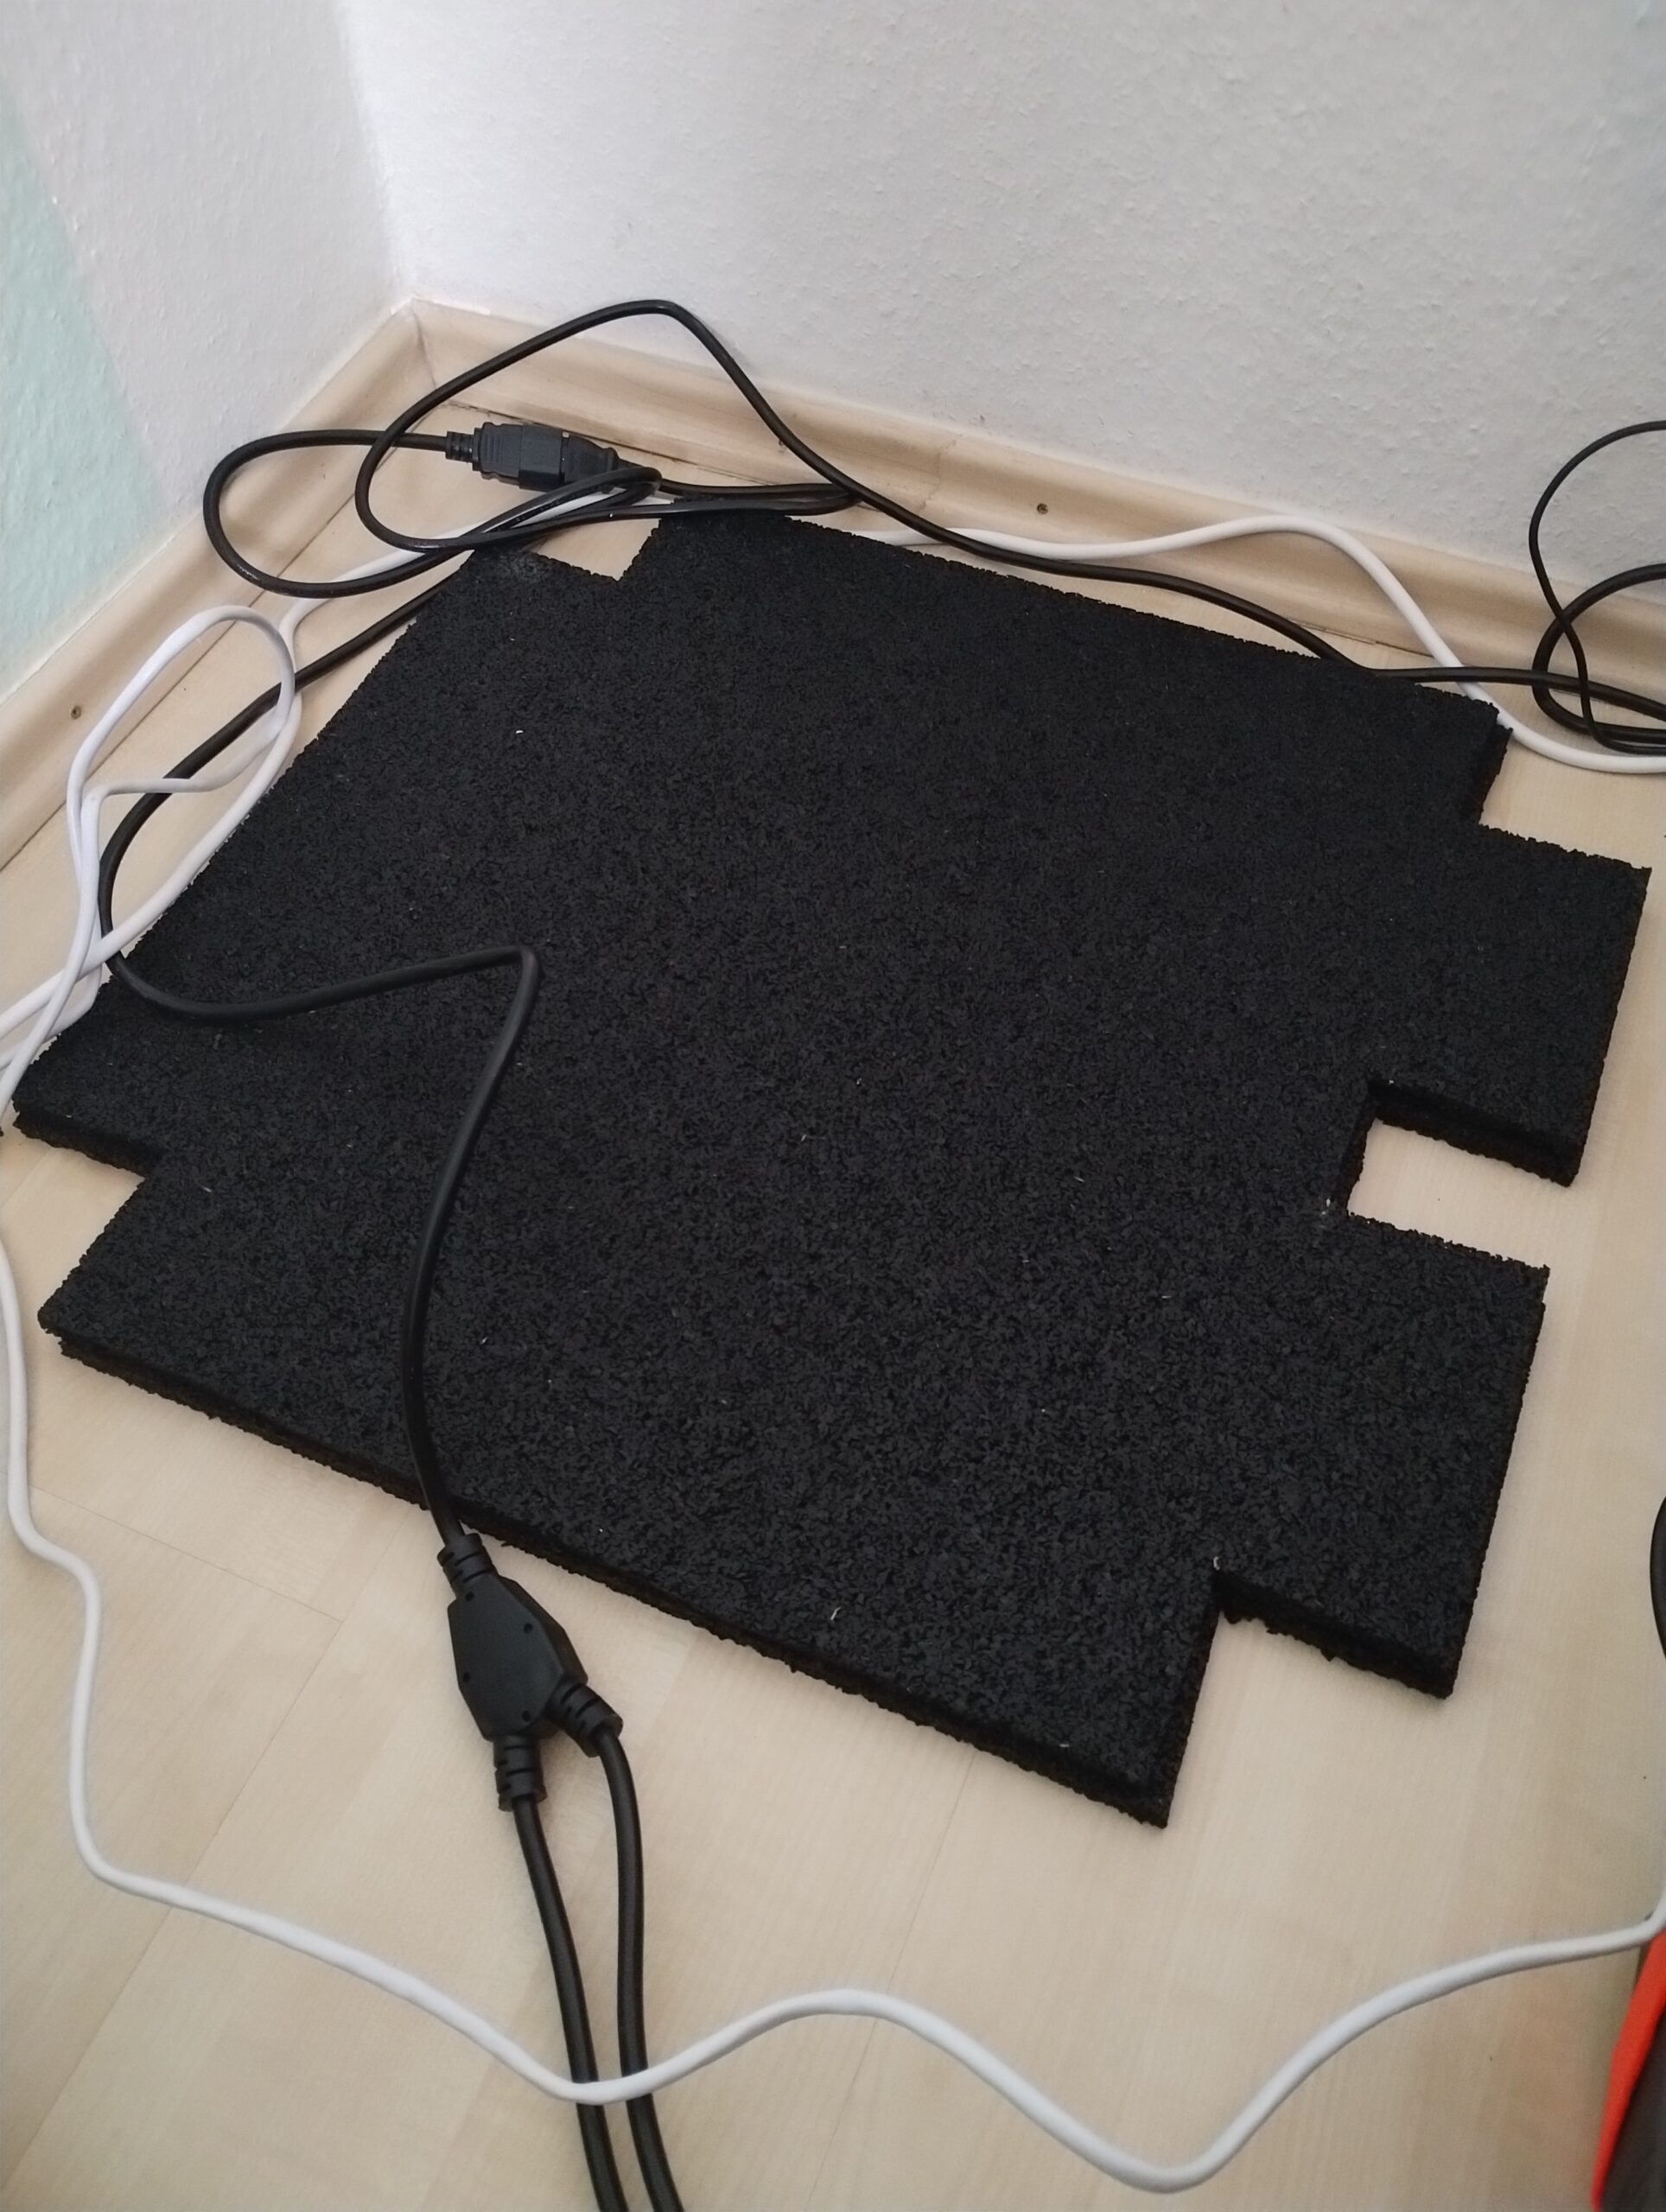
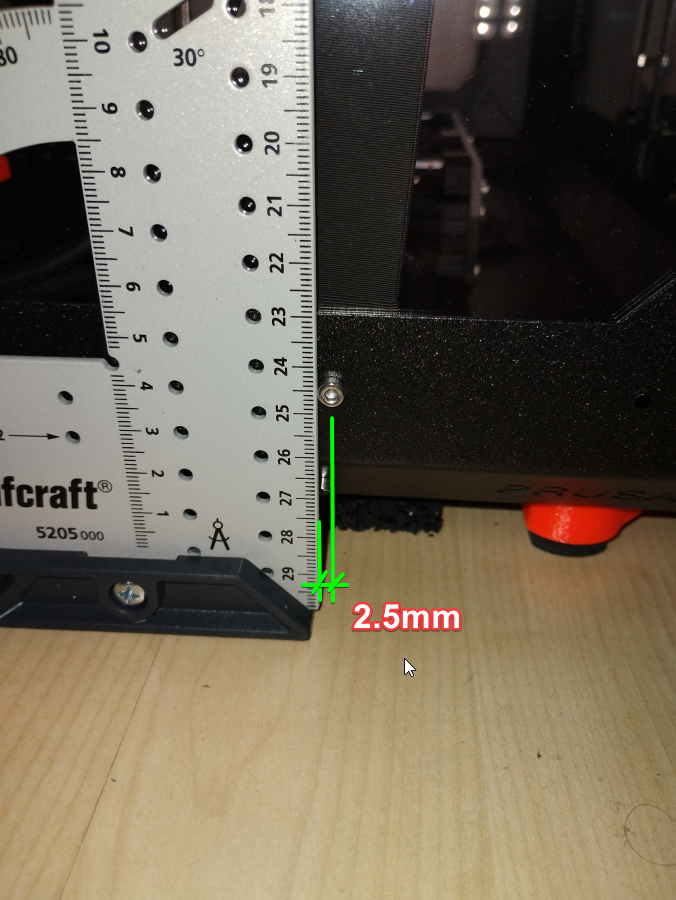
The second thing was the noise. The enclosure is heavy, tough, but it still resonates as one big speaker making the printer much louder than it was before! I think the main problem is that the printer is standing on the bottom panel which is not supported directly under the printer but only in the four corners of the frame. So I've bought two heavy rubber antivibration pads (each 10mm thick) and cut out the areas where the cables and stands are. Then I've placed the whole enclosure on it. The original stands are barely touching the floor now. Noise level went down significantly.

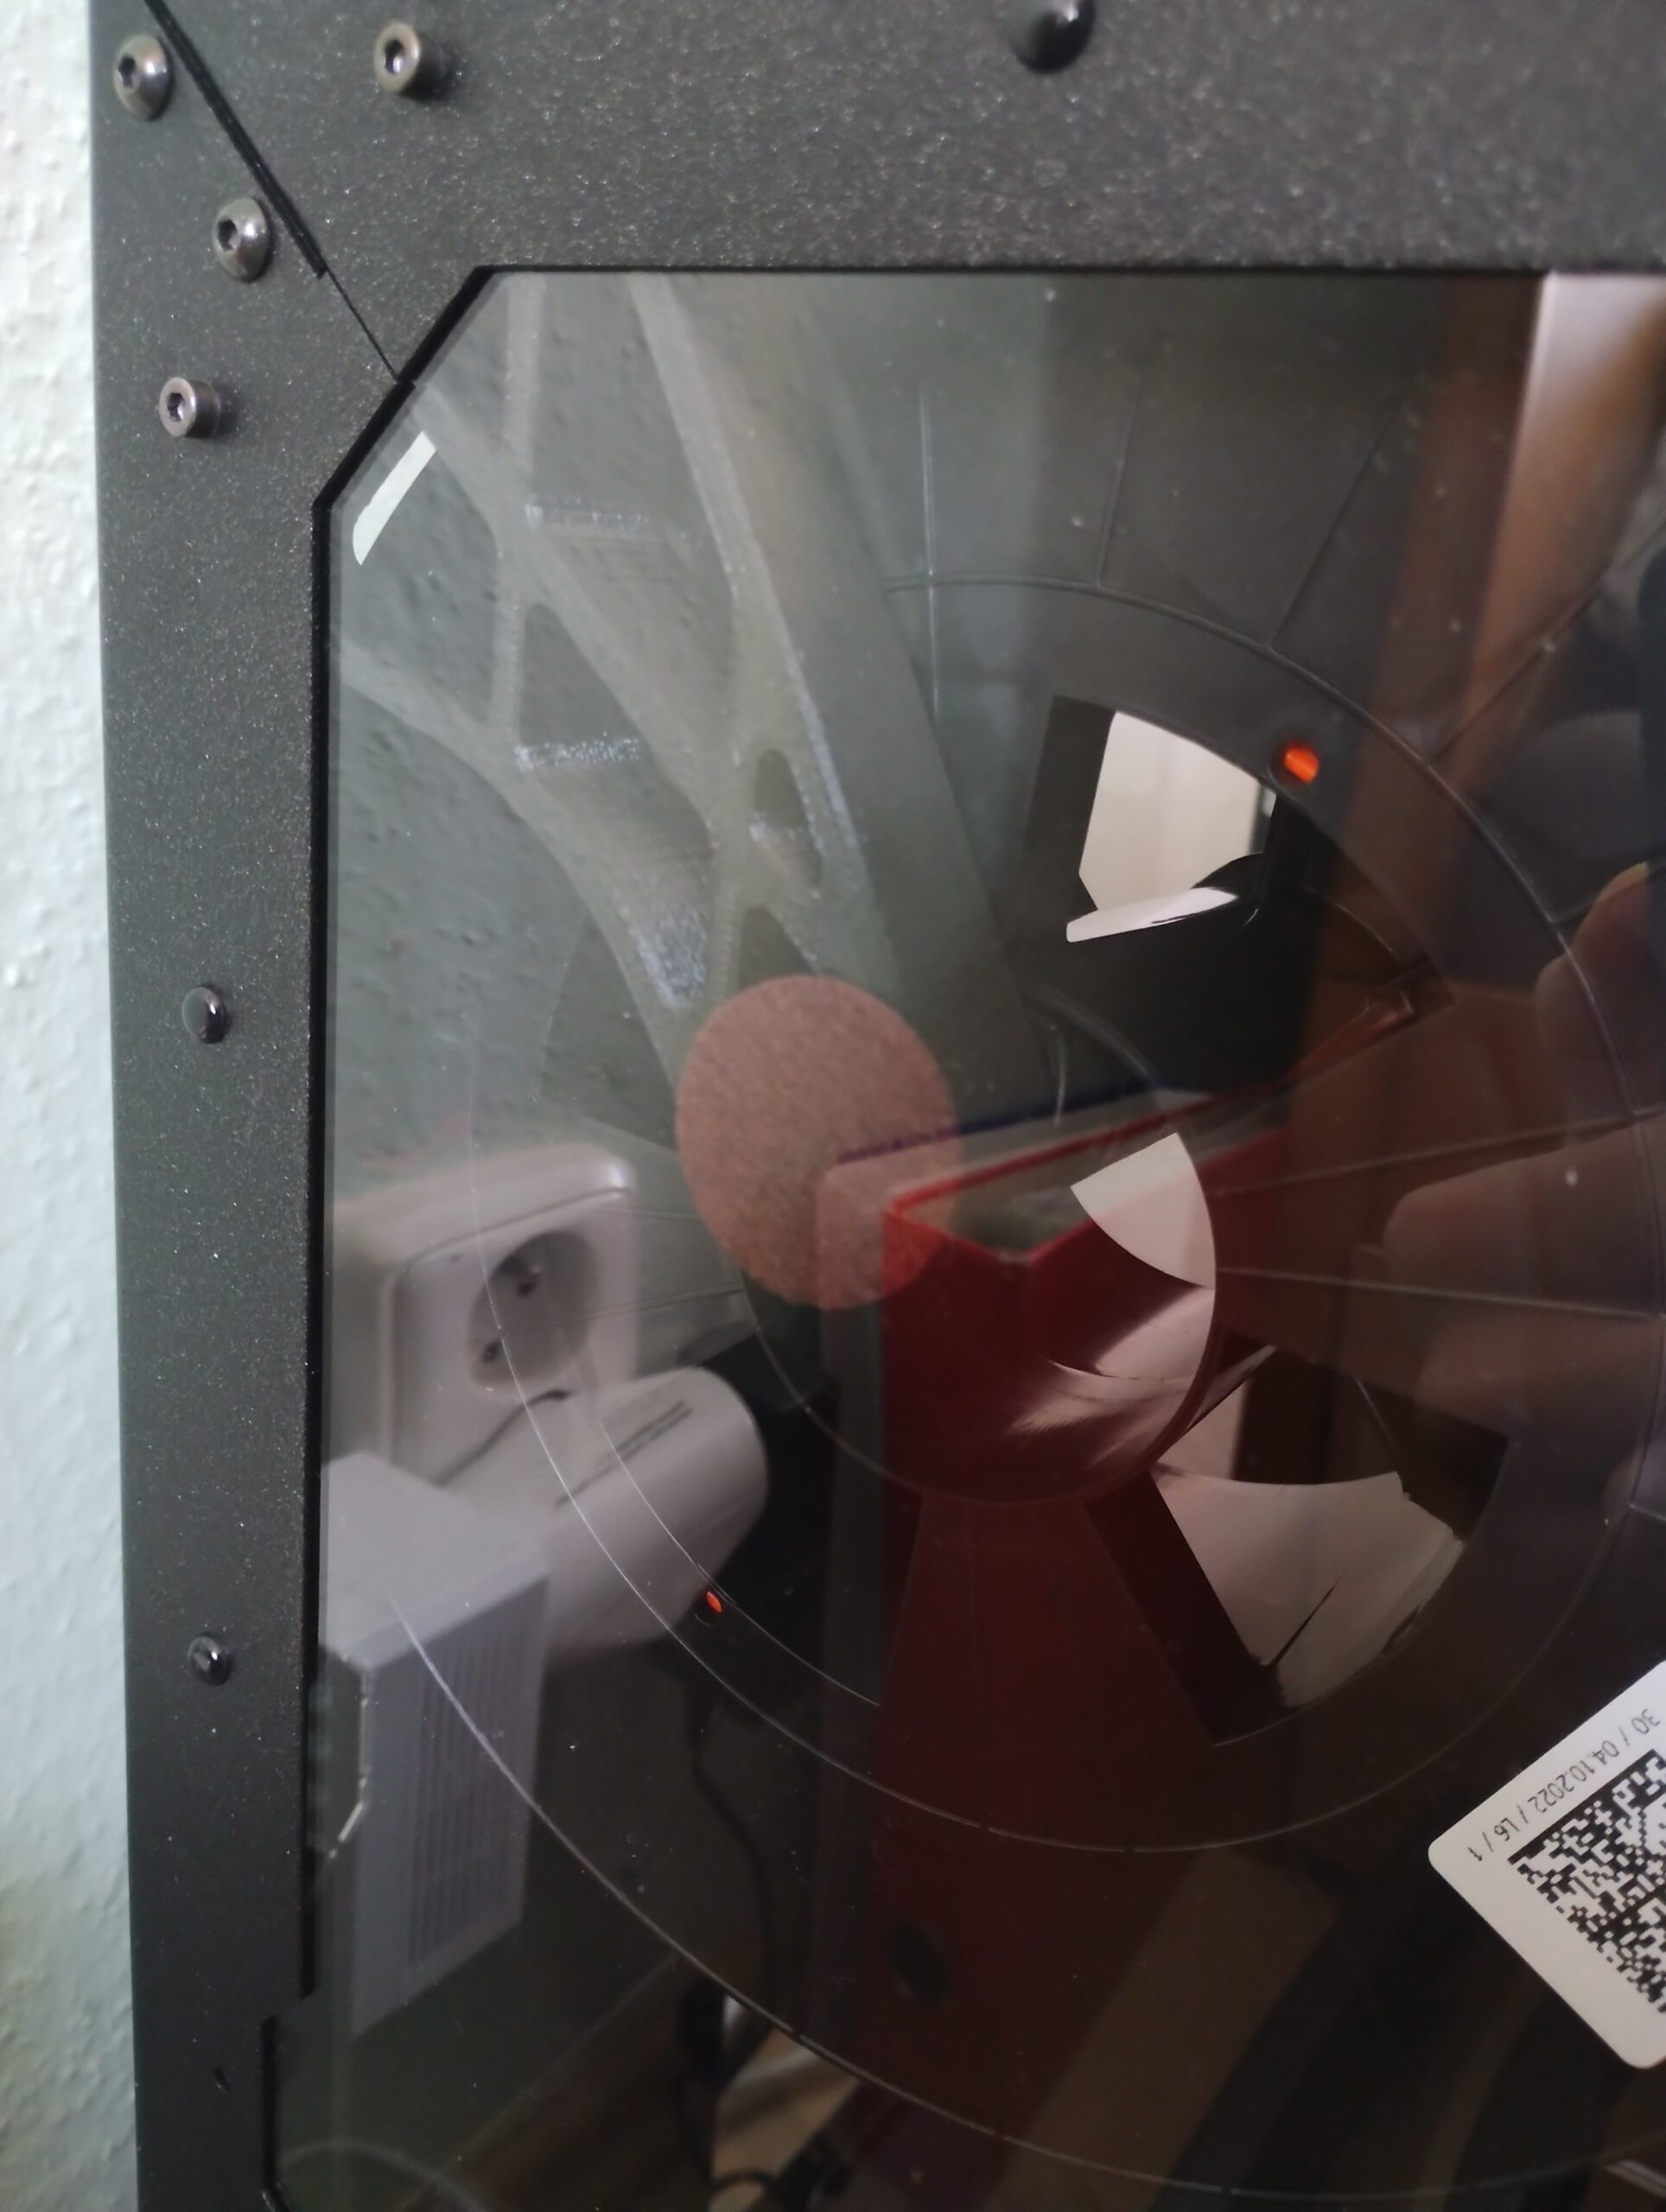
Another thing that made noise was the filament holder touching the transparent acrylic side panel. I've sticked a standard IKEA chair leg protector on the filament holder and it fixed it.
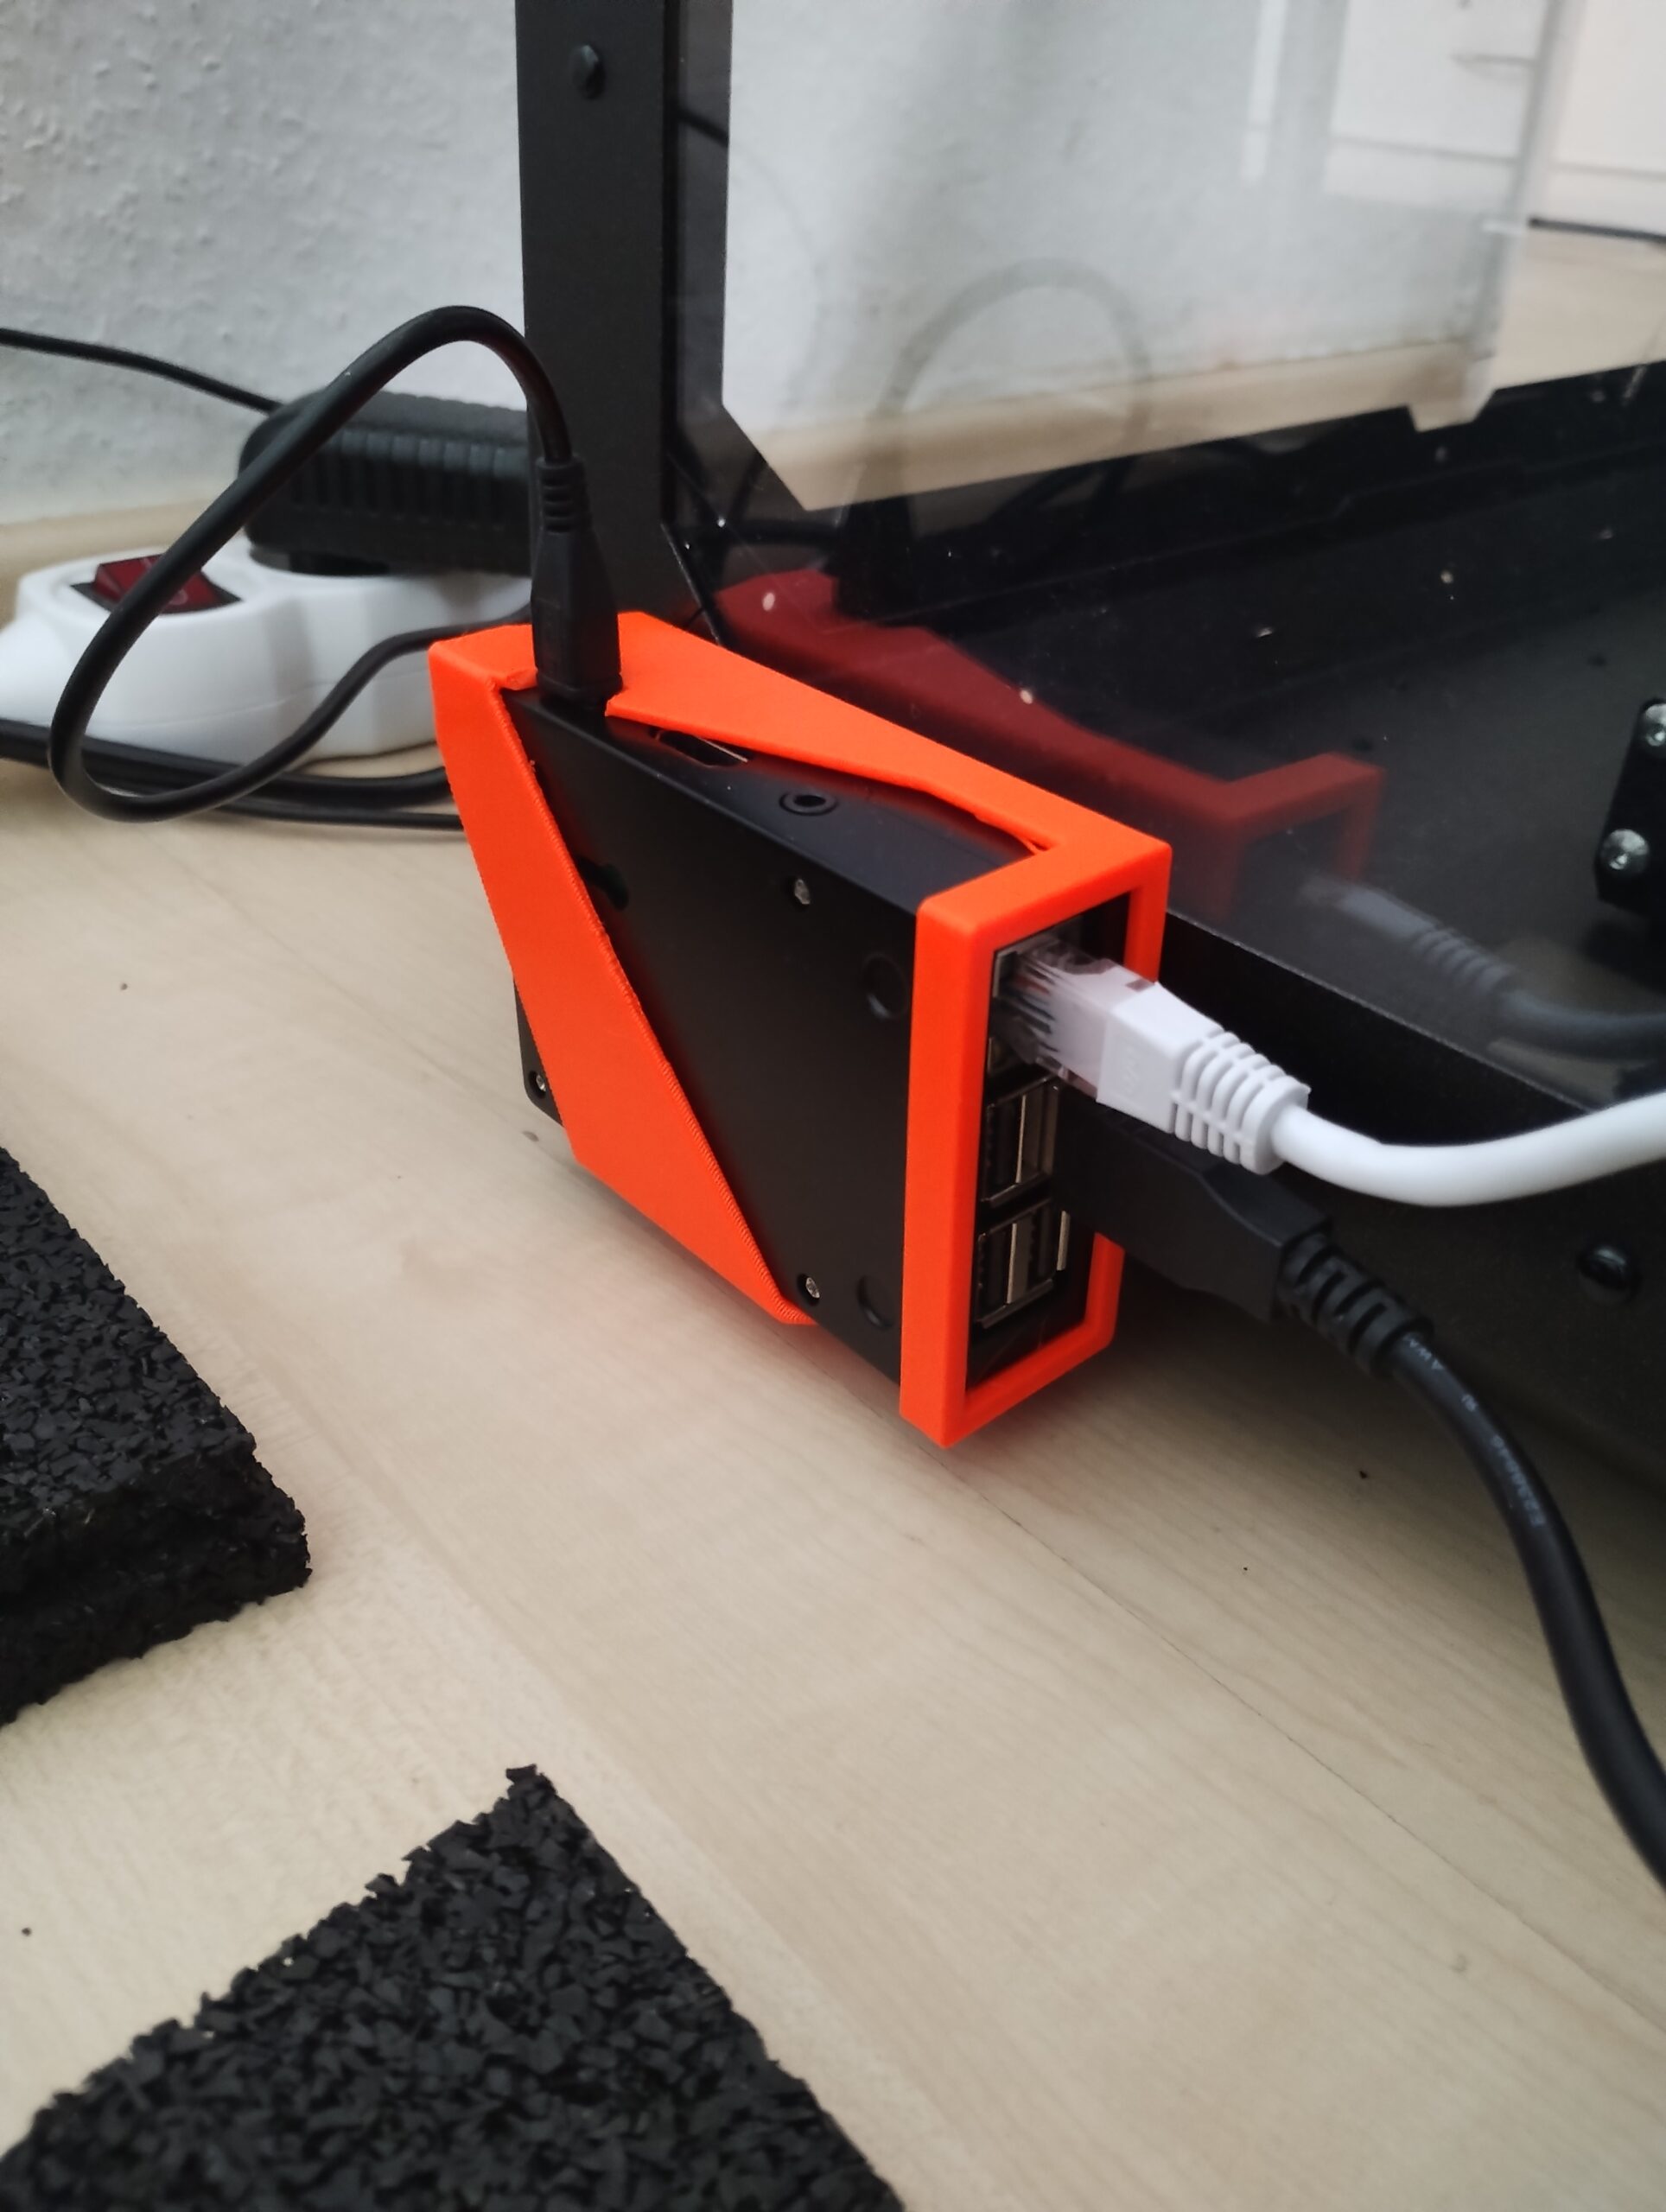
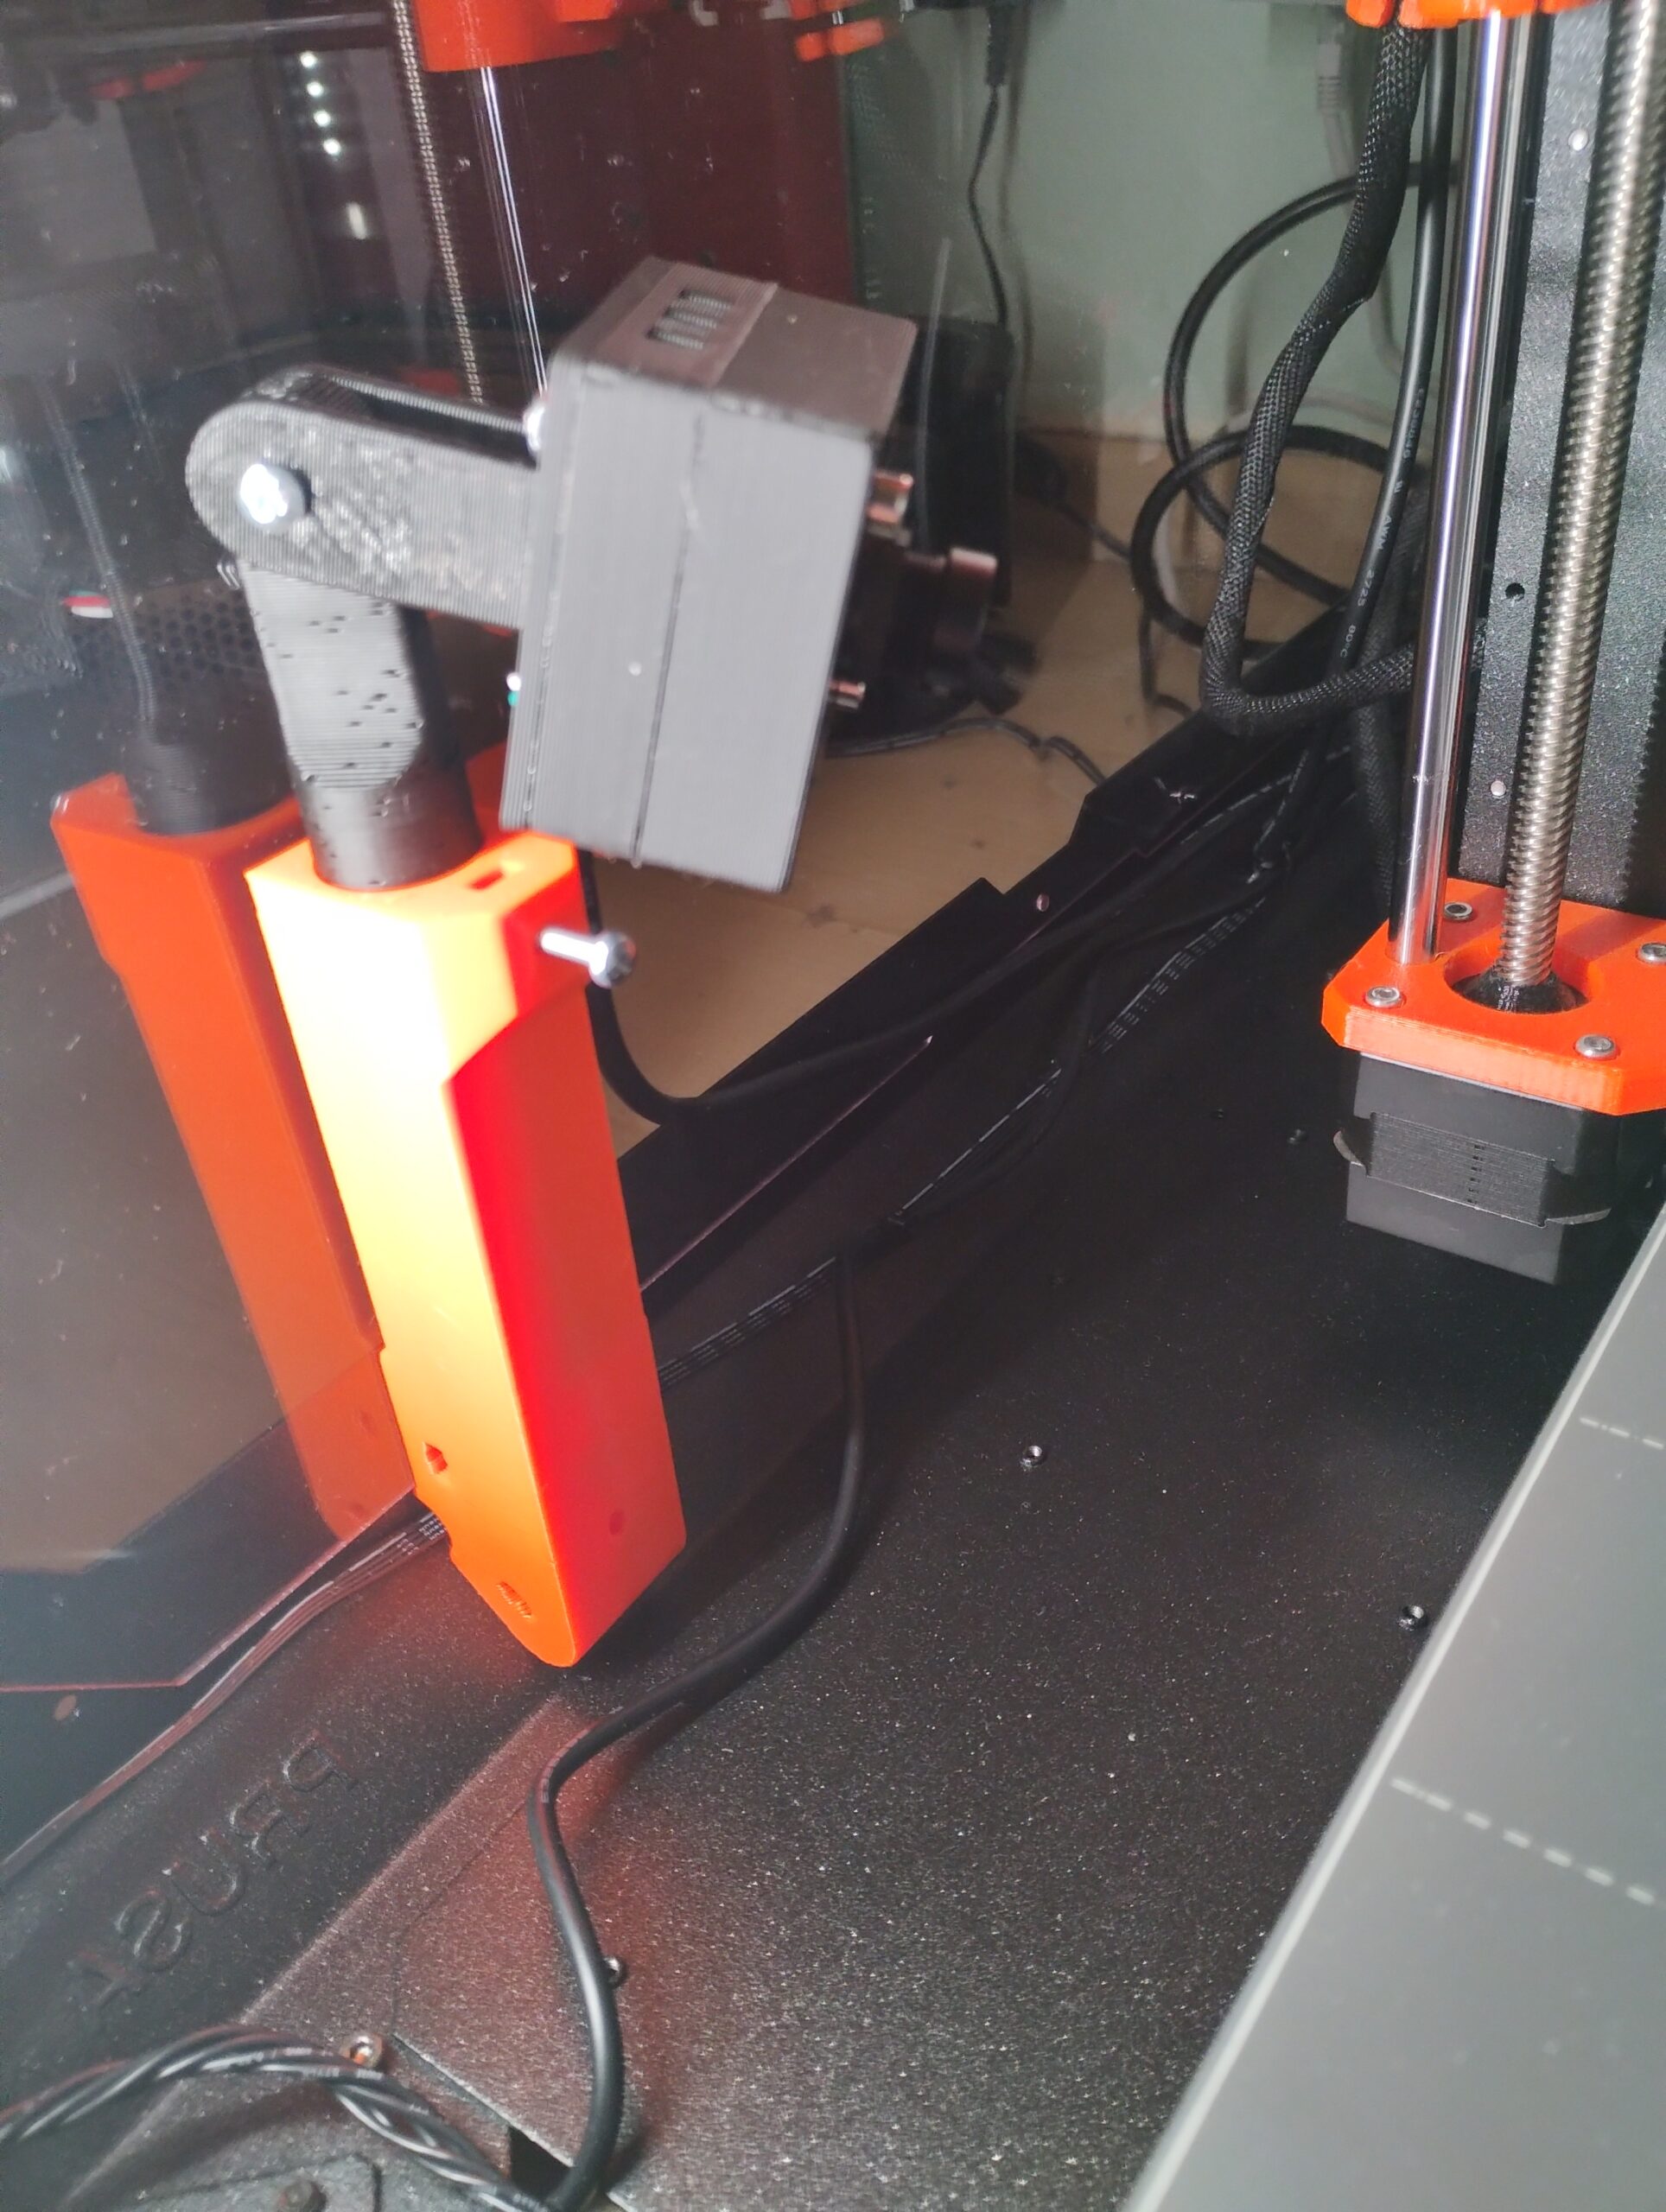
The third improvement was the Raspberry Pi attachment. I've already had Pi 3B+ in passively cooled aluminum case connected to the printer by USB cable. I've hacked version of PSU holder model to match the size of the pi case. There are plenty of unused mounting holes around the enclosure so it was easy to attach it.
What could be better
- Even with the rubber pad and the filament holder fix it's not as silent as it could be. I've also found out that the door hinges are resonating (they feel a bit loose for some reason). Also the acrylic panels are a bit too flexible.
- Doors with lock and keys are great but it's impossible to pull the key from the lock in unlocked position. So, while unlocked, the key must remain inside the lock.
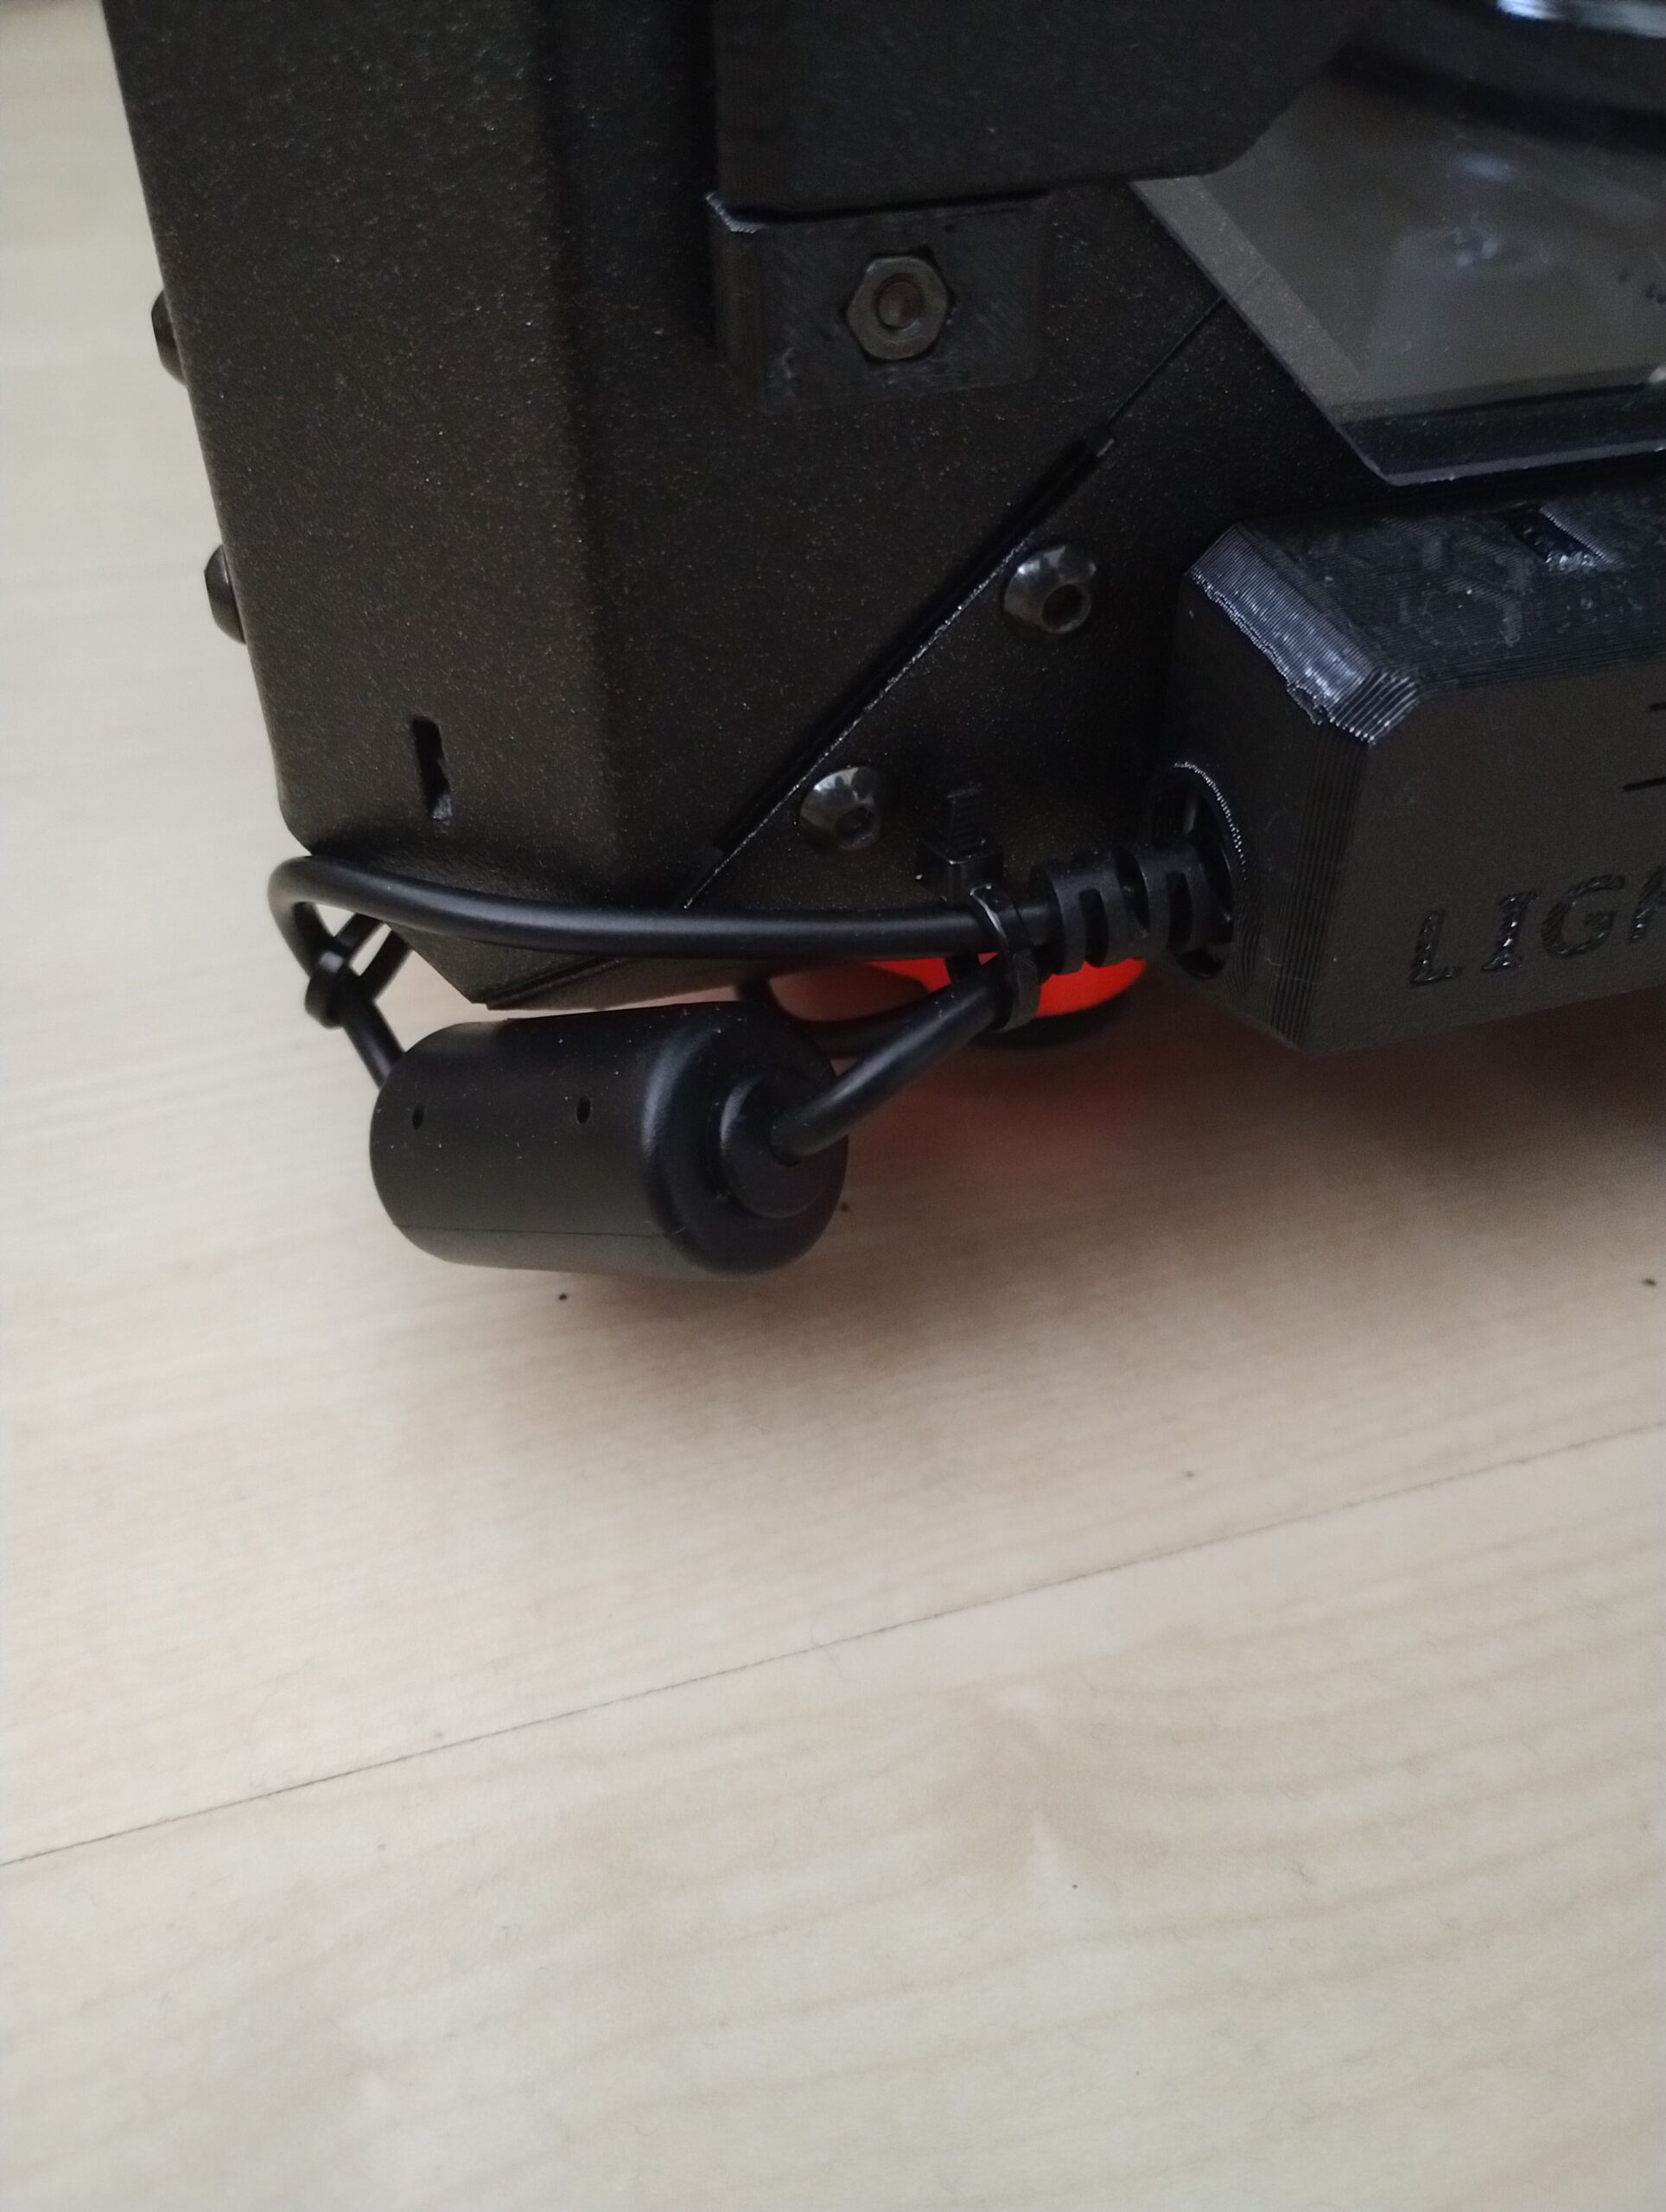
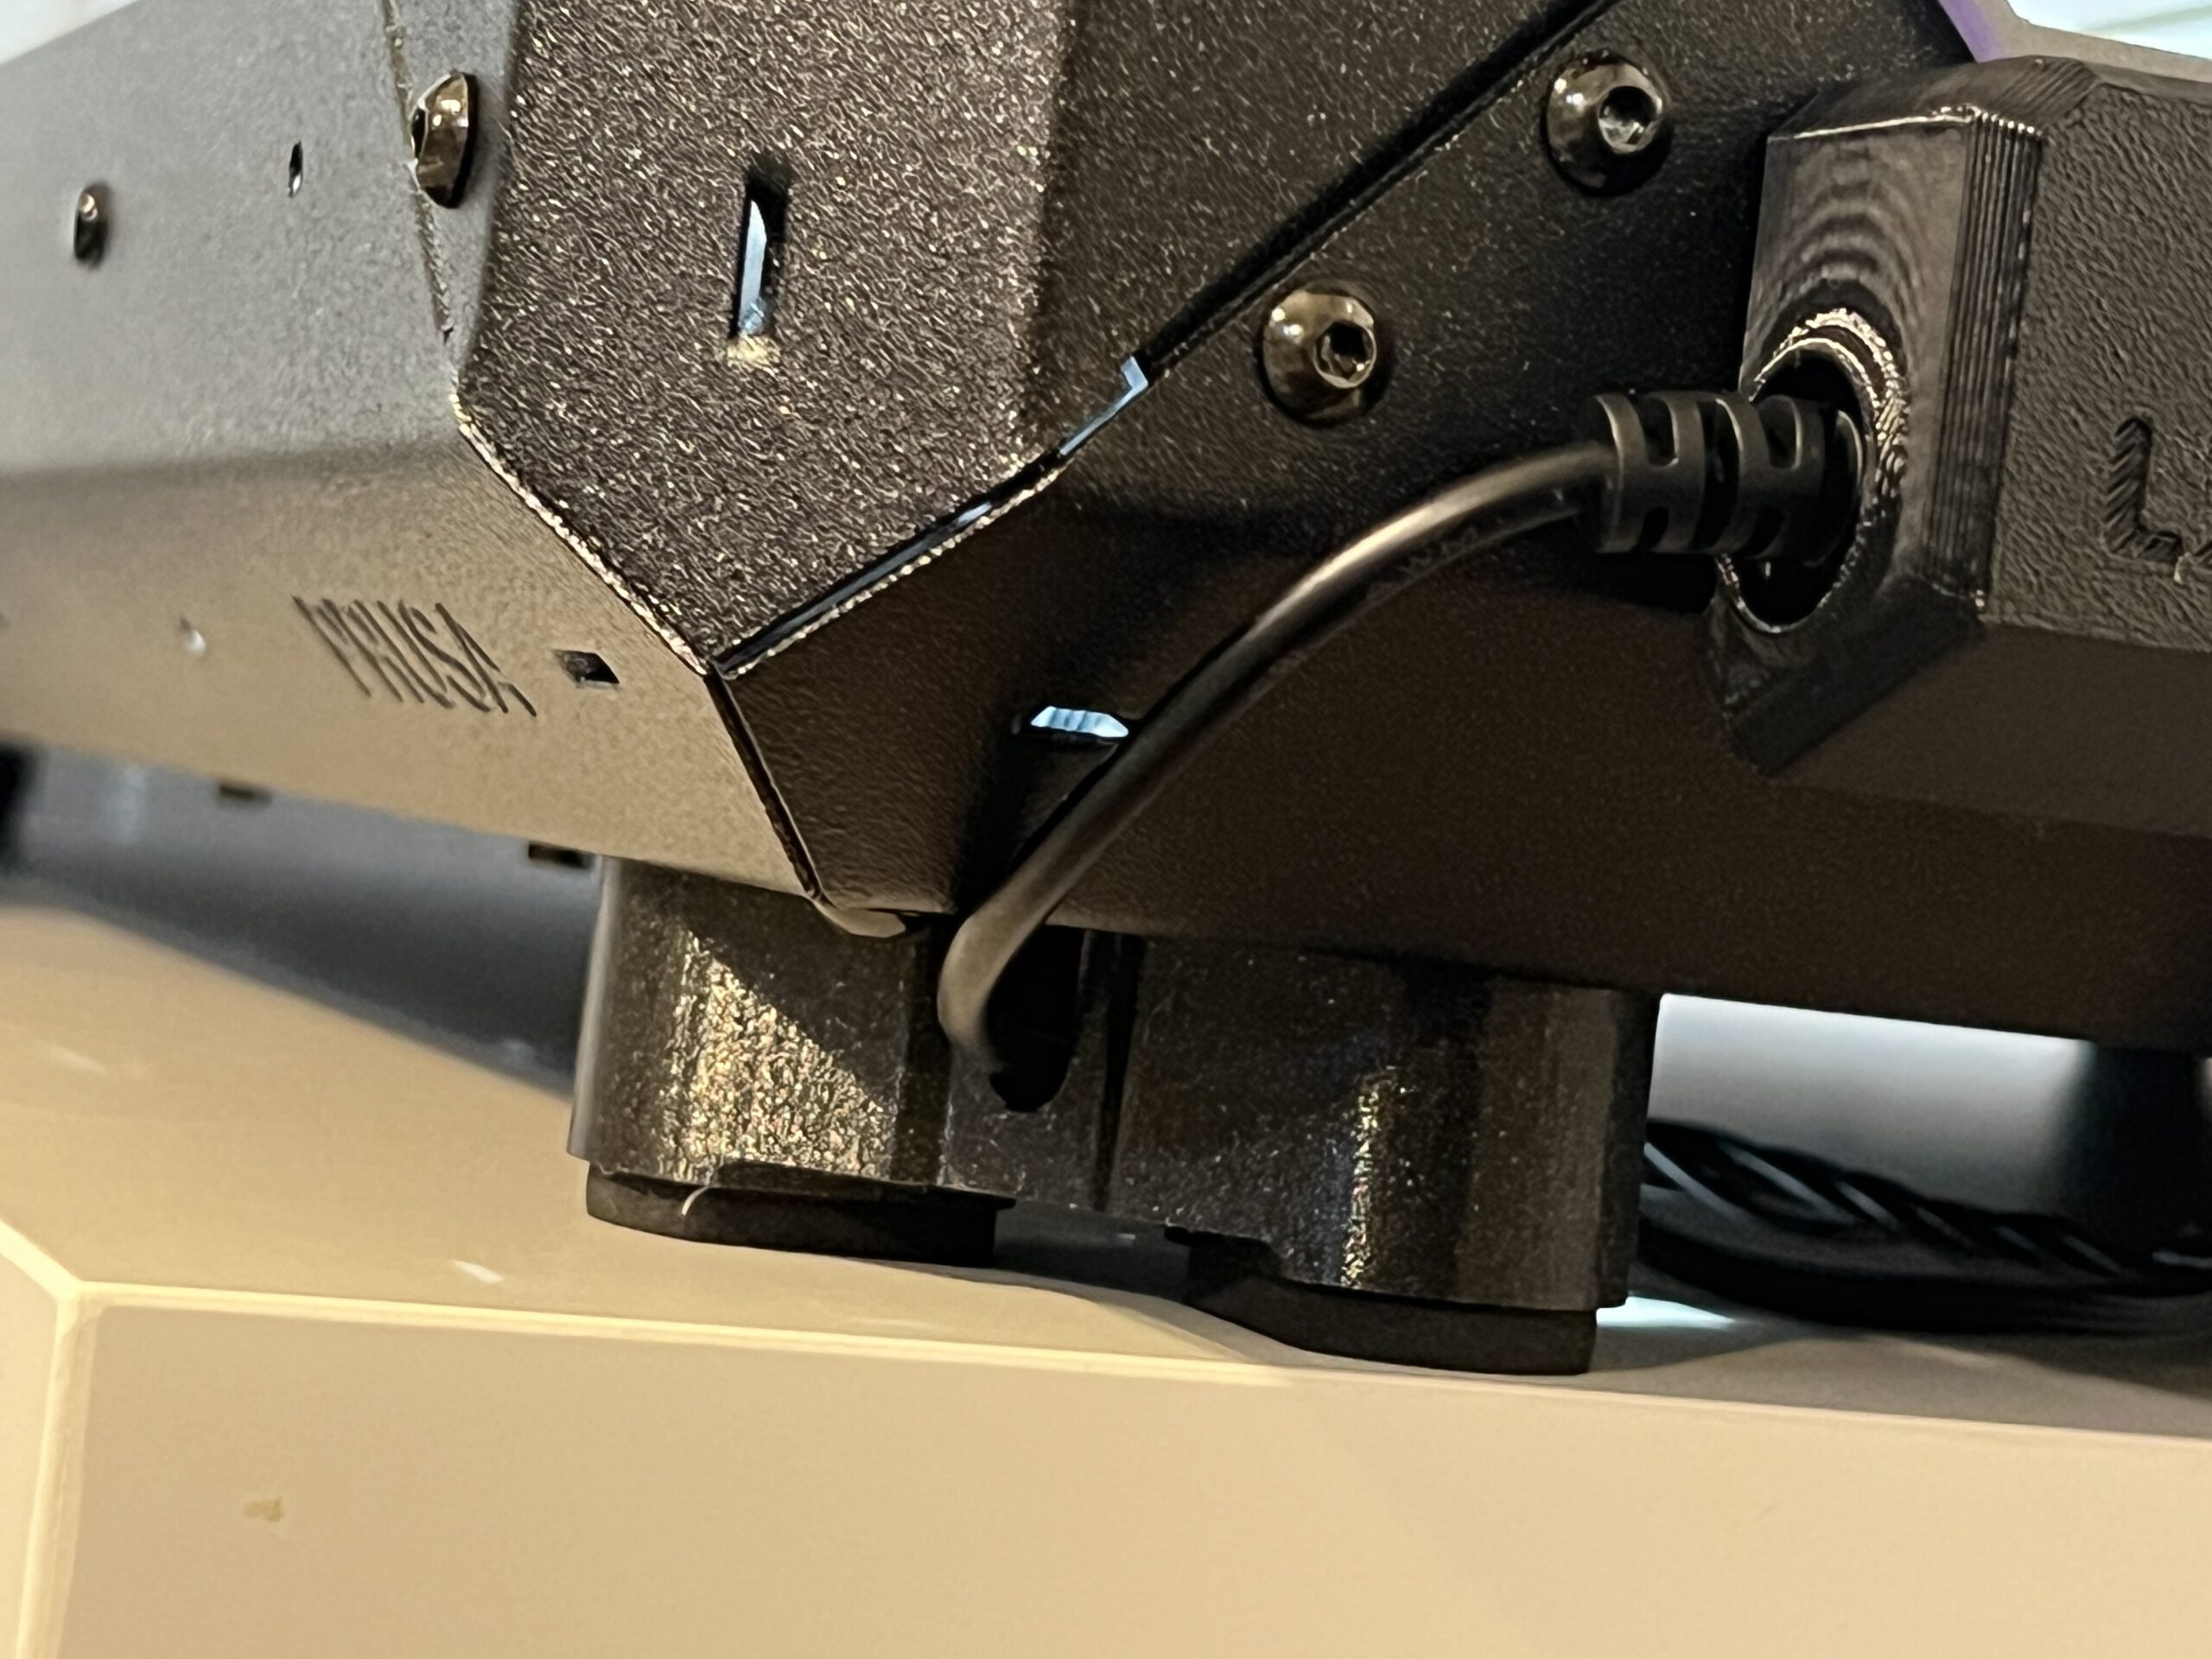
- The external PSU XP power unit has the ferrite near the connector. That's really weird design and I wasn't able to put it inside the enclosure (distance between the ferrite and the connector is too short). That looks ugly I might think of some fix later.
Final thoughts
I think the Original Prusa Enclosure is worth the money. It looks futuristic, it's very solid, it keeps the heat inside and the dust outside well. Even with all the addons there are a lot of places where custom addons can be attached inside or outside.
There is a list of my favorite addons:
- transport handles (must have if you need to move it around - even once)
- the hinged lid (very convenient way to do anything inside)
- quick release PSU cable (just disconnect the printer from PSU and from LCD and pull it out, simple)
And in my case the LED strip is really great since I don't have enough light around the enclosure especially at night.
That's it, have fun!
RE: Enclosure with all addons
I am still waiting for my enclosure Add-ons, but I did print out the parts and added the top door. Access to MMU2S mounted horizontally is good. Then I realized I wanted the door to open sideways. Now looking for a hinge mod that will work, Or I may build one.
RE: Enclosure with all addons
Small update:
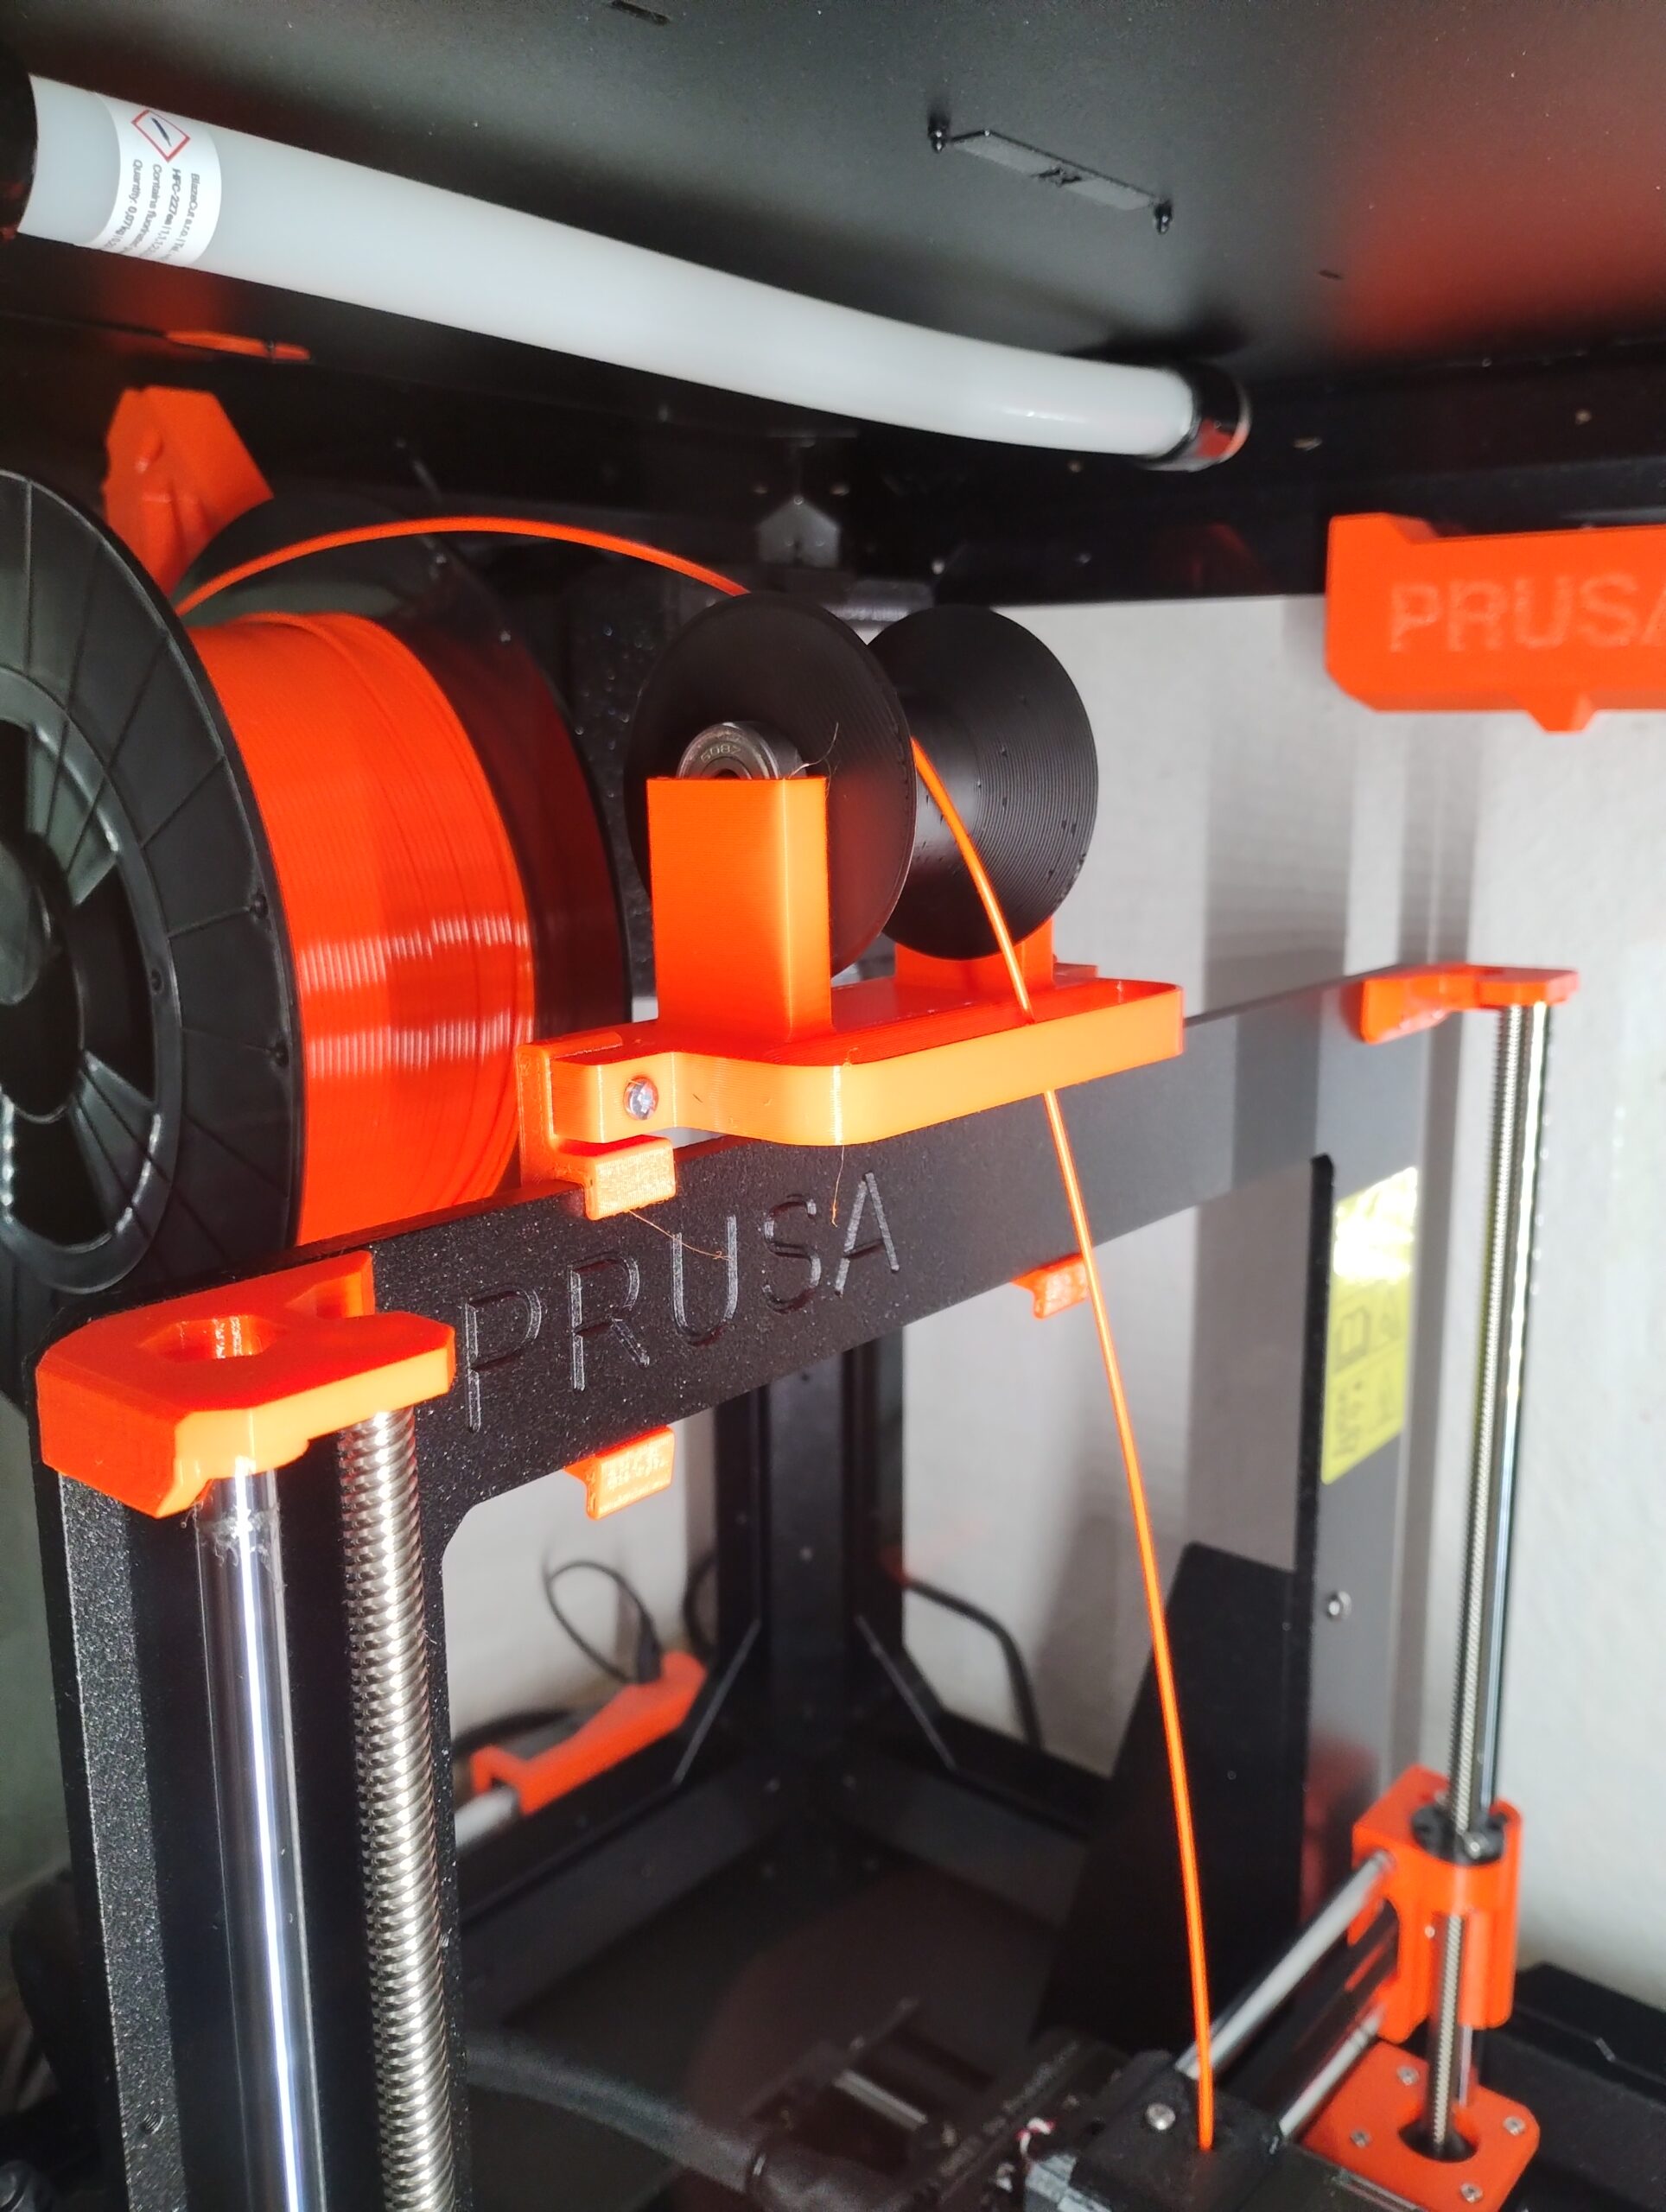
I've removed the "filament roller coaster" and replaced it by a new spool holder mounted to the back center position of the enclosure. Also the filament guide was replaced by shorter version.
RE: Enclosure with all addons
- The external PSU XP power unit has the ferrite near the connector. That's really weird design and I wasn't able to put it inside the enclosure (distance between the ferrite and the connector is too short). That looks ugly I might think of some fix later.
I publisher a solution for that ugly problem. You find it here!
RE: Enclosure with all addons
Thank you! I'll definitely try it.
RE: Enclosure with all addons
Addons arrived Jan 4, 2023. I added 2 holes to the enclosure and 2 to the lid and put the hinges on the right side. I like it better this way. Less arm reach needed to open the lid.
I printed the correct power supply mount. The mount is "optional", not in the kit.
Quick release PSU cable. Works well, except the old power sensor cable would not release. The tabs to press down for release flexed too much. It took a small screwdriver and some work to release it. Both ends had the problem.
Filter no problems
LED light, no problems. LED cable length is short, it will only fit in the front, left corner or by the switch. You may be able to move the switch to the other side or on top if you want to move the light. Filter cable can be easily routed to the other side or top for the switch. Most likely the power cable, also. There is plenty of power plug length, so moving the power supply mount to the right side or top, if needed, should work also. You would have to make your own power cable routing if moving the switch to the top for the LED.
My ferrite core was near the end of the power cable. This requires unbolting the corners of the enclosure floor to route the power cable inside and back outside. It is in the instructions, but near the bottom of the instructions, read all the instructions first. The instructions show the ferrite core is outside, past where the cable runs through the foot to prevent binding the cable.
I am still waiting for my enclosure Add-ons, but I did print out the parts and added the top door. Access to MMU2S mounted horizontally is good. Then I realized I wanted the door to open sideways. Now looking for a hinge mod that will work, Or I may build one.
RE: Enclosure with all addons
I'm in middle of assemble my first Enclosure (of 4 Enclosures) - I have some complain about instruction and require print. Instruction need to modify for people who already bought Enclosure along with addons. I almost went all the way with power quick disconnect- lucky - I realized that I could have install power quick disconnect while I'm at it.
I felt that they have forced us to print extended PSU (for lights and filter) bracket on our own. I believe that I paid for those addon and expected to have whole thing ready at the time I install it.
RE: Enclosure with all addons
Small update:
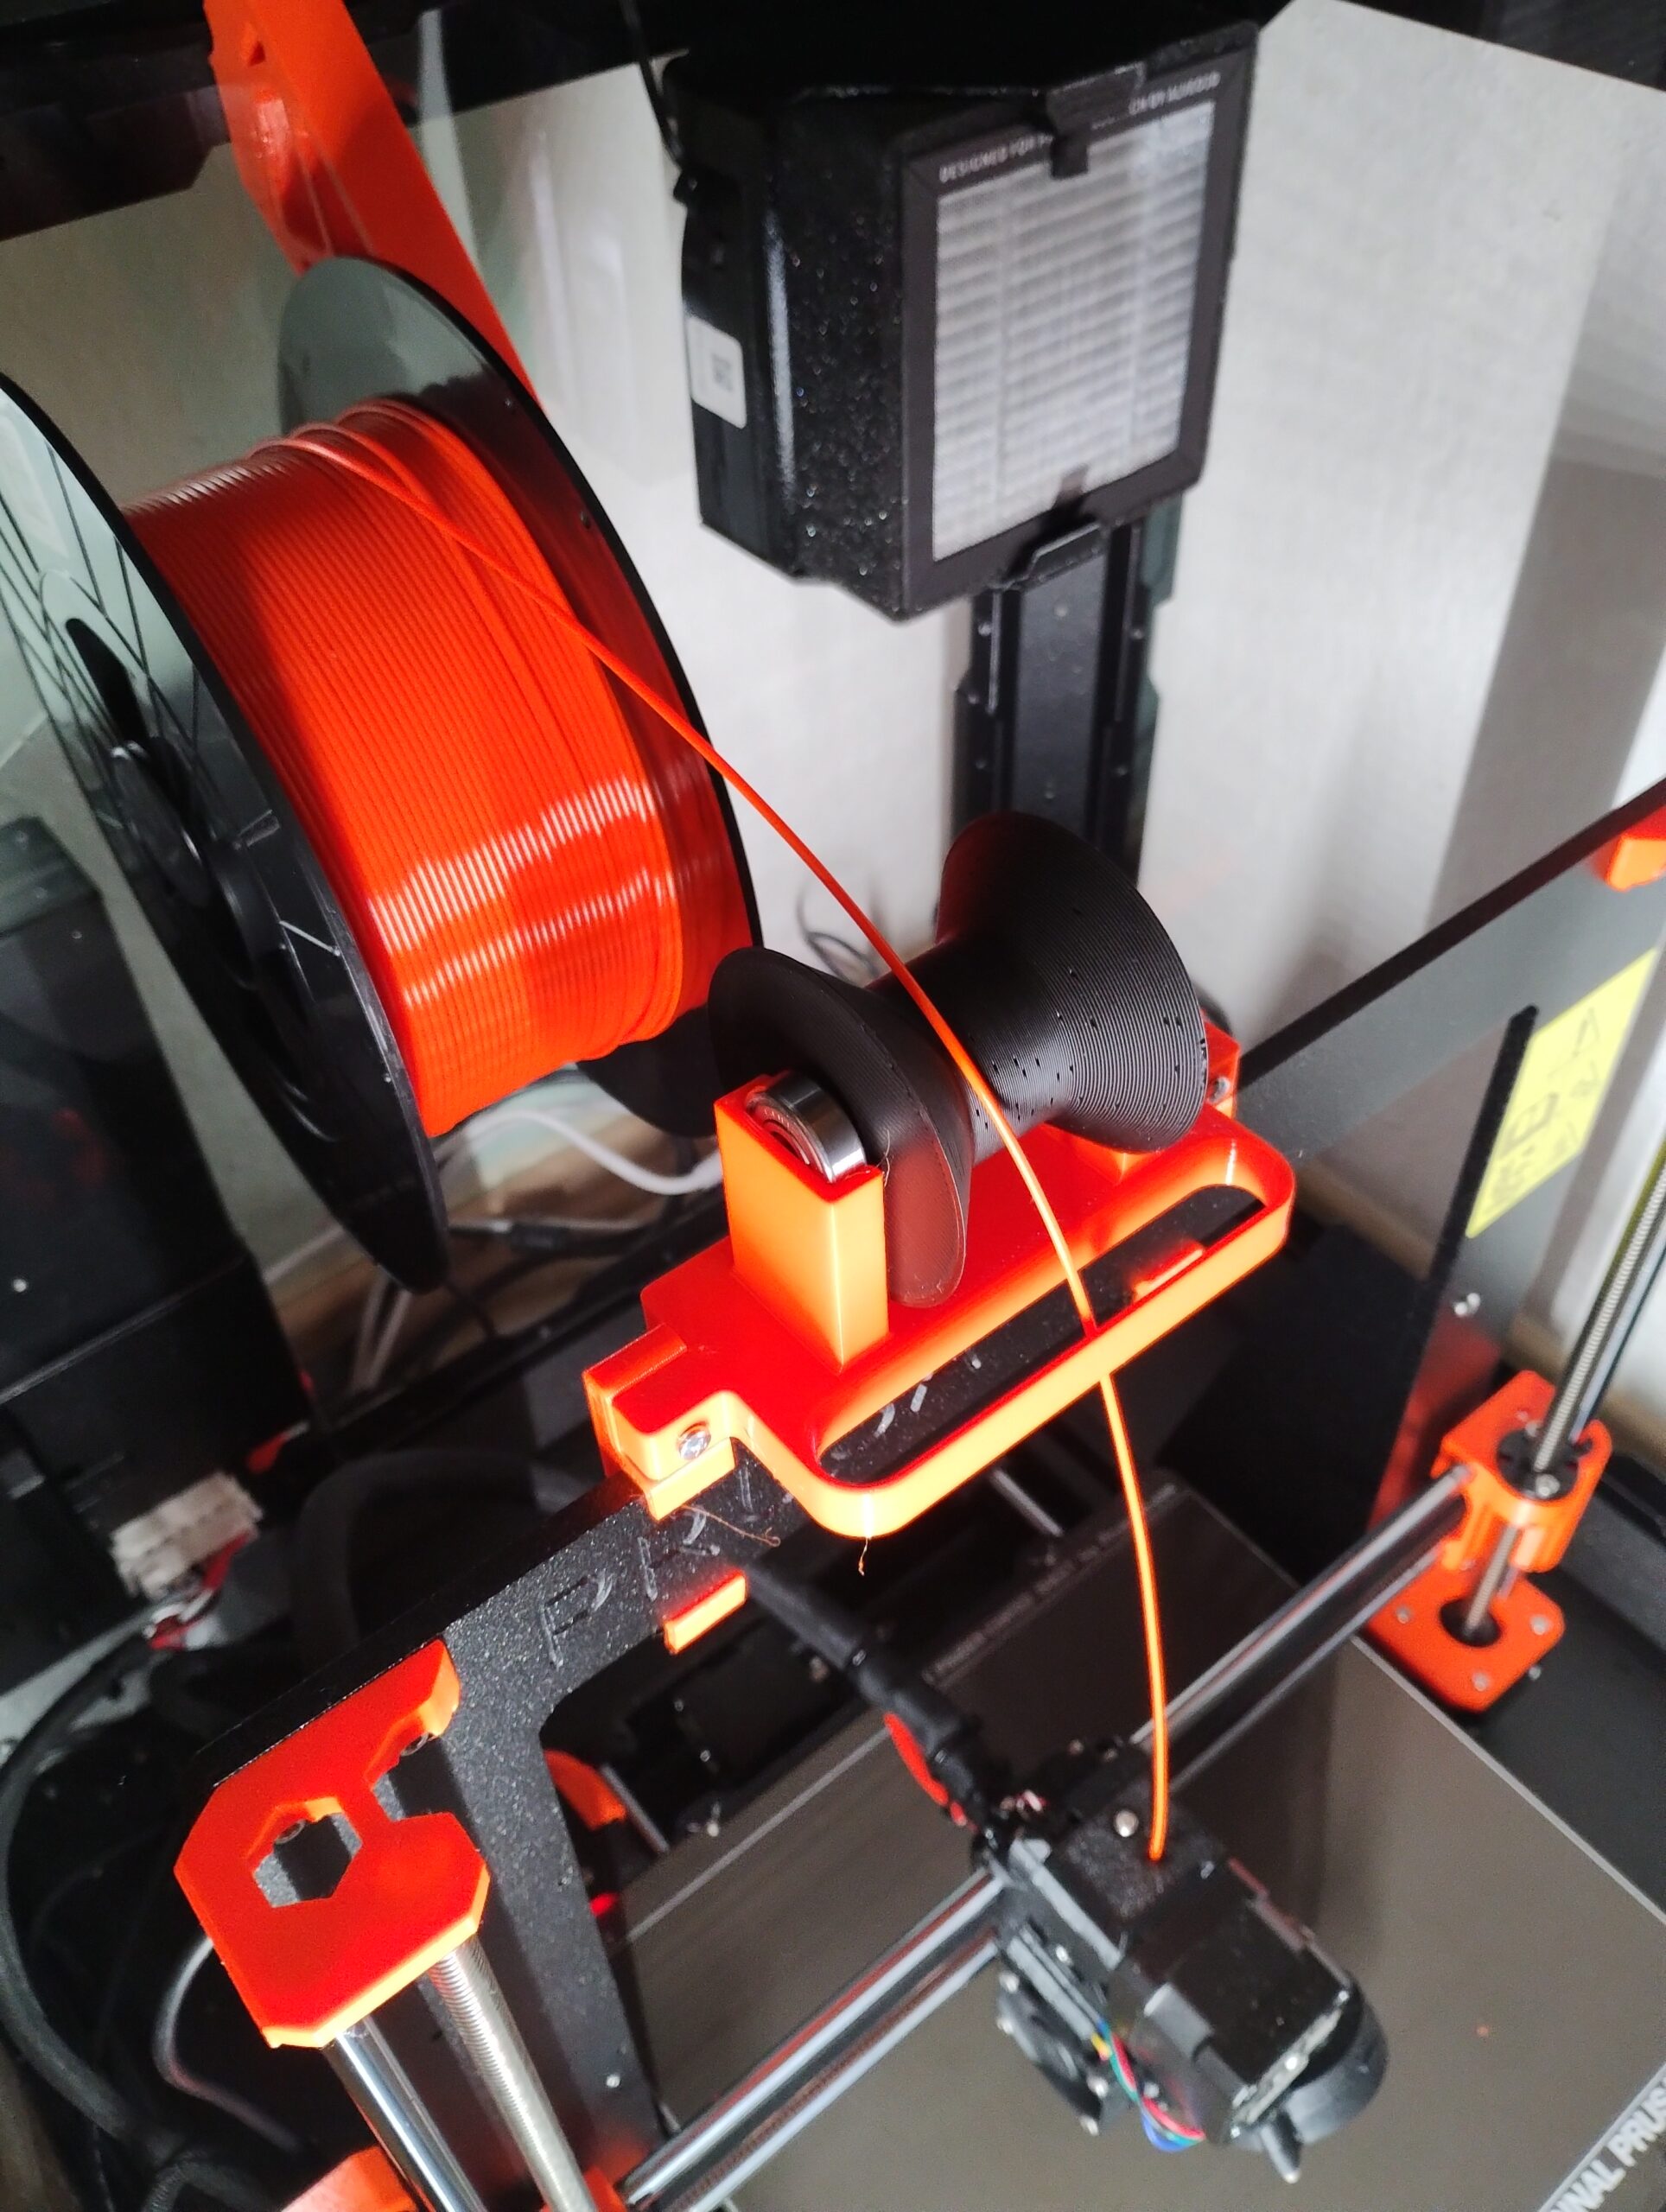
I've removed the last piece of PTFE tube and replaced it by filament guide with two standard 22mm bearings. The problem with PTFE tube occurred after every print when the extruder went a little bit up and to the left. The filament thread was bent in a sharp angle right above the point where it entered the extruder. (I'll upload the design later when I clean it a bit.)
Another useful upgrade I've made is the Arducam camera mounted to on the left side of the enclosure and connected through an USB cable to raspberry in the back.

Note: designing the camera stand was a real pain. Dear engineers at Prusa, can you explain why are those holes - in the quarter of distance on every enclosure edge - misaligned?
PS: I've also tried to solve the "ugly ferrite" problem as GiantBrain suggested. In my case it's not so simple since my enclosure literally lies on the antivibration pads and the ferrite just doesn't fit under it. I don't want to add third pad on them just to make enough space for the ferrite. I'm thinking about drilling a hole to the enclosure just for that cable.
RE:
PS: I've also tried to solve the "ugly ferrite" problem as GiantBrain suggested. In my case it's not so simple since my enclosure literally lies on the antivibration pads and the ferrite just doesn't fit under it. I don't want to add third pad on them just to make enough space for the ferrite. I'm thinking about drilling a hole to the enclosure just for that cable.
I came across this on printables, but haven't printed it yet. Might be a solution, it makes it look like someone actually thought about it a little.
https://www.printables.com/model/363818-ferrite-core-holder-for-xp-power-external-psu-orig
RE: Enclosure with all addons
PS: I've also tried to solve the "ugly ferrite" problem as GiantBrain suggested. In my case it's not so simple since my enclosure literally lies on the antivibration pads and the ferrite just doesn't fit under it. I don't want to add third pad on them just to make enough space for the ferrite. I'm thinking about drilling a hole to the enclosure just for that cable.
I came across this on printables, but haven't printed it yet. Might be a solution, it makes it look like someone actually thought about it a little.
https://www.printables.com/model/363818-ferrite-core-holder-for-xp-power-external-psu-orig
Whether this solution is now really an improvement, everyone must evaluate for themselves 🤣
Thank you for suggestion! Finally it looks good 😀
RE: Enclosure with all addons
.. and there is the filament guide I've promised to share: https://www.printables.com/model/381756-prusa-i3-filament-guide-with-22mm-bearings
RE: Enclosure with all addons
I wanted to ask your opinion on Hinged Lid add-on, I'm wrestling with my decision whether I should install or not. Currently, I have 4 enclosures stacked up - two MK3S+ are on top of the stack while two Mini+ are using bottom.
The question is - is it worth to have Hinged Lid add-on for two top stacked as ease of access to my MK3S+?
RE:
Well, from my point of view it's worth it because I change filament through it. Also any modifications on printer or inside the enclosure are very easy to do if you can open the top.
But, since the whole top is moving it needs a lot of space above it. Also there are lid parts that may go in the way if you want to stack anything on it.


RE: Enclosure with all addons
Well, from my point of view it's worth it because I change filament through it. Also any modifications on printer or inside the enclosure are very easy to do if you can open the top.
But, since the whole top is moving it needs a lot of space above it. Also there are lid parts that may go in the way if you want to stack anything on it.
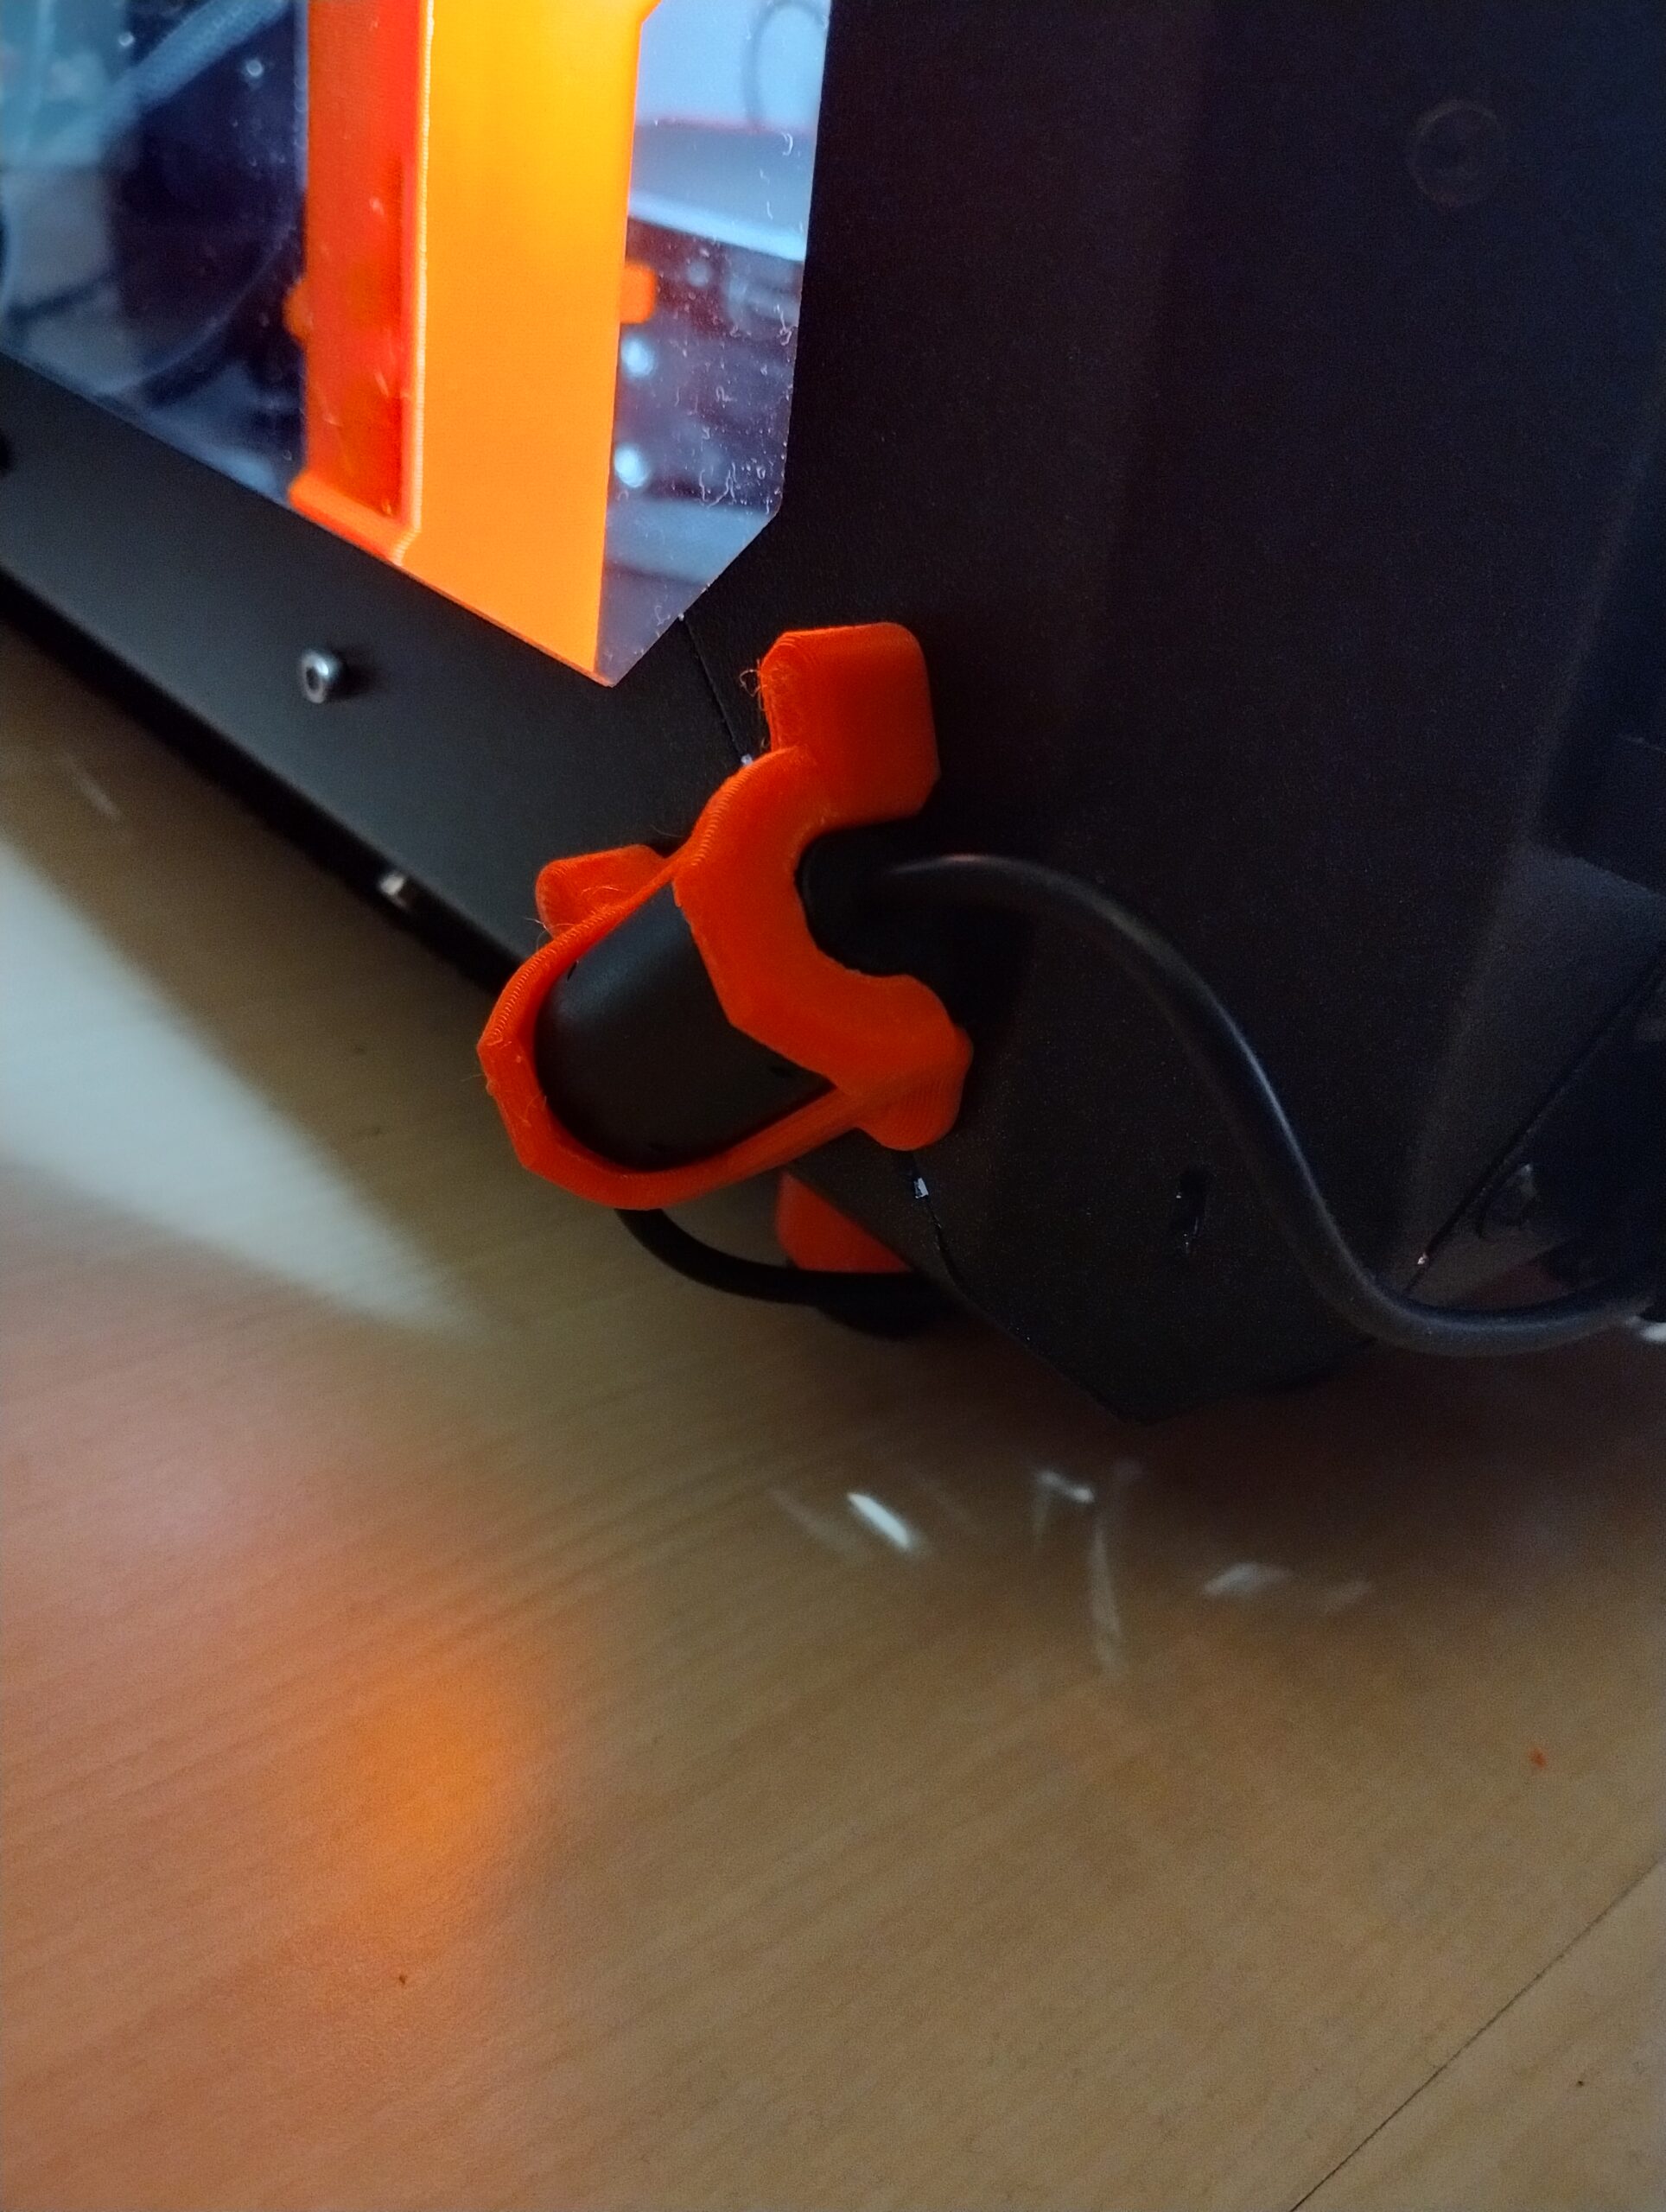
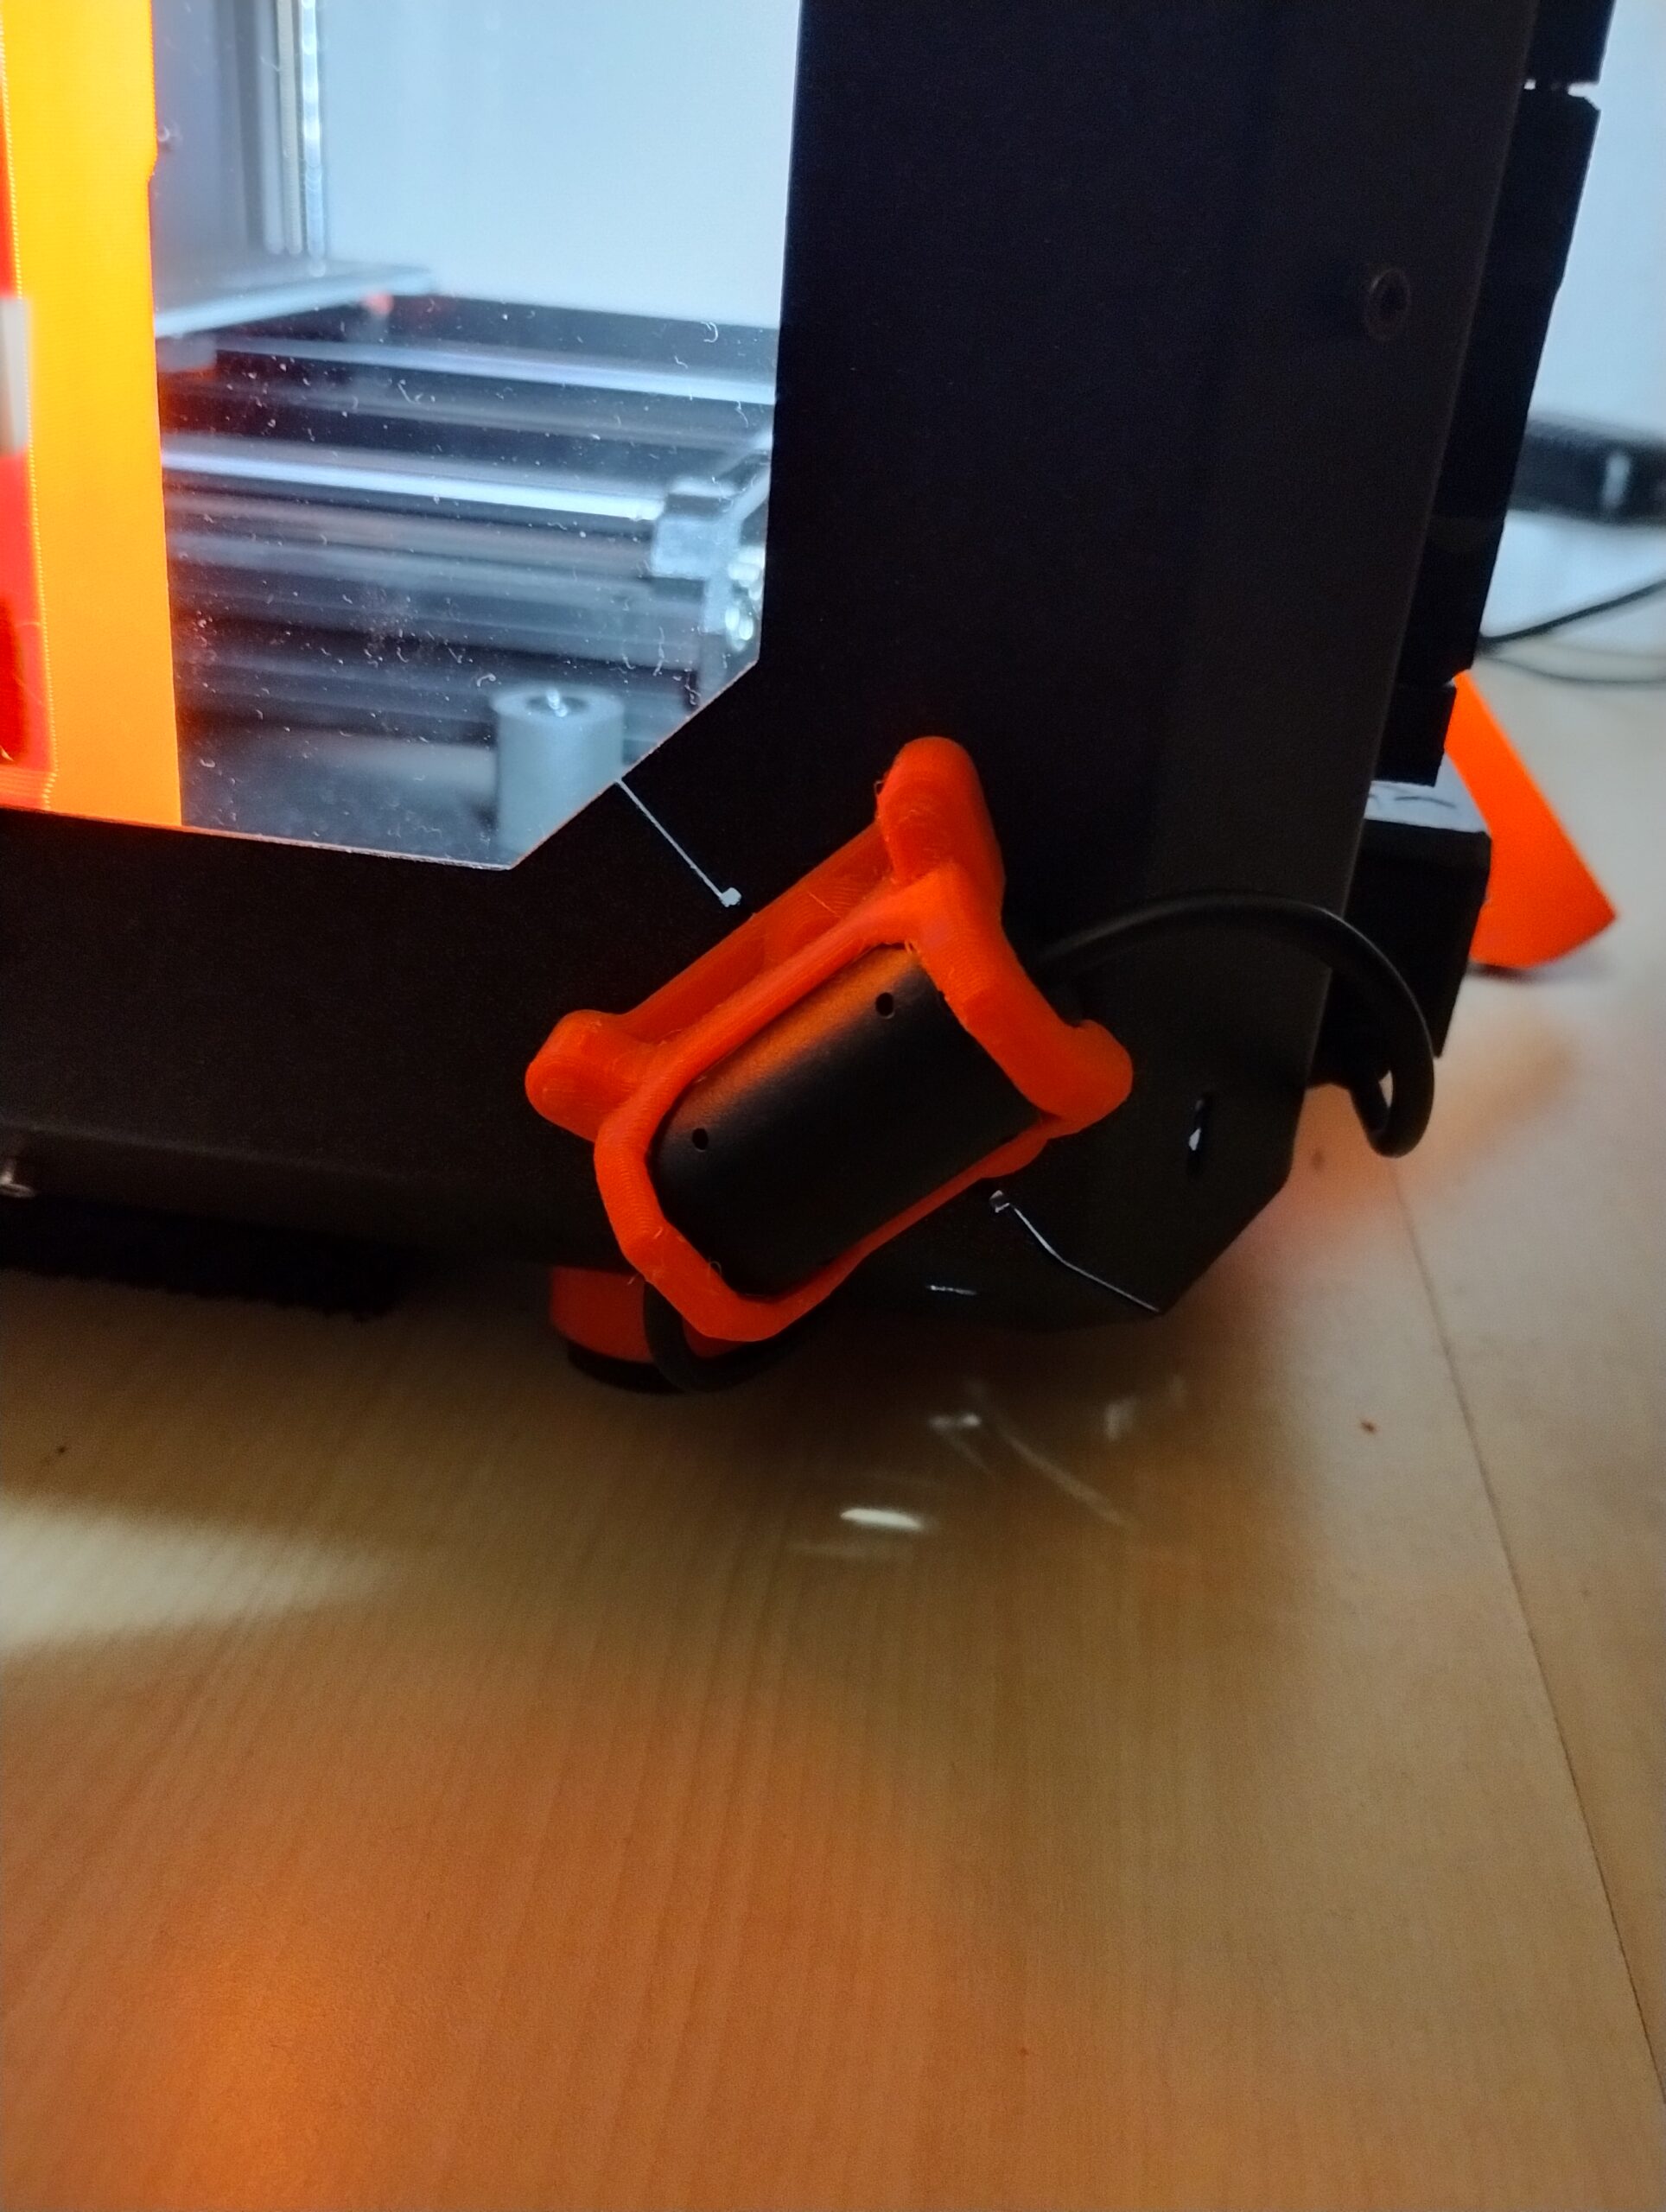
How did you install the hinged lid and the filtration system? I haven't reattached the hinge on that side since I've installed my filtration kit.
RE: Enclosure with all addons
Well, from my point of view it's worth it because I change filament through it. Also any modifications on printer or inside the enclosure are very easy to do if you can open the top.
But, since the whole top is moving it needs a lot of space above it. Also there are lid parts that may go in the way if you want to stack anything on it.
How did you install the hinged lid and the filtration system? I haven't reattached the hinge on that side since I've installed my filtration kit.
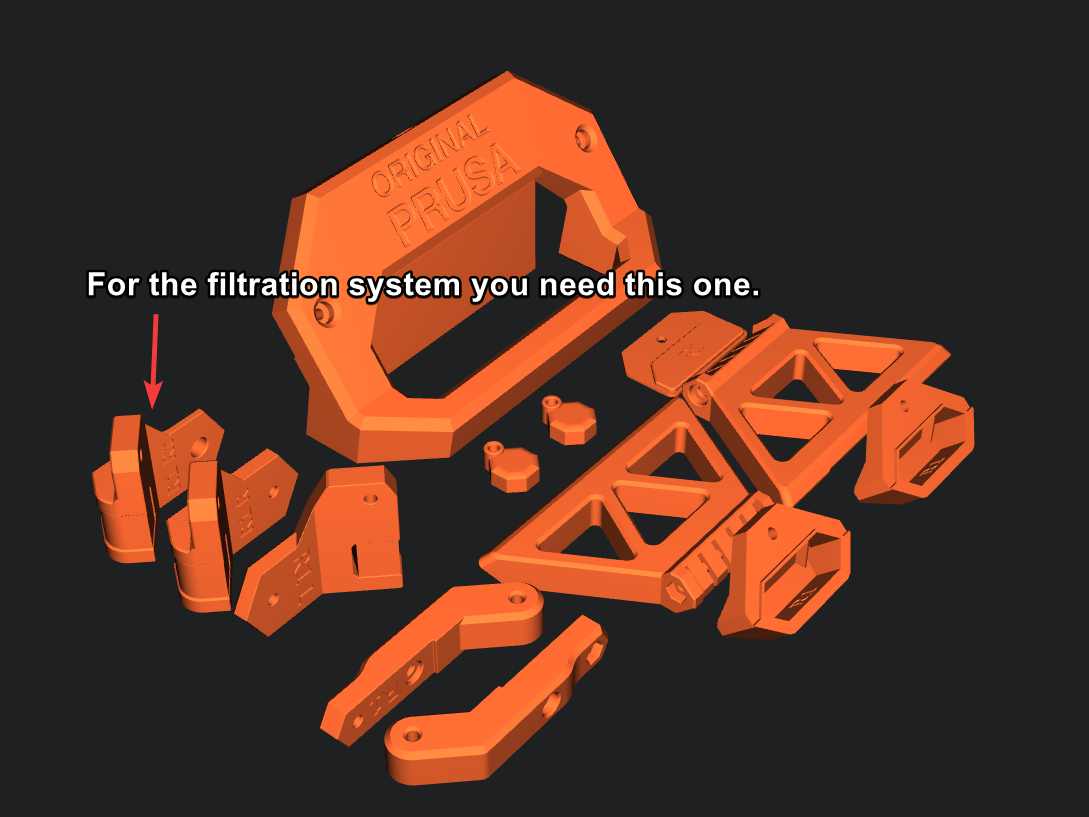
If I remember correctly:
RE: Enclosure with all addons
.. and there is the filament guide I've promised to share
Thanks! This is an awesome design. I recently just purchased a MK3S+ with the enclosure kit and immediately upgraded to this and the center spool holder you also designed. I've been using 2 kg spools and it's been a small pain to swap them out, so I modified the right version of your center spool holder to mount farther towards to the outside of the enclosure and then made some brackets to hold a spool rod. This allows me to just lift the spool directly up and out of the enclosure rather than having to hold it with one hand and twist out the original spool rod with the other.
 I machined the rod from some plastic rod I already had rather than printing it.
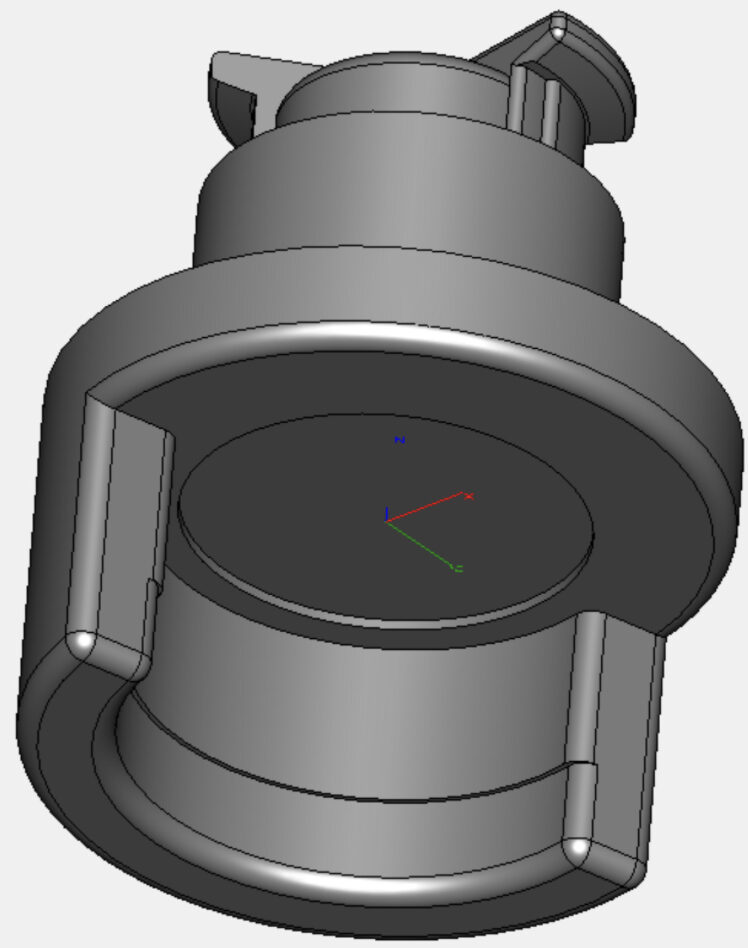
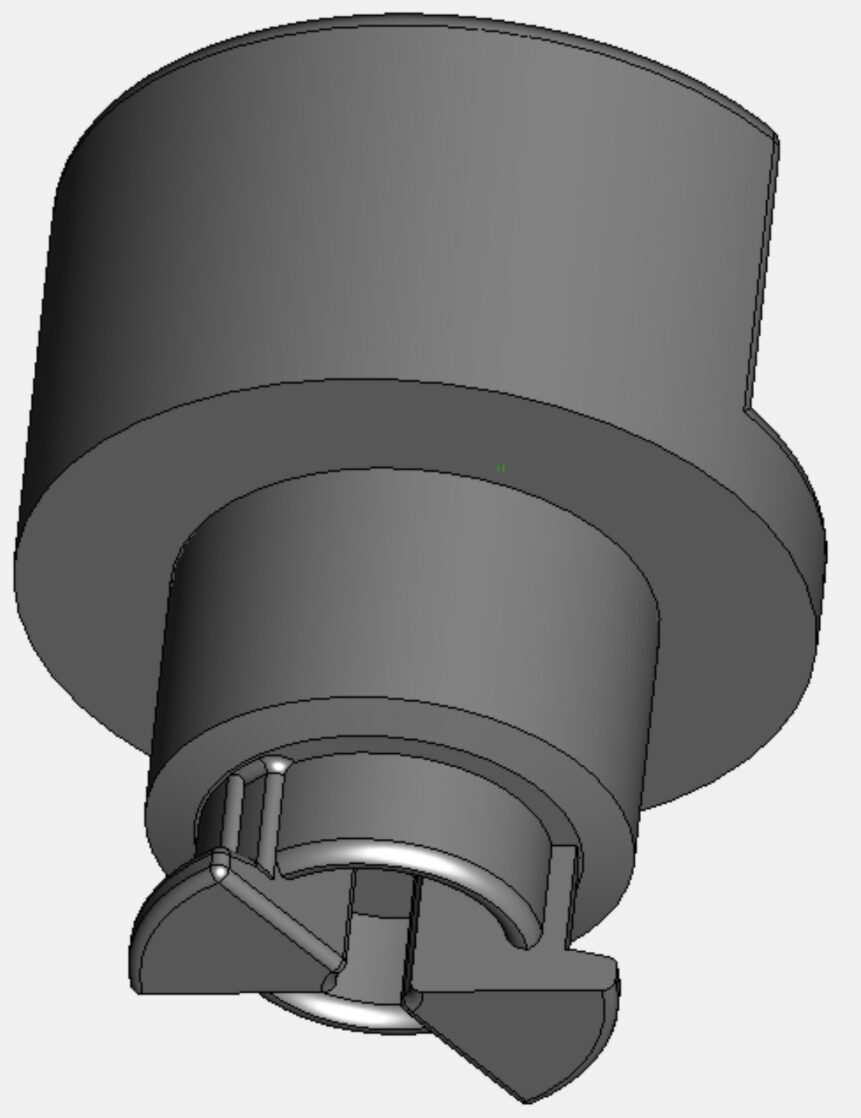
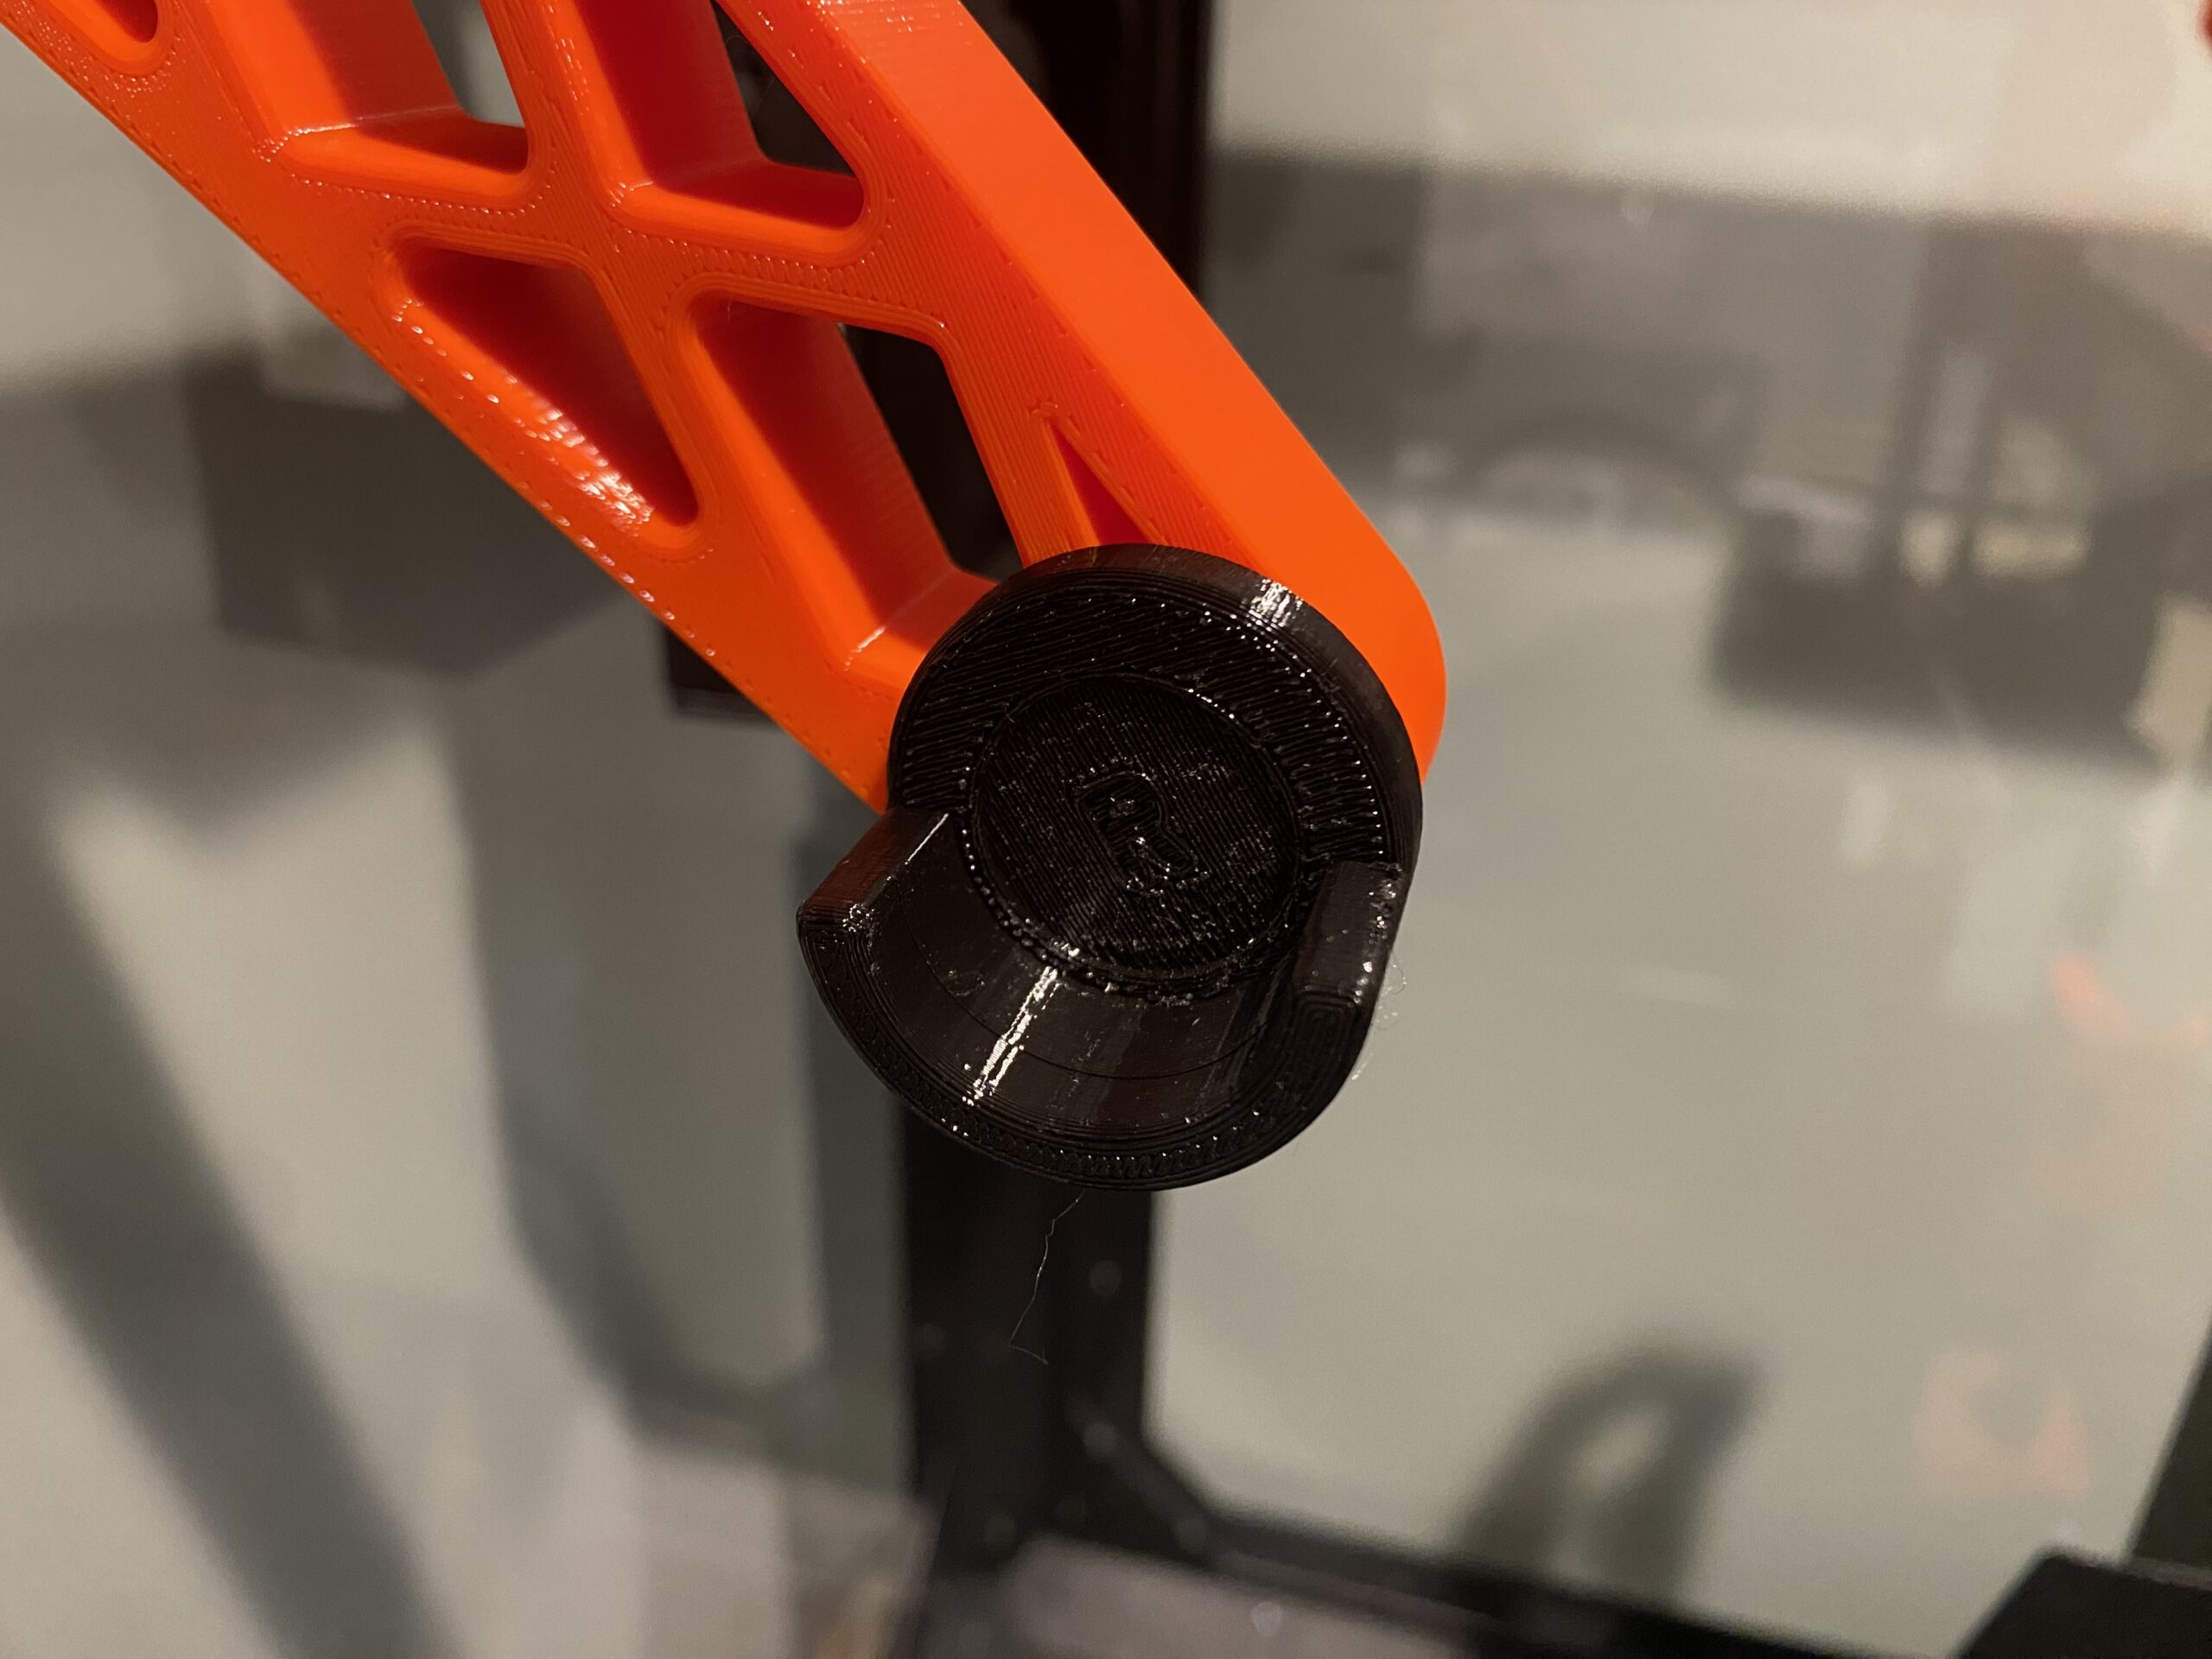 The bracket twists into place to hold the spool rod.
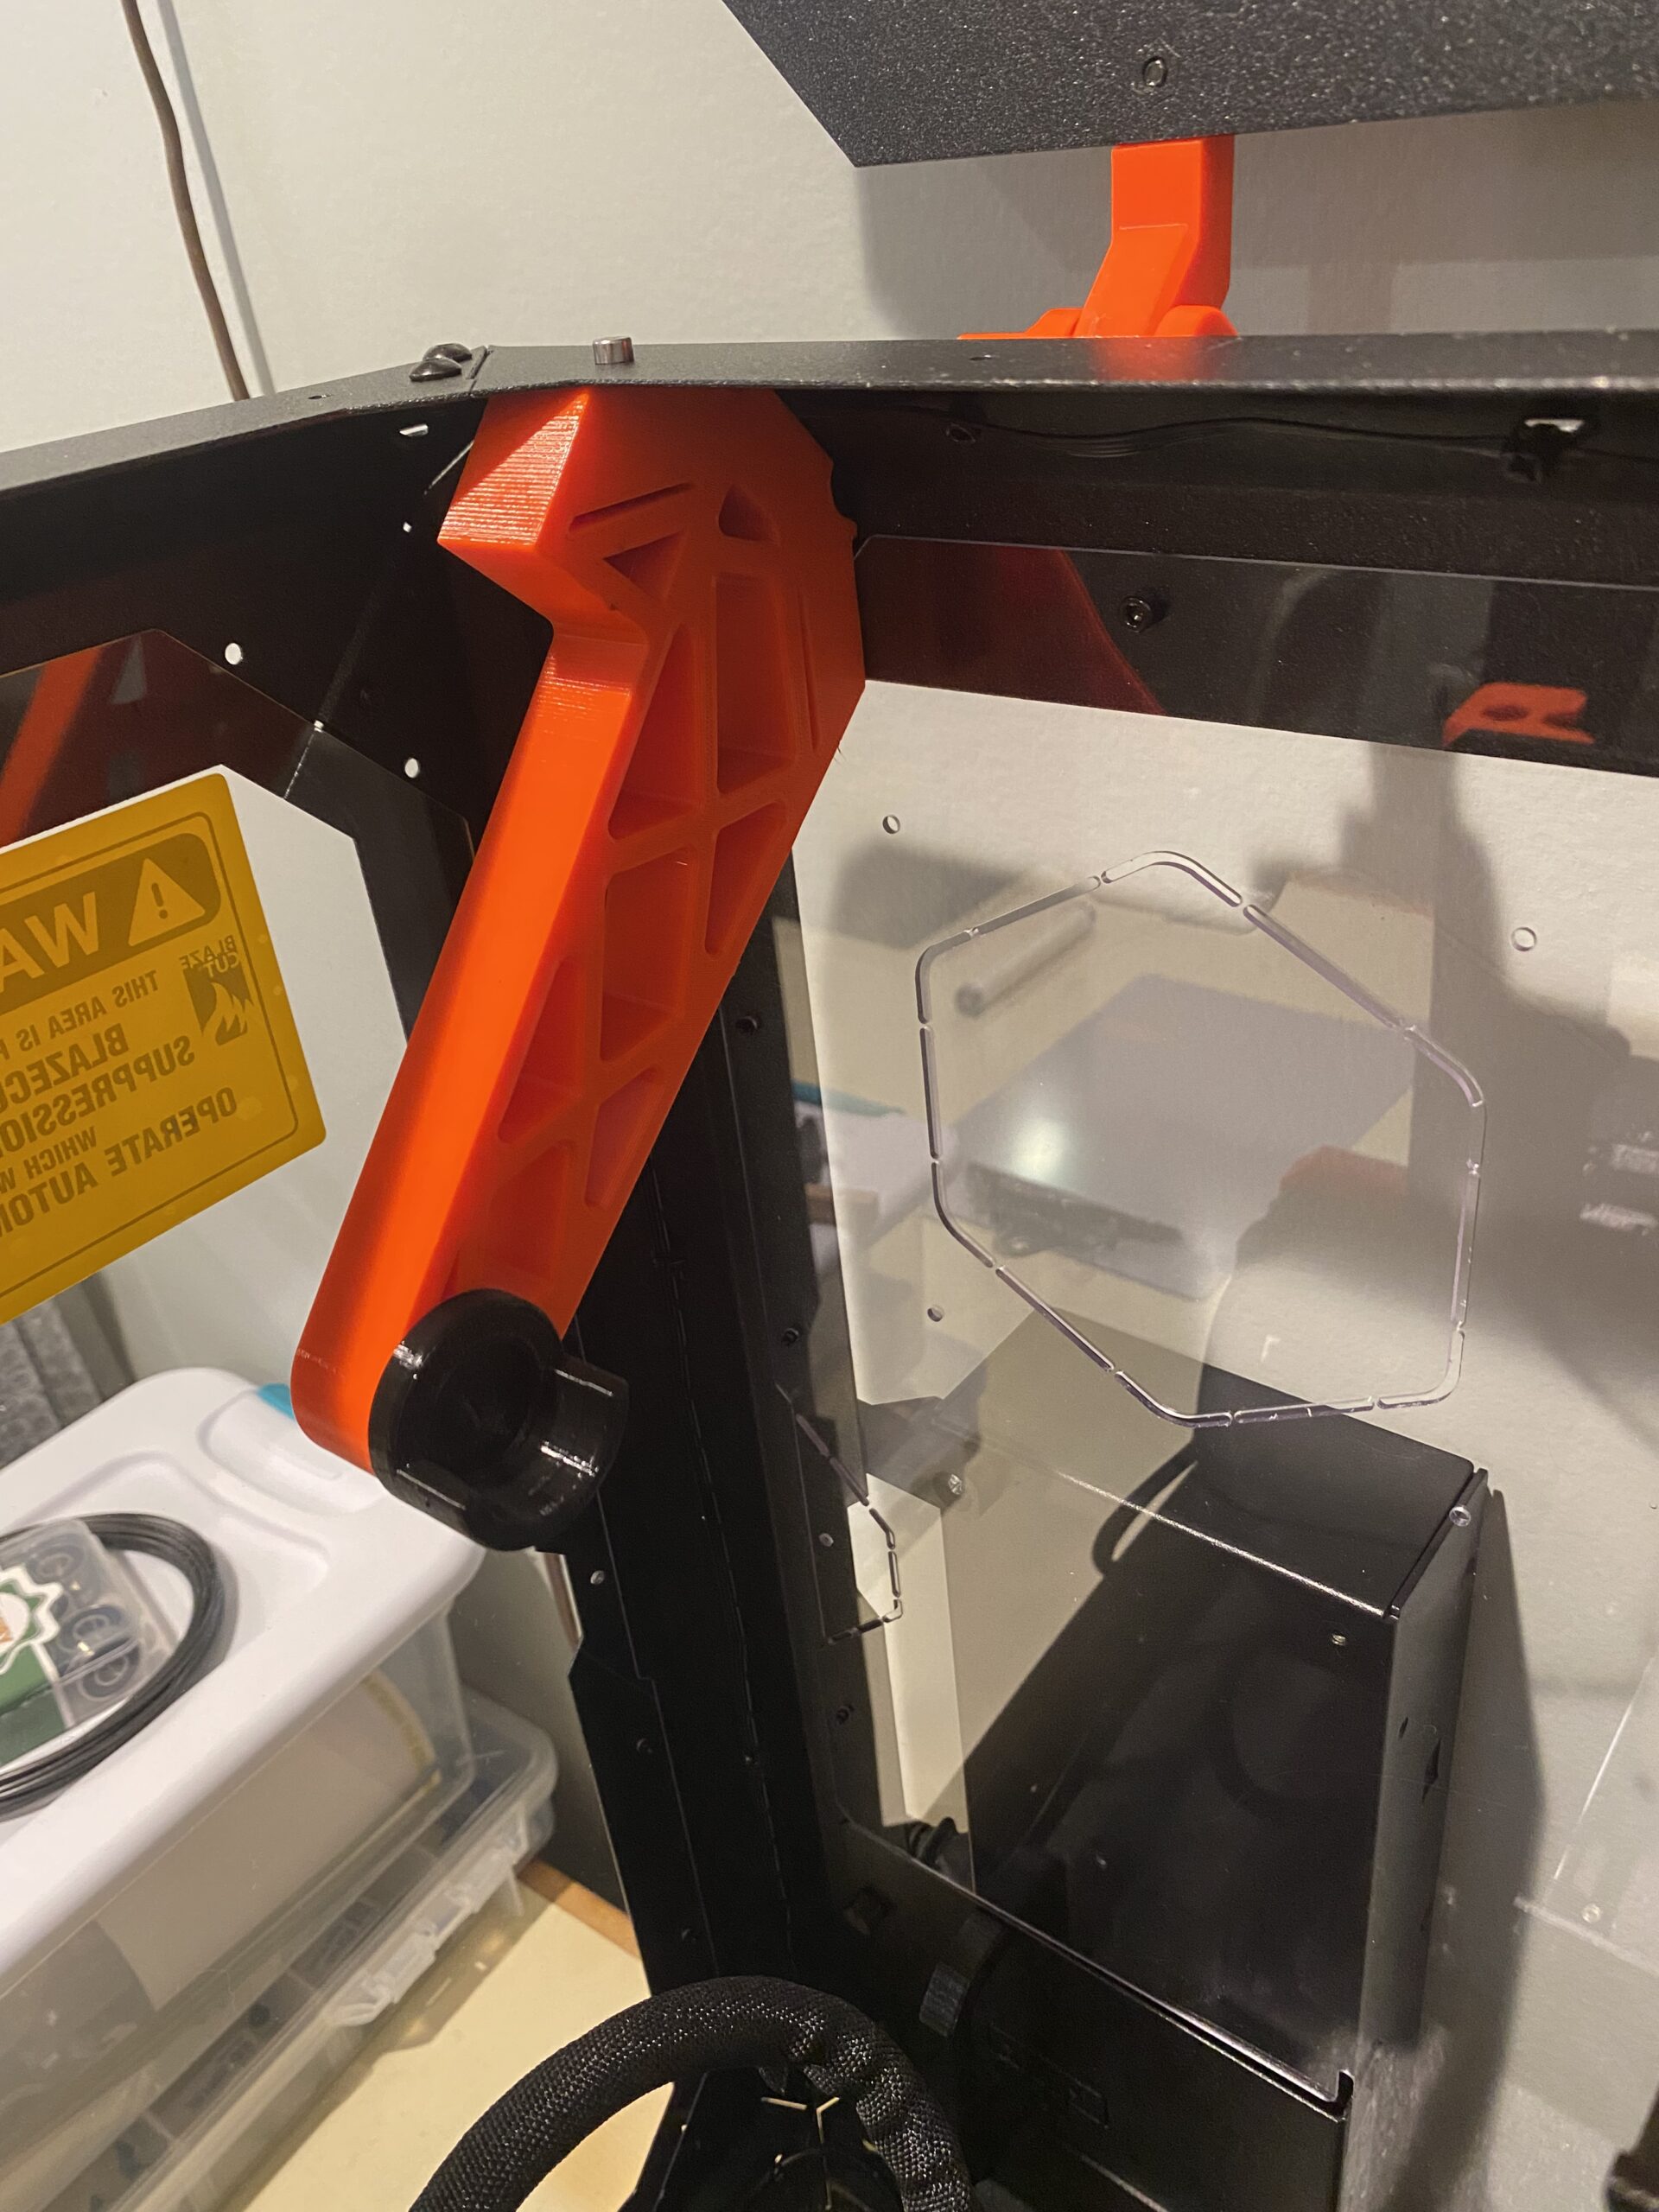
RE: Enclosure with all addons
That looks great! I was also thinking about bearings for the spool holder. I might give it a try but just for 1kg spools, that's more than enough for my projects.
RE: Enclosure with all addons
This looks to be a very well-done enclosure.
May I ask you, how do you use the Raspberry Pi in this context?
And do you plan to add MMU? And the material management then.
Do you consider Fire Suppression System is a must have (for home usage)?
P.S. am still waiting for the printer with the enclosure (assembled one, though), so I’m totally a newbee here. Thus looking into more details and options of what can I leverage.
RE: Enclosure with all addons
Posted by: @ K Douglass
Thanks! This is an awesome design. I recently just purchased a MK3S+ with the enclosure kit and immediately upgraded to this and the center spool holder you also designed. I've been using 2 kg spools and it's been a small pain to swap them out, so I modified the right version of your center spool holder to mount farther towards to the outside of the enclosure and then made some brackets to hold a spool rod. This allows me to just lift the spool directly up and out of the enclosure rather than having to hold it with one hand and twist out the original spool rod with the other.
@K Douglass Could you please share the model ?
thank you