Printer keeps destroying print
Hello!
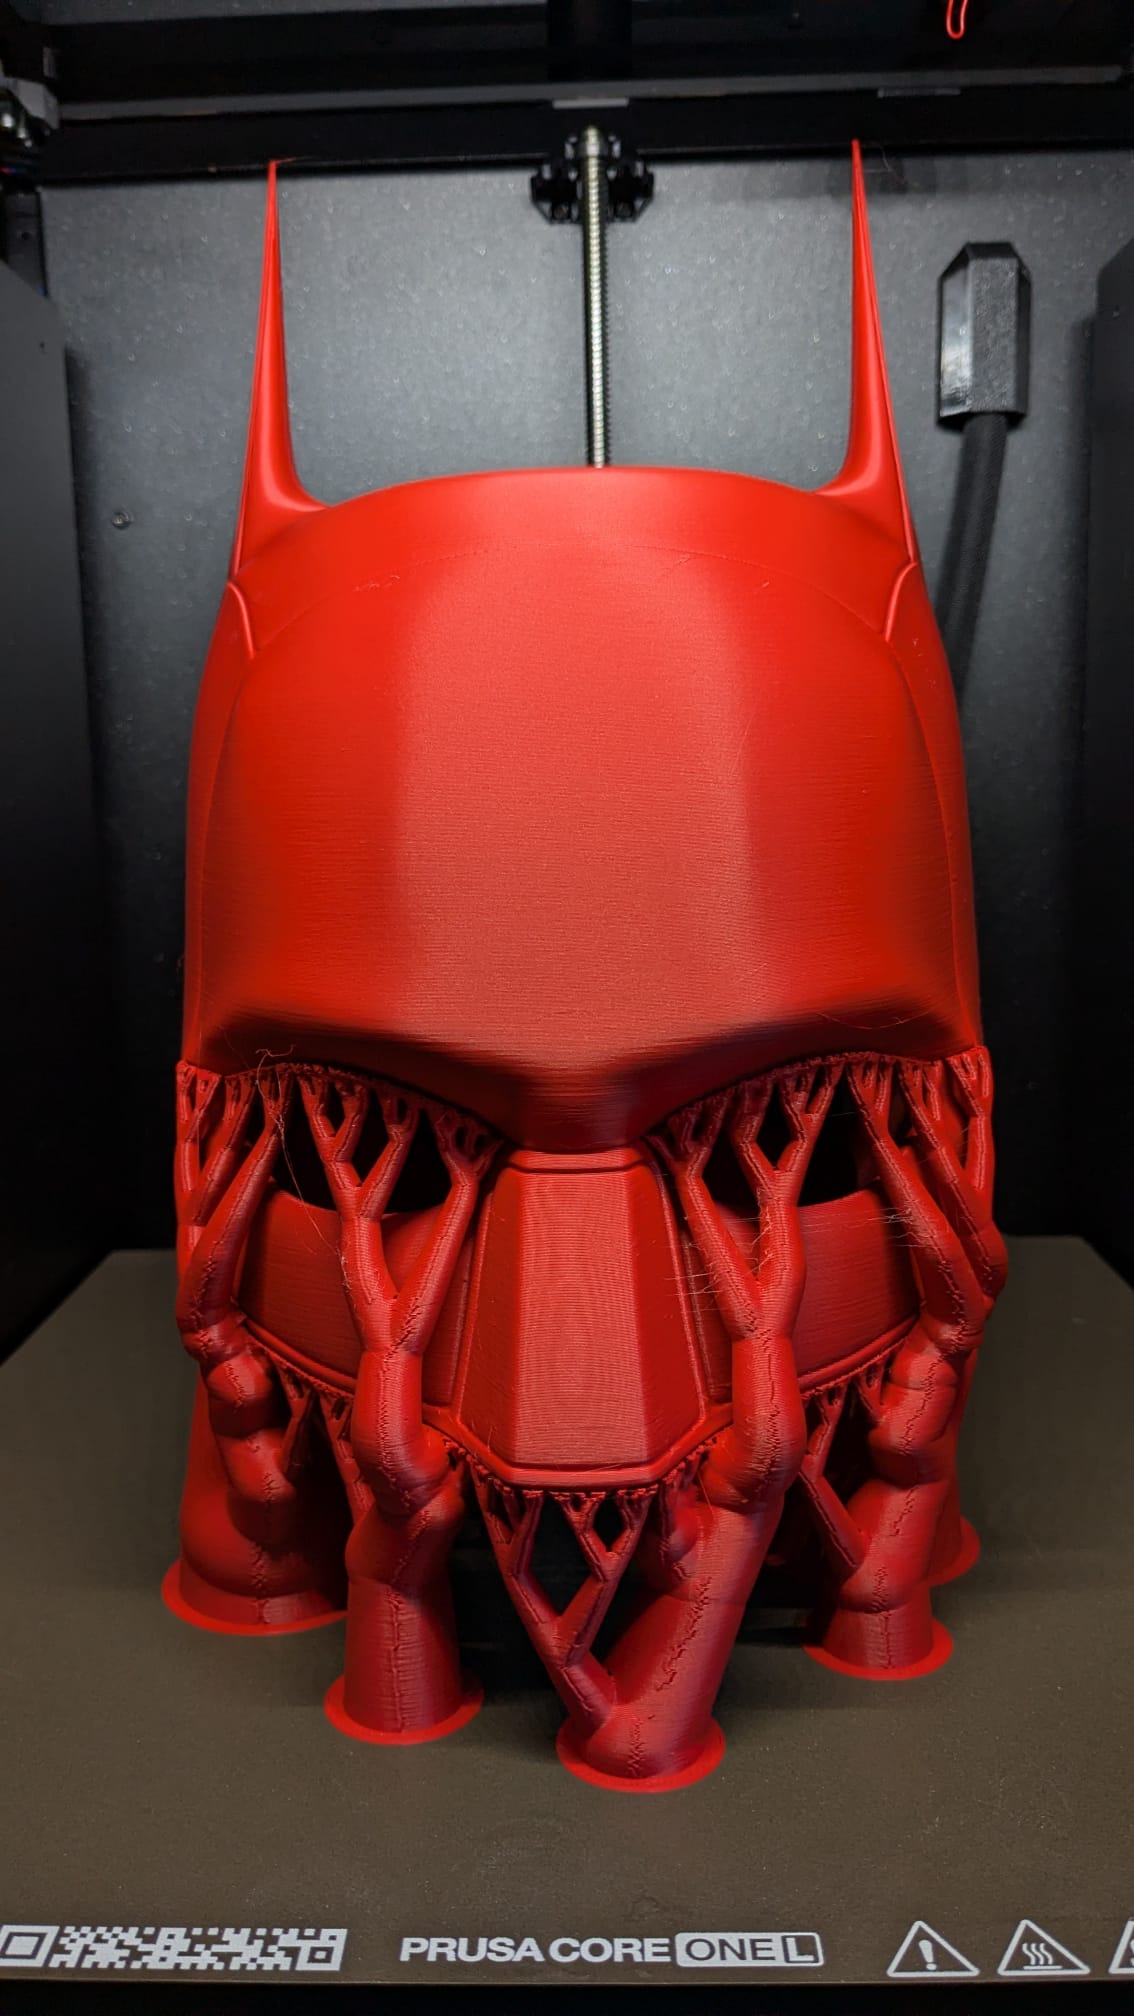
I've had my Core One L for a few weeks now, but I'm running into trouble when I try to print large objects. At first I thought it was bed adhesion, but as you can see in the picture, the print broke apart while the first layer is still stuck to the bed. I use Polymaker PLA and the standard (non–high-flow) nozzle.
I tried increasing "First layer expansion" and "Top interface layers," turned down the support speed, and set the lift height to 0.4 mm.
I use the latest PrusaSlicer. Does anyone have any idea what could cause this? I've tried about 10 times with different settings but keep running into the same problem. I'm getting a bit desperate. I've tried so much and wasted a lot of PLA.

This is the model i tried printing but got similar issue's on different helmets.
https://www.printables.com/model/196134-the-batman-2021-inspired-helmet
RE: Printer keeps destroying print
Please zip the 3mf file, add to Media and attach to the post.
Some suggestions:
- higher nozzle temperature
- decrease the max volumetric speed for the filament or the supports so it prints slower, you may need to fine tune it for that filament on smaller test prints (simple cone with a base of 60mm and 50mm height diameter is a good and quick test)
- sometimes increasing cooling helps
See my GitHub and printables.com for some 3d stuff that you may like.
RE:
... and the all-time classic, make sure your filament is dry (and hot enough). If in doubt "what, I'm using a dry box / it just came out of a sealed bag", maybe do some reading on the topic and start saving for a SpacePi or similar.
If your print snaps in two (right end / the broken-off part in the middle), I'd look at layer adhesion and those would be prime candidates.
EDIT: In the mid-bottom-right organic support, do I see stringing?! That would be a dead ringer for moisture.
RE:
mid bottom right - you can clearly see some lines going across the support base, and those usually mean the adhesion was not good enough between the layers and the filament contraction when cooling was causing it to detach, making the lines. So higher temp and maxing cooling or slowing down the print should help there.
Most of the filament profiles are just too fast for the Core One series.
See my GitHub and printables.com for some 3d stuff that you may like.
RE: Printer keeps destroying print
Thanks for all the advice. Layer adhesion and moisture could indeed be the problem.
I'm currently printing a layer adhesion test, and I have a filament dryer. I did some research before I bought the printer, so I knew it could become a problem. I didn't know that brand-new filament still needs drying, so from now on I'm going to dry every new spool I get. There's so much to learn I'm still pretty new to 3D printing
I will also decrease the printing speed. I watched a YouTube video where someone explained that printing faster is better for quality, but I don't think that's true for my printer. maybe it is for other brands.
Thank you again! I really appreciate your help. I’ll let you know how the tests/settings go.
RE: Printer keeps destroying print
Update!
After 16 tries, I finally managed to print it! I'm pretty sure the biggest impact was the speed. I used these speed settings and put the printer manually on 70% print speed. I also dried the new PLA spool and increased the temp from 205 to 215 °C.

Here's a picture of the final print (took 48 hours) . I think it looks awesome and super high quality!