RE:
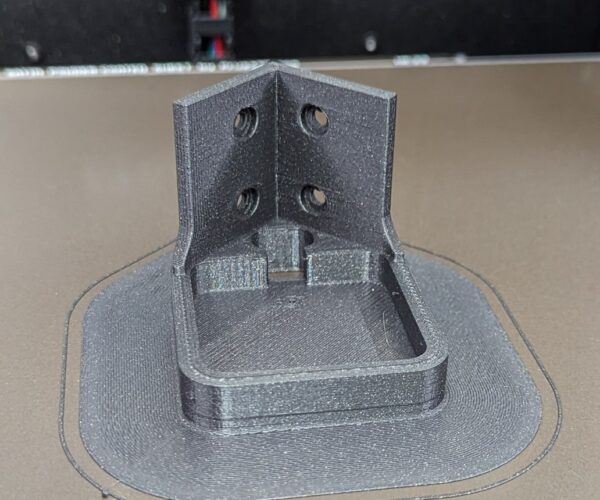
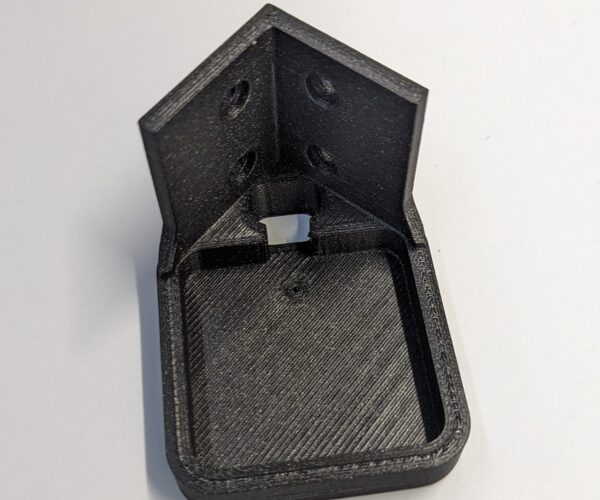
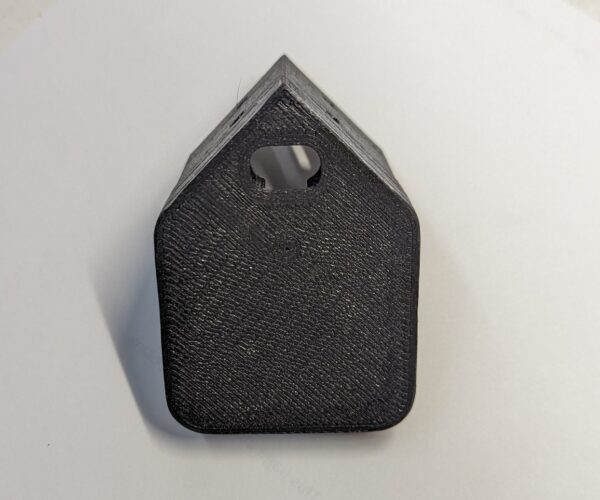
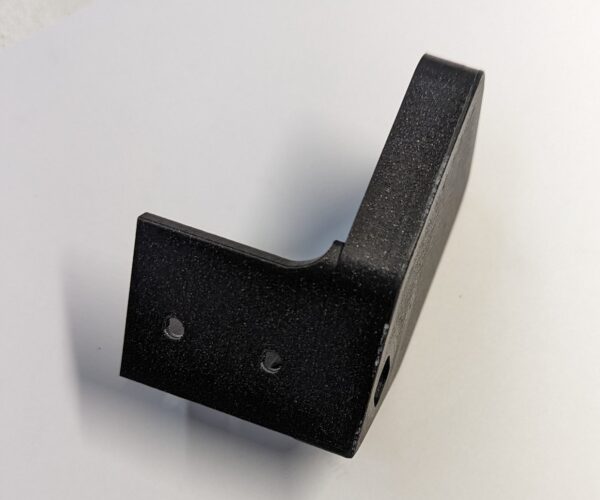
The print finished and is cooling down. It looks really good . Will take another pic once cooled down.
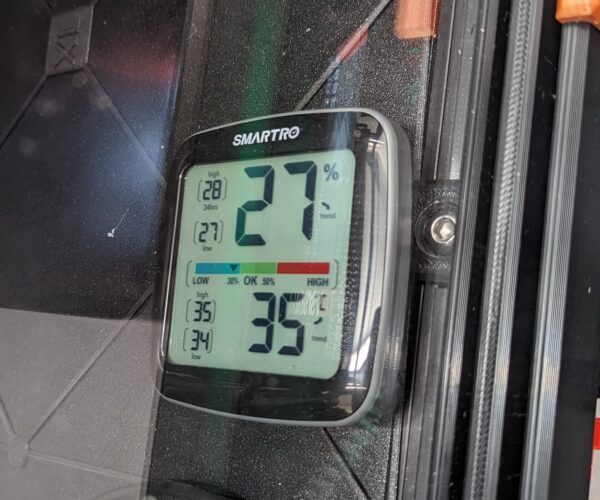
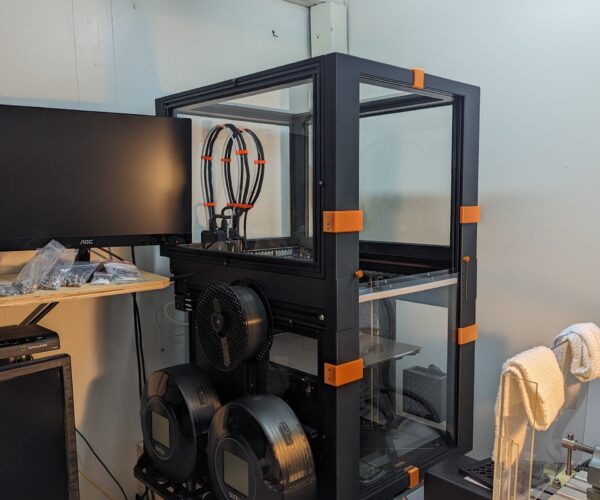
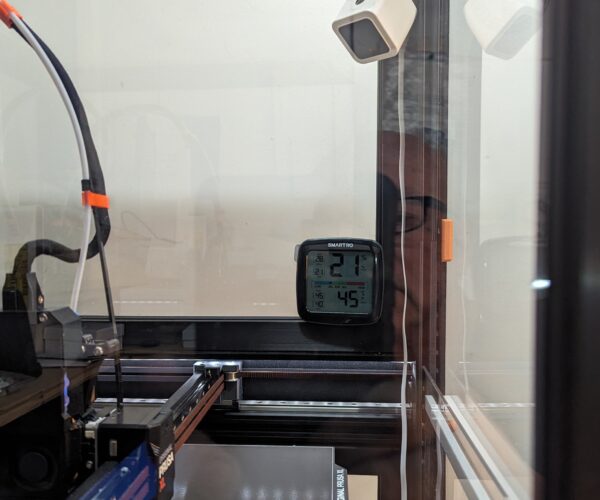
This was a short ASA print 2 hours and 40 minutes. The chamber made it to 35C and a low humidity of 27%.
RE: Ideas to make enclosure for XL Multi Tool
Absolutly great
yoo pushen my desicion to confirm my Order for the 5 Tool XL i recived Mail yesterday. I was unsere Idee it woudnt be better to Change towards mk4 with prusa endlosere but the Solution you presented is extraordinary.
a possible Solution to raise Temperture a Bit is using a Thin Styrodur plate on top of the Acryl cause Heat goes up. So a Thun Champ on top ans side will add some more possibilities.umwarf.
greets FromGermany
the Text Editor is still Problematik
Thank you. This has been a really good project. It has taken a while but it has been funny. I am going to publish everything as soon as I get all the parts and pieces done. So anyone that wants to access the files will be able to. Even though this proto type is printed in PLA the removable T2020 aluminum extrusion panels are acting like a heat sink for the PLA. After I printed the camera mount in ASA without a issue. I felt the inside PLA parts and they felt pretty good and not real warm. The enclosure was at 35C for the entire print. I am curious to see how it handle a lot of ASA printing.
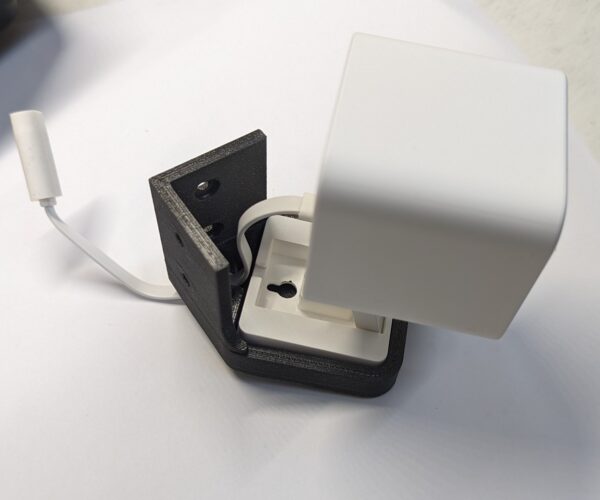
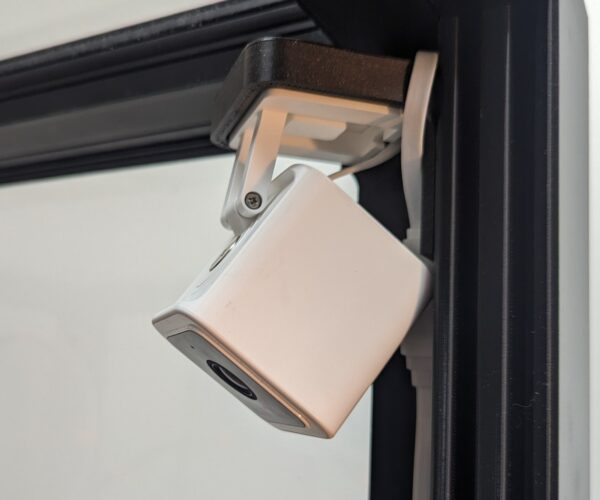
The Prusament ASA camera mount printed very nice. I printed it in .20 layers thickness 265C for all layers, 110C bed temp, .60 nozzle. Very pleased with the print.
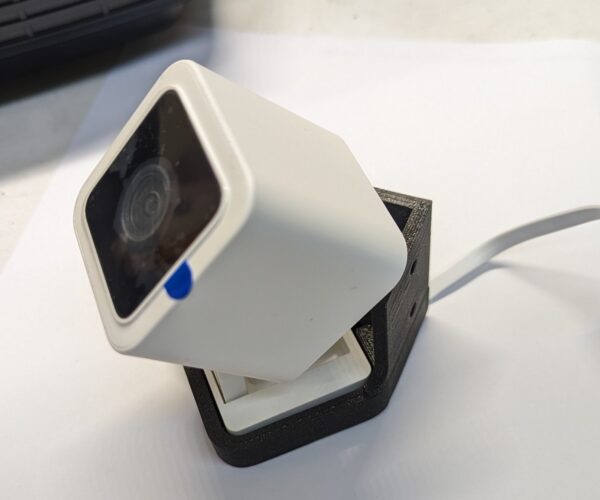
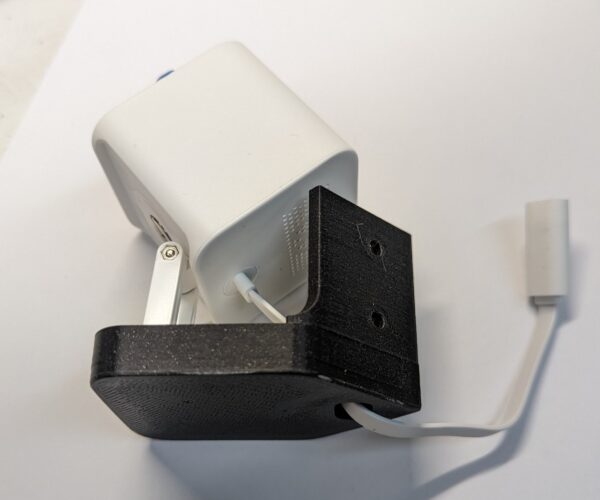
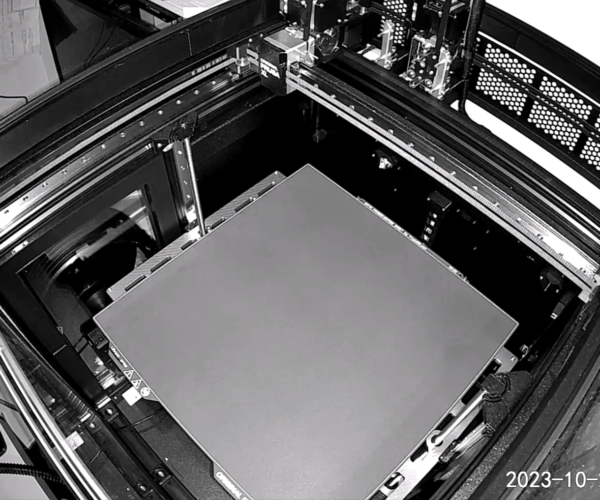
I did get the WYZE camera and mount up and running today as well.
RE:
One note the back upper venting behind the tooling is still open. Still deciding on how to handle it. I think I am going to design a panel with individual adjustable vents behind the Nextruders.
RE: Ideas to make enclosure for XL Multi Tool
Just had a look at Wyze Cam V3. It costs about €75
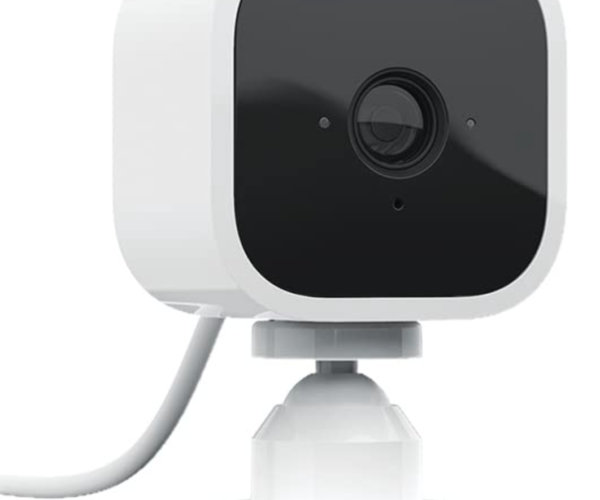
Amazon offers a Blink Mini Cam, which looks exactly the same as the Wyze. But it costs only €35
Has anyone experience with the Blink Mini Cam. It has 4.5 stars at Amazon, so it could not be a complete failure.
RE: Ideas to make enclosure for XL Multi Tool one more question
Has anyone an idea if it is possible to print after release of the stl's 🙂 directly in ASA (recomended nozzle 0,25 ??? it will consumes much more time ???) using cardboard or styrodor as temporary housing, to avoid printing 5 kg pla and renew print 5kg asa to avoid additional plastic waste and reduce cost?
Cause im an absolut beginner is it possible for me to print asa or will it be recommended still to use pla and after one year to try it again?
is there an easy way to change all connection holes by type 4/5/6 etc to metric measure in one run or must it be done hole by hole?
other idea using only one diameter for all so perhaps clamps will become bigger at some places but on other hand you must only use one tool
How do you cut the acryl panels without scratching them?
sincerely Olaf
RE: Ideas to make enclosure for XL Multi Tool
@O.Knode: ASA will not mandatory need a closed print room as ABS does. A preliminary "tent" made of card board or acrylic panels will certainly do a good job. But I would recommend to monitor the print in case of some faults. But the safety features of Prusa are quite good (thermal runaway).
For cutting acrylic panels I would recommend a table saw or a circular hand saw with a guide rail. As the panels have protective sheets on both sides, this should work.
If there are visible acrylic edges, you could first use a deburrer and fine sandpaper. After this you could polish the edged (there are more then enough YT videos about this topic).
RE: Ideas to make enclosure for XL Multi Tool
Just had a look at Wyze Cam V3. It costs about €75
Amazon offers a Blink Mini Cam, which looks exactly the same as the Wyze. But it costs only €35Has anyone experience with the Blink Mini Cam. It has 4.5 stars at Amazon, so it could not be a complete failure.
I have a blink camera at my house and like it. I went with the WYZE due to the square footprint and the longer adjustment arm. You could use the blink but you would have to make the mount a little different.
RE: Ideas to make enclosure for XL Multi Tool
The WYZE camera also can be mounted closer to the corner. It also has a small pigtail with a small disconnect you can run throuh the mount for installation.
RE:
Has anyone an idea if it is possible to print after release of the stl's 🙂 directly in ASA (recomended nozzle 0,25 ??? it will consumes much more time ???) using cardboard or styrodor as temporary housing, to avoid printing 5 kg pla and renew print 5kg asa to avoid additional plastic waste and reduce cost?
Cause im an absolut beginner is it possible for me to print asa or will it be recommended still to use pla and after one year to try it again?
is there an easy way to change all connection holes by type 4/5/6 etc to metric measure in one run or must it be done hole by hole?
other idea using only one diameter for all so perhaps clamps will become bigger at some places but on other hand you must only use one tool
How do you cut the acryl panels without scratching them?
sincerely Olaf
Let's see if I can answer your questions. You could make a temporary enclosure to print the ASA. I printed some before the enclosure and the pieces didn't come out near as clean and had a little warping. With the enclosure the few prints I have done have been great.
Screw and bolt hole sizes had to vary do to their location. That being said there are only 2 machine bolt sizes. 3mm and 8mm. All the 3mm are the same length, all the 8mm are the same length. The 2 sizes of screws are #4 and #6. The #4s are two different lengths and all the #6 are the same length. For the #4 and #6 screws I put a chart with the metric conversions. Now there is some play where you can jump up one size for the #4 and #6 screws.
Since I couldn't really find many of the components in my area every part I ordered came from Amazon! That's right all the parts. The T2020 extrusions and components, the 1/8 inch acrylic, the screws and machine screw all from Amazon. All the parts are readily available on Amazon.
I cut my own acrylic. It is super easy. You don't need a saw. For the 1/8 inch panels all you have to do is measure and score both sides of the panel a few times with the back edge of a carpet knife blade. I used a metal yard stick/ meter stick for a straight edge. Place the scored edge on the edge of a flat surface and push the end sticking out down with a little force and the panel will snap clean. Looks just like the factory edge no clean up. The corners of the acrylic panels need a small 12mm x 5mm notch. I just used a hack saw blade for the notch. The panels were very easy to make. Leave the protective covering on the acrylic till you are ready to install them in the T2020 frames.
Hope this answers your questions.
RE: Ideas to make enclosure for XL Multi Tool
Alright I am printing another ASA camera mount that brings the camera out about 10mm more for a little more adjustment.
I also moved the temp/humidity gauge up to just above the starting print bed position. Big difference in the temp. The temp has been holding at 45C and a humidity of 27.
RE: Ideas to make enclosure for XL Multi Tool
What sort of hygrometer do you use?
what do you trink using the hygrometer from mk3 encosurre
RE: Ideas to make enclosure for XL Multi Tool
The print finished and is cooling down. It looks really good . Will take another pic once cooled down.
This was a short ASA print 2 hours and 40 minutes. The chamber made it to 35C and a low humidity of 27%.
How do you like that humidity/temperature sensor?
RE:
The print finished and is cooling down. It looks really good . Will take another pic once cooled down.
This was a short ASA print 2 hours and 40 minutes. The chamber made it to 35C and a low humidity of 27%.
How do you like that humidity/temperature sensor?
So far it is holding up pretty good. It has magnets on the back so I just put some double stick tape on a thin piece of steel for it to attach to .
For the Nevermore carbon air scrubber I mounted a hour meter this morning to track the hours when I use it. You are supposed to change the media inside every 30 hours of once a month. I am bad about keeping track of time!! 😎 😎
RE: Ideas to make enclosure for XL Multi Tool
What sort of hygrometer do you use?
what do you trink using the hygrometer from mk3 encosurre
I just use the digital temp and humidity gauge above. Seems to work well.
RE: Ideas to make enclosure for XL Multi Tool
It sounds like you have some excellent ideas for designing an enclosure for your XL Multi Tool 3D printer. Here are some additional suggestions and considerations:
Lighting: Consider adding LED lighting inside the enclosure to improve visibility while monitoring prints and making adjustments. Proper lighting can also help with time-lapse recording of your prints if you're into documenting your 3D printing projects.
Cable Management: Plan for cable management to ensure that all the wires going in and out of the enclosure are neatly organized and do not obstruct the printer's movement. Cable trays, clips, or channels can help with this.
Filament Management: While keeping the spool holders outside is a good idea, you can design a small access port for the filament to enter the enclosure. This can help reduce the chances of filament getting tangled or caught on anything while printing.
Insulation: Consider insulating the enclosure to maintain a stable and controlled temperature inside. This is particularly important if you're printing with materials that require a specific environment.
Sealing: Make sure the enclosure is well-sealed to prevent heat loss and to minimize the escape of fumes or odors. This can help maintain a stable temperature and create a controlled printing environment.
Noise Reduction: If the printer is noisy, you might want to add some acoustic foam or other soundproofing materials to the interior of the enclosure. This can make the 3D printing process less disruptive.
Emergency Shutdown: In addition to a fire suppression system, consider adding an emergency shutdown button accessible from the outside. This can be handy in case of any issues that require an immediate stop.
Camera Mount: If you want to monitor your prints remotely, you can add a camera mount inside the enclosure for a webcam. This will allow you to keep an eye on your prints even when you're not in the same room.
Filtration System: In addition to HEPA filters, you can consider adding an activated carbon filter to help remove odors and VOCs (volatile organic compounds) generated during printing. This can be particularly useful if you're printing with materials that produce strong odors.
Safety Interlock: Consider adding a safety interlock system that prevents the printer from starting if the enclosure is not properly closed or if the filters are not in place.
Materials Choice: Ensure the materials you use for the enclosure are fire-resistant and have good thermal insulation properties. Safety should be a top priority.
Ergonomics: Design the enclosure in a way that is user-friendly. Make sure it's easy to load and unload filament, access the printer's controls, and perform routine maintenance.
Remember to regularly assess the enclosure's performance and safety, and make adjustments as needed. Building a well-designed enclosure can greatly enhance the usability, safety, and print quality of your 3D printer.
