RE: Ideas to make enclosure for XL Multi Tool
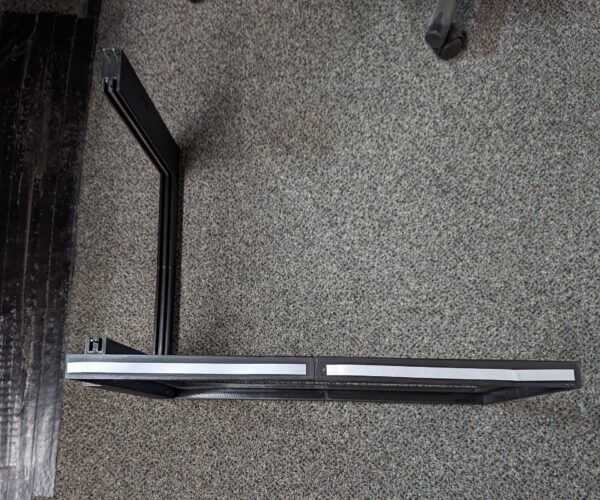
I was just looking at the printer this afternoon. It has a very large foot print. A total enclosure for the entire printer would be huge. I believe this will be the way to go in the long run. It offers pretty easy access to the printer. The enclosure also has to be tall as to cover the moving upper parts of the printer.
RE:
Today will be my last post until October. I will be out of town on business for a few weeks.
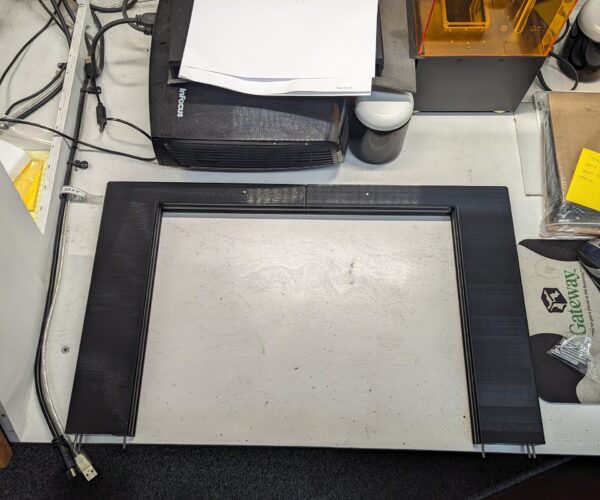
Special day today! All the parts for the front of the enclosure have been printed and fitted. Everything fits perfect with all the parts printed true to size on the XL. Very impressed so far with this printer. Everything has been printed with a .60 nozzle @ .35mm first layer and .30 layers for the rest. As noted earlier I did drop the nozzle temp down 5* for all the printing so far and don't see a need to change that.
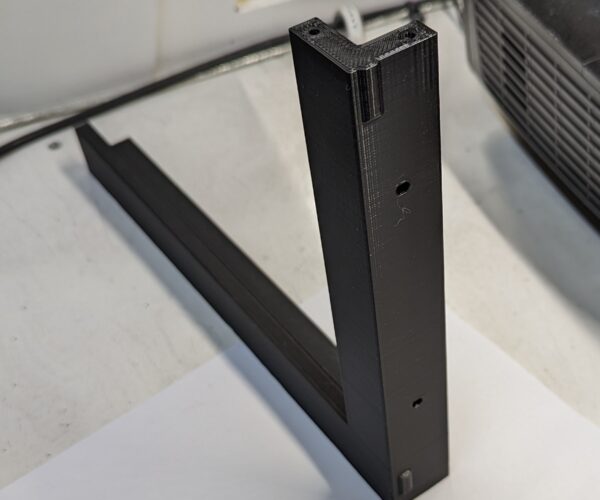
Here are a few pics of the last part of the front of the enclosure and some assembled. The top to pieces of the front have permanent pins. The top two section are joined by pins and it just slides into the lower part of the front. When I get back in October I will be starting on the top and partial back of the enclosure which will cover the entire top. This will basically complete the printing room around the bed of the printer on all sides.
See you in a few weeks!! Enjoy
This is the upper front right section of the front. Once again all the alignment keys and mounting holes are printed in place.
Here are the upper front sections assembled.
A pic of the top front set down on the lower front. This allows for easy disassembly.
RE: Ideas to make enclosure for XL Multi Tool
Just want to say, thank you so much for the amount of effort and passion you've put into this project.
I'm still waiting on "the email" to be able to purchase mine, but seeing what you've done to transform the XL into a complete tool is just making me anxious in anticipation.
RE: Ideas to make enclosure for XL Multi Tool
This is amazing! I love the design. Would you consider sharing it with the community?
RE: Ideas to make enclosure for XL Multi Tool
Okay finally made it back to the shop. I finalized everything for the upper left and right T2020 acrylic panel frames today. There will be four sections per side. Each section uses 185 grams of filiment. Just like all the other parts any holes, nut holders, alignment holes, alignment locks etc will be incorporated into the prints.
I should have the first section of the upper left frame pics tomorrow. Print time for each section is approximately 6hrs and 45min.
RE: Ideas to make enclosure for XL Multi Tool
This is amazing! I love the design. Would you consider sharing it with the community?
Yes I will when I have it complete. I am keeping a list of minor changes that I will make before I release anything.
RE:
Back at it! Here is the first of 4 parts for the Left Top/Side frame. Everything to mount the back, top, and front is incorporated into each part.
Here you can see the a mounting point for the back. The counter sinks for the nuts are made into the frames. These are for 3mm x 14mm hex head bolts nuts and washers.
A better look at the first section and the location for it on the upper left side of the printer.
There will be no drilling into the rail covers needed. The top will be attached to the upper part of the front. It will be removable in one piece. If you remember the top front just slides down on pins for alignment. I did build in two screw mounting holes for the middle section of the front if needed. Time will only tell if they are needed.
RE:
Just a short update. The right lower half of the top side panel is done. They are held together with 2pcs 3mm x 30mm stainless pins. These are friction fit just like all the rest of the connections. If you wanted you could put a few drops of super glue or epoxy. They fit very tight without any glue. You actually have to tap them in fairly hard with a hammer. The holes are a hair smaller than the pins.
A note for you. When I printed the lower side panels without a brim I noticed a very slight lift on all 4 of the bed side corners of the print. It did not effect the prints. For the rest of the parts after that I have been printing them with a 10mm brim. This has eliminated the slight lifting on the corners.
Pics of the top left side lower two parts assembled. As mentioned approximately 6hrs and 45min per section 186 grams of filiment.
Upper right side panel sitting on the rail cover to check fit. ✔️✔️
RE: Ideas to make enclosure for XL Multi Tool
Just to let everyone know I am at 200+ hours of printing since I received the XL without any issues at all.
RE: Ideas to make enclosure for XL Multi Tool
This is looking great - keep up the good work. Looking forward to seeing the finished thing. Can I ask which brand of PLA are you using for this - it seems to be working well.
RE: Ideas to make enclosure for XL Multi Tool
This is looking great - keep up the good work. Looking forward to seeing the finished thing. Can I ask which brand of PLA are you using for this - it seems to be working well.
This whole prototype has been printed with Sunlu PLA. First layer at 215 the rest at 205.
RE: Ideas to make enclosure for XL Multi Tool
That is rather involved to print a whole +3 kg enclosure in PLA just to print then the proper one in ASA. A Frankenstein large tape+cardboard enlcosure might have done the trick as well. But then, most of us like to overengineer 😉
Regarding ASA, given how large your parts are and that such an XL enclosure is rather large by necessity you might still experience some warping even with enclosure. If you do, an option would be heavily modified ABS like TitanX or 3djake Easy ABS. They basically warp no more than PLA does. There is also an ASA variant called ApolloX but I have no 1st hand experience with it yet.
Mk3s MMU2s, Voron 0.1, Voron 2.4
RE:
That is rather involved to print a whole +3 kg enclosure in PLA just to print then the proper one in ASA. A Frankenstein large tape+cardboard enlcosure might have done the trick as well. But then, most of us like to overengineer 😉
Regarding ASA, given how large your parts are and that such an XL enclosure is rather large by necessity you might still experience some warping even with enclosure. If you do, an option would be heavily modified ABS like TitanX or 3djake Easy ABS. They basically warp no more than PLA does. There is also an ASA variant called ApolloX but I have no 1st hand experience with it yet.
Yes it is a time consuming print project for sure. That is ok. My business is prototyping and one off DLP 3d printed pieces for other companies. I have been in business for 37 years. This is my 25th year doing CNC and or 3D DLP printing thou smaller scale prints.
This proto enclosure project allows me to make sure everything works and assembled as it should. Since I needed a enclosure with a exhaust system to print some of the materials I want to print this is a good project to see what I can and cannot do with the XL. I already have a list of some changes I would like to do. So far so good.
I will definitely look into the filaments you mention they have peaked my interest. Thank you for the information as it is always welcome.
RE: Ideas to make enclosure for XL Multi Tool
Does anyone that has delt with enclosures have a suggestion for the location of the exhaust/hepa filter. The intake hepa filter is located on the lower right side panel. You can see it in the pic above. I am trying not to create a draft on the printing surface. Thanks ahead of time
RE: Ideas to make enclosure for XL Multi Tool
Air flow? I would put the out flow on the opposite side and corner. I would also make the air flow so you can stop it if you need higher temps.
--------------------
Chuck H
3D Printer Review Blog
RE: Ideas to make enclosure for XL Multi Tool
Air flow? I would put the out flow on the opposite side and corner. I would also make the air flow so you can stop it if you need higher temps.
Thanks, So opposite the intake filter? I am going to duplicate the filter housing (which has a sliding air control door) and add a outflow exhaust pipe hook up to it. I have a exhaust system in the shop. I would just need to run the pipe and connect it.
RE:
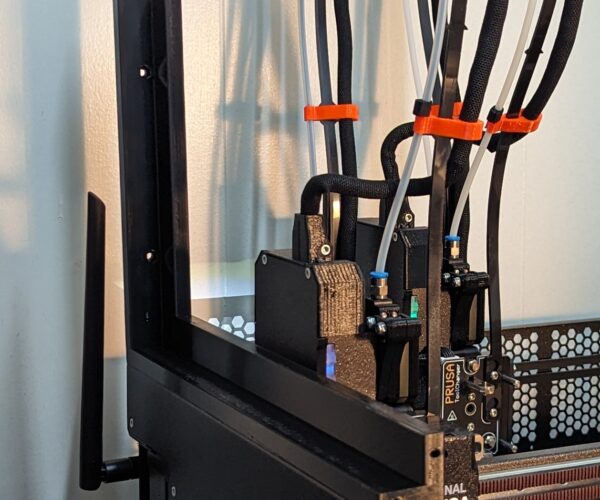
The 3/4 inch #6 button head Philips screws came in today so I assembled the top left frame to the front. Again the top sides rest on the rail covers. I allowed a 1/16 inch gap on the bottom of the top side panel for the single sided foam tap. The 1/16 inch foam tape is attached to the bottom of the frame to rest on the rail covers.
Pics below.
This shows the mounting points for the top left frame to the upper front.
Here the single sided tape just set on the bottom of the frame.
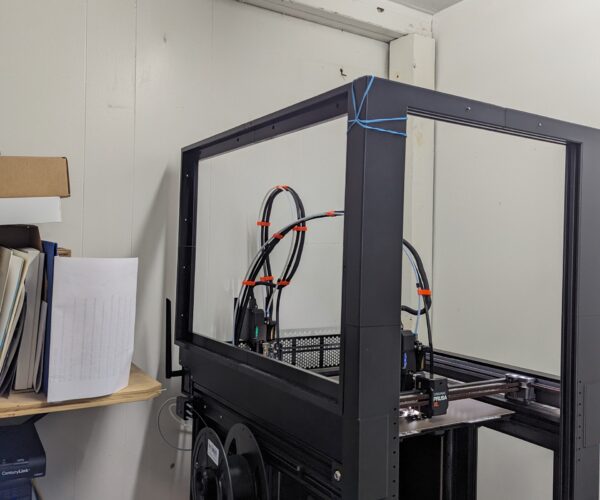
This pick shows the top hat in place. And a pic of the top with the pins going into the lower front frame. Remember the whole top comes off as one piece. All the T2020 acrylic panel inserts will also be removable just like the two lower side panels.
RE:
It's Friday and still pushing forward with the enclosure. The last section of the top right side is printing today. While it was printing it gave me a chance to fit the 2 front acrylic sliding panels. I was also able to drill the anchor holes in the front top and bottom acrylic sliding panels.
If you click on any of the pics on this thread you can see the entire photo.
Note the acrylic still has the protective plastic on it that's why it looks frosted .


