RE: Ideas to make enclosure for XL Multi Tool
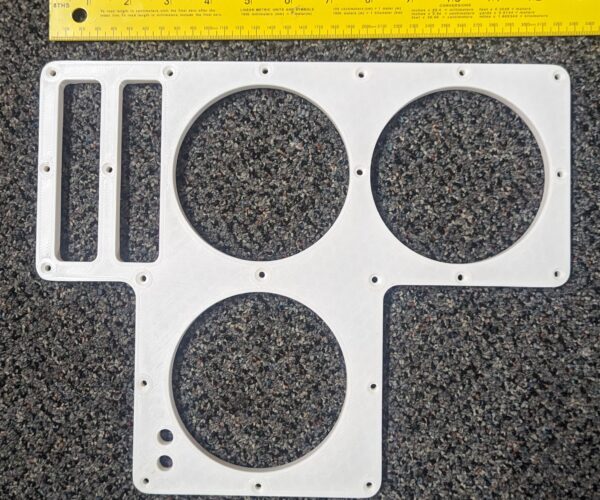
The dimensions of the part is 170mm x 130mm x 100 mm tall and 570 grams. I have been using the stock printing preset for ASA except for 270C for the first layer.
I have found using 6 bottom top and perimeter layers and at least 60% infill with a brim or a raft helps with reducing warping and curling. Also keeping the enclosure temp as consistent as possible. I have been keeping the enclosure between 38C and 42C lately. The printer does not like any temps above 45C and will keep printing but quit extruding filament.
RE: Ideas to make enclosure for XL Multi Tool
One other note don't remove the print till it totally cools. A print with the volume takes a few hours.
RE: Ideas to make enclosure for XL Multi Tool
You also asked about the nozzle. I am using a .40. .30 first layer .20 for all other layers.
RE: Ideas to make enclosure for XL Multi Tool
What material was this printed with?
Ray Durham, [email protected]
RE: Ideas to make enclosure for XL Multi Tool
Are these ASA parts printed without the enclosure?
Ray Durham, [email protected]
RE: Ideas to make enclosure for XL Multi Tool
Why do you print a 0.30 mm layer as the first? I've always used the same as the rest of the print. What's the advantage?
You also asked about the nozzle. I am using a .40. .30 first layer .20 for all other layers.
RE: Ideas to make enclosure for XL Multi Tool
A thick first layer can be more accomodating to adhesion than a thinner layer, and if there is no real detail in the first layer, it gives a quick step up the printed part
Generally not necessary if first layer calibration is good, less problematic if first layer calibration is not good.
regards Joan
I try to make safe suggestions,You should understand the context and ensure you are happy that they are safe before attempting to apply my suggestions, what you do, is YOUR responsibility.Location Halifax UK
RE: Ideas to make enclosure for XL Multi Tool
Sorry I have been busy in the shop this past week. Found a killer deal on a used Solus DLP printer that I have been setting up!
Back to the task at hand.
@Durhamray my enclosure is printed in PLA. It is holding up perfectly with zero issues. Most of the parts I am printing now are ASA as I am printing lots of outdoor pieces.
@EastMemphis I raised the thickness to .30 and the first layer temp to 270C to see if I could get better first layer adhesion on the corners of some larger ASA prints. So far it has worked well. That is pushing the first layer temps for ASA but no issues so far. I like a little heavier first layer with filaments with higher temps. I have also gone to 6 layers on the bottom and top layers as well as the perimeter layers on parts with more column to cut down on warping.
RE: Ideas to make enclosure for XL Multi Tool
About to wrap up this marine project. All parts for this project were printed in Prusament Signal White ASA. When the last 90* elbow is done they will all be post processed. In total 2.5 KGs will be used. A total of 168 printing hours running pretty much 24/7 on this project. All the parts needed UV resistance, water resistance, and strength for abuse.
They were all printed with the same specs.
1. Enclosure preheated to 38C then enclosure temp constant 38C to 40C for duration of all prints.
2. .30 first layer .20 all other layers. 25mm brim with supports only as enforcers enabled
3. 270C first layer 260C for all other layers.
4. Parts will be acetone post processed.
RE: Ideas to make enclosure for XL Multi Tool
You guys are thinking inside the box. IMHO, the filamant delivery on this printer SUCKS big time. I have a much better way of doing things, including building an enclosure as part of the printer, not outside it, including a new filament delievery system. I have an Octoprint box that will control the printer that is outside the printer (so it doesn't get hot) with a 10" display to control the printer. It also has some modified plug-ins to bring up a browser (to control Octoprint) and to shut off the printer (and Octoprint) when a print is finished (user selectable). There is a main power switch on the Octopi box, including a circuit breaker (Prusa doesn't even include a fuse or breaker). Requires some custom GPIO hardware and power hardware. I have a complete Octopi prototype finished (that I am using on my MK4) using the 7" touchscreen, but the touchscreen has too low a resolution, so I'll use a larger, higher resolution touchscreen. I'll make a new box for both the XL and the MK4. I am making a new filament delievery system using a bunch of dry boxes on a pedestal behind the printer, and putting the printer on a BIG lazy susan bearing so it can rotate around so changing filament is easy. I'll be out of town for a couple of months, so I can't work on it, but can order the parts.
The XL is REALLY heavy and takes two men and a horse to move it.
The only thing that needs to be printed is the Octopi box components. The rest of the stuff is off-the-shelf. The Pi has a prototype hat that I have built the circuitry for to control the printer.
Right now, I have a Creality enclosure on the MK4 and absolutely do not like putting the printer inside an enclosure. The Octopi box has a camera and a smoke detector on it so it automatically cuts power if the thing catches fire.
I prototype stuff out of PETG, but the final box will be printed out of flame retardant PC, which I have used before. I like to prototype stuff out of PETG, and even if I don't want to reprint a part, PETG is pretty good. I also print stuff out of PETG+Carbon Fiber and PC+CF.
Steve
Senior Life member of IEEE.
RE: Ideas to make enclosure for XL Multi Tool
You guys are thinking inside the box. IMHO, the filamant delivery on this printer SUCKS big time. I have a much better way of doing things, including building an enclosure as part of the printer, not outside it, including a new filament delievery system. I have an Octoprint box that will control the printer that is outside the printer (so it doesn't get hot) with a 10" display to control the printer. It also has some modified plug-ins to bring up a browser (to control Octoprint) and to shut off the printer (and Octoprint) when a print is finished (user selectable). There is a main power switch on the Octopi box, including a circuit breaker (Prusa doesn't even include a fuse or breaker). Requires some custom GPIO hardware and power hardware. I have a complete Octopi prototype finished (that I am using on my MK4) using the 7" touchscreen, but the touchscreen has too low a resolution, so I'll use a larger, higher resolution touchscreen. I'll make a new box for both the XL and the MK4. I am making a new filament delievery system using a bunch of dry boxes on a pedestal behind the printer, and putting the printer on a BIG lazy susan bearing so it can rotate around so changing filament is easy. I'll be out of town for a couple of months, so I can't work on it, but can order the parts.
The XL is REALLY heavy and takes two men and a horse to move it.
The only thing that needs to be printed is the Octopi box components. The rest of the stuff is off-the-shelf. The Pi has a prototype hat that I have built the circuitry for to control the printer.
Right now, I have a Creality enclosure on the MK4 and absolutely do not like putting the printer inside an enclosure. The Octopi box has a camera and a smoke detector on it so it automatically cuts power if the thing catches fire.
I prototype stuff out of PETG, but the final box will be printed out of flame retardant PC, which I have used before. I like to prototype stuff out of PETG, and even if I don't want to reprint a part, PETG is pretty good. I also print stuff out of PETG+Carbon Fiber and PC+CF.
Steve
We look forward to seeing your creation.
RE: Ideas to make enclosure for XL Multi Tool
I can't wait to see what you come up with. I have some other ideas myself just haven't had the time to work on them.
RE: Ideas to make enclosure for XL Multi Tool
Hey everyone. It's been quite busy in the shop. I have been testing the Fashforge Whit ASA since the Prusament Signal White ASA is not in stock. The Flashforge White ASA is white white vs the Prusament Signal White ASA which is off white. The print temp had to be lowered to 255 first layer and 255 for all other layers for the Flashforge ASA. The FF is a 1k spool vs the Prusament which is 878grams.
Right to the details here. I like the Prusament ASA. It prints better, the prints are dimensionally correct vs the Flashforge shows a little warpage and is off dimensionally by as much as 1-2 mm for the same print. I do like the white white color and the little bit lower printing temp.
If you are printing parts that don't require super tight tolerances it is a decent filament.
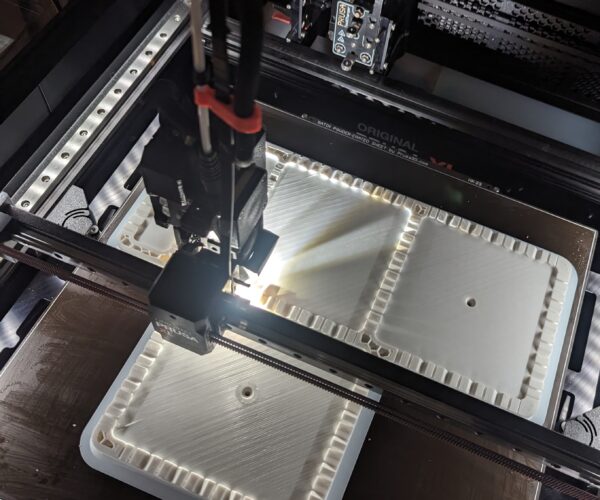
I am printing a 2 part custom marine piece that took 12 hours and it came good. The second part is printing now it will be a 80 hour print. 935 grams.
RE: Ideas to make enclosure for XL Multi Tool
So the base for the print above has been printing all day. This print in ASA with .40mm nozzel and .20mm layer height will take a total of 80 hours. Give or take a few minutes. It will take right at 965g of filiment.
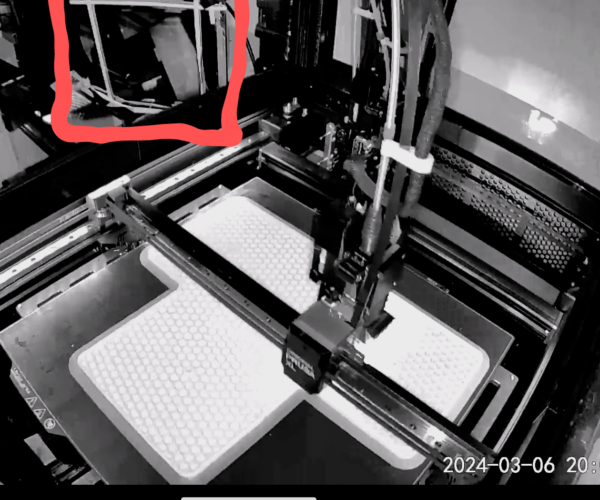
Since I can not be at the printer 24/7 on such a long print I wanted to be able to monitor the spool with the camera in the enclosure. I ended up mounting a tilted mirror outside the enclosure and above the spool. You can actually see the spool turning . To make it easier to see the spool turning I added a few small pieces of white tape on the outside edge of the spool so I can see it turning. In the pic below you can see the spool and the white piece of tape on the edge of the spool.
RE: Ideas to make enclosure for XL Multi Tool
Another thing the bigger and longer the print the hotter everything gets. I had to recalculate how much to open the front to keep the enclosure at 38C. This print the sliding front is open 10" with both exhaust fans running wide open.
RE: Ideas to make enclosure for XL Multi Tool
Couple of questions:
1) How hot did the chamber get?
2) What size exhaust fans did you use? Are they temperature controlled?
Senior Life member of IEEE.
RE: Ideas to make enclosure for XL Multi Tool
Couple of questions:
1) How hot did the chamber get?
2) What size exhaust fans did you use? Are they temperature controlled?
1. If I didn't control the the temp it would go over 50C easy. Anything over 42C is a no go with this Nextruder. It pretty much stops extruding. Whether it is heat creep or something electronic in the Nextruder I don't know. Everytime I exceed 42-44C in tests the Nextruder quits extruding.
I never go above 42C anymore. I start the print between 32 and 36C. Then top out between 38-42C
2.I am running a 4 inch exhaust fan piped down to 2.5 Inches near the printer. I have a small 80mm low speed inline fan near the printer to slow the exhaust down a little. Both the 4 inch and the 80mm fan have speed controls. I leave them on full speed all the time with no issues. If you back up in this thread you will see the build of the exhaust system. The TVOCs have been really low in the room where this printer is set up.
3. I preheat the enclosure to 32-34C now the heater is thermostatically controlled so I have it turn off at 34C. Then I start the print. I only preheat for ASA and Nylon. I adjust the upper front sliding door to regulate the temp after the print starts. I have the adjustment holes marked with the temp associated with that opening. The air scrubber inside circulates the air inside the enclosure to keep the temp pretty consistent.
All this is above in this thread. It's a good read!😁
RE:
I didn't control the the temp it would go over 50C easy. Anything over 42C is a no go with this Nextruder. It pretty much stops extruding. Whether it is heat creep or something electronic in the Nextruder I don't know. Everytime I exceed 42-44C in tests the Nextruder quits extruding.
I never go above 42C anymore. I start the print between 32 and 36C. Then top out between 38-42C
Hi @MME - I posted in another thread where you were tracking down an issue with the PTFE tubing causing problems with higher temps... have you looked into upgrading the idler parts to something more heat resistant than PETG?
I know from my experiments with > 50c enclosure temps on the MK3+ that it was the idler tensioner door that warped and caused my problems. In one of your other threads I think someone posted a link to MK4 users doing this upgrade (but I can't seem to find that post now).
I just recently got my XL so I'm just starting on my enclosure, but when I go to attempt higher temperatures I think I'll try upgrading the Nextruder idler parts.
RE: Ideas to make enclosure for XL Multi Tool
I didn't control the the temp it would go over 50C easy. Anything over 42C is a no go with this Nextruder. It pretty much stops extruding. Whether it is heat creep or something electronic in the Nextruder I don't know. Everytime I exceed 42-44C in tests the Nextruder quits extruding.
I never go above 42C anymore. I start the print between 32 and 36C. Then top out between 38-42C
Hi @MME - I posted in another thread where you were tracking down an issue with the PTFE tubing causing problems with higher temps... have you looked into upgrading the idler parts to something more heat resistant than PETG?
I know from my experiments with > 50c enclosure temps on the MK3+ that it was the idler tensioner door that warped and caused my problems. In one of your other threads I think someone posted a link to MK4 users doing this upgrade (but I can't seem to find that post now).
I just recently got my XL so I'm just starting on my enclosure, but when I go to attempt higher temperatures I think I'll try upgrading the Nextruder idler parts.
No I haven't yet. I do plan on reprinting them.


