A slightly different XL Enclosure design
I thought the best enclosure would require the least amount of acrylic cutting and have good thermal insulative properties.
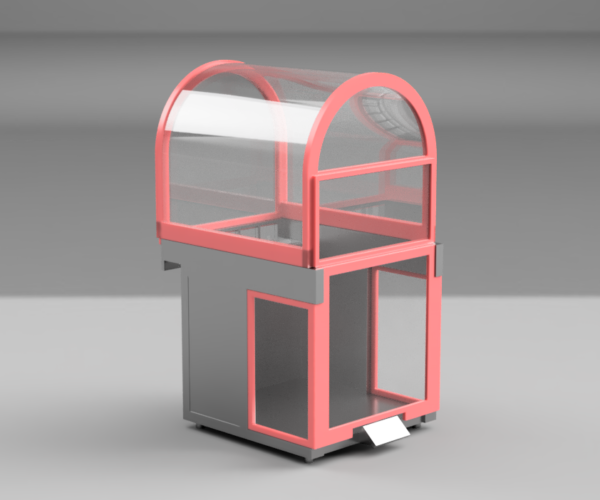
This design uses 1/16" (~2 mm) lexan which can be purchased in a 4x8' sheet that ships rolled up. About $100US for the sheet on Amazon.
The curved top uses two 2x4' sheets, or just two cuts from the 4x8 sheet. The two sheets form a thermal insulative barrier with a 12 mm space between them. Sort of like the windows in a house.
The ends of the top cover are single pane as they only constitute about one third of the area of the top clear plastic. A single pane would provide the best clarity for use with a camera or visual inspection.
The front of the machine has a hatch attached with embedded magnets and the bottom part slides in snuggly over the top of the display. The back of the enclosure sticks out a bit to allow room for the tools. There's a cover over the vent area behind the tools but below where the tools attach is open. If the convective activity is slowed or stopped, then it's acceptable to have an opening at the bottom.
I think this design has several benefits:
1. Inexpensive to build. Only $100 in clear plastic is required.
2. Less cutting of the clear plastic since the entire top consists of two standard size pieces.
3. Thermal insulation from two panes of plastic with an air gap of 12 mm.
4. Excellent visibility as there are no cross members or supports in the center section.
5. Lightweight and sturdy.
Here's a nice rendering from Fusion 360:
RE:
The design for the top is finished and I've started printing test pieces to check the fit of joints and the lexan clear plastic. The entire top prints with six major parts and eight minor ones. Here's an exploded view of the major parts.
I decided to make all the panes double, except for the hatch. That will make it over 90% of the top thermally insulated with double panes.
RE: A slightly different XL Enclosure design
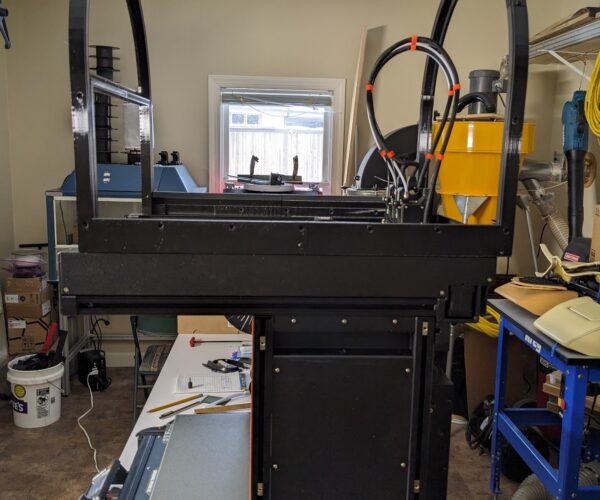
Finished printing the major components. The entire frame is made of four corner pieces and two curved top pieces. Looks like it fits as expected.
RE: A slightly different XL Enclosure design
Catching the top of the XL...
I can't believe this but I've run out of filament. We had a major winter event here and that has caused the entire world to backup. My delivery, which should have been here Friday, won't get here until sometime (maybe!) next week, depending on if we thaw out or not.
I tried to buy filament in a regular store and came up empty. Perhaps I've overestimated the penetration of 3D printers into the populace.
RE:
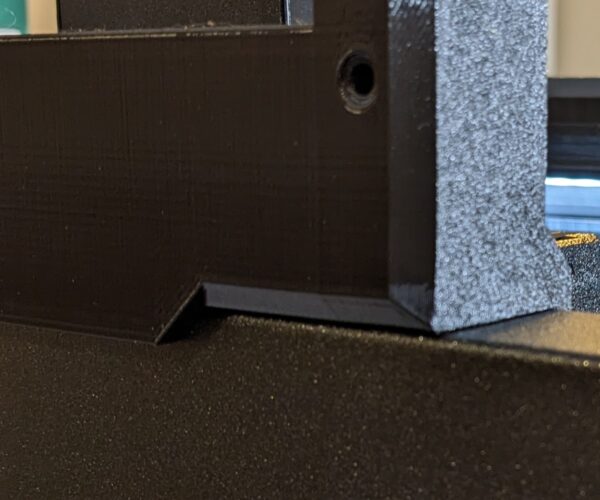
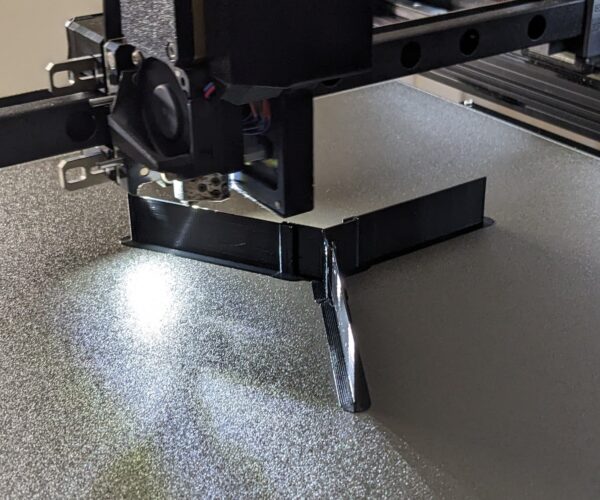
Be careful of those tabs on the inside of the upper rail. The Nextruder can hit them. Go to control and manually run the x y over to the tab. I believe the Nextruder will hit them when homing.
RE: A slightly different XL Enclosure design
Be careful of those tabs on the inside of the upper rail. The Nextruder can hit them.
They're clear by at least 5mm. Thanks for the heads up on that tricky area.
RE: A slightly different XL Enclosure design
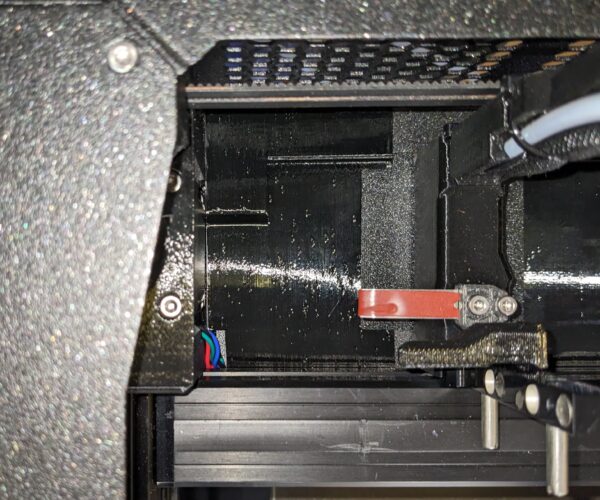
This is a view straight down from the front-left corner showing the tool holder in the position it would be during an autohome. There's about 5mm space between the tool holder and the left side and about 2mm between the tool holder and where the hatch cover will sit.
RE: A slightly different XL Enclosure design
Front hatch held on by 6x1.75mm magnets.
Printing the major pieces consumed about 3 spools. I used 5 for perimeters, top and bottom with a 20% hex infill. I used Polymaker Polylite PETG for most of the major components. It's a bit tricky to work with as it has a narrower temperature range but I found 75c bed for first layer, 70c for the rest and 235c extruder worked well.
RE: A slightly different XL Enclosure design
I've used that filament quite a bit and I run the bed much hotter, 90c. But the outside environment can influence that.
It seems to print best at 240 if your using input shaping and you also need to make sure the volumetric flow rate is set correct in the filament advanced settings. They recommend a maximum print speed of 50mm/sec which is low compared to say hatchbox which is 100mm/sec.
I don't know what Nozzle size or layer height your using so I can't tell you what to put for the flow rate. You can find the formula easily enough on Google.
RE: A slightly different XL Enclosure design
I've used that filament quite a bit and I run the bed much hotter, 90c.
I started at 85c but the edges and ends of some pieces were curling up like they were melting. 70c, the Polymaker recommended bed temperature, didn't have the adhesion I wanted so upping that to 75c on the first layer and 70c after seems to be the best. I'm using a 0.6mm nozzle, structural IS, and the generic PETG preset with no other changes besides the temperatures.
RE: A slightly different XL Enclosure design
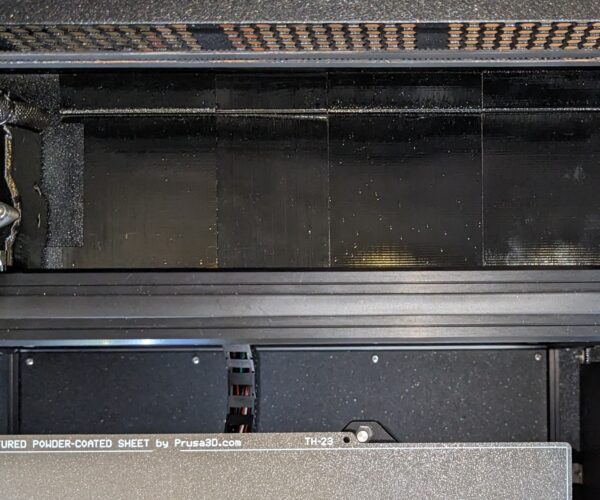
Vent cover on the back of the XL... held on by the side clips and held to the machine with ten small magnets.
I've been looking at the leaks in the machine, air wise, and there are plenty. Each metal panel requires a seal around it. The holes have to be plugged with something and a negative pressure system installed that will recirculate the air and filter the exhaust.
RE: A slightly different XL Enclosure design
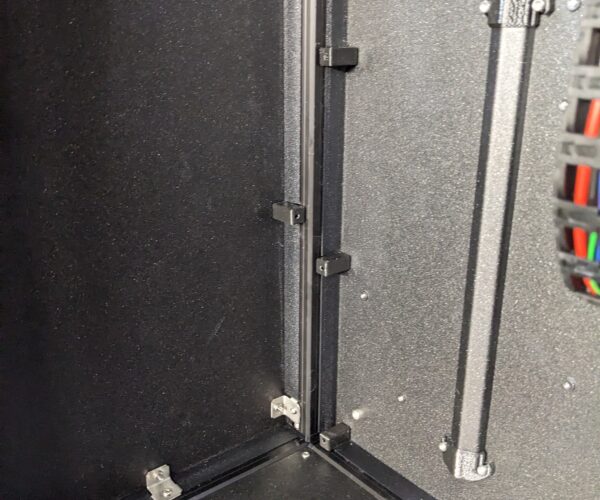
I designed an air gap seal printed in Shore 95A TPU (Overture) for the panels that worked out very nicely. One serendipitous discovery is that the panels, once deadened with the seal, no longer rang like a drum when struck. Instead, they give of a dull "thuck". I wonder if some of the resonance issues with the XL are due to these panels vibrating?
I added the seal to my printables page for those interested in doing the same to their printer: https://www.printables.com/model/742061-prusa-xl-extrusion-air-seal
RE: A slightly different XL Enclosure design
very cool idea
RE: A slightly different XL Enclosure design
do you think there's any benefit to printing in softer tpu like ninjaflex or even chinchilla?
RE: A slightly different XL Enclosure design
I have tons of tpu spools sitting around, I might give this a try.
RE:
I selected the 95A because it's soft enough to seal but stiff enough to keep its shape and apply pressure to the panel. I sized the seal to be add just the right amount of pressure so it's a dance between installability and the seal. A stiffer material would be too difficult to install and a softer material wouldn't allow enough pressure to both seal the gap and hold itself in the extrusion. This project was strangely satisfying as the seal looks great and is on the inside of the machine only, except for the handles. I printed long strips and cut them up with scissors. The longest was 405mm and goes in the bottom of the back. The rest are much shorter.
do you think there's any benefit to printing in softer tpu like ninjaflex or even chinchilla?
RE: A slightly different XL Enclosure design
Fair enough. I tend to keep more of the 95A stuff around(sainsmart), I was just curious. I have some things I have lined up to print in line ahead of this, and then I'm going on vacation in the middle of feb, but I still think I want to check this out. When it warms up I'm going to look into trying some ABS/ASA when I can roll the printer closer to the window and hook up ventilation. At this point I've not tried ASA/ABS on either the XL or the MK4 since it was cold when I finally got them lol
I selected the 95A because it's soft enough to seal but stiff enough to keep its shape and apply pressure to the panel. I sized the seal to be add just the right amount of pressure so it's a dance between installability and the seal. A stiffer material would be too difficult to install and a softer material wouldn't allow enough pressure to both seal the gap and hold itself in the extrusion.
do you think there's any benefit to printing in softer tpu like ninjaflex or even chinchilla?
RE: A slightly different XL Enclosure design
I added four more models for various other leaks in the chassis of the XL: Electrical ports (2), handle holes upper (2), handle holes lower (2), and the hole in the front-top extrusion (2). The models are in my printables page: https://www.printables.com/model/742061-prusa-xl-air-seals
RE: A slightly different XL Enclosure design
Awesome. I was looking more closely at my XL yesterday and I noticed some other holes that could be plugged too. I'm guess that's what you added them for. I'll take a look later, work's getting in the way haha.
Thanks!
I added four more models for various other leaks in the chassis of the XL: Electrical ports (2), handle holes upper (2), handle holes lower (2), and the hole in the front-top extrusion (2). The models are in my printables page: https://www.printables.com/model/742061-prusa-xl-air-seals
RE: A slightly different XL Enclosure design
The tool bays are the most complex problem to seal. I came up with three models that do the trick. I calculated the leak size for the overall machine to be about a 75 mm circle. Installing the seals reduced that to maybe a 5 mm circle. I think that will be good enough for my purposes.
This is a view between the tool bays with the tools removed.
This is the back left side where the grounding plug connects. The motor cables require a small cutout in the part. The parts are extremely thing (1 mm) so are easy to cut.
This is the empty part of the bay. I have a two tool XL.
This is underneath the empty part of the tool bay.
This is under the second tool. Note how tight everything is.
I found this to be an acceptable way to print tall and thin things I needed multiple copies of. The models are touching at the center and stick together slightly. That keeps them from going all weird when they get tall. The highest is 60 mm.
The models are on my printables page: https://www.printables.com/model/742061-prusa-xl-air-seals

