Dimensional Accuracy
Are there any models/guides on how to calibrate the SL1 for dimensional accuracy and tolerance. I just finished a print to find that all the circles are smaller than designed(Holes and perimeters ).
Keep on smiling -
RE: Dimensional Accuracy
Could it have more to do with software?
I’ve been printing jewellery designed to fit specific stones down to 0.1mm and I’ve hadn’t perfect fits every time.
RE: Dimensional Accuracy
I will print a 10x10x10mm cube and we will see the accuracy but based on my experience so far it is +-0,1mm
RE: Dimensional Accuracy
Circles are the problem I am getting perfect results on square shapes thats what is driving me nuts
Keep on smiling -
RE: Dimensional Accuracy
Then definitely you should print one test object, and create an issue on github for this, it seems to be related to slicer
RE: Dimensional Accuracy
That is what I was asking for a calibration print to trouble shoot this. Do you know of any?
Keep on smiling -
RE: Dimensional Accuracy
Hm, we can draw one, let's say 10x10mm cube with 5mm hole in the center
RE: Dimensional Accuracy
When exporting models to STL format from a drawing program (CAD) curves and circles are converted to segments of straight lines. Most exporters have a setting to determine, how accurate this conversion is.
As your squares are accurate, but circles are not, I think this could be the problem.
Have a look at my models on Printables.com 😉
RE: Dimensional Accuracy
On Facebook I'm told this accuracy is good enough for most applications. But I wanted a more in depth answer on tuning resins.
This was basically my post:
How do we calibrate a resin that hasn't been added to prusaslicer? We don't have calibration print for SL1 yet ☹️
I got this from another Facebook group:
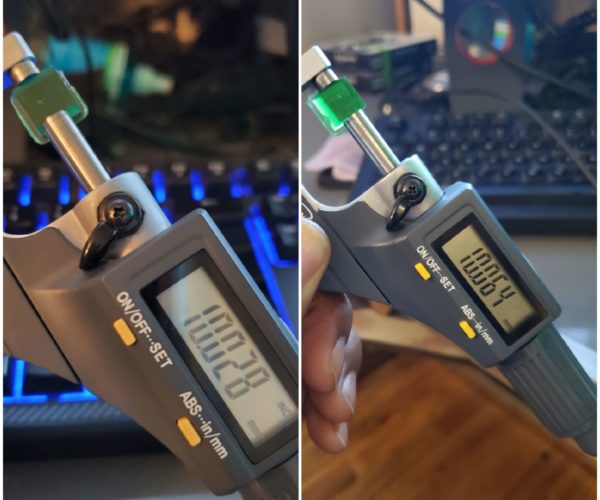
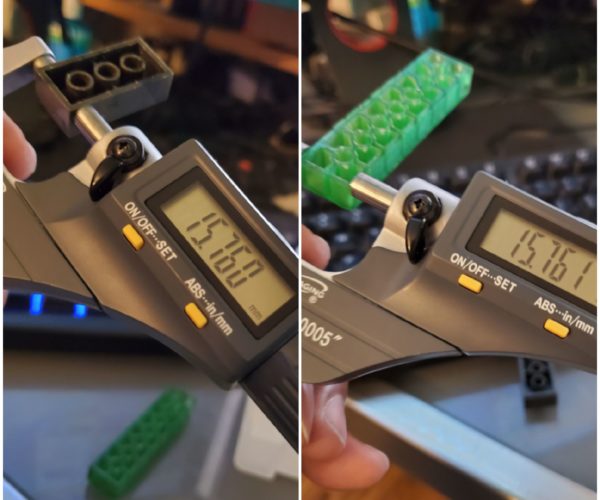
""If the printer doesn't have a built in calibration print there's another simple option. You need to print a 10*10*5mm rectangle either on the build plate or on supports it doesn't matter. After printing measure the block with digital calipers, if it's 9.5mm increase the cure time, 10.5mm decrease and so on until you have it printing at exactly 10mm. With some practice it only takes 2 or 3 test prints to get dialed in. There's nothing else to do, it's a very straight forward method.""
Nevermind the pad of calibration square in the photo.... It's just for leverage to remove it.
I started with exposure of 7sec per layer...
So my question is since I'm close to 10mm would I be better served lowering my exposure time slightly as suggested above or use the dimension adjustment in prusaslicer?
edit:
updated the photo with split screen. Rotated the square to show x<-->y difference.
So 1+ for actual calibration print.. my test only help for straight walls @ 0.05 layer height.
Need to calibrate:
Different layer heights
Different shapes like circles
Fine points
Etc for unsupported resins.
Prusa MK3 > MK4s
Prusa MK2.5 kit > MK3 > MK3s > MK4s
Prusa SL1 3D printer + Curing and Washing Machine (day1 order)
Taz6 - taken apart for space
CR10s4 - upgrading
Delta 3ku - dont use
RE: Dimensional Accuracy
Made a github issue:
https://github.com/prusa3d/Prusa-Firmware-SL1/issues/6
Basically asking prusa to release a exposure finder type tool for finding good exposure settings for a given resin. This is related to dimensional accuracy.
Prusa MK3 > MK4s
Prusa MK2.5 kit > MK3 > MK3s > MK4s
Prusa SL1 3D printer + Curing and Washing Machine (day1 order)
Taz6 - taken apart for space
CR10s4 - upgrading
Delta 3ku - dont use
RE: Dimensional Accuracy
@clearmindmetals
can you please clarify your comment
are you saying that you have or you havent had perfect results?

