Resin calibration object issues
Finally after 2 months I have done my first SL1 print (long story that I'll post at some point) and it is the resin calibration object with Elegoo water washable resin. Per the bottle I set the base time to 60s and started the layer time at 6s with 0.5s increments (bottle suggested 8s).
I had unpacked the printer earlier in the day and ran it through the setup wizard and calibration. The print itself appeared to work fine though with ~30 minutes left it was making a slow but constant beeping sound. There were no error messages or any other indicators of an issue that I could find. After it finished I ran it through the CW1 for the wash, scraped the parts off (half were much harder than the other half), tossed them in the CW1 again for the drying/curing cycle and went to bed.
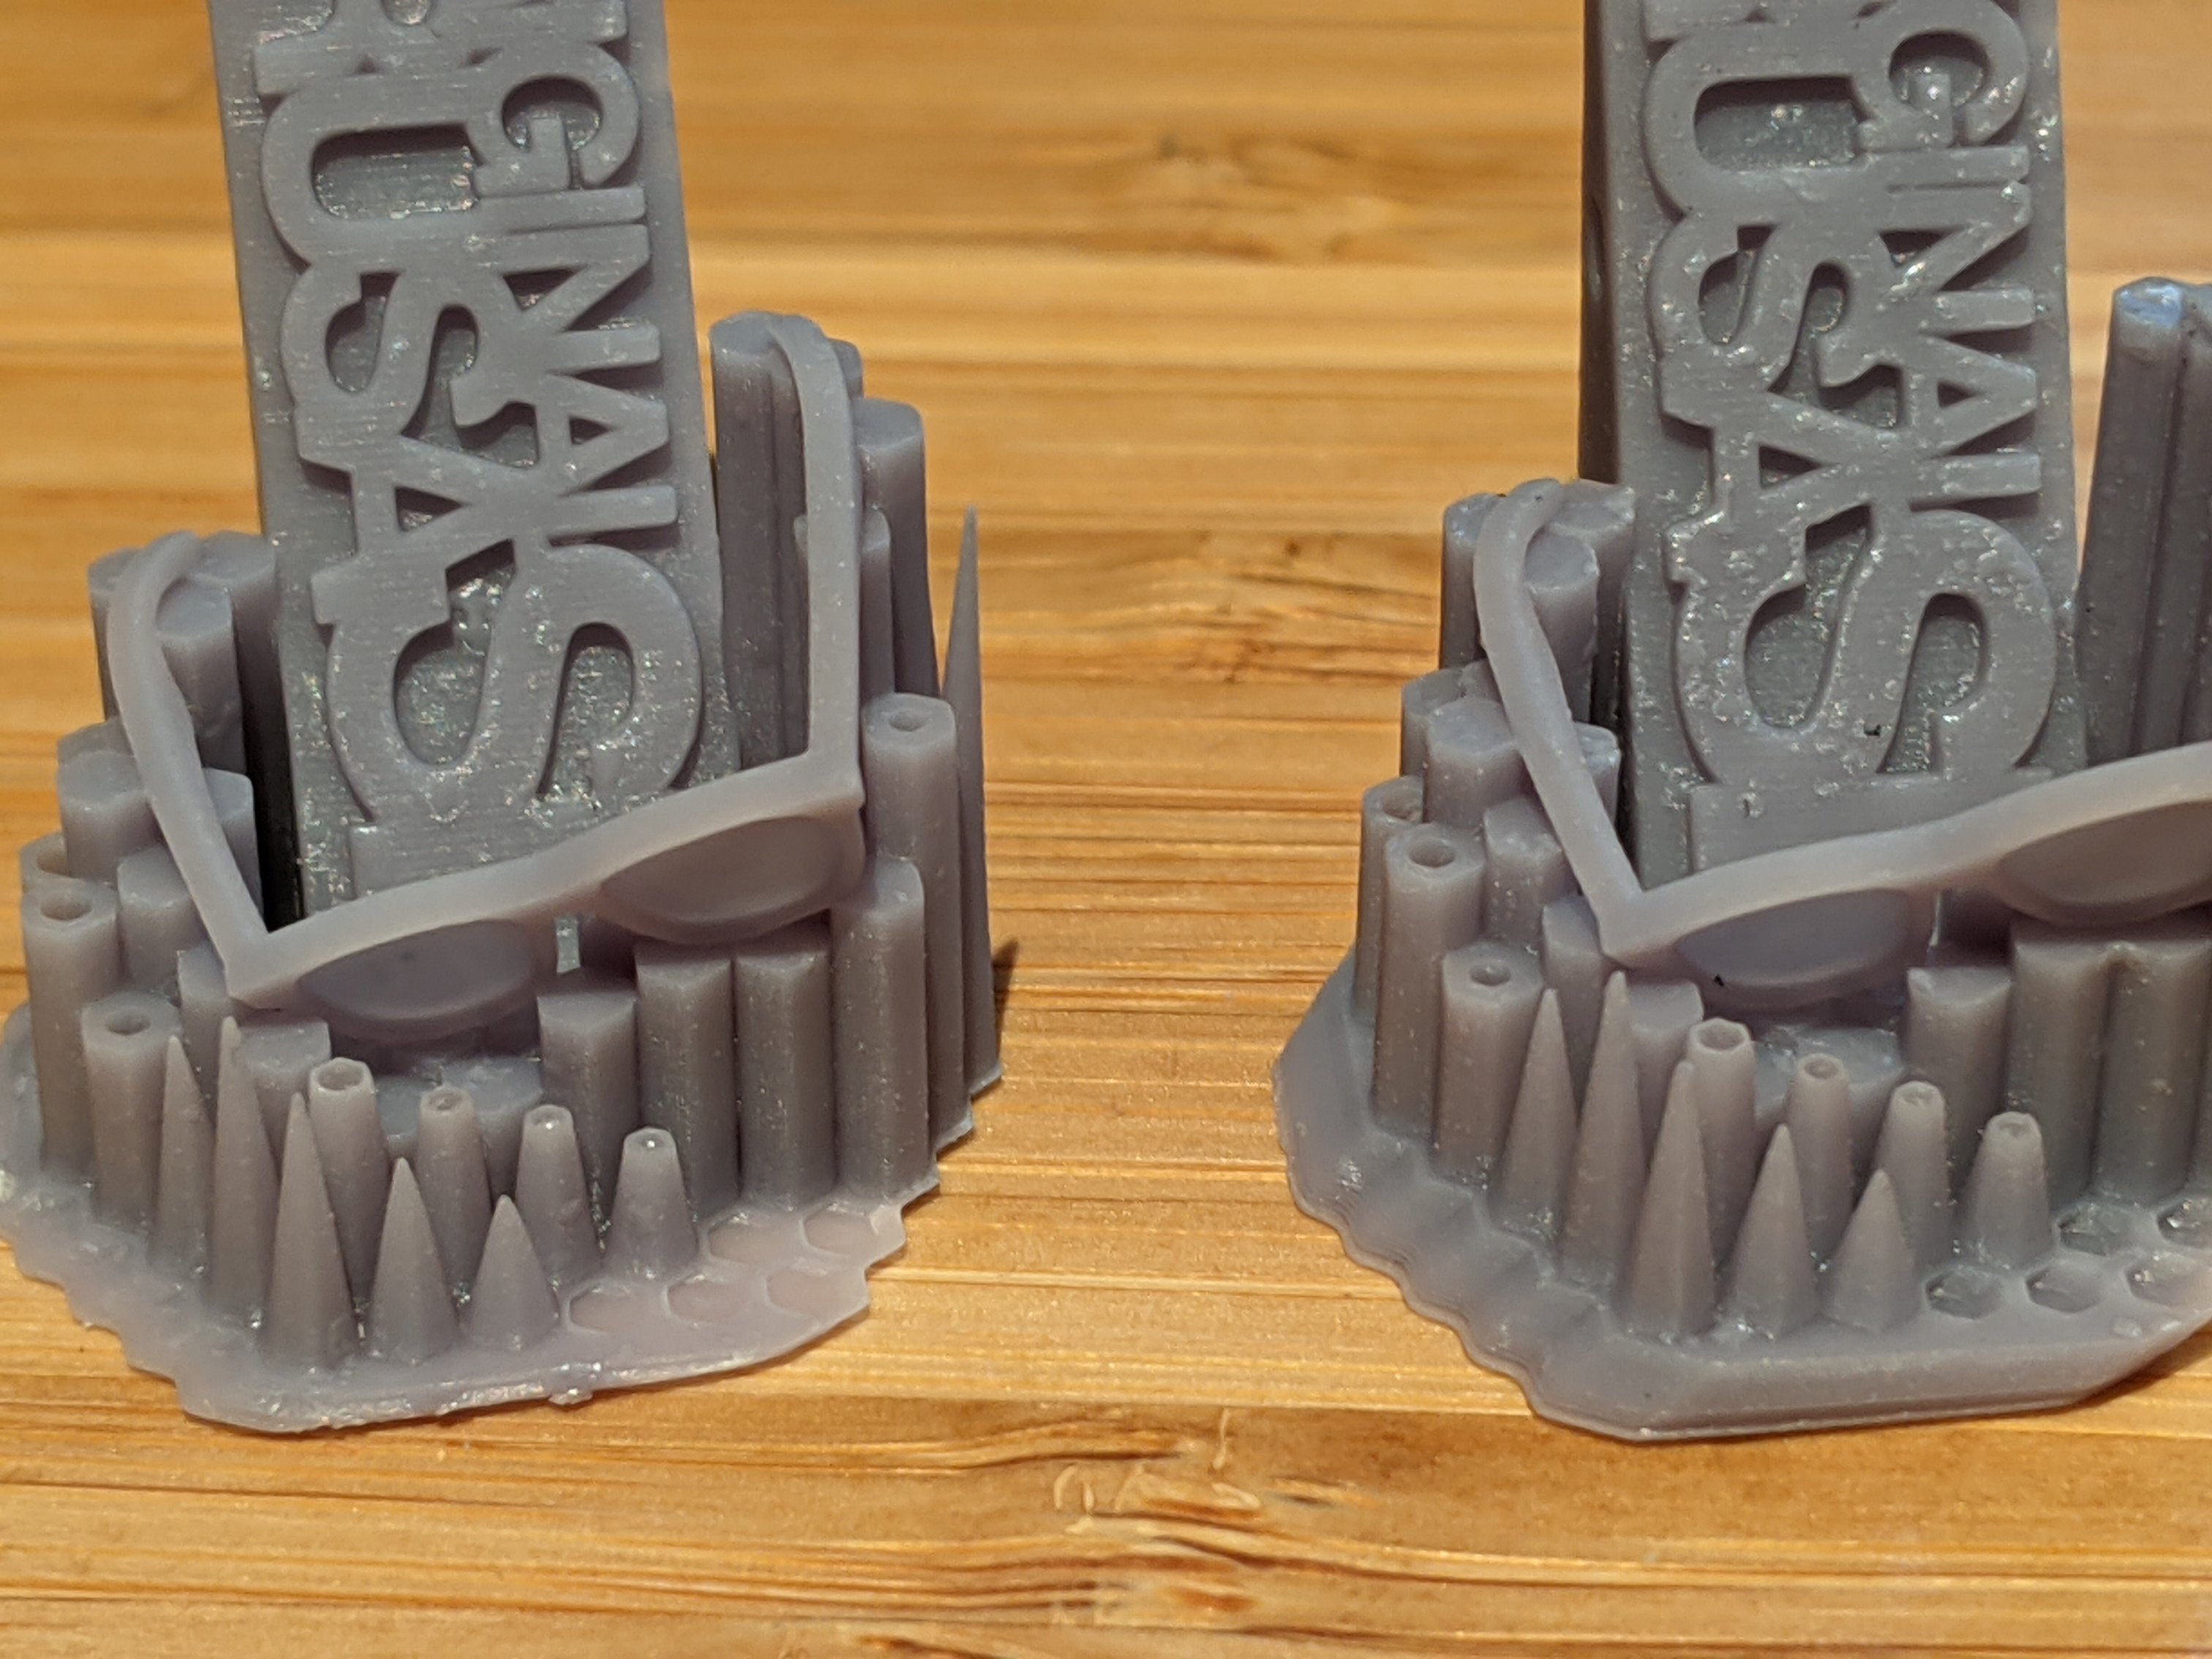
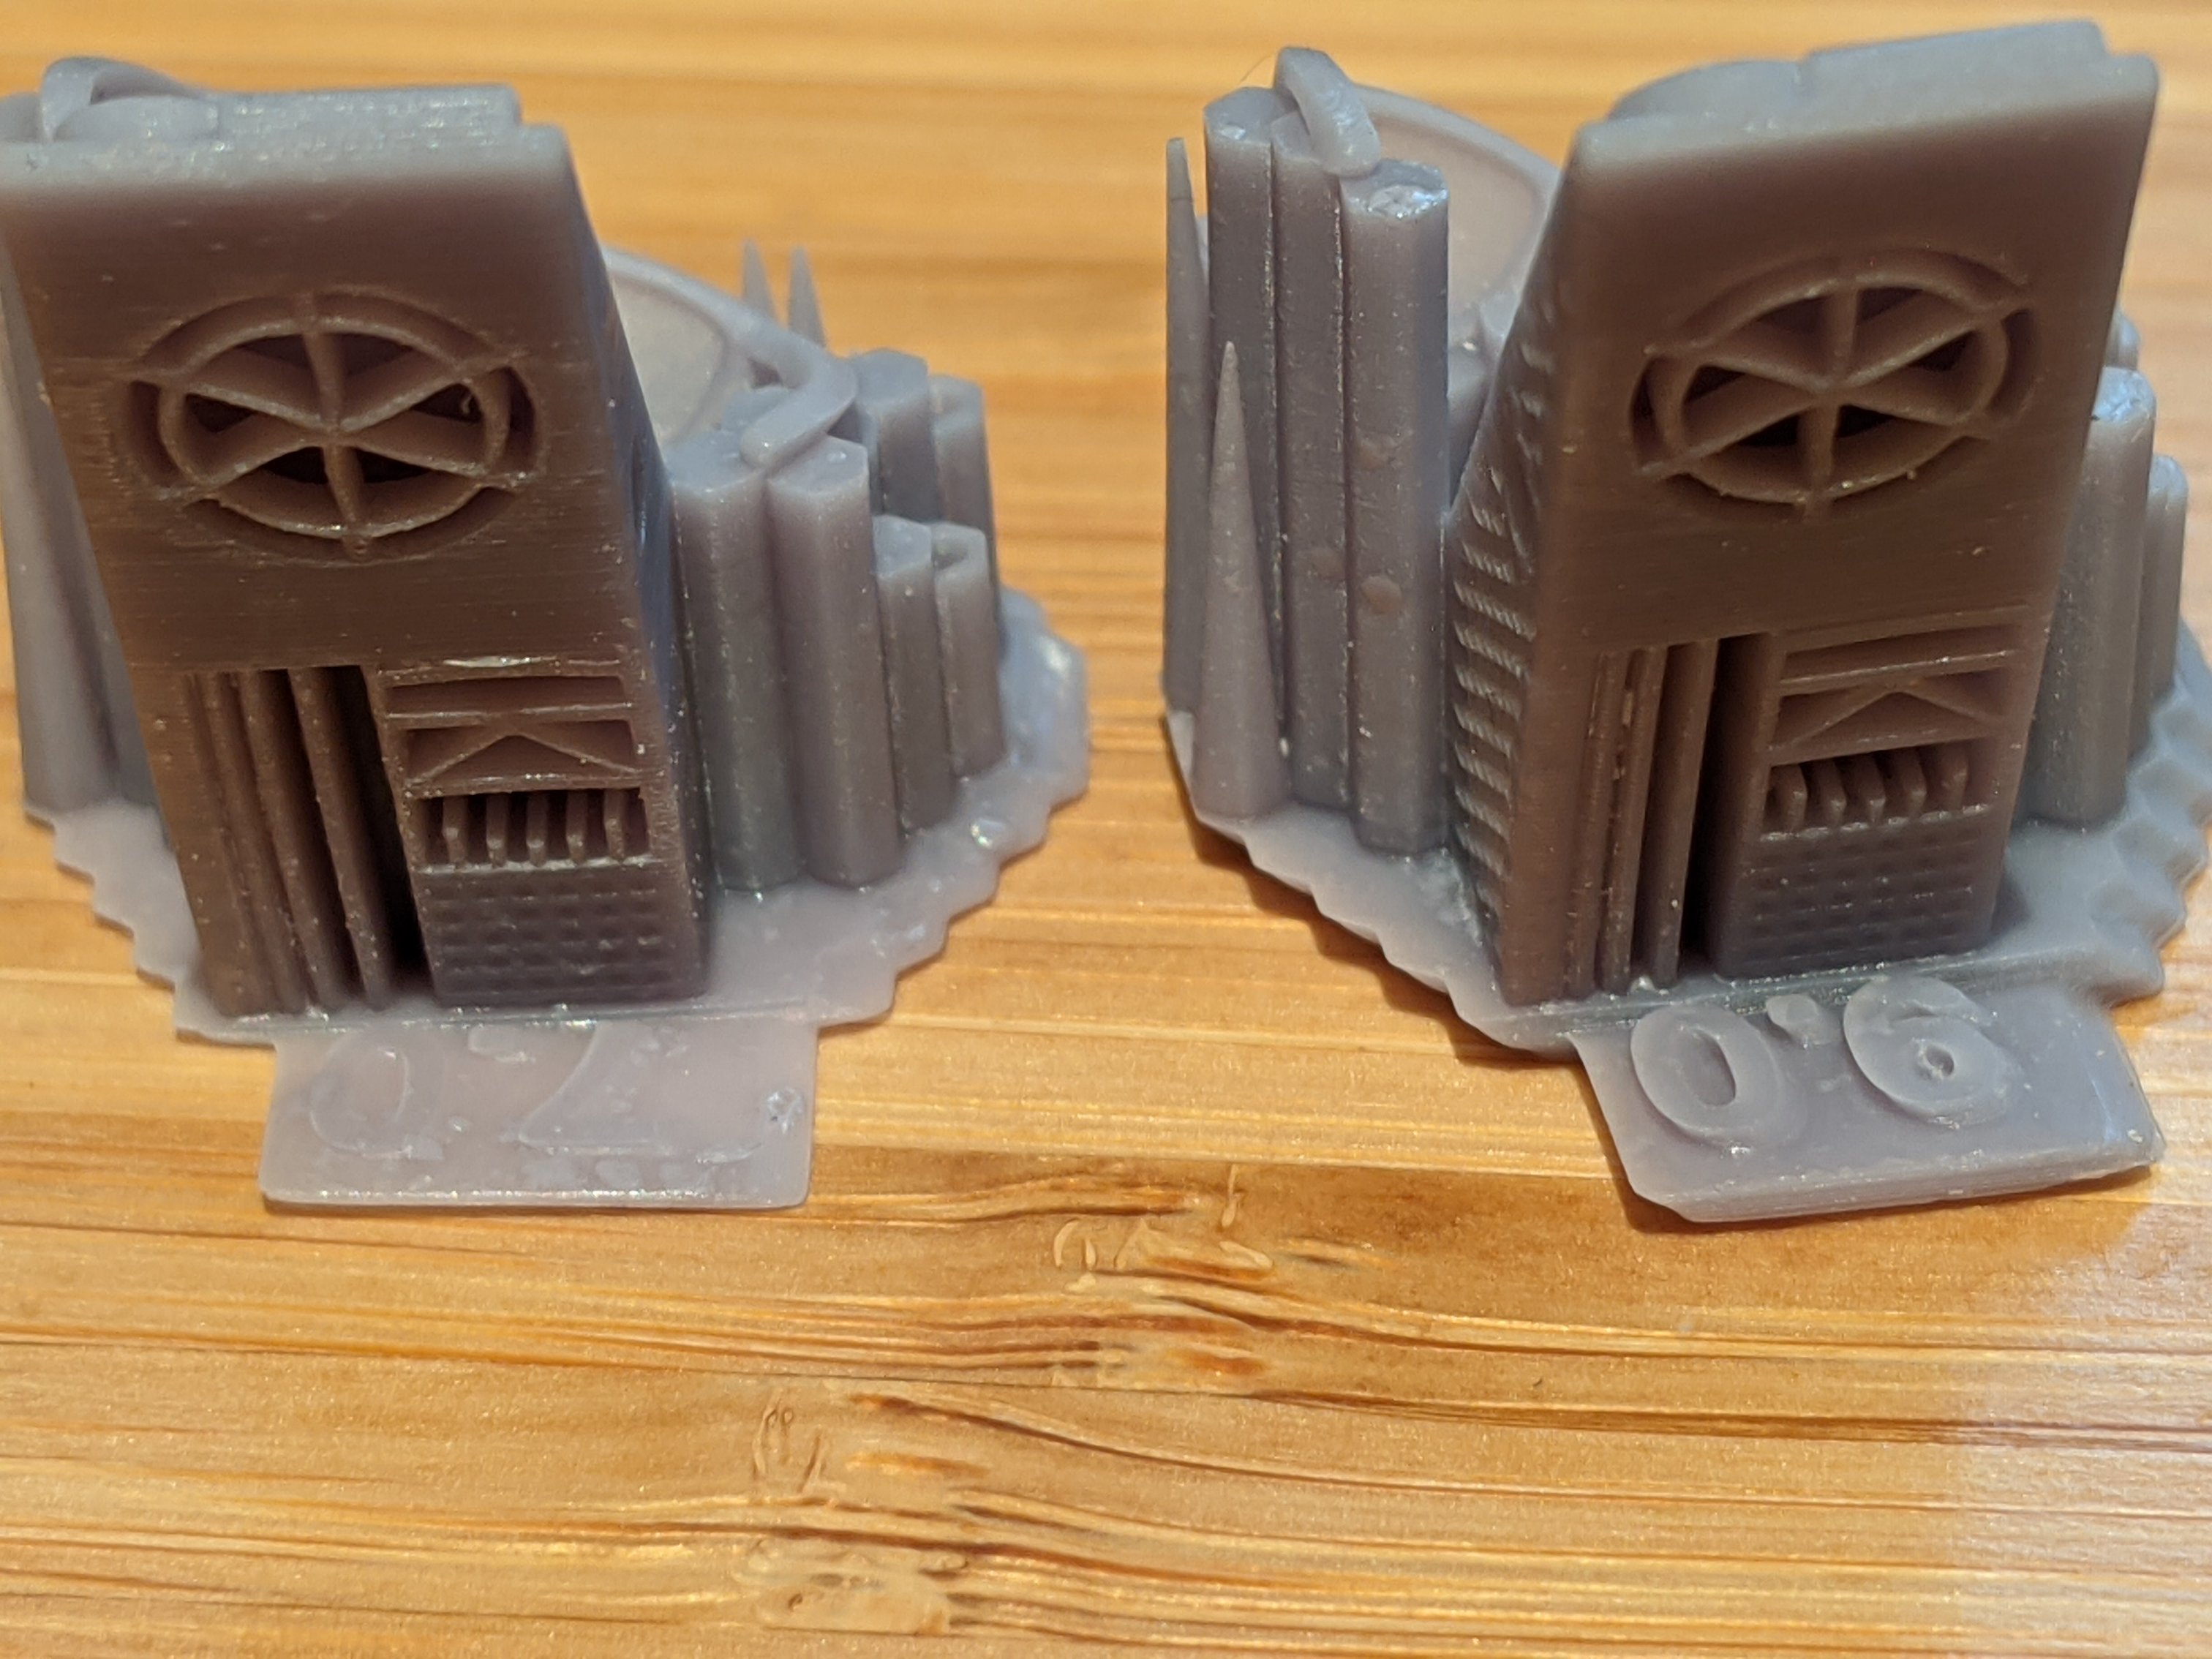
This morning while comparing them to the calibration document I noticed 2 things shown in the following pictures. The first is that half have significantly thicker bases that the other half (and I'm guessing that it's the thinner ones that were the trouble coming off the plate). The second is that they appear to have a shift towards the back of the plate.
Anyone have any ideas what might be going on here?
RE: Resin calibration object issues
Prusa sent me https://help.prusa3d.com/en/article/skewed-deformed-prints-sl1_1793 and while the example shown there looks exactly like what I'm seeing, I was confident that the build plate and tank were secure. So this evening I recalibrated the printer again, made really sure everything was tight, and still got the same slanted result.
RE: Resin calibration object issues
The print itself appeared to work fine though with ~30 minutes left it was making a slow but constant beeping sound. There were no error messages or any other indicators of an issue that I could find.
Well at least one mystery appears to be solved, the beeping. The recalibrating I mentioned in my last post was a bit of an ordeal because the first few attempts failed due to complaints about the cover not being closed when it really was. I ended up having to pull the printer apart to check the switch and it's connection. Initially the switch failed continuity tests at the switch itself, but when I moved on to check at the plug I found it was seated correctly and the continuity tests passed. After putting things back together the calibration test finally passed.
While making a video of the first few layers being printed, I opened the cover and got the beeping noise that I heard the night before. So I suspect that my cover switch might not be entirely happy.
RE: Resin calibration object issues
So on a whim of "maybe something is wrong with their test" I sliced my own model to see what would happen. Other than issues related to some adhesion issues and that I didn't print at an optimal orientation (printed standing straight up and down so I could better notice any shifting). There were two models on the plate, but only one arose from the resin though 🙁
So I think it's good and the lean is just an issue with the calibration object.
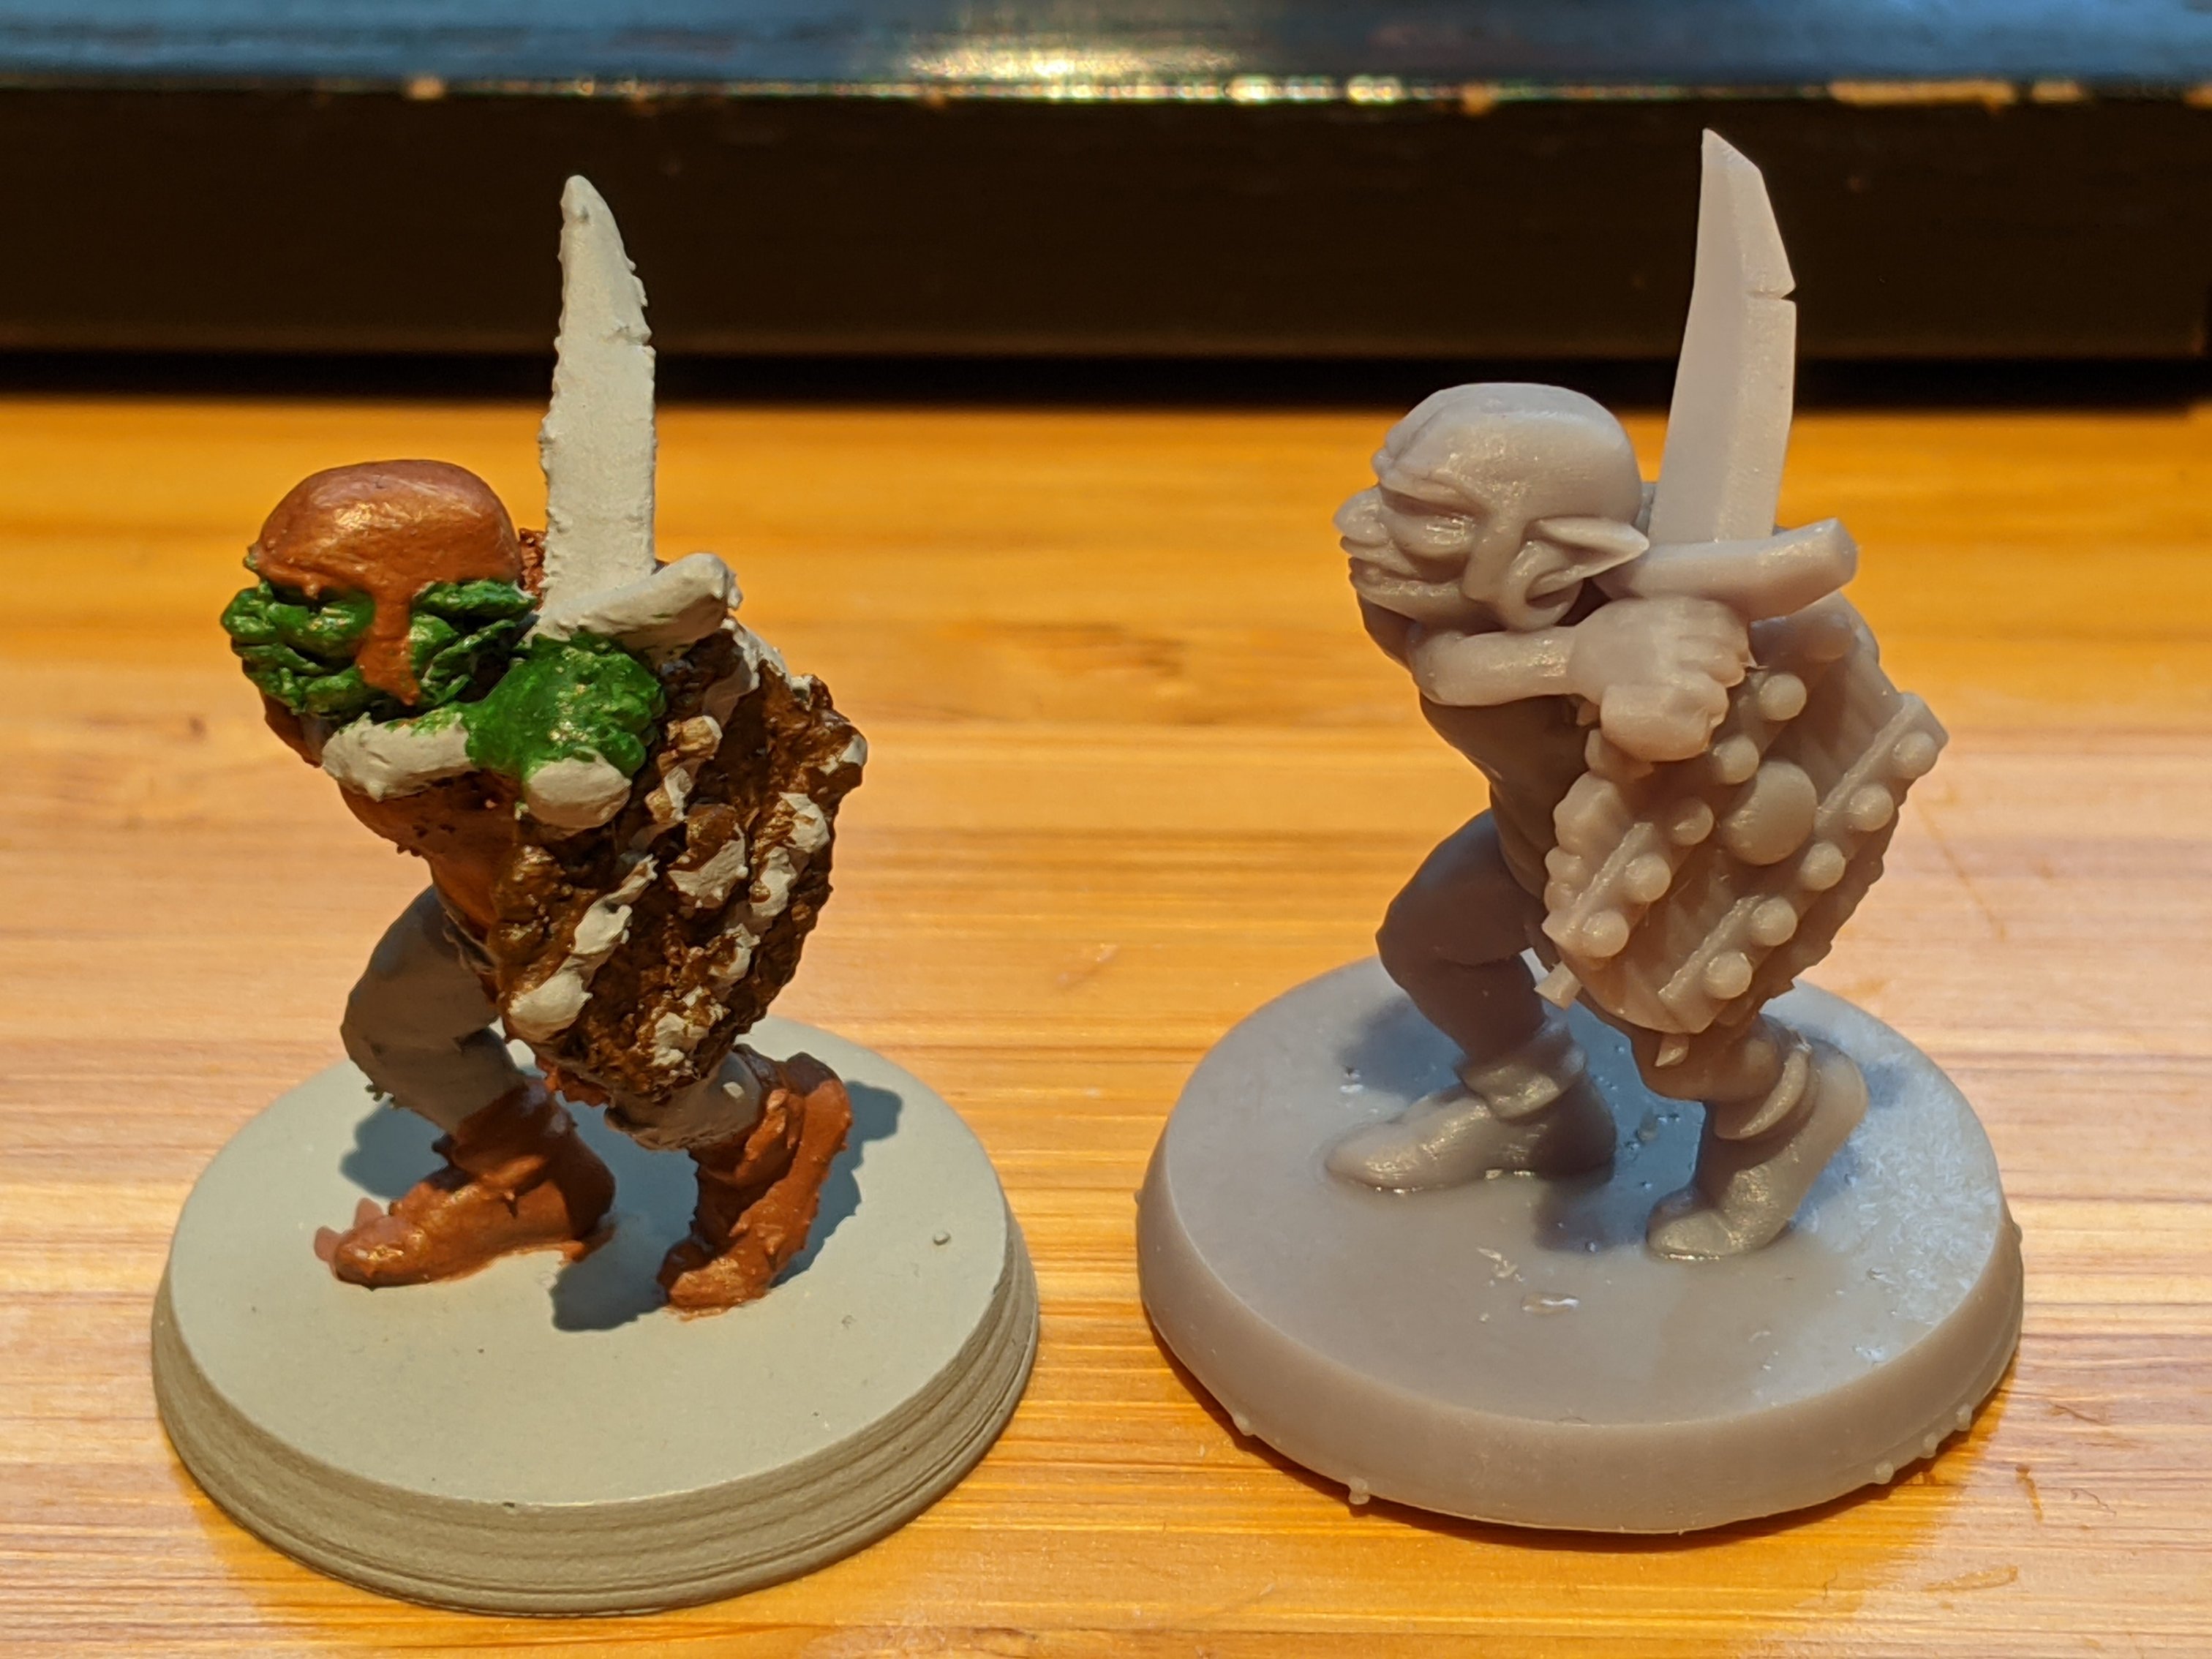
MK3S with 0.4 nozzle and 0.05 layers vs SL1 @ 0.025 layers
RE: Resin calibration object issues
Or not. I ended up with more failed prints and in cases where I had multiple objects at the front and rear of the platform it was clear that there was a discrepancy in both the thickness and angle between the two.
I did finally seem to resolve the issue by telling the printer where to stick it's calibration and I manually leveled the platform.
While running the calibration for the umpteenth time I threw a level on spots to see what was really happening. After doing the LCD adjustment the LCD and tank showed level and matched the frame of the printer itself. Prior to lowering the platform, the platform was also showing level while loose. I tested again at the point where it wanted me to tighten things down and both the platform and tank showed a slant towards the front of the machine. I locked it in place and started the factory supplied Joe pushing the "honeycomb" model. I stopped it after a few millimetres because I couldn't hear the separation from the FEP so I thought it had failed completely. It actually was still printing, but it clearly had the lean issue as well.
Next was to create some 20x20x2mm squares with a 45 degree edge that I put 6 copies directly on the platform (no pad and no support) turned at various angles. I ran the print and (As expected) the "lean" was evident. So I manually leveled the platform with my level and tried the squares again. I won't claim the results are perfect, but I couldn't visually see any issue as all edges had the desired edge and all the squares appeared to be the same height.
I've since thrown a few other prints at it that have come out "perfect".
So if you run into issues with it's auto-leveling, give a level a shot and see if that helps.