Wallet Style Filament Slack Take Up
I'd really love to work with TheBall - we're doing different things but have a lot of commonality. I'd like to keep this thread open to anyone interested in developing this sort of device for the community.
---------------------------------------------
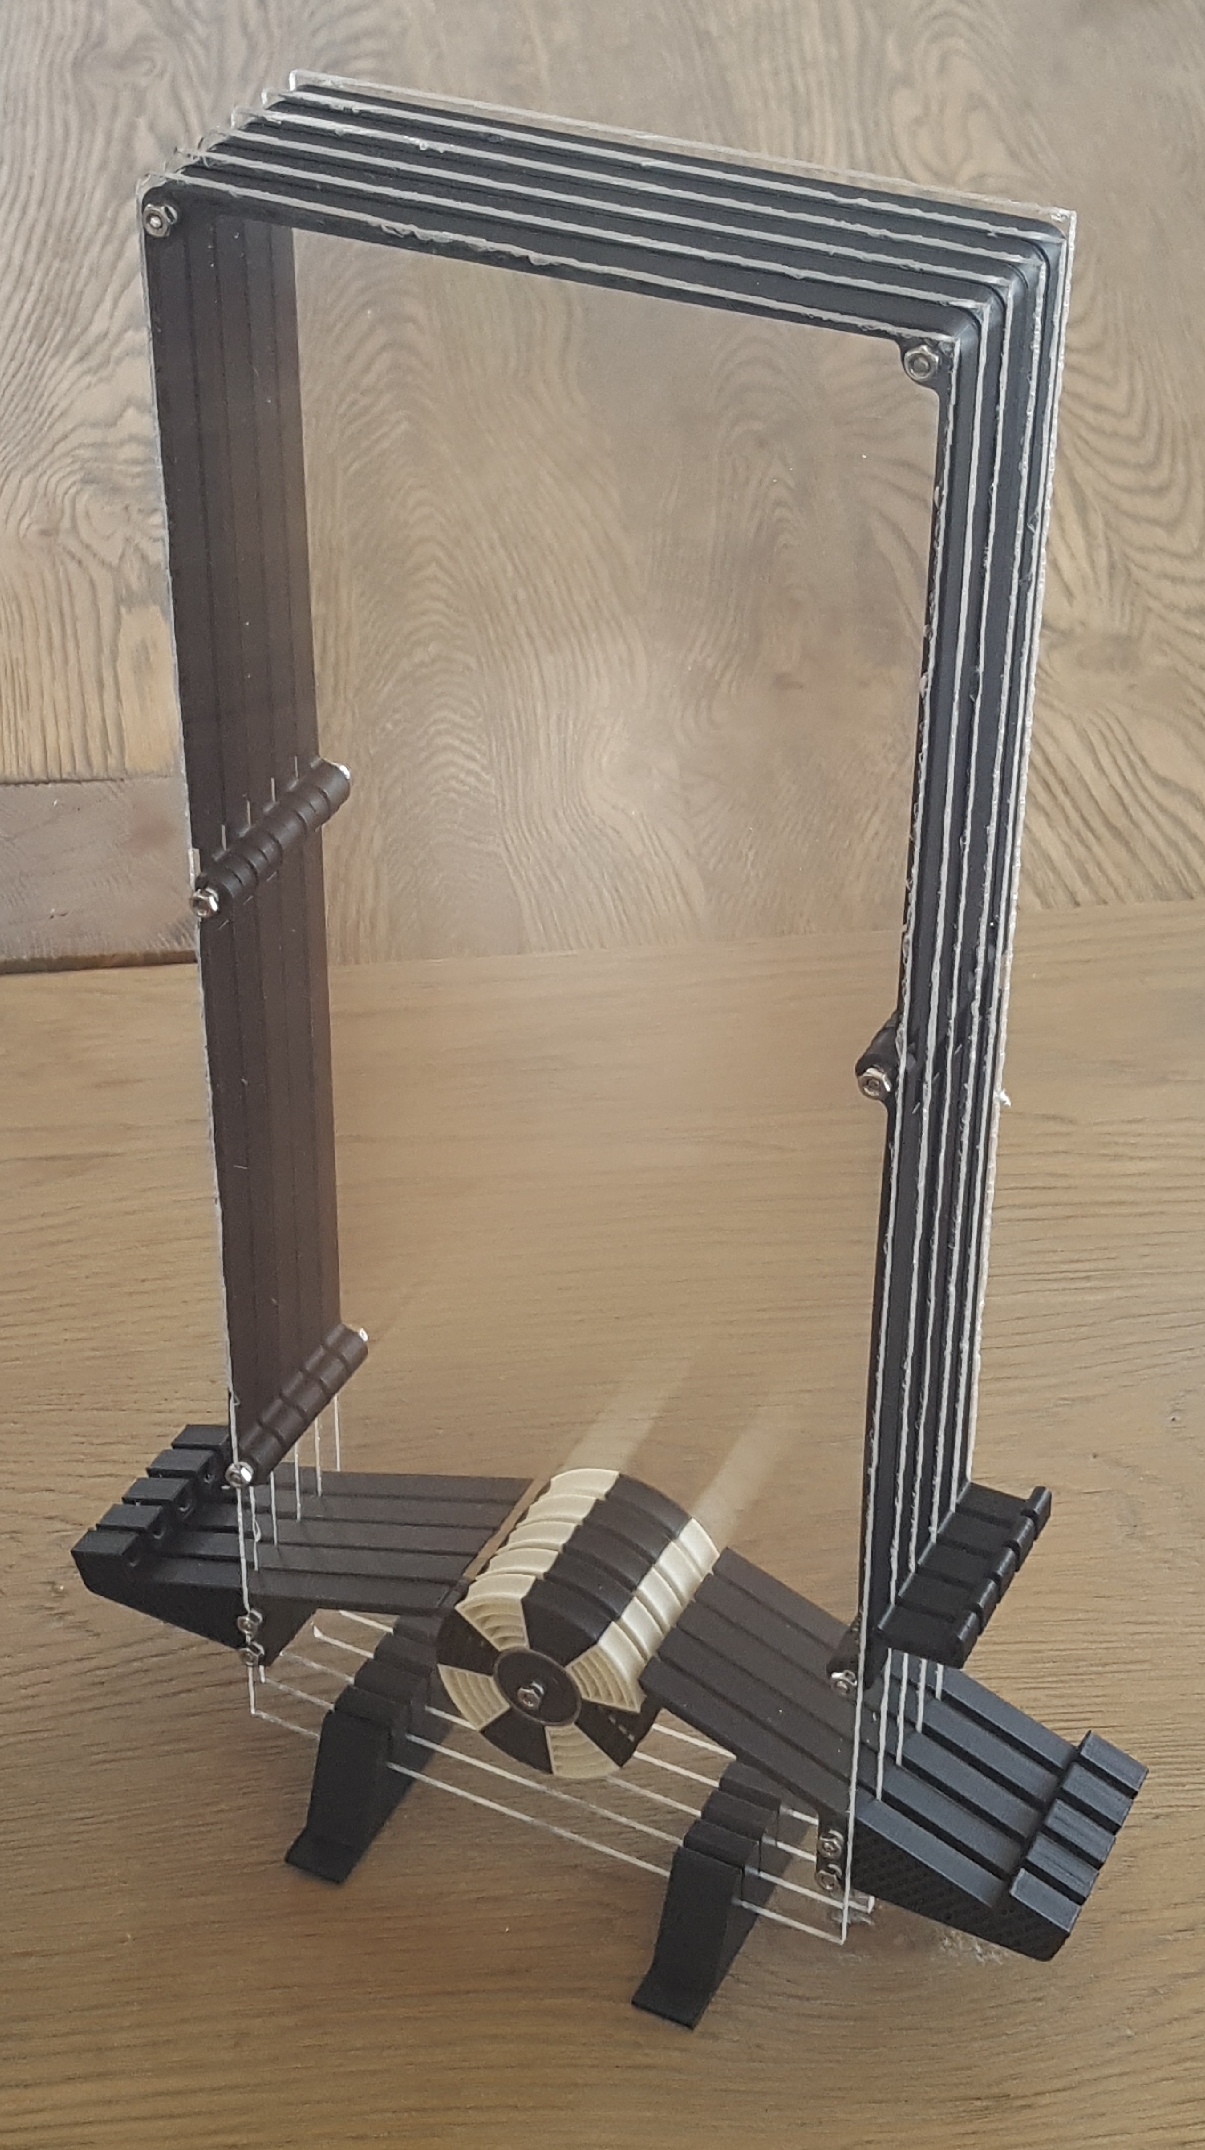
It seems a couple of us have been thinking in the same direction. I've come up with a quick-and-dirty prototype for the stock set-up, and user TheBall ( https://shop.prusa3d.com/forum/memberlist.php?mode=viewprofile&u=4772 ) has a really beautiful set up which is conceptually very similar at https://shop.prusa3d.com/forum/user-mods-octoprint-enclosures-nozzles--f57/mmuv2-first-impresisons-and-lackrack-setup-t24877.html
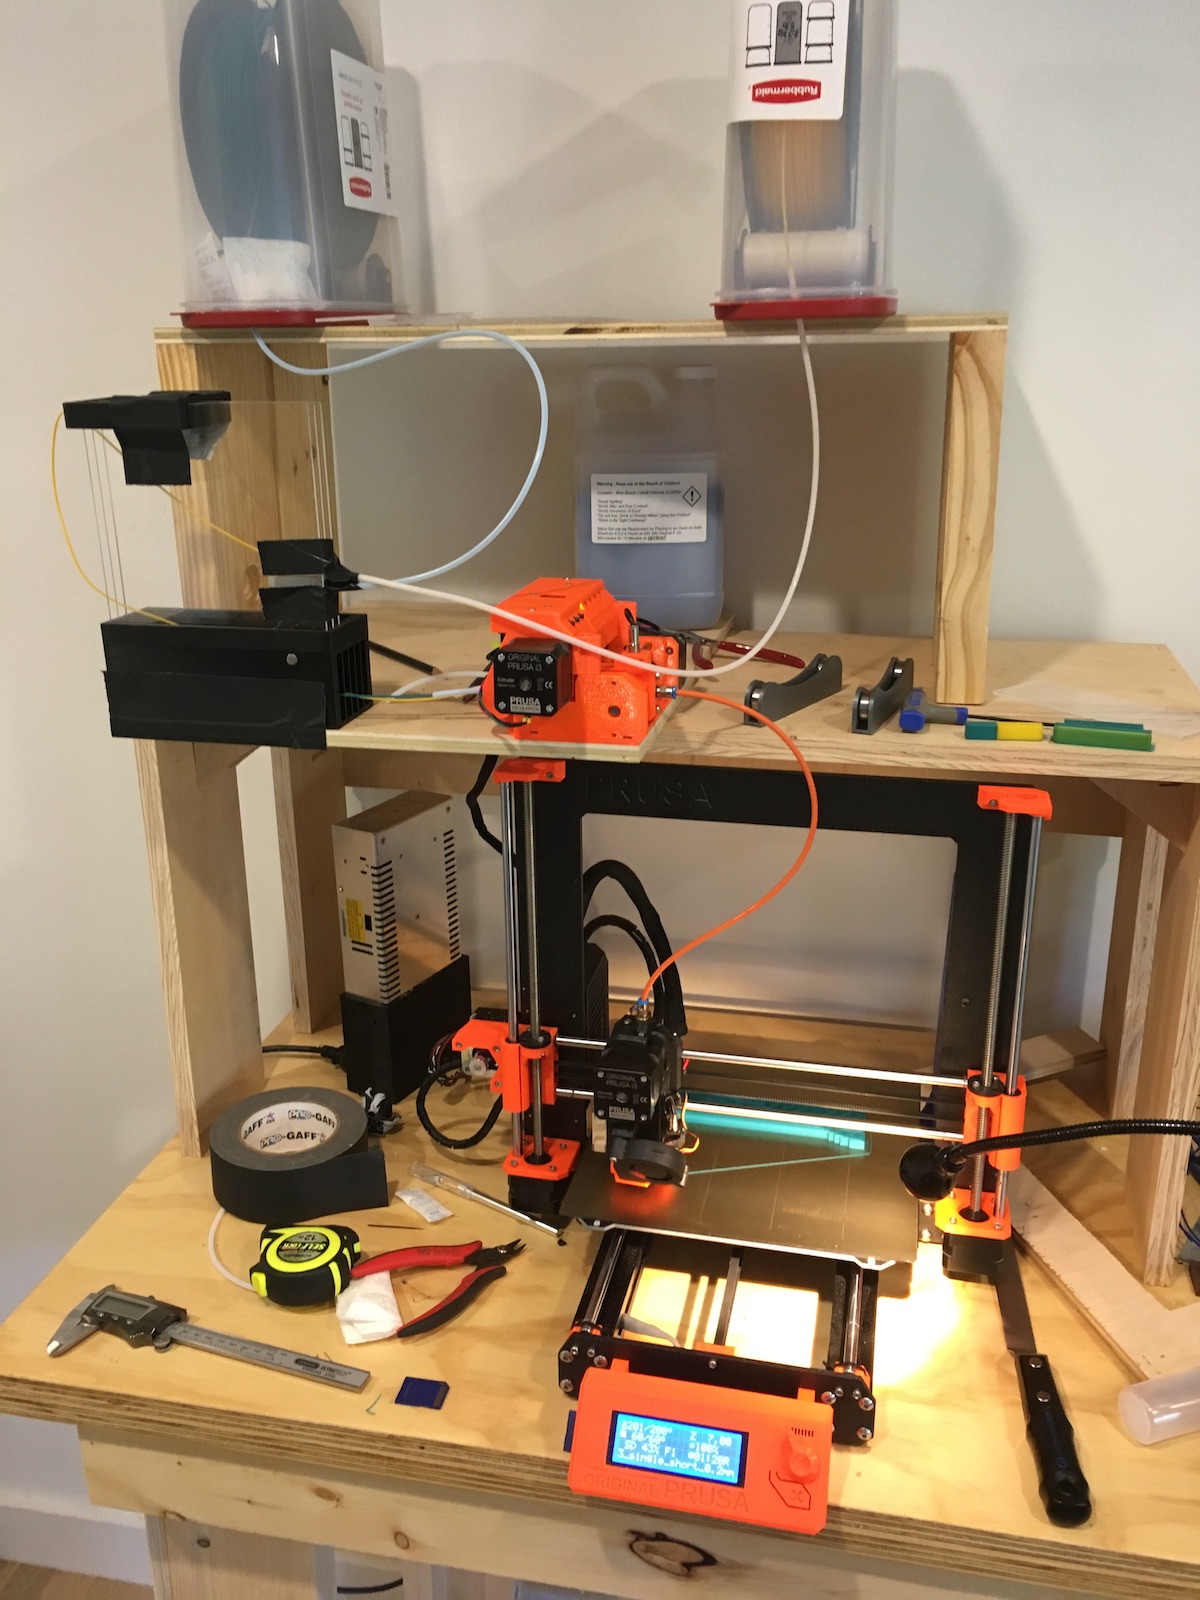
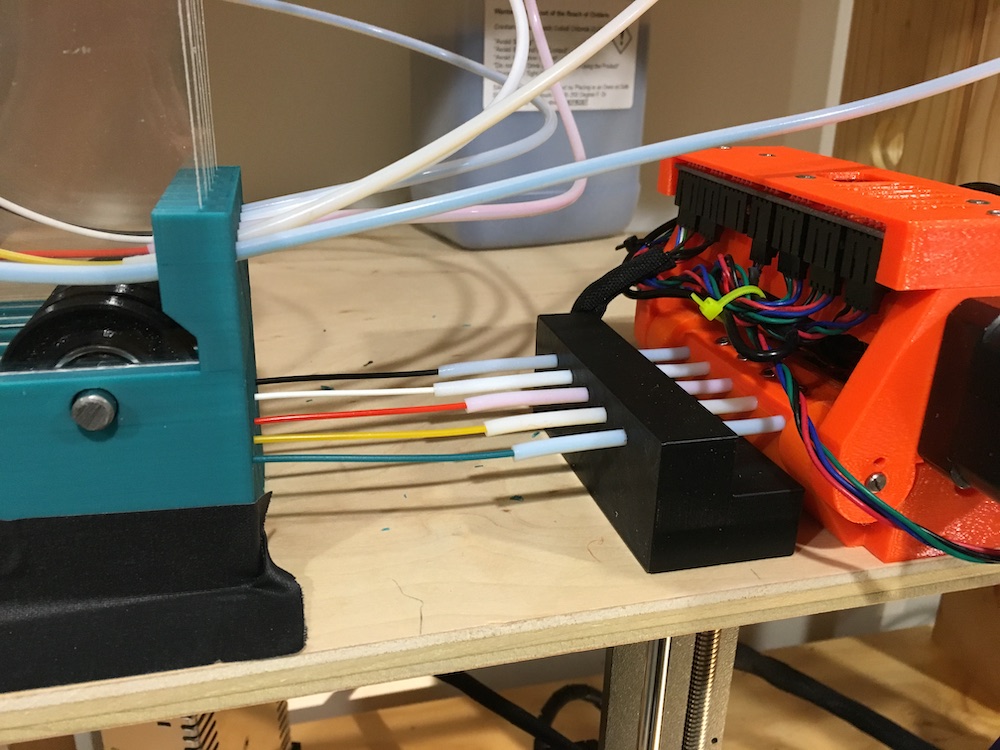
His really nice work:
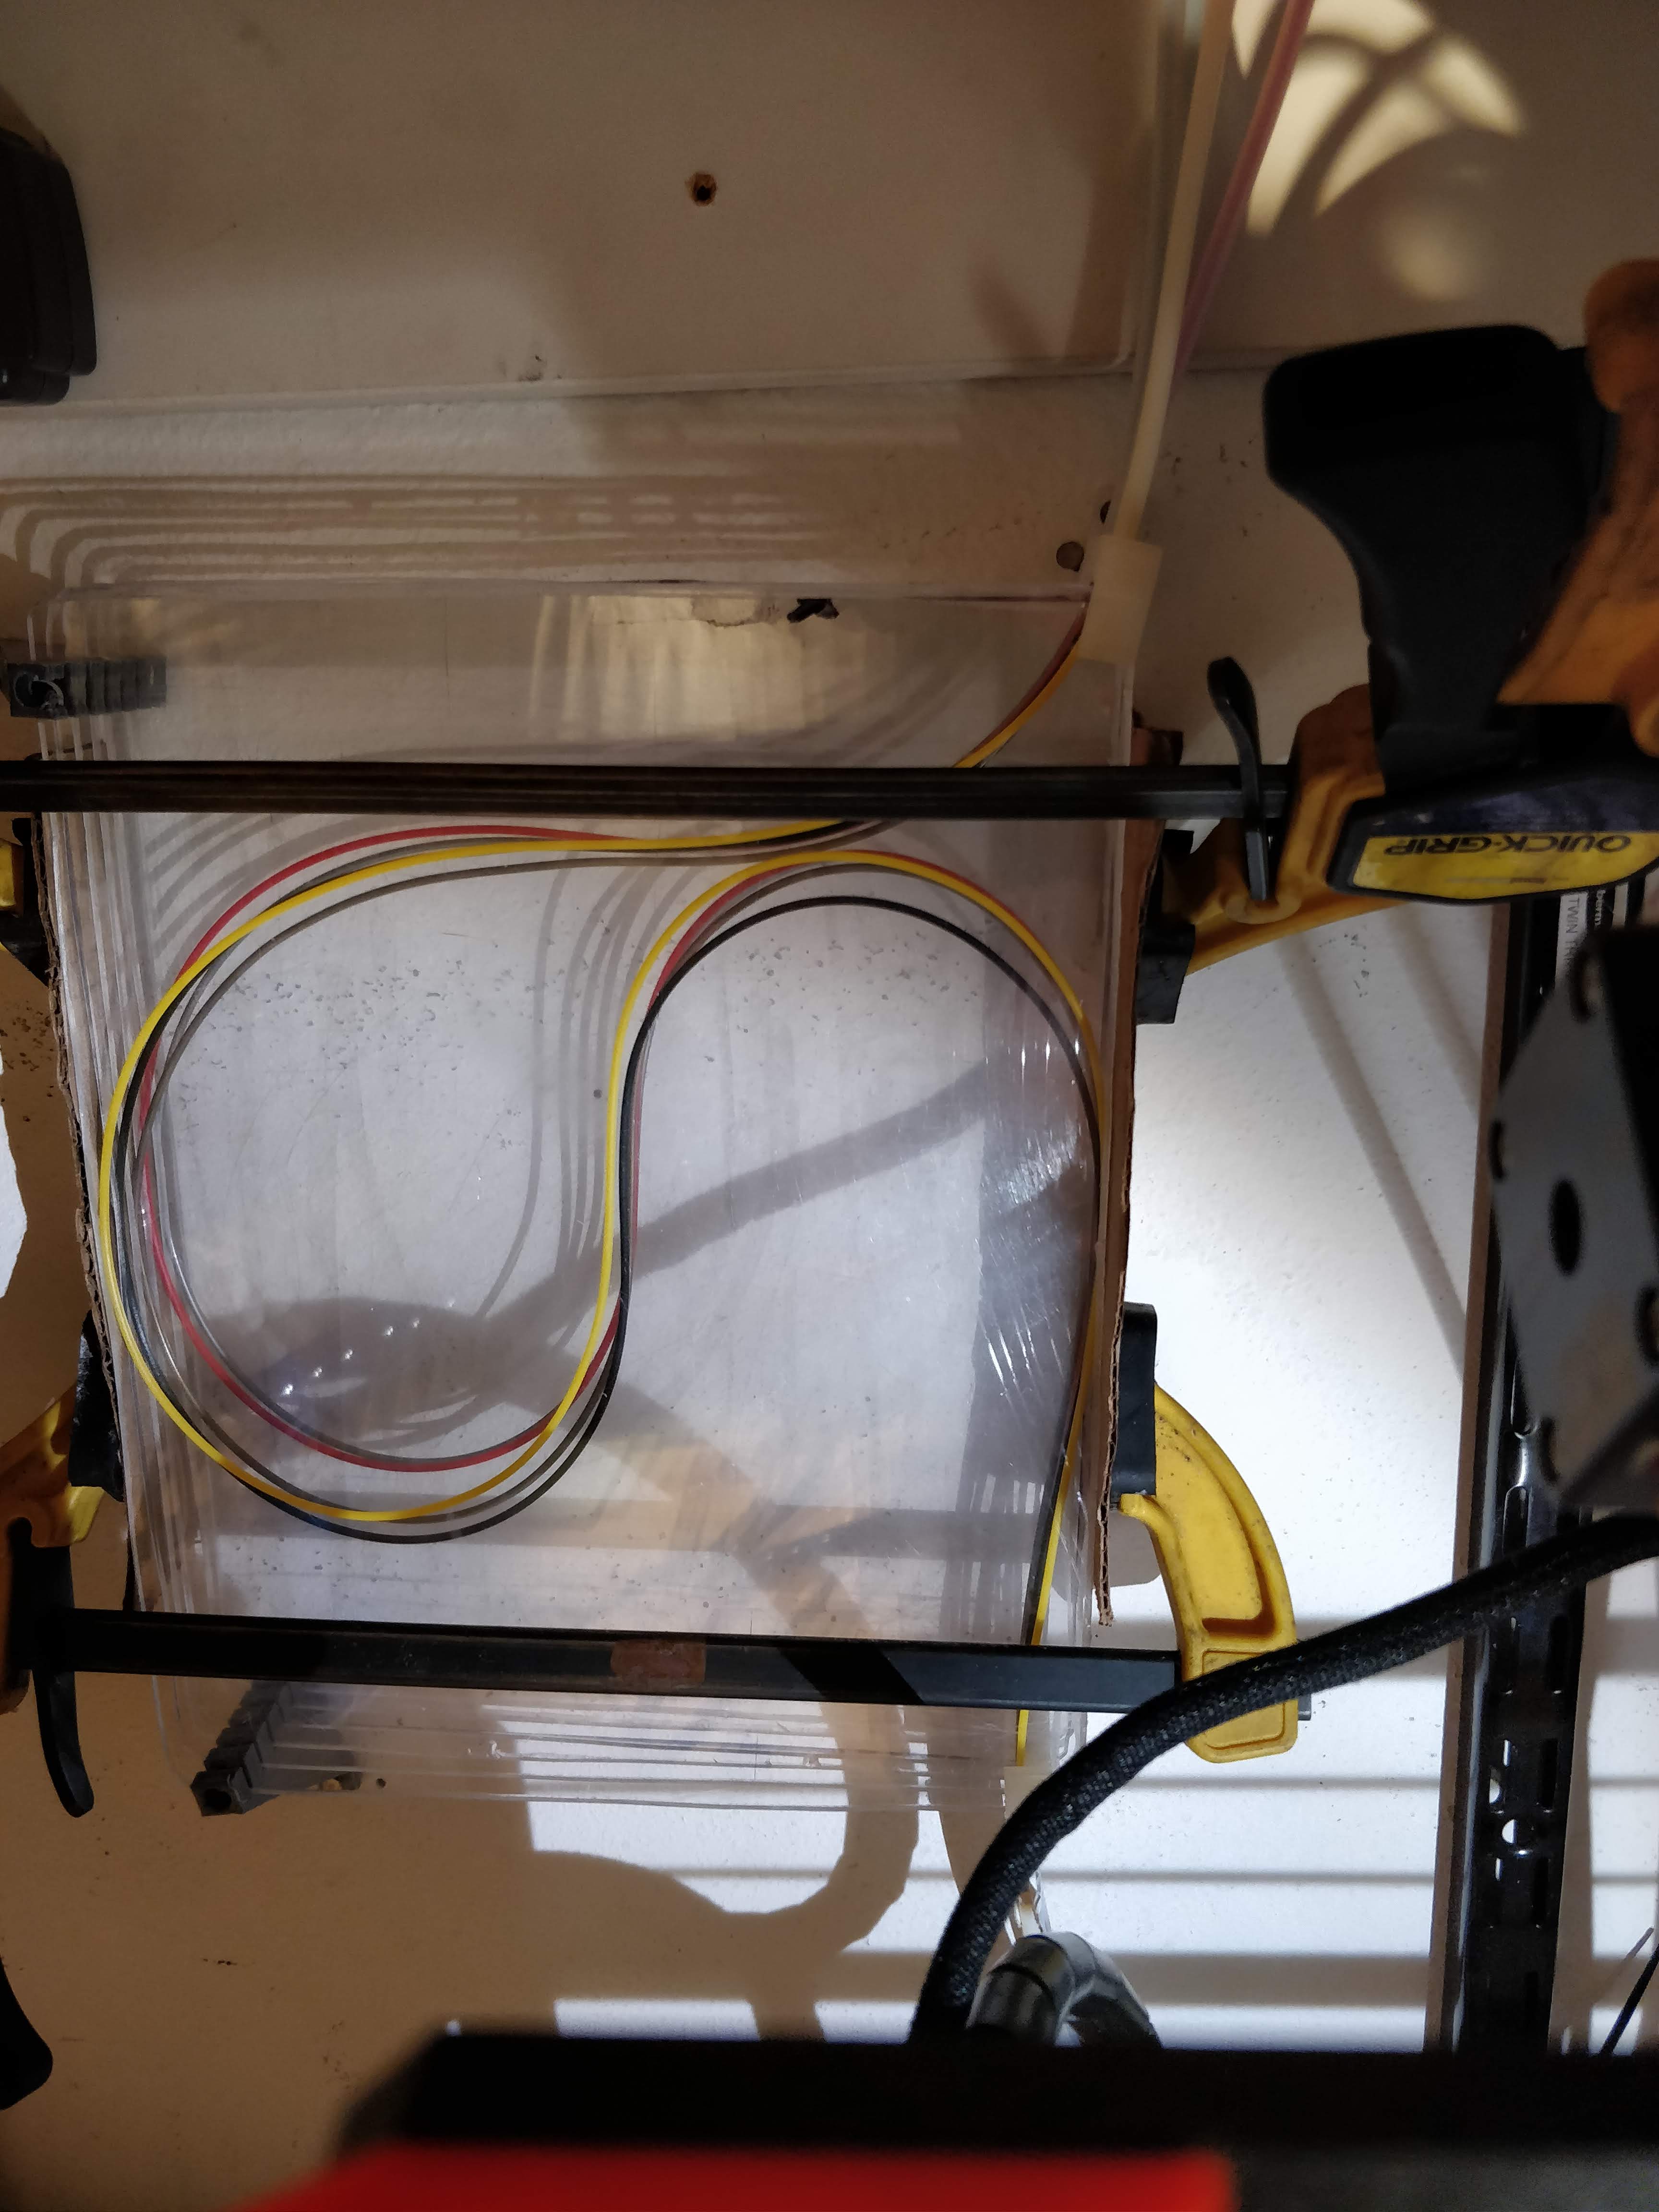
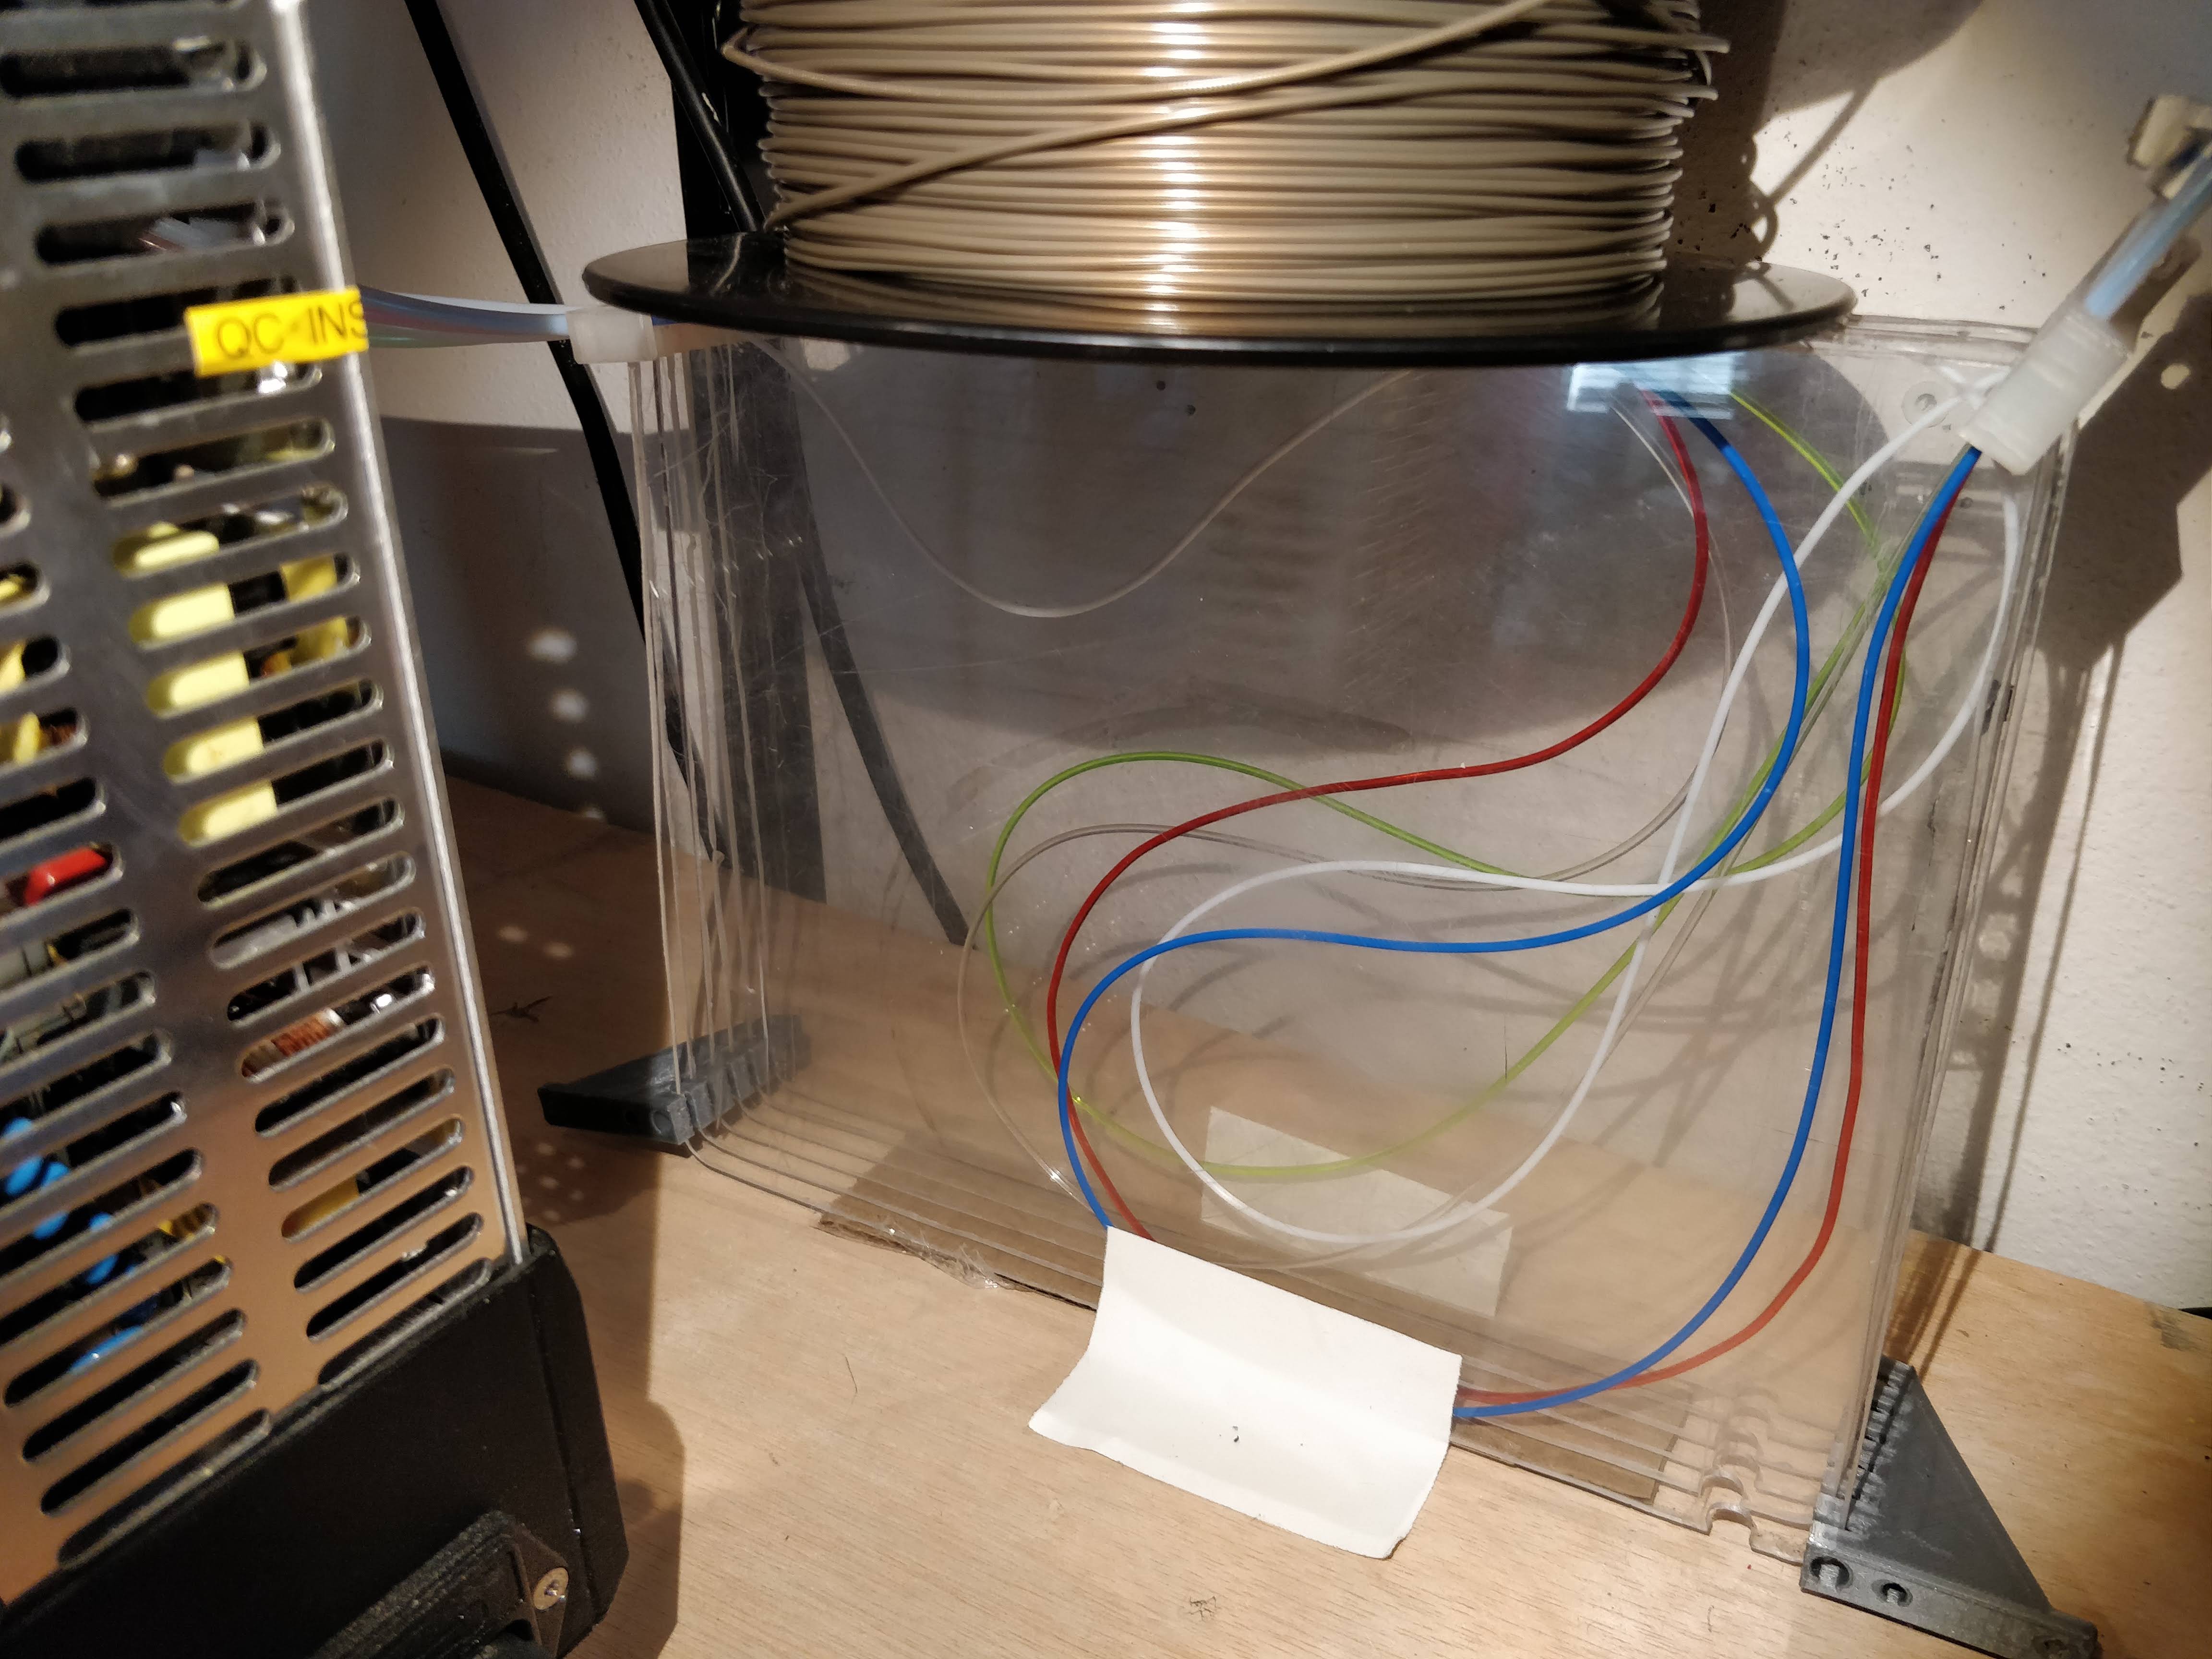
and what I've got right this second running and don't want to tear down:
What I like about mine: It can be made pretty cheaply - no bearings needed. It's a nice reuse of them, and I originally had some, but just a slight angle between inlet and outlet does the trick. Ten degrees, maybe? If you do this, you are making the ends of the PTFE be your bearing, but it's very minimal, much less than the drag through the clever pivot brake thing that came with the printer.
I feel you can have them straight and use a single piece of PTFE tubing perpendicular to the filament path and layers (parallel to your screws) which would be more than enough encouragement to get the bend going the right way, and again be very minimal drag.
My side pieces (currently cardboard - I have them clamped on "in case I need to work on it" but in practice I've not needed to take it apart once since I added these grooves which lets the filament slip out of the frame easily.
Given that that's the case, I think I'll make both of the far side brackets as one piece with an integral wall and post it.
I'd originally envisioned this as a wallet which could be flipped open like a book to service any individual line, but am less convinced about that now.
Finally, to further encheapenate the whole thing, you COULD use cardboard for the sides. I don't recommend this, being able to see which channel is taking the filament has been invaluable in getting my MMU up and running.
I maintain an informal list of San Diego, CA 3D printing enthusiasts. PM me for details. If you include a contact email and I can add you to the informal mailing list.
Re: Wallet Style Filament Slack Take Up
A few ideas for future development:
This works fine on its side, you could make it as a tray under the printer or under a shelf.
My first endeavors here was running each filament through old food jars, but it took up a ton of space. The pictures are even more embarrassing. 🙂
Obviously this could be made nicely, probably in a traingular or pie slice arrangement, laser cute, combs and all.
I maintain an informal list of San Diego, CA 3D printing enthusiasts. PM me for details. If you include a contact email and I can add you to the informal mailing list.
Re: Wallet Style Filament Slack Take Up
I've spent all day on this. You and TheBall have inspired me. I have my MMU2 spread out on a table, and it's working great, but I'd like to move it back to it's spot with a manageable spool system above it.
I bought some 2.5mm thick acrylic on Friday and I've been working on my design ever since. I want to mount my MMU2 on a flat surface above the printer (similar to TheBall, but likely not a Lack table). I'll put my spools above that. The filament control will therefore have a 90degree bend and feed directly into the MMU2. I'm figuring 2-4cm between the filament control and the MMU2, possibly with no PTFE between the MMU2 and the filament control (or very short).
It would be pretty straightforward if it weren't for the issue of easily loading filament:
When I put a new spool on, I need to feed curved filament in from the top and have it quickly/easily/consistently pop out the front so I can feed it into the MMU2. The simple solution is a tool or moving part (I think this is what TheBall is pursuing) that guides the filament during loading. Makes total sense, but that bugs me. I'm looking for some magic geometry that will guide the filament from the top to the front (under the wheel) without impeding the unload. And no moving parts. Not clear if it is possible.
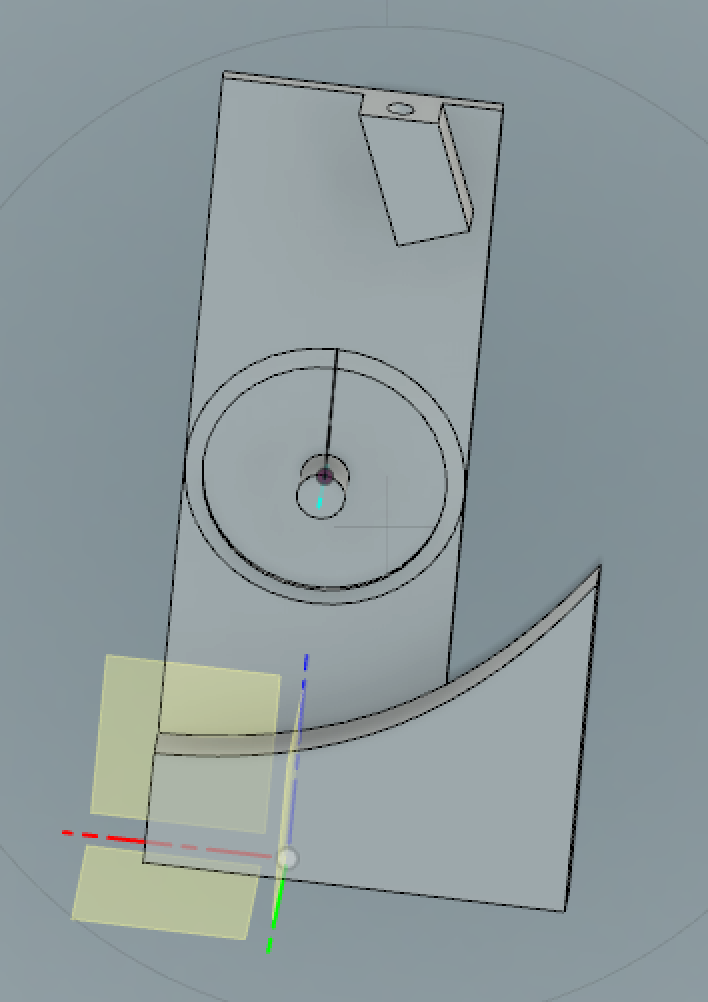
My current design (which does *not* work):
There will be a 40mm wheel mounted on a 22mm OD 608 bearing on that post. The wheel is surrounded by an angled guard to keep the filament from catching under the wheel. Five copies of this (with acrylic extending to the right) will be my basic setup.
Loading on this works ok (if the filament is curved the right way) but on unload the filament pushes back into the spool. Still working on it.
Re: Wallet Style Filament Slack Take Up
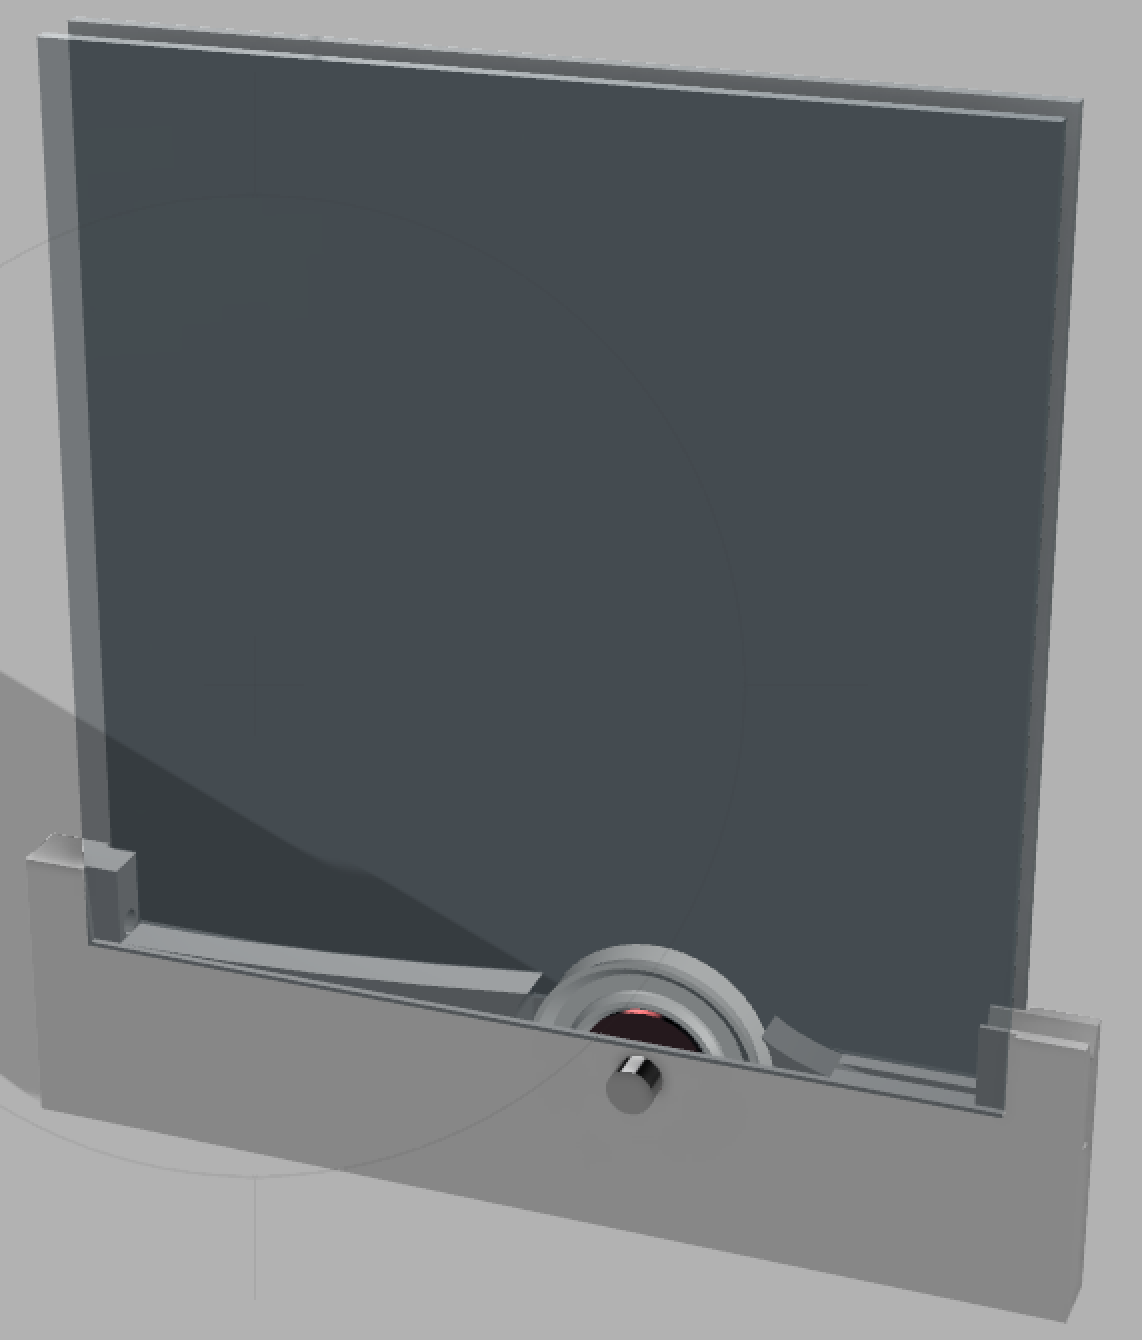
Latest iteration. Redesigned the wheel for less friction, base with PTFE hole in back, slot for filament in front.
General concept:
Usage:
I've got a single instance printing now, testing tonight.
Re: Wallet Style Filament Slack Take Up
Back from a week out of the country and making progress in a totally new direction. I'm turning my MMU2 sideways!
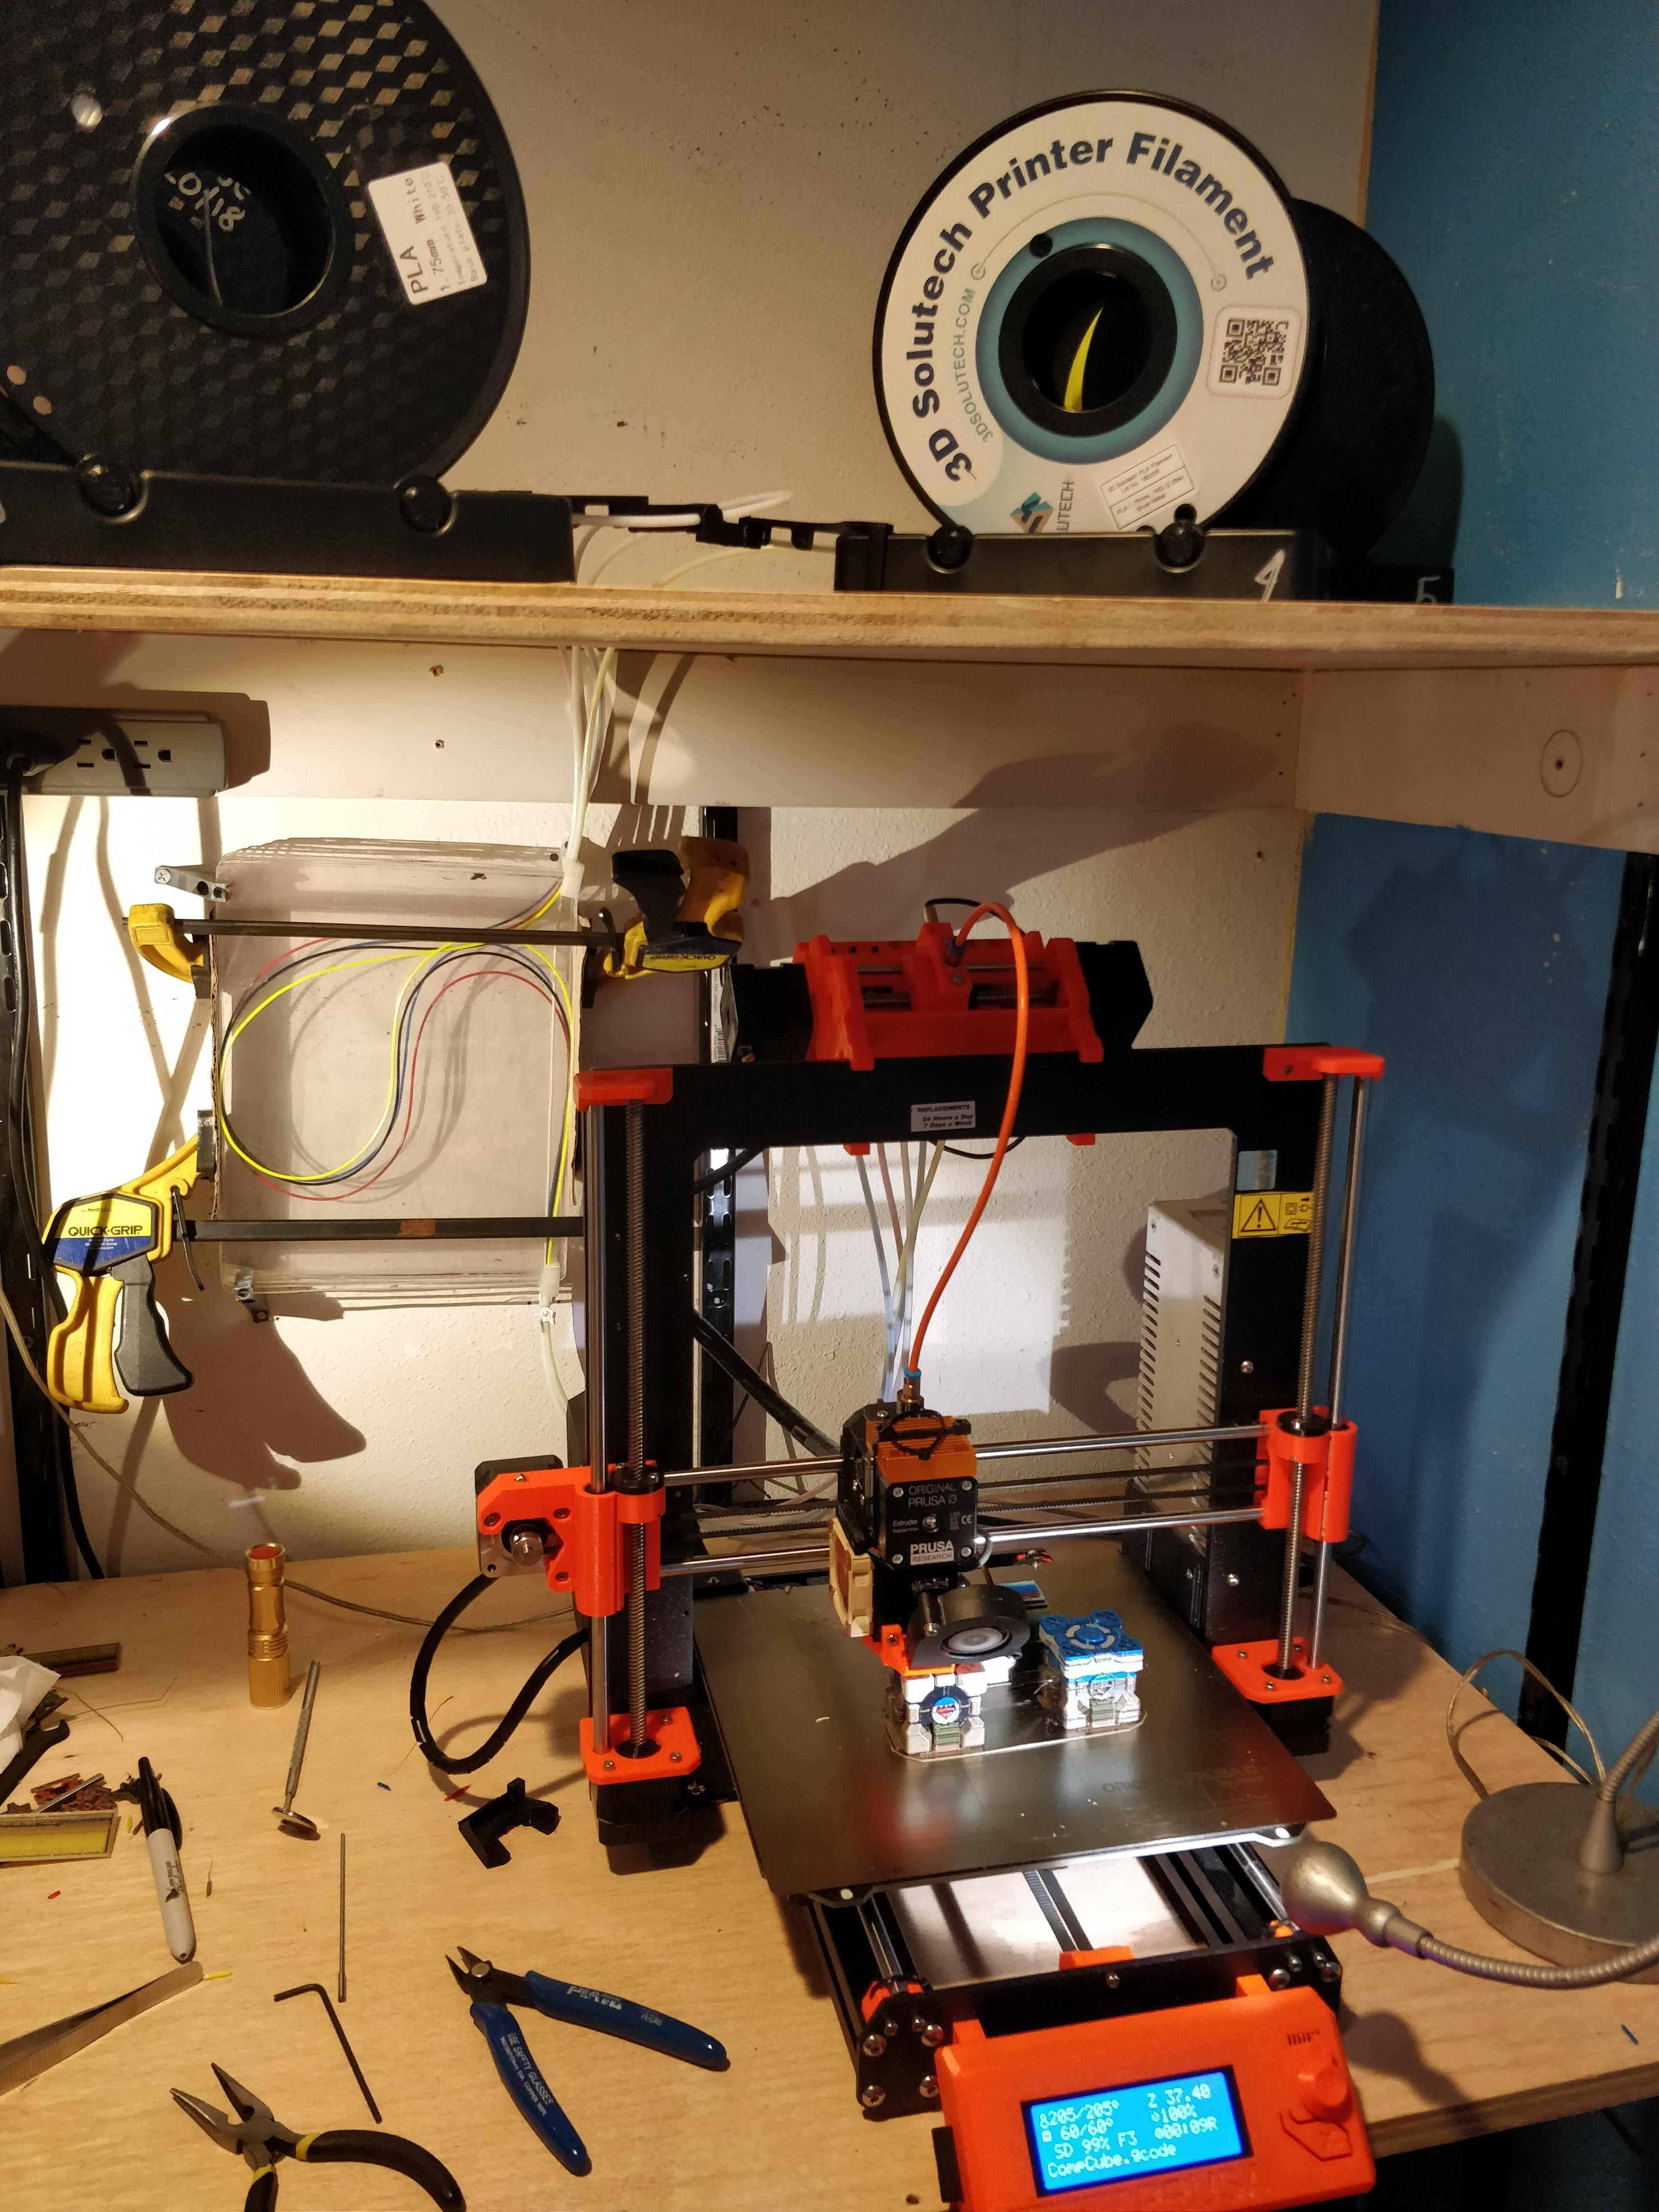
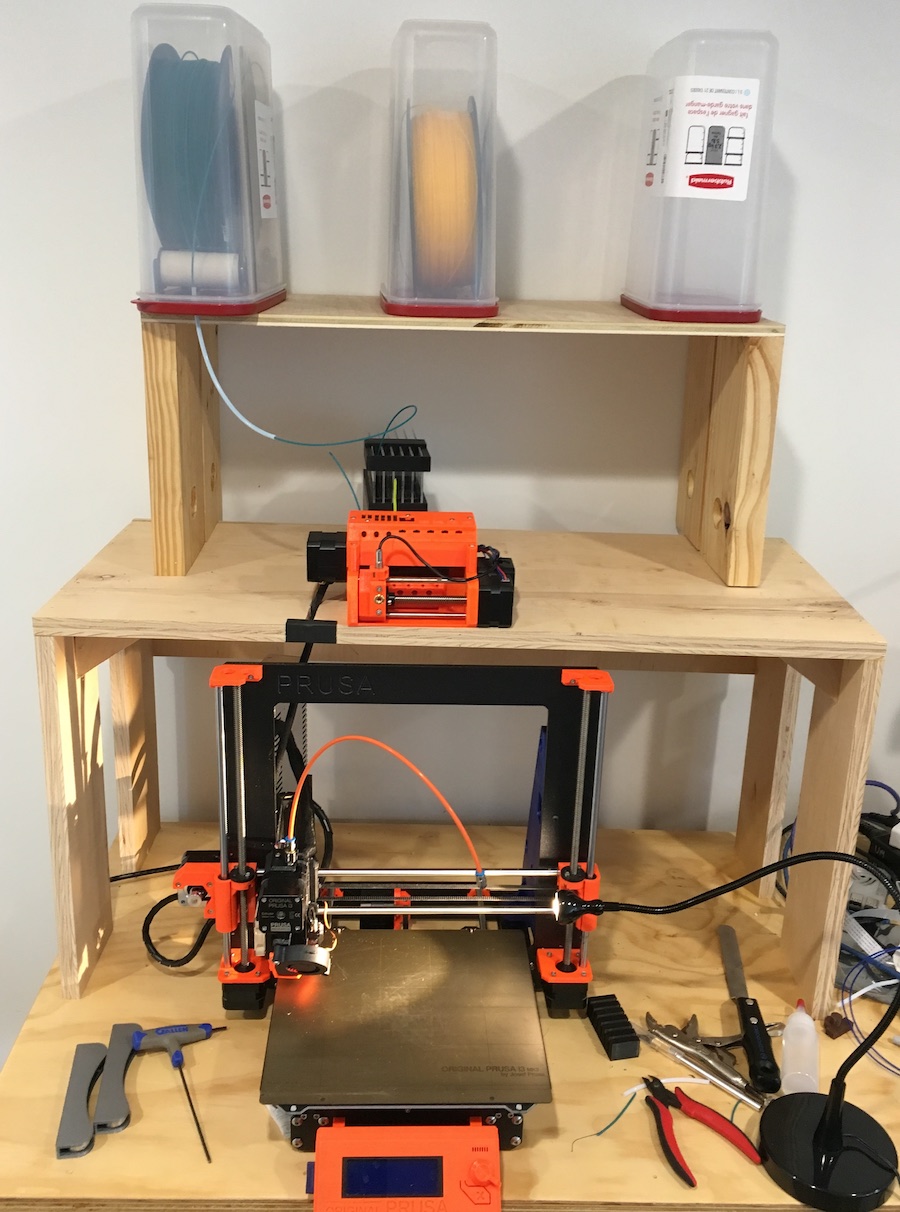
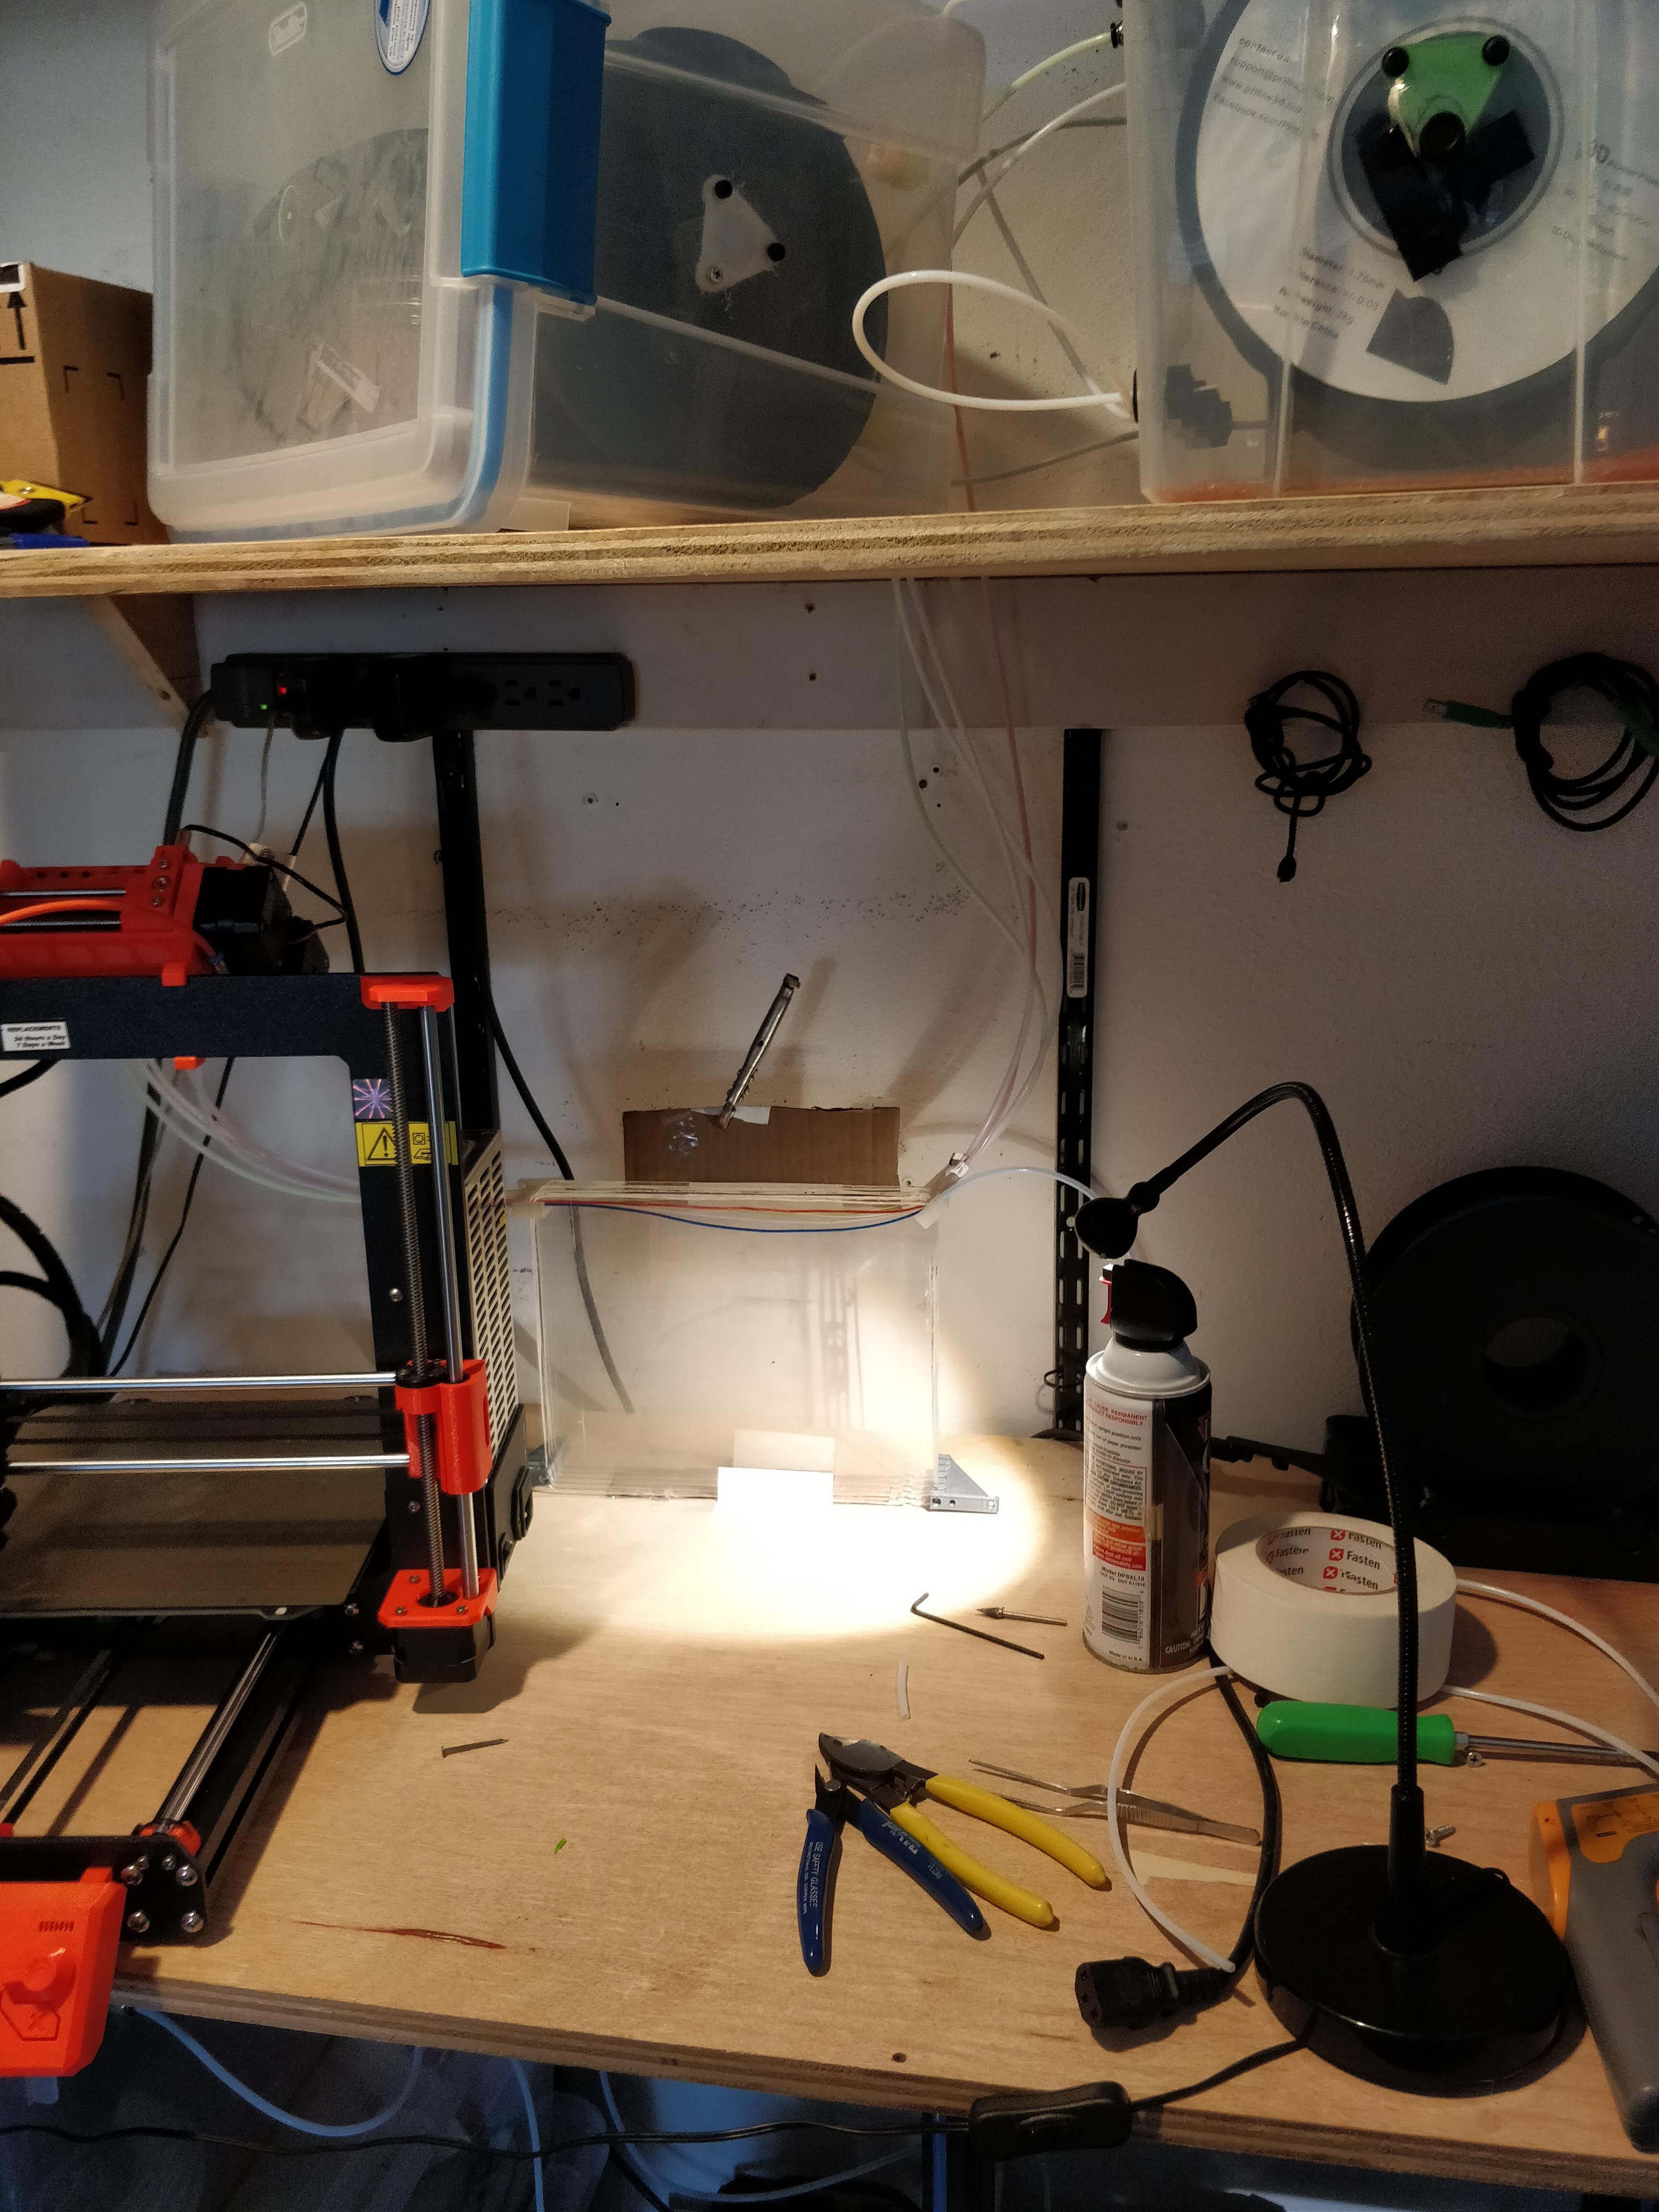
Here is my starting point, brand new filament wallet, new shelf 17" over the printer, MMU2 mounted to the shelf, another shelf over that for my spool holders:
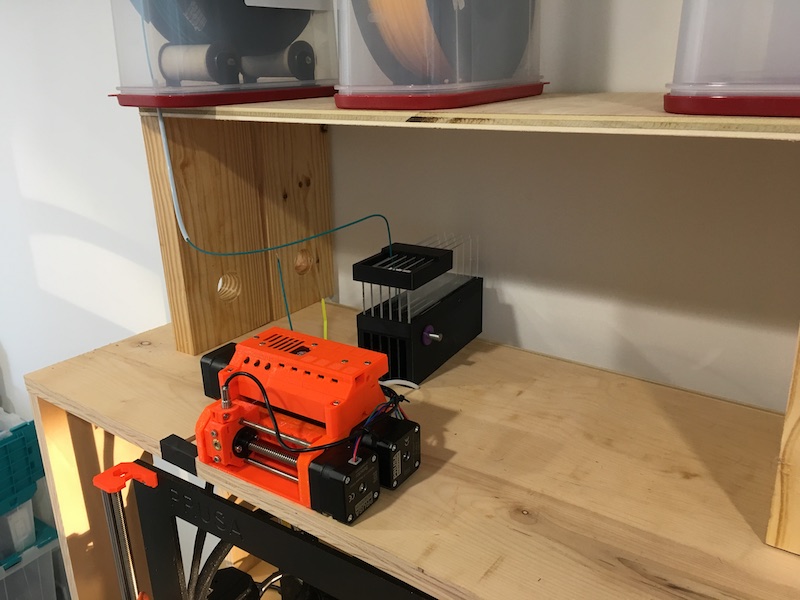
Problem: loading/unloading filament was a pain. I have to be able to access the spool holders, the back of the MMU2 to be able to grab filament, guide it through, push it into the MMU2. I've got to be able to access the front of the MMU2 for fixing jams and accessing the controls. At first those two seemed mutually exclusive (in my setup where the printer is against the wall without easy side access). However, it turns out the MMU2 works fine sideways!
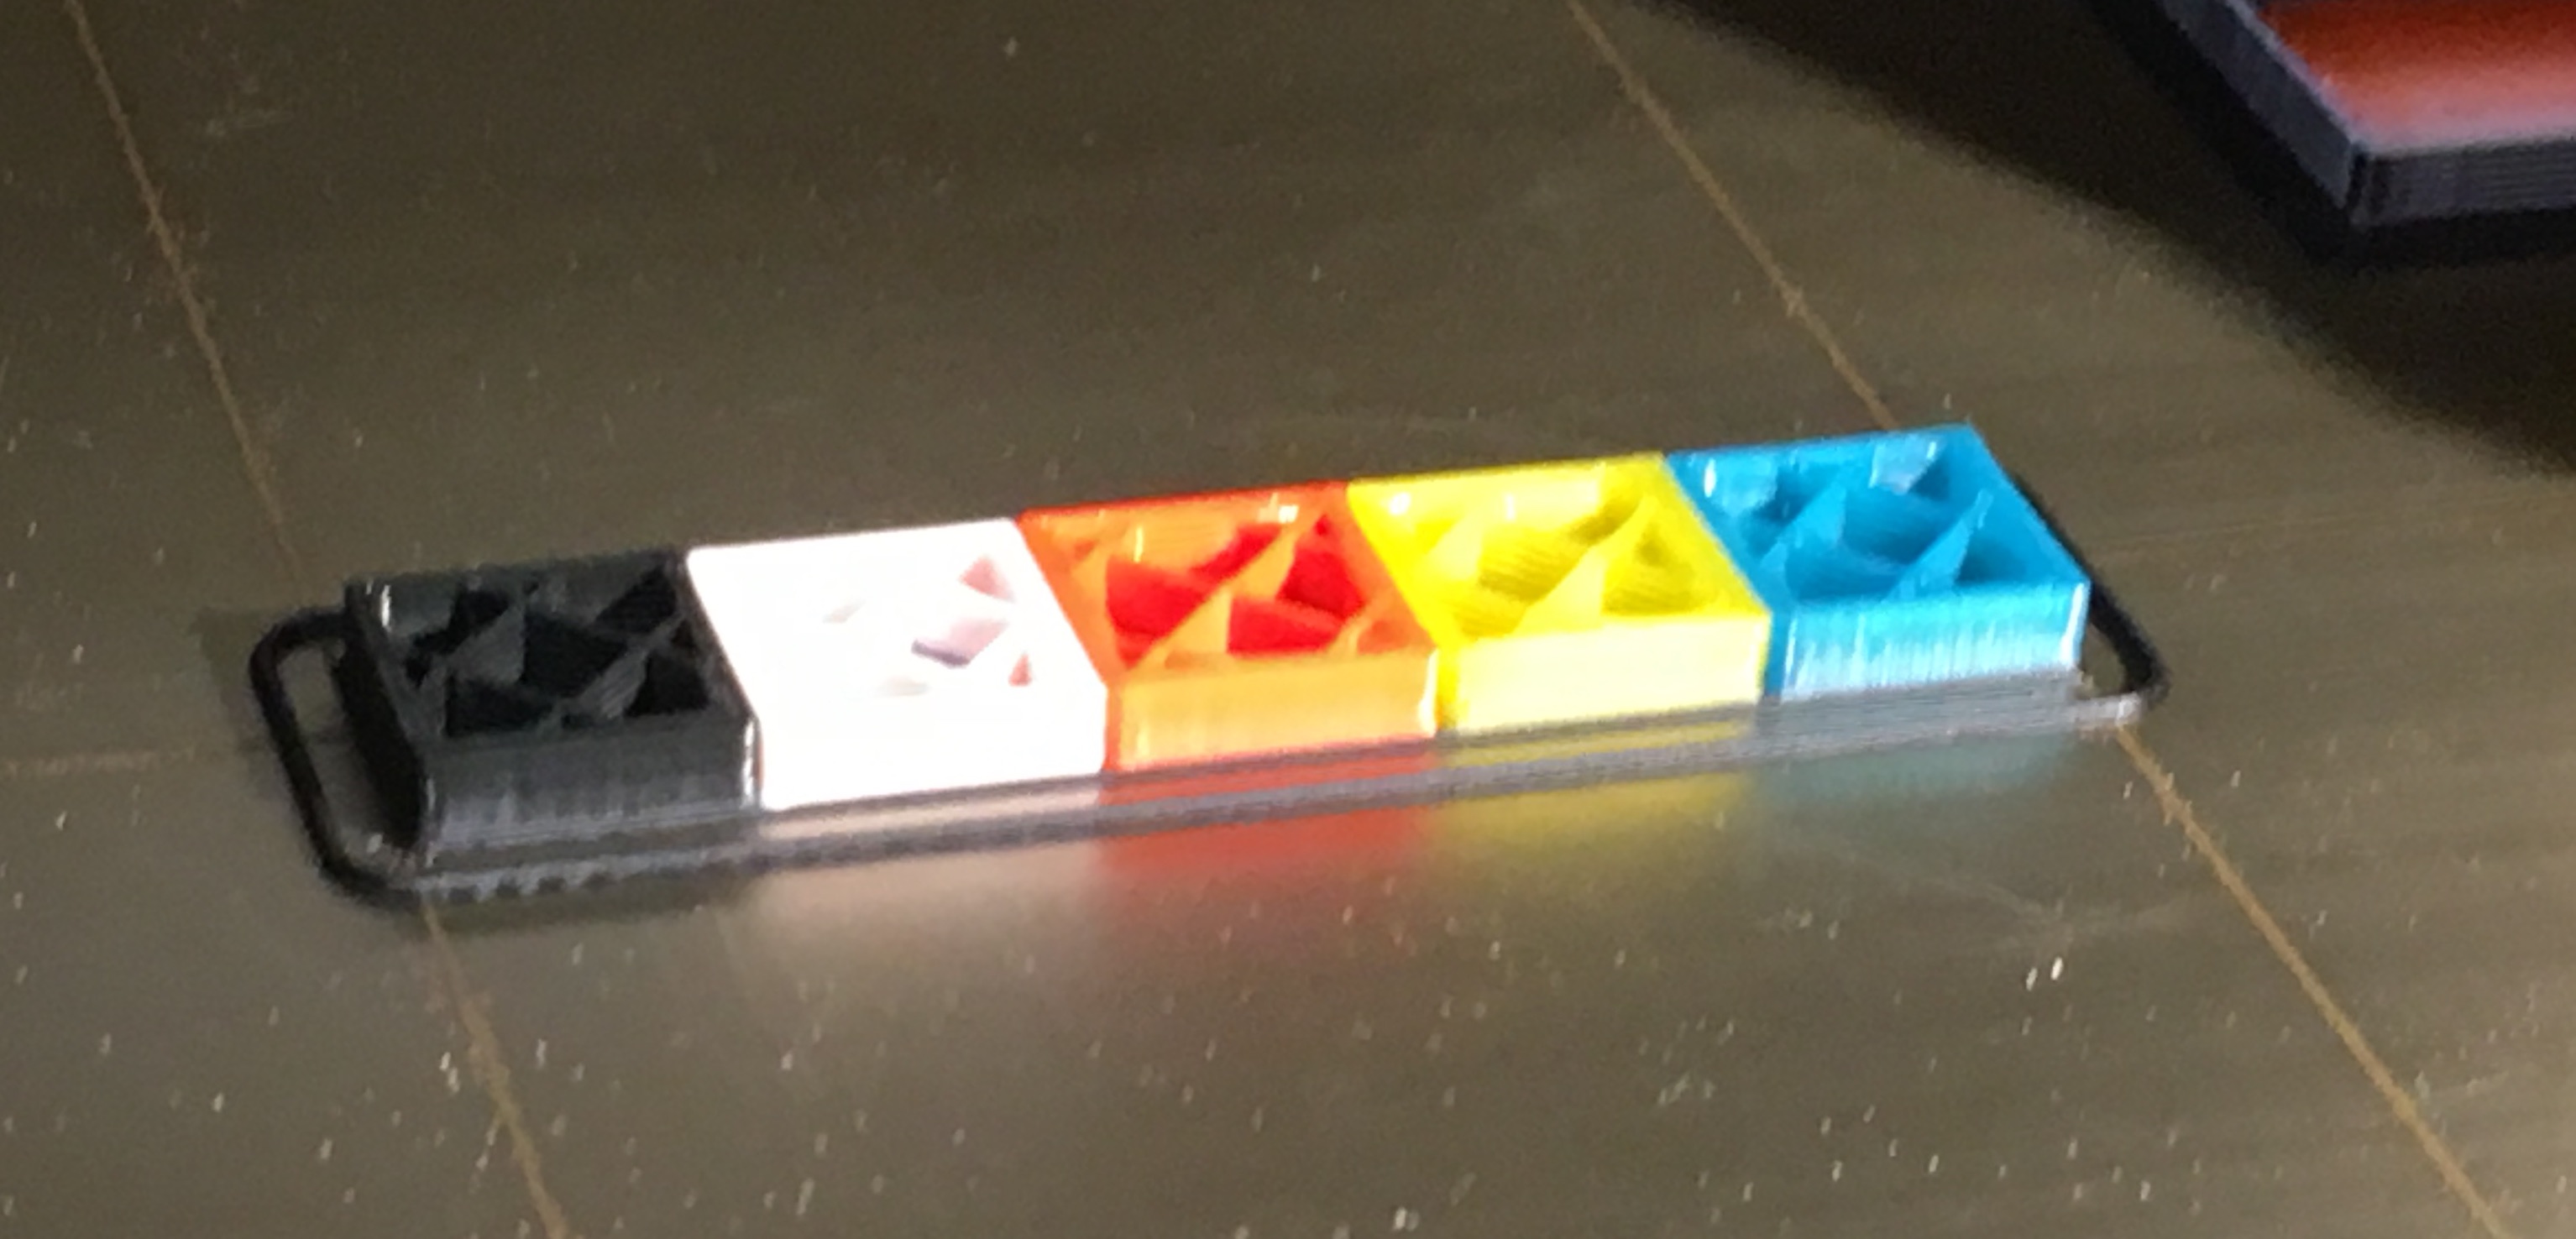
I've got it mocked up with two filaments, testing the load/unload. Everything is accessible from the front now, and I did a full two color test print without a single glitch.
I'm redesigning the wallet now with a different curvature in the filament track, a raised front for the PTFE from the spool holders, and a much longer acrylic sheet (you can see the yellow filament spills out to the left here). Printing a single filament test version now, full thing overnight if that works.
Re: Wallet Style Filament Slack Take Up
I don't know how I missed this thread!!
I'll check it out when I get off my phone. Looks awesome. Mine is moving for sure, once I figured out how to work on it (feed a length of filament, out piles out other side), it's tough to want to change.
What size is your box? It seems small to take up all the slack, can you post a picture or video in use?
I still feel a roller causes more friction than it saves. If I were to make a performance improvement it would be to add desiccant - my filaments pick up moisture sitting in wallet over weekend.
-----------
Oh yeah, looking really good. I would like more pictures! Originally, I found I could get away with much smaller sheets, but when stuff pokes out the end it can have issues even if rarely.
BTW - there's fancy new orange desiccant, supposed to be less carcinogenic.
I maintain an informal list of San Diego, CA 3D printing enthusiasts. PM me for details. If you include a contact email and I can add you to the informal mailing list.
Re: Wallet Style Filament Slack Take Up
My wallet is too small right now. You can see the yellow filament sticking out of the back. I'm going to leave the base roughly the same size, but I added guides for the input PTFE, angled down towards the wheel.
The wheel itself adds almost no friction. The place the friction tends to come in is rubbing across any edge, or whenever the PTFE is forced to bend relatively sharply. I'm still working that part out. My goal will be to really minimize the friction.
Once I get this setup working, if I feel friction is too high my first moves would be:
Once I have this put together, I can quickly reposition the filament input to see what works. Printing the base is a 10+ hour nightmare, which slows down iteration.
Re: Wallet Style Filament Slack Take Up
Use my, or something like my, part - that's my next move if I bother - to break out the "comb" and the bowden holder. Mine print in like an hour, so I went through five or six versions in a day.
I'm with you - the pulleys are not a big deal. I think we don't need them, but if you want to have a significant angle change in the system it is a great place to do it. I'm debating having the MMU vertical, filament box on top and filament could be behind/above,
In practice, I like having it "facing the viewer". It's just plain fine to work on with my set up - pull out ~16 inches, the entire top and bottom are open, and it dangles out the bottom. Horizontal might be better.
I found that once I got all the friction out of the slack devices, the printer stopped caring (within reason) what I did on the far side. The next biggest pain point for me now is the needlessly long tubes from MMU to Filament Wallet.
I maintain an informal list of San Diego, CA 3D printing enthusiasts. PM me for details. If you include a contact email and I can add you to the informal mailing list.
Re: Wallet Style Filament Slack Take Up
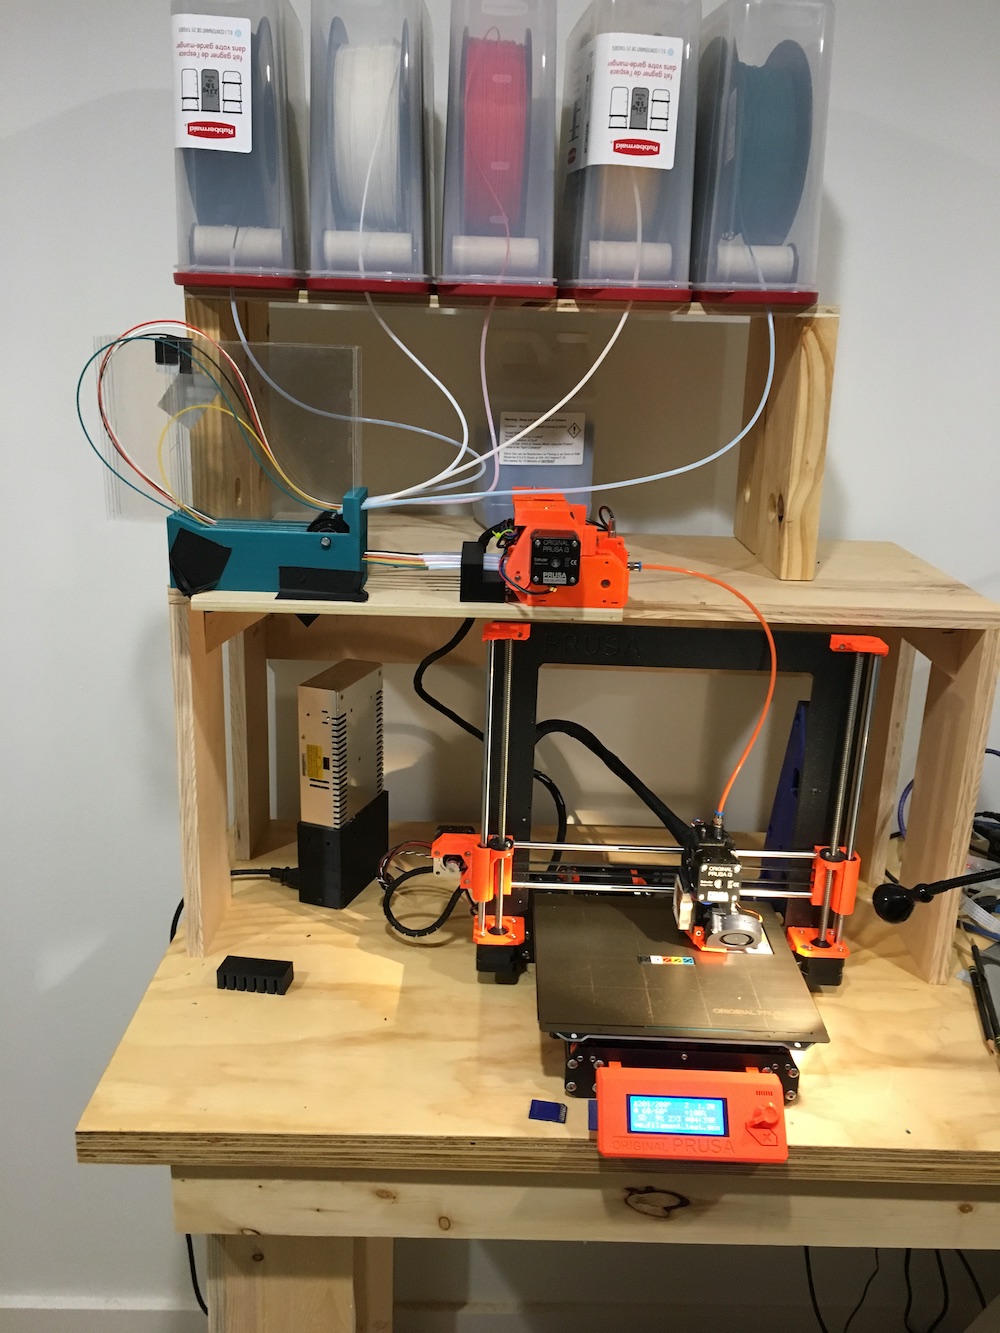
Here is my latest setup:
I've got all 5 spool holders done, rubbermaid containers with desiccant in there.
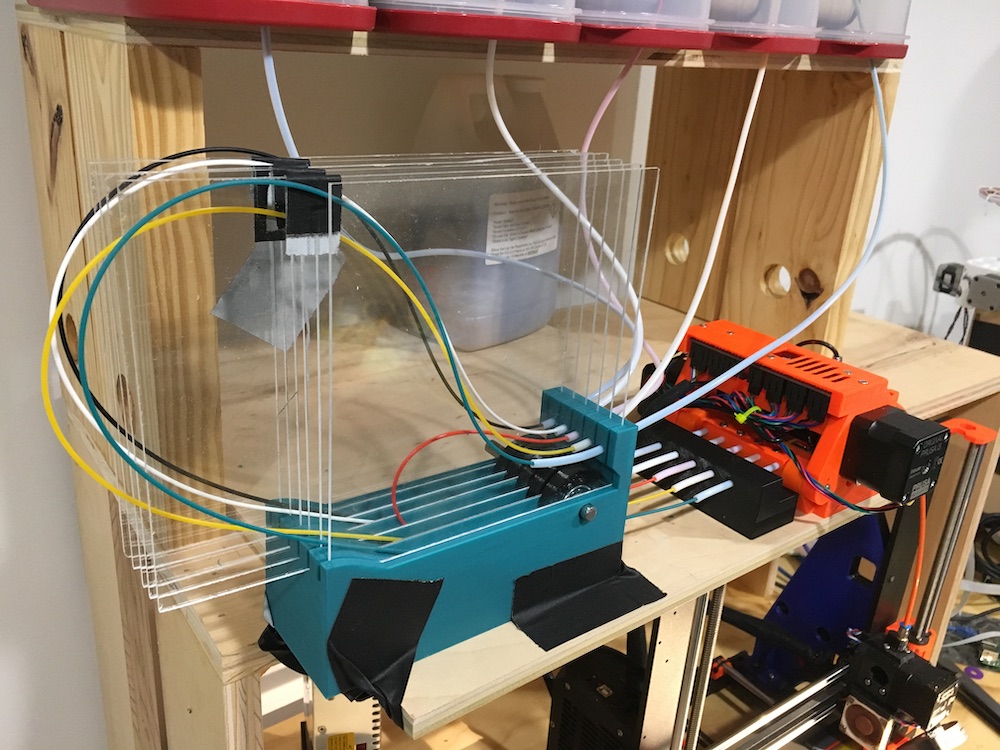
Turned the MMU2 sideways, printed the latest base for my filament control. This one extends the slope a bit and allows for longer acrylic panels. (I was too lazy to cut new ones tonight, so I just taped on some scrap I had to extend the back). The filament feeds in at an angle at the front. I used PTFE with larger ID between the spools and the filament control to minimize the friction.
I've got a small block to stick the PTFE from the MMU2 through. I use 5 short pieces (maybe 3 inches) and stick them through that block. That way they are a bit easier to control and not curving all over. It also brings them a bit further away from the back of the MMU2 so I can more easily feed filament into them when loading.
Video of it working:
Filament Control Video
Seems to be working so far.
That's really interesting.
I tried here a couple set ups with 90-120 degree bends, and I never got the filament to turn the bearing. The loads just aren't that high for me. I guess I could throw sand in the filament box. 😛 Your ~180 degree turn probably needs the bearing a lot more.
You don't have "removable" bowdens on the feed side, which at first seems like a shortcoming, but it's true that I never have those out when filament is fed all the way to the printer.
How do you keep the gaps narrow with a wide bearing? Oh, one can see the bowden tubes inside, so there's at least a 4mm gap. I keep mine tighter.
I'm giving horizontal a try.
I maintain an informal list of San Diego, CA 3D printing enthusiasts. PM me for details. If you include a contact email and I can add you to the informal mailing list.
Re: Wallet Style Filament Slack Take Up
The standard 608 skate bearing is 7mm wide. My wheel is exactly that width. The gap between my panes is 8mm and the wheel spins freely in there. The wheels are printed with a bit of a V cross section so the filament tends to track to the middle. I’ve had no issues with the filament wedging between the wheel and the pane (something I was concerned about).
Going to flash the latest firmware tonight and then go for a kitten.
Re: Wallet Style Filament Slack Take Up
By the way, my sideways wallet design has an significant unexpected benefit: it makes it *trivial* to check your tips! Video speaks louder than words.
Three things make it work so well:
Re: Wallet Style Filament Slack Take Up
That wallet looks great. You are doing awesome work on this and the ramcool script.
Have you posted the file to print that wallet? what size plexi glass panes would I need? I am so tired of the crappy Prusa filament control solution.
I really want to use my 60qt dry box to feed the MMU from the floor or shelf below the printer. I think a wallet yours is my best bet.
At this rate, between the script and the wallet I might as well just copy everything you...LOL
Re: Wallet Style Filament Slack Take Up
I'll post it today. I wanted to make sure the basic concept worked. I may still tweak it, but it's basically ready to put up. The only thing I may change over time is the input PTFE position/angle. I wouldn't mind raising it a bit and lowering the angle. I could also see increasing the wheel size to minimize the filament bend (and therefore energy/friction expended turning the corner)
Re: Wallet Style Filament Slack Take Up
Looking forward to it! I've had mine set up hanging for the last day or two and it's helped the TPUs to look just like the rest.
An unexpected benefit is it is 100% exposed from above. I can lift out the entirety of the filament path away from the wallet even during a print.
I've since "upgraded" my flap, but here's a piece of cardboard with some tape and a weight (pliers). The nice part is I can feed my filament from a variety of sources and I've had no issues.
I still feel weird about your exposed filament. I would be curious to see what happens if you print something genuinely flexible. For a short enough distance it may be ok. Love the tip test - I do the same thing, but it's two hands, one to slide the tube out and one to shove on it. I thought about a Notch but don't mind my friction fit. Probably some hybrid design where you have an open air gap, but the bowdens mount rigidly to a holder which defines that gap.
Here's mine doing two changes, printing PET and TPU:
https://photos.app.goo.gl/6tyNMV1rDAdHm7dQ9 <- video
Not sure the value of the closeup, but here it is in all its short tubed glory.
Anything production would need the MMU-side bowden mounts to be flat or angled down slightly, the other side could be facing the other feed, with a pulley on the inside if you were to have a huge angle.
I think I still prefer the gaps to be less than two filament diameters wide - you can see my temporary bottoms are wider and it allowed the white TPU to cross itself. In practice I've never ONCE seen a problem with uncrossing and I have thousands of changes through the set up, but I don't see the advantage to making it wider.
Ultimately, I think I want a triangle with a single gear, similar to what you have but to feed the filament from the front/side - the plane of the bend wouldn't be parallel to the ground but rather tilted ~isometrically.
I maintain an informal list of San Diego, CA 3D printing enthusiasts. PM me for details. If you include a contact email and I can add you to the informal mailing list.
Re: Wallet Style Filament Slack Take Up
You are correct: my filament control was not designed with flexible filament in mind. I suspect it would work fine, but I'd need to tighten the distance from the back of the MMU2 to the filament control. I suspect it might still work, but I haven't tried it.
I have a bunch of ninjaflex (regular and cheetah) I can try at some point, but for now I'm happy dialing in PLA.
Re: Wallet Style Filament Slack Take Up
I've not tried any really flexible stuff yet. Primarily it just isn't in the budget. 😛 I've used all ~95a stuff.
I maintain an informal list of San Diego, CA 3D printing enthusiasts. PM me for details. If you include a contact email and I can add you to the informal mailing list.
Re: Wallet Style Filament Slack Take Up
You are correct: my filament control was not designed with flexible filament in mind. I suspect it would work fine, but I'd need to tighten the distance from the back of the MMU2 to the filament control. I suspect it might still work, but I haven't tried it.
I have a bunch of ninjaflex (regular and cheetah) I can try at some point, but for now I'm happy dialing in PLA.
Please only watch the video through the 21 second mark. It works amazingly up until then. Of course, then the friction on the 'ramp' gets too high, the ninjaflex can't push it, and over it flops.
So, you were correct, I'll need ptfe to much closer to the wheel if I use flex. However, I'll likely keep the space open for PLA for tip checking (at least until I rewrite the MMU2 firmware and hack the gcode to get my automated ram/tip-checking system going!)
Re: Wallet Style Filament Slack Take Up
I like what you're trying to do, and while pulling the tubes is pretty easy on my set up, yours is certainly easier.
I think the solution lies in moving the from-spools feed to the top, and take the pulley with it, creating a 90 degree bend to feed your filament up to the top.
Alternatively, move the pulley below the filament and it's open space. Use a 90 to get the feed back down to the printer's shelf and keep your filament there. That would expose much of the top whilst letting gravity assist with TPU's like I do.
It's an iterative process - just imagine if you have to send out to have each part made or hack each one up with 2x4's* and a band saw.
*A piece of wood that is NOT 2" by 4", cause 'Merica.
I maintain an informal list of San Diego, CA 3D printing enthusiasts. PM me for details. If you include a contact email and I can add you to the informal mailing list.
