Re: Wallet Style Filament Slack Take Up
I'm adding my concept here as well, as per Abraham's suggestion.
https://www.thingiverse.com/thing:3180671
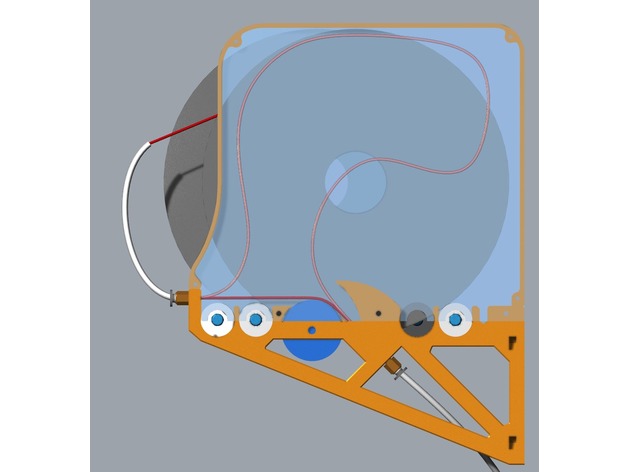
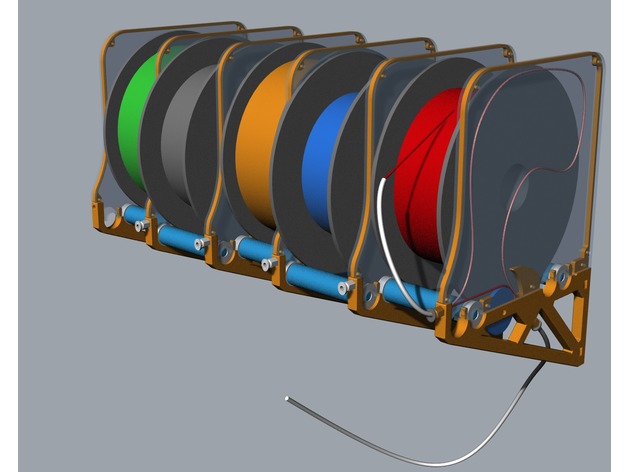
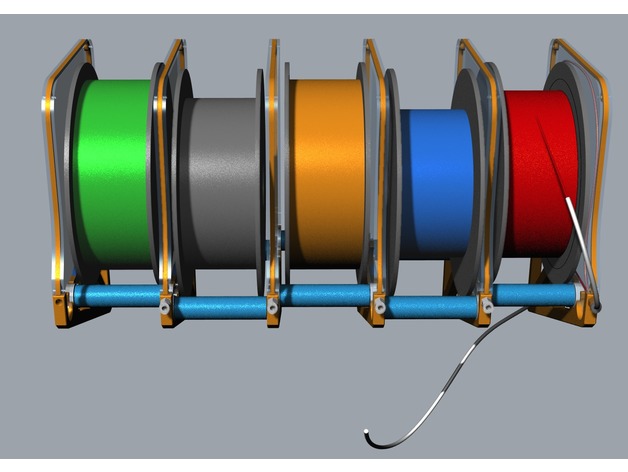
I have very little space for my setup. The MMU however, retracts a lot of filament for the 4 unloaded filaments. This design incorporates a wallet (thanks to some inspiration from TheBall and Abraham.M on the Prusa forums) that sits in the gap between each spool. This keeps the filament from getting tangled on things.
Re: Wallet Style Filament Slack Take Up
Ah! I think I figured out what I'd do - I really like what you have, but try running the slack verticle, so flexibles can fall over.
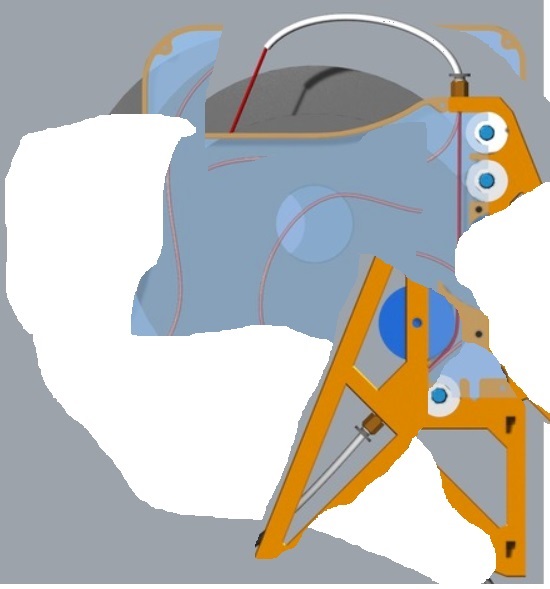
Excuse the HORRID MSPaint job, buit I just moved your feed to up against the wall (more compact), turned the same mechanism on its side, and feed the spool from the top - easier to hit when loading, I feel. I can try to draw it better if needed, but other than communicated the idea, I am pretty outclassed here making pretty graphics.
I maintain an informal list of San Diego, CA 3D printing enthusiasts. PM me for details. If you include a contact email and I can add you to the informal mailing list.
Re: Wallet Style Filament Slack Take Up
Ahh. I see. I didn’t even consider that design because it would be too much of a reach for me with my setup. 😀
Just thinking about it now, I think the biggest problem with flexibles in my setup will be loading them. I’ll have to have a play.
Re: Wallet Style Filament Slack Take Up
I went and checked. Loading TPU is ok. A bit more fiddly than other filaments but it went through fine. Need to make sure there's no kinks in the end 10cm though.
When retracted it runs up the inside of the wallet to the top before filling out to the rest of the wallet. I think it may work because it "rolls" along the wall, rather than sliding along the wall, so it can reach the top of the wallet without a problem. It doesn't fill out the wallet as well as the harder filaments, but it should work fine.
I've attached a photo with around 500mm of TPU "retracted" into the wallet.
Re: Wallet Style Filament Slack Take Up
I've posted my filament control on thingiverse.
Use at your own risk, it's a work in progress. I hesitated to post, but I've had a number of requests.
My latest thinking is to restart from scratch and have something that hangs below the shelf that holds the MMU2, but I'm not far yet.
Re: Wallet Style Filament Slack Take Up
great idea, looks like i also was drawing.
still waiting on the MMU, need to get the length of filament that gets retracted out of the emu.
to size the space for the slack
should be part of the spool or close to.
reducing the space used by the setup....
nice to see more people are taking a crack at it.
regards Ron
Re: Wallet Style Filament Slack Take Up
I'm glad you guys are both posting.
When you get it built, try running a multi-TPU print for a while. For a while I was in the same mental boat - it *worked* with TPU, but looked funny doing it. Going to horizontal has fixed enough issues that I'm busy in hardware and firmware land.
I'll make up a bottom part, and perhaps a top part at some point - maybe something with individual caps for each filament though I rarely have to get in there unless I'm doing something wacky.
I maintain an informal list of San Diego, CA 3D printing enthusiasts. PM me for details. If you include a contact email and I can add you to the informal mailing list.
Re: Wallet Style Filament Slack Take Up
When you get it built, try running a multi-TPU print for a while. For a while I was in the same mental boat - it *worked* with TPU, but looked funny doing it. Going to horizontal has fixed enough issues that I'm busy in hardware and firmware land.
Can you post some pics of your current setup? Or is it still approximately this?
(I've asked some questions and shown a pic of mine on thingiverse..)
Re: Wallet Style Filament Slack Take Up
Okay, got my 'plex. Do you prefer questions here or on the prusa forums?
questions:
your pictures show many different setups. I assume, based on the video, that you suggest the "in top right, out bottom right" layout?
how do you feed the filament? Remove the bottom PTFE tube?
what are the guides that don't have slots for the PTFE tube meant for? Why does it have a slotted mounting hole instead of a full hole?
feedback:
can you rename this object so it includes "wallet" and "MMU2" in the title?
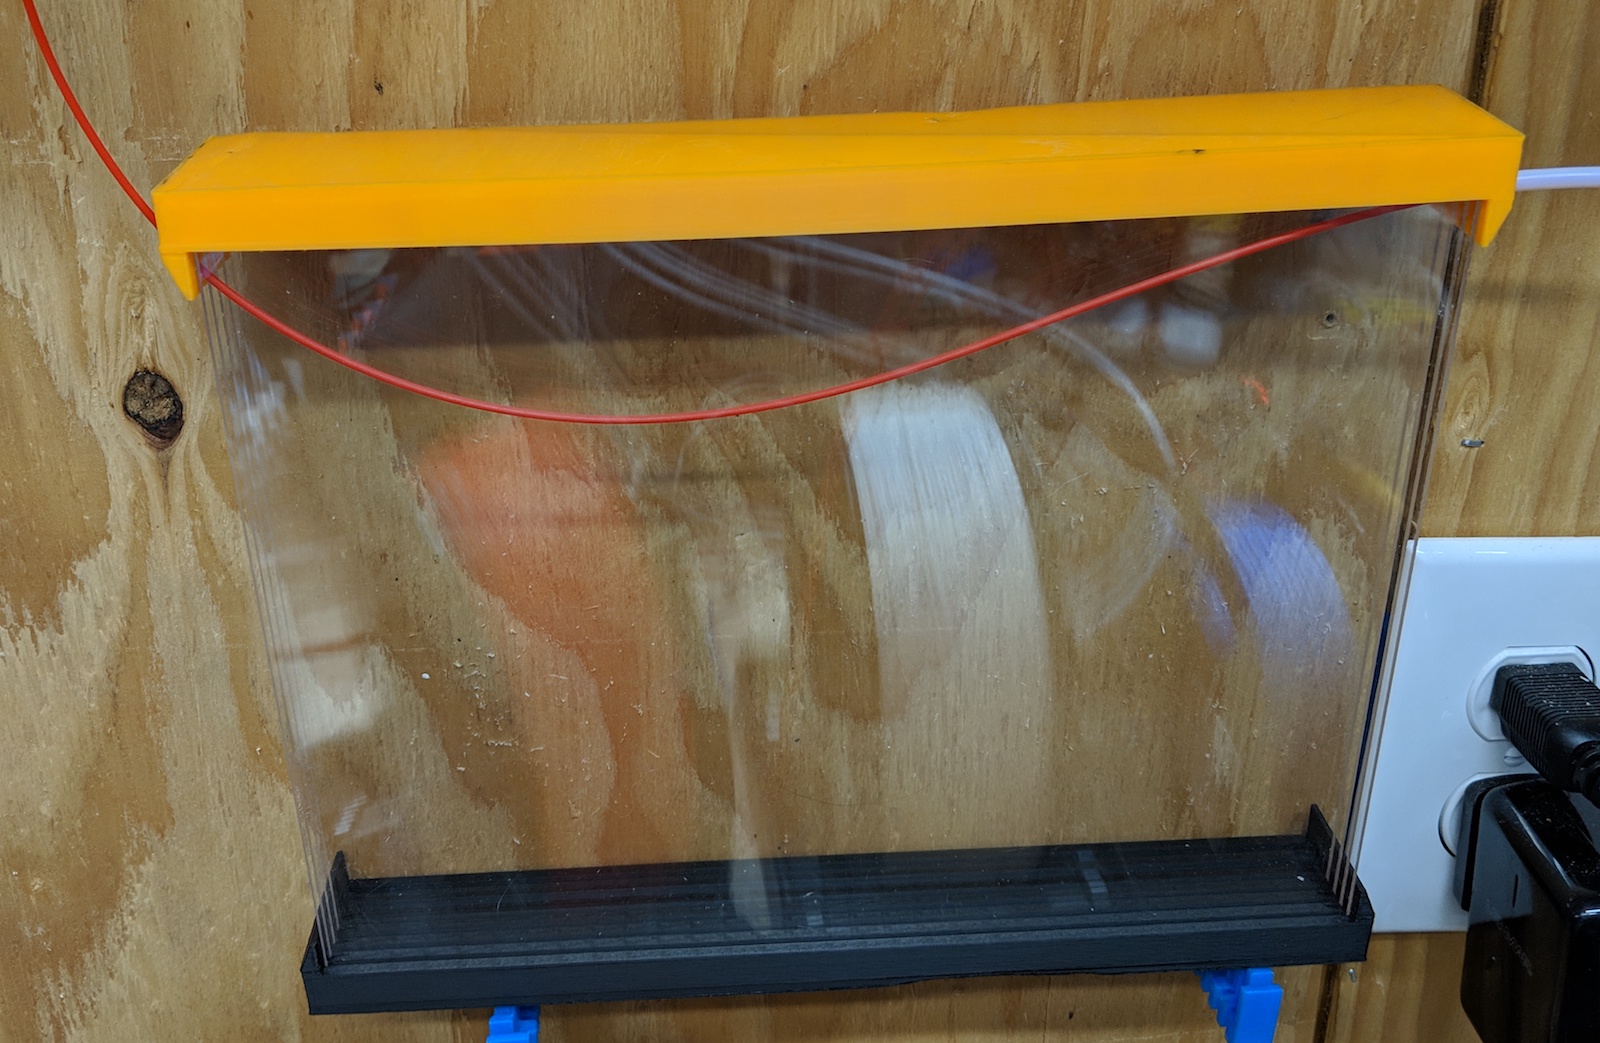
I've attached a picture of my wallet with two panels installed and one piece of PTFE/filament threaded in to see if I'm on the right track. I've screwed in the two mounts on the right, the third (lower left) is just pressed into place to make it hold its form. I'll need to cut some pieces of wood (or 3d print some pieces) for the left and right walls; it appears the thing will need to be disassemblable in case things get mucked up.
1) right now I have across-the-top which seems to work the best.
2) Both tubes pull out easily, I pull the wallet-outlet tube with one hand, try feebly to move filament with my thumb (never works) then pinch with other hand and feed it.
2a) An upgrade would be holding the tube further along so you COULD feed with one hand. Similarly a notch in the plexi would do it.
3) The guides without the slots are just to keep the plexiglass sheets in place. The slots are in case the whole thing is resting on nails, so you can lift the entire assembly off the wall. Right now I'm using some older parts which are very tight and keep it from falling apart. Pins/bolts would be better so you could get it apart I guess.
You're basically on the right track - flip the parts so the grooves face one edge, the one the filament runs along when taught. That way you can pull either/both sides when needed.
The last picture is my current set up, probably what I'll base a "good" one on, if I ever bother.
I was pretty worried about having to get it apart, but really, you don't need to. You might change angles on the inlet/outlet, but the panels and none-bowden parts don't ever need work (so far). 🙂
Glad it's working out!!
I maintain an informal list of San Diego, CA 3D printing enthusiasts. PM me for details. If you include a contact email and I can add you to the informal mailing list.
Re: Wallet Style Filament Slack Take Up
3) The guides without the slots are just to keep the plexiglass sheets in place. The slots are in case the whole thing is resting on nails, so you can lift the entire assembly off the wall. Right now I'm using some older parts which are very tight and keep it from falling apart. Pins/bolts would be better so you could get it apart I guess.
Okay. If I get it working I'll probably fire up openscad and try to design a couple of combination wall-combs, I think I could make it so there are the two PTFE tubes and a couple of wall-combs that hold the shape better (as well as, obviously, being walls).
Re: Wallet Style Filament Slack Take Up
That's just what it needs - combs for the bottom which incorporate a stand. And the combs for the top need both an attachment method (I like the idea of drilling a hole through the hole stack and sliding in a piece of PTFE to pin it together). It would be good if the inlet had two to define it's angle - depending how many different angles you feed it from (I feed from above, below, behind and in front) it's nice to make sure it'll sit at the most advantageous angle.
Lastly a fold down lid for the top.
I'll probably try to do it all in AutoDesk at some point so I can post and share it, right now it's locked into SolidWorks.
I am happy to report that I still have no serious issues, and all my print failures have been due to other things like firmware.
I maintain an informal list of San Diego, CA 3D printing enthusiasts. PM me for details. If you include a contact email and I can add you to the informal mailing list.
Re: Wallet Style Filament Slack Take Up
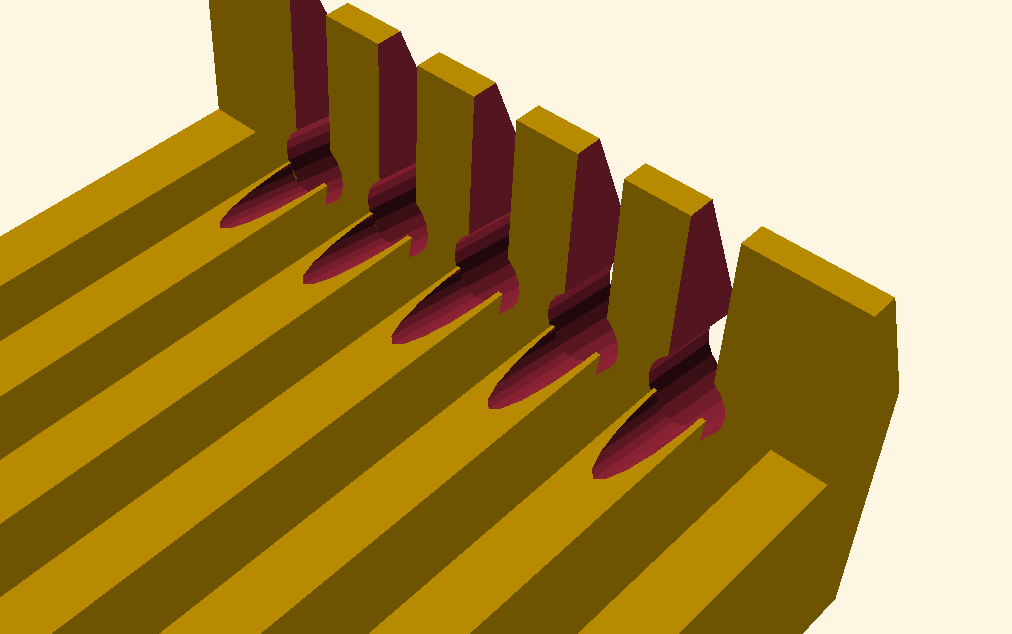
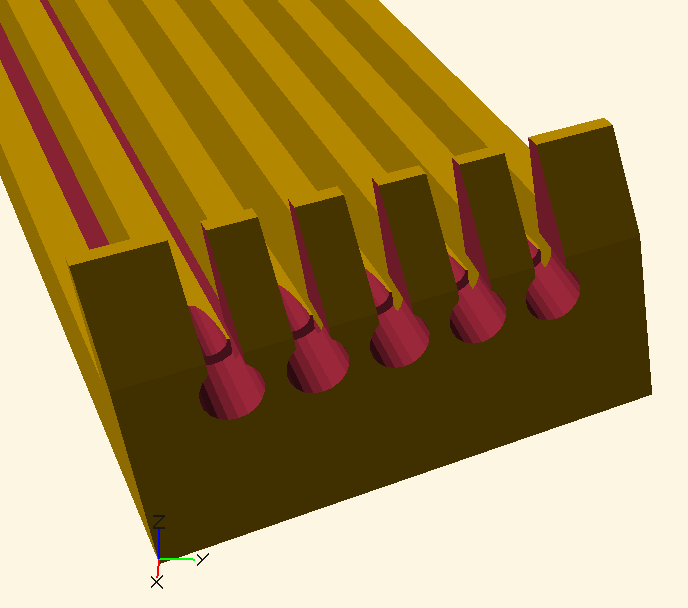
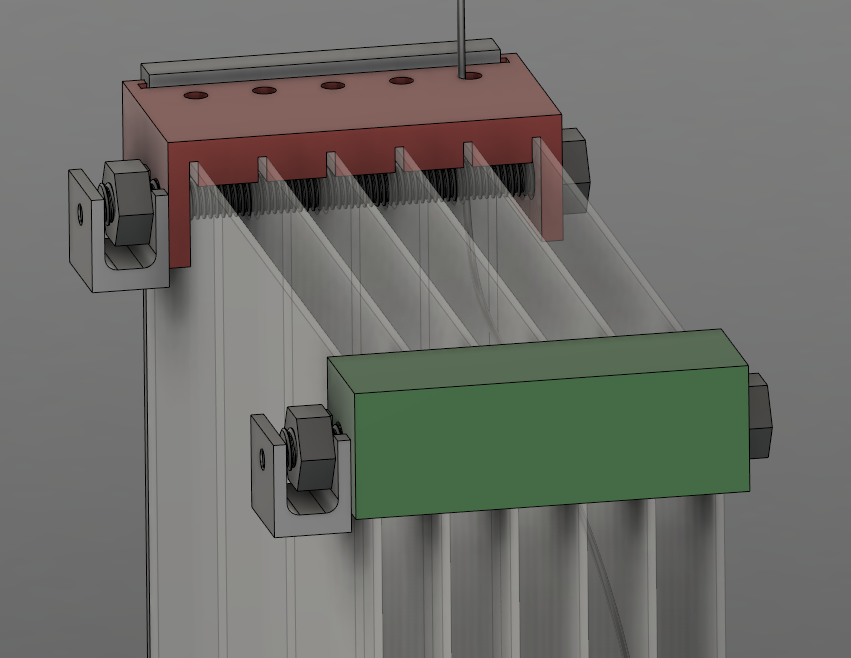
Here's my redesign. I was trying to hold the plex but now I'm basically replacing the pieces. I've learned a lot as I go- for instance, the end pointing to the MMU needs to have slots so the filament doesn't get stuck when I am initially feeding it in. The orange piece is ready to use, I have 6m of PTFE arriving today that I'll use to set it up. The black piece is a previous design, it works to hold the side but ultimately two of the newer design are perfect.
I need to adjust the tolerances so it isn't as fussy to assemble. Also need to design a little bracket to hold it on the wall. Basically going to put it on a little shelf which'll make it easy to put up and take down, rather than trying to mount the whole thing.
Not sharing files because it isn't ready yet, and it's very dependent on tolerances, plex size/thickness, etc. Once I post it, does anyone want me to sell a "wallet kit" with the PTFE+plex+brackets? I know I would've bought one rather than spend time getting it all precise!
Re: Wallet Style Filament Slack Take Up
This is my version it works pretty well. Try it https://www.thingiverse.com/thing:3205097 !


Re: Wallet Style Filament Slack Take Up
How do you feed the filament through the wallets for the initial load?
Re: Wallet Style Filament Slack Take Up
This is my version it works pretty well. Try it https://www.thingiverse.com/thing:3205097 !
Hey, i really like your design. I redesigned some things, so you can load your filament much easier. You can take off the sidepanel and grab the filament with a plier or maybe your fingers. You also can use 3d-printed screws and threaded nuts to fix the parts to your acrylic glass so they wont get off. I think you don't need to close all sides of your box so you can save print time and filament.
EDIT:
to mount it on the wall you can use a bracket like this one. In this case maybe its better to use screws out of steel.
Re: Wallet Style Filament Slack Take Up
Here's my redesign. I was trying to hold the plex but now I'm basically replacing the pieces. ... Once I post it, does anyone want me to sell a "wallet kit" with the PTFE+plex+brackets? I know I would've bought one rather than spend time getting it all precise!
Yes, this is nice! I should print it out and check it comparatively. It seems to catch most of what's needed, keeping it easy to work on. I guess you lift off the whole orange piece? I think ultimately the two side pieces need to be permanent, with the top part removable. Ideally, each channel opens separately.
Plus my parts got an honored position as shelf brackets. 🙂
I maintain an informal list of San Diego, CA 3D printing enthusiasts. PM me for details. If you include a contact email and I can add you to the informal mailing list.
Re: Wallet Style Filament Slack Take Up
I found that it's nice to have the "ends" open, but the "sides" closed. That way when you feed filament in, it tends to go to the far end so you can grab it. In reality it might make sense to close three sides so only the end towards the MMU is open, but that's more filament, more prints, and doesn't let the filament overflow out the end if needed.
Re: Wallet Style Filament Slack Take Up
The two sides parallel to the filament travel (when taut) are the sides I find need closing. The others can get stuff in them when you're doing oddball stuff, but ordinarily the filament never reaches there.
Post pictures/video if you have some!
I maintain an informal list of San Diego, CA 3D printing enthusiasts. PM me for details. If you include a contact email and I can add you to the informal mailing list.
Re: Wallet Style Filament Slack Take Up
Post pictures/video if you have some!
I pulled most of the filament out of it to reprint the piece with the tubes, I wasn't satisfied with the retention/taper. So I'll post .. soon.
Re: Wallet Style Filament Slack Take Up
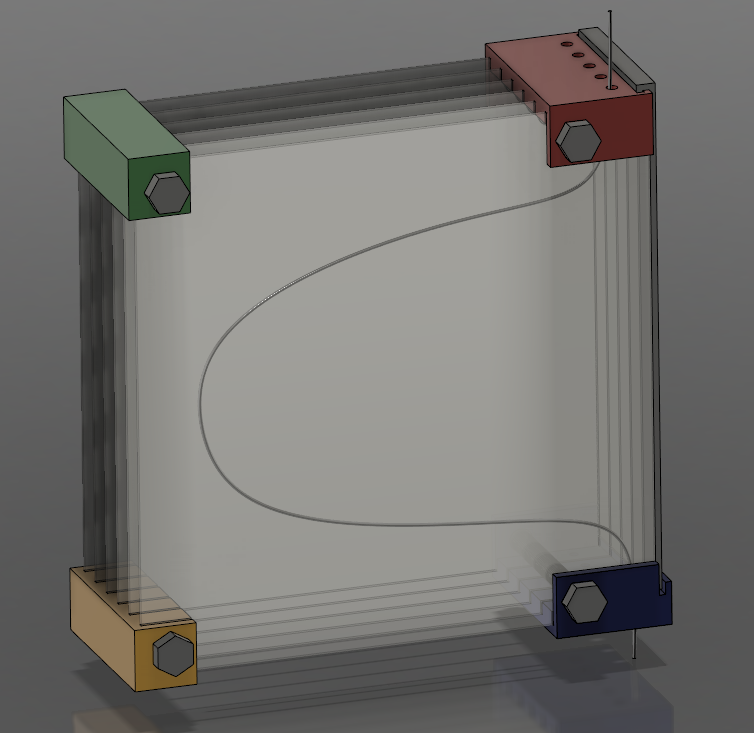
based on youre ideas ive tryed a aproach that fit and work with my Assembly well.
I hope to help and inspire others.
Prusa MMU 2.0 Filament Seperator


Toolfree PTFE Holder Clip
Filament in/out each corner by 90deg
What you need?
Print:
4xPrusa MMU 2.0 Filament Seperator Corner.stl
24xPrusa MMU 2.0 Filament Seperator Roll.stl
1xPrusa MMU 2.0 Filament Seperator PTFE Holder.stl
1xPrusa MMU 2.0 Filament Seperator PTFE Insert.stl
Buy:
4xM6 Screw
4xM6 Nut
6xAcryl Glass 25x35
Source:
tinkercad
(The Roll is Designed in Sketchup, only copied into the workbench)