Re: Wallet Style Filament Slack Take Up
Hi there, Just want your thought about my Retract Management Test:
You think it's viable, or it's a wrong way?
Some Noise in the video....cut the sound
Re: Wallet Style Filament Slack Take Up
😯 So many Thought, I don't know what to do with all of them !!! 😀
Re: Wallet Style Filament Slack Take Up
😯 So many Thought, I don't know what to do with all of them !!! 😀
:D... Your design looks cool. It has a smooth filament path and i think it should work reliable but how do you feed the filament in?
The other thing is, why you don't let the bottom open? I would have a better feeling if the filament won't get bend so much.
Re: Wallet Style Filament Slack Take Up
Thanks for the design but design didn't make it work 😉
it's smooth and if I open the bottom > filament twist and it's absolut not clean, but maybe if I test it with Printer, not with hand, the twist go away?
And sh** I didn't think about feeding the filament.... 😮
Or maybe yes 😀
/!\ Noise in video.....
Here the process to feed filament:
I must print a second slot to test in real condition, Hope it work....
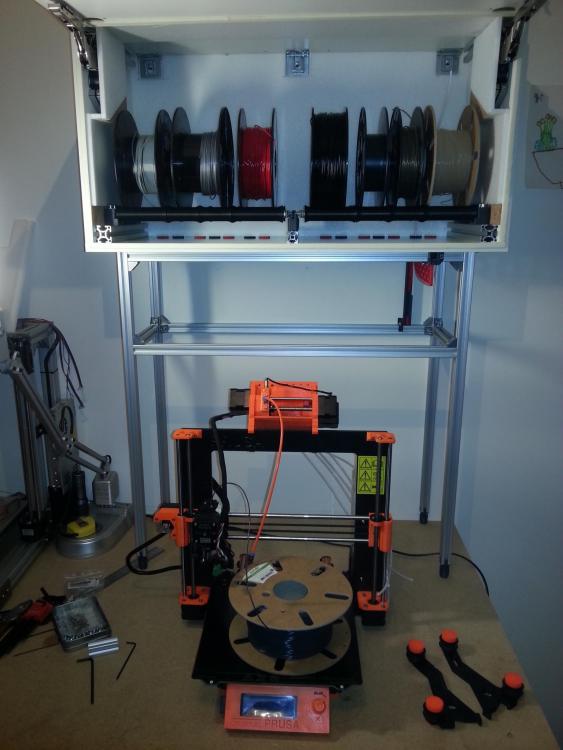
And here a vision of my futur setup (a lot to do before the end...):
Re: Wallet Style Filament Slack Take Up
Thanks for the design but design didn't make it work 😉
it's smooth and if I open the bottom > filament twist and it's absolut not clean, but maybe if I test it with Printer, not with hand, the twist go away?
And sh** I didn't think about feeding the filament.... 😮
Or maybe yes 😀
really impressive your design. Looks like you are using a spring in your front cover? Your filament feeding looks good but you also could feed the filament without take off the acrylic, don't you?
Do you have to use two stand alone acrylics for each filament? Or do you can use the second acrylic also for the next filament?
In general it looks like a really workable filament changing/feeding system. The only thing i would change is to find an easier way to mount it on the wall so that you don't need that massive aluminium profile construction.
Thumbs up.
Re: Wallet Style Filament Slack Take Up
It looks pretty reasonable. There's a lot of drag area when the filament is tight, riding along the red rail. It's probably not an issue, but it's there.
The other thing is keeping them from crossing. Most of the time it is fine, but you want it loose enough to won't catch, or tight enough it won't cross, but you don't want knots in there.
Looks really nice.
I maintain an informal list of San Diego, CA 3D printing enthusiasts. PM me for details. If you include a contact email and I can add you to the informal mailing list.
Re: Wallet Style Filament Slack Take Up
based on youre ideas ive tryed a aproach that fit and work with my Assembly well.
I hope to help and inspire others.
Prusa MMU 2.0 Filament Seperator

That's pretty nice. You have rollers and otherwise empty space. A little concerned about flexibles - perhaps tipping the whole thing 30 degrees? - but overall it seems really nice. Perhaps a bit of a pain to load and unload?
If I ever get the MMU to the state I can just load any filament I want and get a good print out of it, I'll revisit all this. I'm trying the new release firmware stuff but it's slow and buggy, probably will stick with ZeroBeast's MP-1 since it actually works. 🙂
I maintain an informal list of San Diego, CA 3D printing enthusiasts. PM me for details. If you include a contact email and I can add you to the informal mailing list.
Re: Wallet Style Filament Slack Take Up
the black corners have a fillament guide inside so its almost easy from inside out as outside in.
I load the filament in 1) outside in to side 2) side to bottom 3) bottom to edge and out. the device isnt mountet on the bottom so you can insert filament easy verticaly.
Ive done a quick test with 5 flex filaments, the seperator works well but ive troubles with fillament tips on the second fillament cycle.

Curent ive done about 50h successful pla prints
Re: Wallet Style Filament Slack Take Up
Does anyone know if the 25cm x 35 cm size for the plexiglass has proven to be the optimal size?
Is bigger better?
Thanks,
Bryan
based on youre ideas ive tryed a aproach that fit and work with my Assembly well.
I hope to help and inspire others.
Prusa MMU 2.0 Filament Seperator


Toolfree PTFE Holder Clip
Filament in/out each corner by 90deg
What you need?
Print:
4xPrusa MMU 2.0 Filament Seperator Corner.stl
24xPrusa MMU 2.0 Filament Seperator Roll.stl
1xPrusa MMU 2.0 Filament Seperator PTFE Holder.stl
1xPrusa MMU 2.0 Filament Seperator PTFE Insert.stl
Buy:
4xM6 Screw
4xM6 Nut
6xAcryl Glass 25x35
Source:
tinkercad
(The Roll is Designed in Sketchup, only copied into the workbench)
Re: Wallet Style Filament Slack Take Up
Why do you have rollers at the far corners?
I maintain an informal list of San Diego, CA 3D printing enthusiasts. PM me for details. If you include a contact email and I can add you to the informal mailing list.
Re: Wallet Style Filament Slack Take Up
Does anyone know if the 25cm x 35 cm size for the plexiglass has proven to be the optimal size?
Is bigger better?
The size seems to be okay. You could always go bigger, it just takes up more room without a ton of benefit.
My biggest issue right now is dealing with drag; I'm not happy with the PTFE I'm using before the wallet, and I might need to cut down the MMU2's five PTFE tubes to help too.
Re: Wallet Style Filament Slack Take Up
I did that, I cut the tubes between MMU and the wallet shorter and I'm sure it helped. Others have drilled it out so the ID is bigger.
I've yet to find a reason to go bigger than "8x10" inches (20x25 cm), but it depends on where your inlet and outlet are, how flexible the filament is, etc.
The other BIG issue that I have quite a bit is the tubing lengths have to be pretty accurate - if I make a tube between wallet and spools an extra inch or two too long, it'll develop curves which cause resistance.
Ideally, each inlet would be on a swivel, when I feed from different directions (often as I sometimes use multi-MATERIAL instead of multi-color) this can be harder to manage.
I maintain an informal list of San Diego, CA 3D printing enthusiasts. PM me for details. If you include a contact email and I can add you to the informal mailing list.
Re: Wallet Style Filament Slack Take Up
The other BIG issue that I have quite a bit is the tubing lengths have to be pretty accurate - if I make a tube between wallet and spools an extra inch or two too long, it'll develop curves which cause resistance.
My wallet means there's a 90 degree between the wallet and the MMU2, but I also have a 180 between the filament and the wallet; I'm thinking I'll move things so they are roughly in a straight line. That means my dehumidifier cabinet can't be used- doh! I might print some things so make it work without PTFE. Or I should try some of this 4mm ID PTFE I have..
Re: Wallet Style Filament Slack Take Up
If it's any help, my SHARK seems to be working properly. It has several curves in it, but I've tried to make sure they are all fairly smooth. Generally I have no problems with filament feeding, even through my fairly tight rivnut couplers. The curves form a big S with filament coming from the spool, back around through the SHARK, and then back around to the MMU.
What I tried to make sure is that:
• The spools can roll freely. I'm using bearings, but linked to large rollers (20mmØ).
• Sharp curves are avoided. The PTFE tube generally has curves with a radius of 100mm or greater. There is a pulley to roll the filament around the single sharp curve (20mm radius, around 45º deflection).
Re: Wallet Style Filament Slack Take Up
My wallet means there's a 90 degree between the wallet and the MMU2, but I also have a 180 between the filament and the wallet; I'm thinking I'll move things so they are roughly in a straight line. That means my dehumidifier cabinet can't be used- doh! I might print some things so make it work without PTFE. Or I should try some of this 4mm ID PTFE I have..
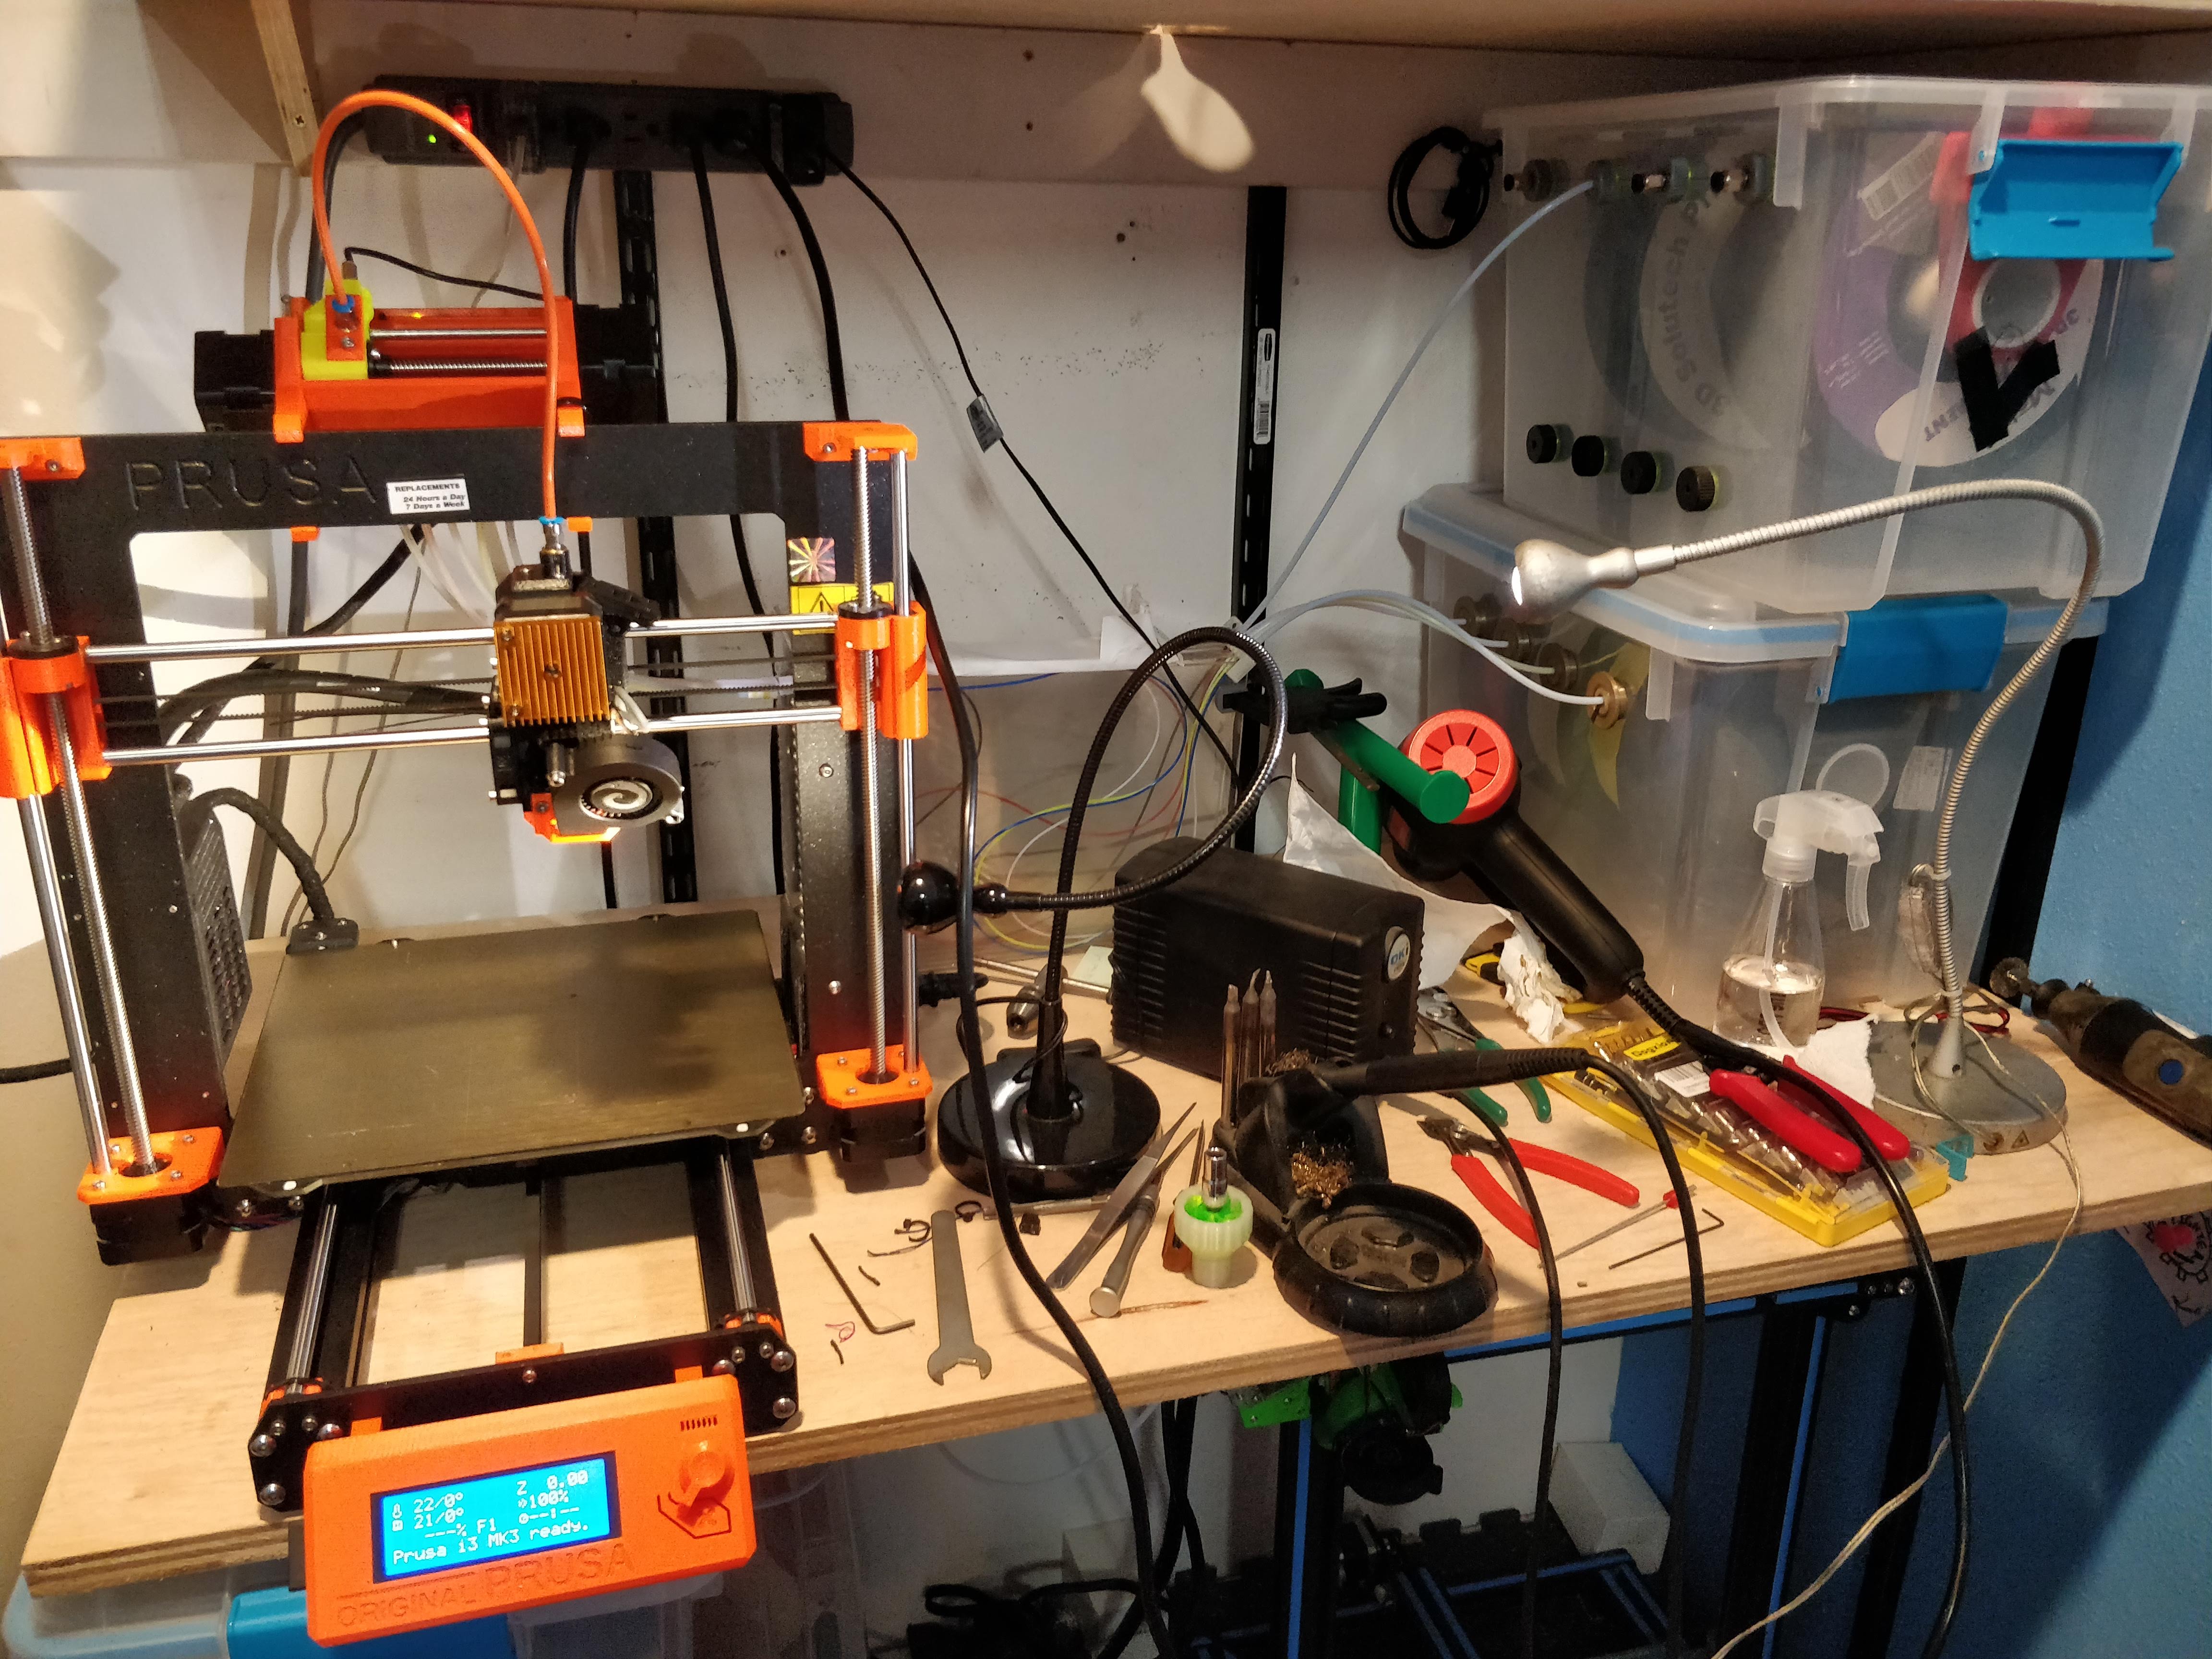
I find it gives me a fair amount of freedom, I've put filament boxes on the shelf next to the printer (as shown), above the printer, and even underneath - just find the right PTFE and hook it all up.
Probably a 90* set up with rollers and keeping the boxes up above is the best overall answer.
I maintain an informal list of San Diego, CA 3D printing enthusiasts. PM me for details. If you include a contact email and I can add you to the informal mailing list.
Re: Wallet Style Filament Slack Take Up
This is based on abraham.m's design.

I used to fix copiers for a living and because of that I tend to look for the simplest solutions. I like his design.... no moving parts. I wanted as much counter space and because of my filament placement, I wanted it movable.
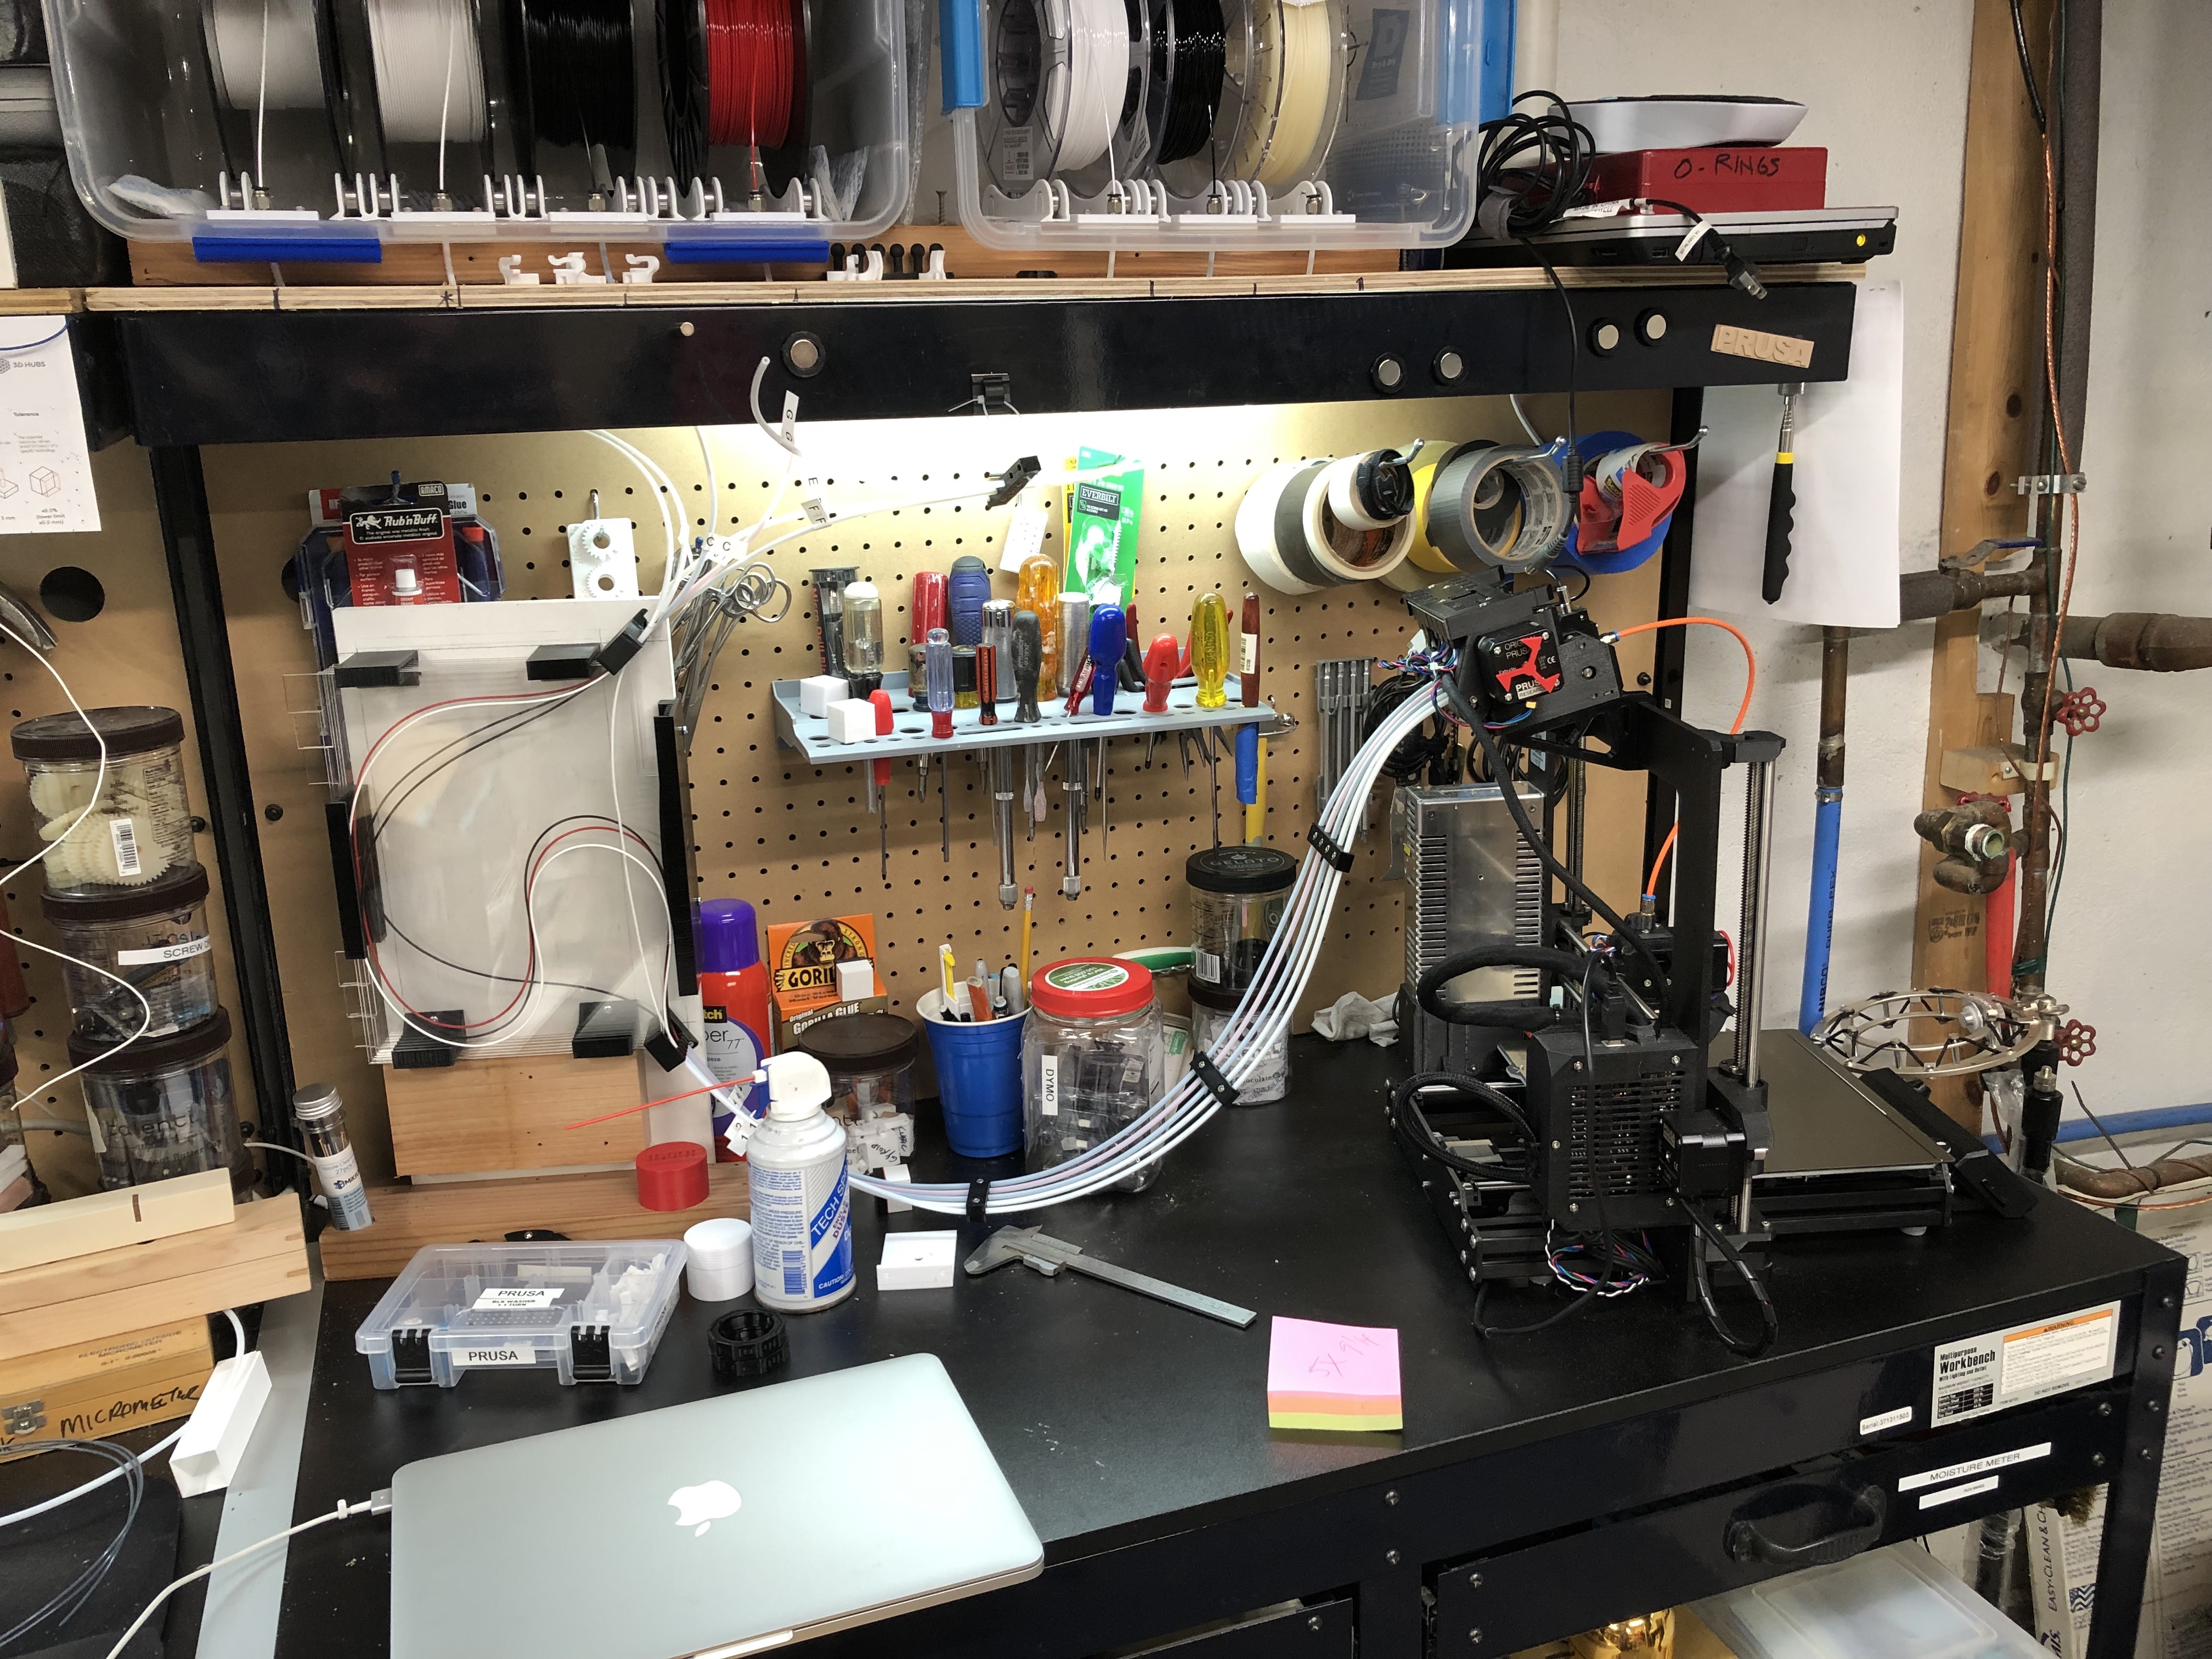
I can also switch between tubes easily above the assembly.
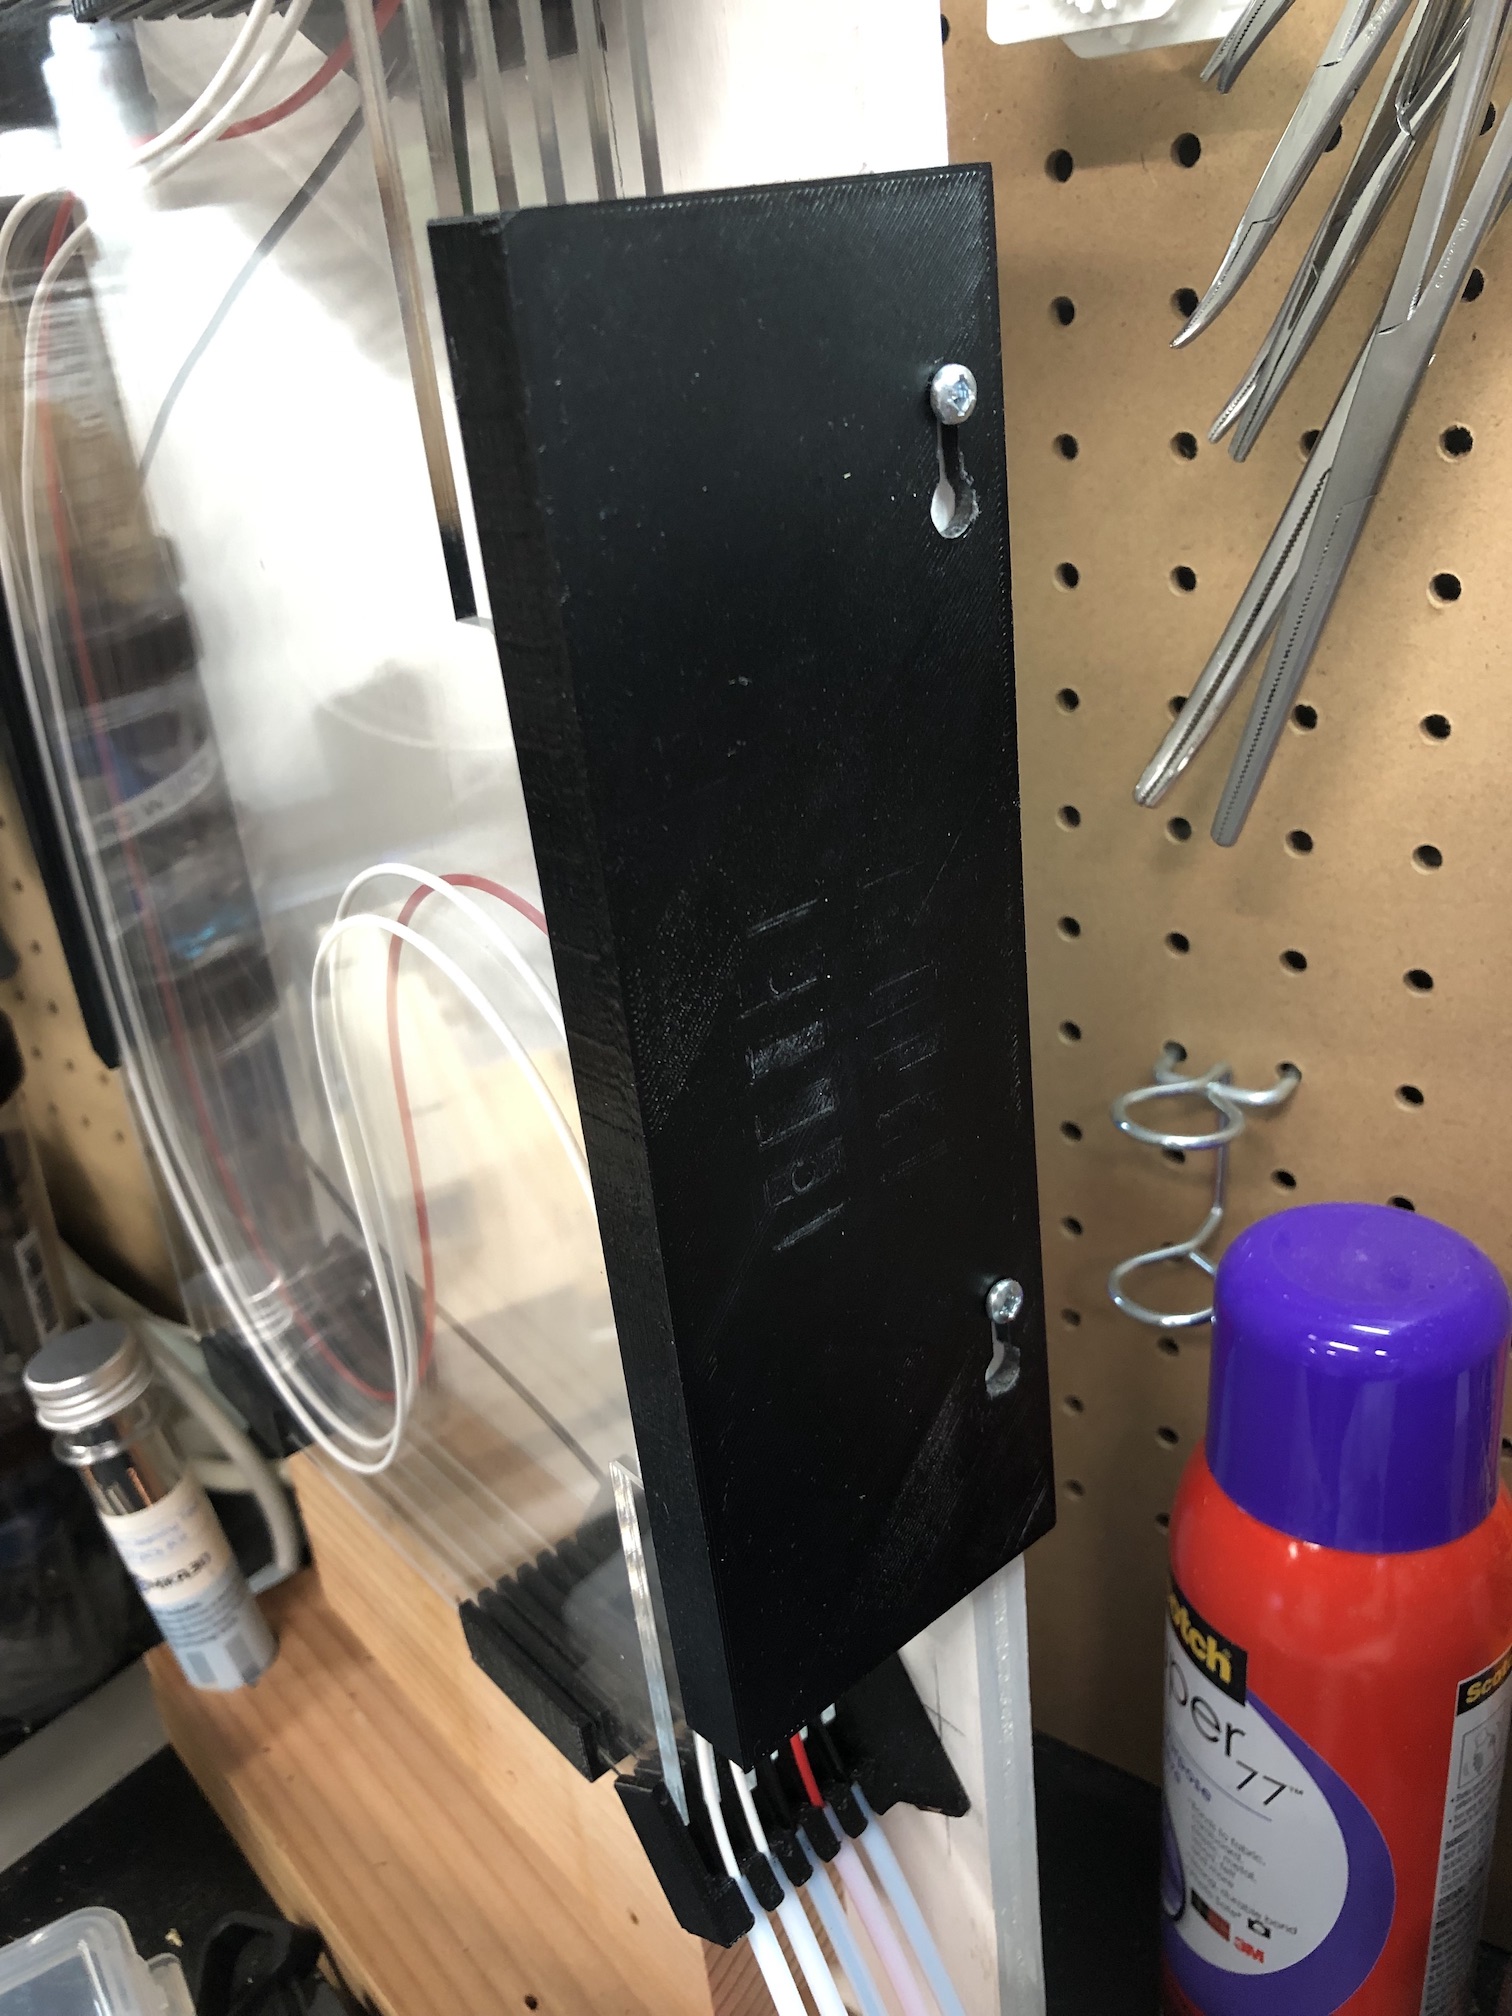
I have access to a laser cutter so that's how I cut the acrylic. I built a wood frame for the weight. (Not everything needs to be 3d printed 😆 ). Note the added 2x4 chunk... that's just below the acrylic. It was still a little unstable with the bottom 2x4 so I added more weight.
The left and right sides come off with keyholes.
So far so good.
Re: Wallet Style Filament Slack Take Up
That looks really good! Post Thingiverse files, if you can - especially design files?
I like the deeper lead-in/out parts, mine are borderline too short and rarely the tubes can push out.
Would you explain all of the fancy shapes on the acrylic? "Because I can" is cool, but I bet there's some logic. 🙂
Posting a video would rock as well.
I'd try to make something to let you adjust the angle of inlet/outlet, otherwise it seems pretty solid. Oh, and I'd take like a yard off the tubes between wallet and MMU. 🙂 Probably rotating 90* so the filament path is horizontal will pay off when switching to flexibles, but it's looking good!
I maintain an informal list of San Diego, CA 3D printing enthusiasts. PM me for details. If you include a contact email and I can add you to the informal mailing list.
Re: Wallet Style Filament Slack Take Up
I'm experimenting with not using PTFE on the pre-wallet side of things, so I designed a quick little "feed bracket" to get the angles correct on the inlet.
I'm printing the parametric auto-rewind setup as it might be more sane for me.
Re: Wallet Style Filament Slack Take Up
Thanks abraham.m and thanks for your suggestions. I put one up on thingiverse. https://www.thingiverse.com/thing:3303876
and added a video
ted.t5, is the auto-rewind working for you? I tried another and abandoned it. Couldn't get it to work properly. Probably because I am PTFE leading up to the wallet. I'm working in a basement and need to deal with moisture.
I'm in a basement too and working on controlling moisture. In fact last year I was using an enclosed printer, this year I had to put a space heater in the workshop space. I'm still printing my first auto-rewinder, so we'll see.
I've gotten my 'controlled humidity' containers to 30% RH, the room humidity is 50-60%. Strangely people talk about lowering the humidity but I've never seen a number given for the acceptable humidity level.
I'm still going to improve my wallet but I'm having trouble finding room for the 5 spools to feed the wallet properly since they need to face 'sideways'.