MMU Experience - from no chance at all to an all week running machine
I just wanted to share and emphasize some solutions for the MK3s MMU2s that really made my setup usable. Others might benefit of this experience. It is at least my hope. I did not reinvent the wheel I just optimized it for my needs. I only have something around 4000 hours of experience with 3D printers.
Background
I owned an Ender 3 Pro (till last week) that was a pain in the *** in the beginning and I strived towards a machine that would run 24/7 flawlessly. After a few weeks I became frustrated and ordered a MK3s MMU2s (with a backlog on orders of about 4 months). Meanwhile I optimized the Ender to run 24/7, three weeks without servicing (including bed levelling, no BlTouch installed). When the Prusa arrived I set it up without the MMU2s (still backlog) and the Prusa was nearly (debateable) as capable as the Ender. I the split the print queue to have the Ender print PETG, while the Prusa did PLA. The world was ok. With the MMU2s arriving things changed. I had the usual loading/unloading issues, some clogs, resulting in a 24 hour print with maybe 300 filament changes to last for 4+ days with lots(!) of interventions. This was no fun at all and is the basis for lots of frustration that can be found in numerous forums. Now, 2 months later: The MMU2s is running rock solid without intervention (4 day prints with 2000 filament changes, maybe 1-2 interventions if at all).
The way
I am using PLA on the machine (Filamentum, Prusa, Noulei, sometimes others). The bondtech gears are strong, hellishly. So, whenever anyone thinks this would be a problem as giving loading issues it is something else (even my Ender was able to pull filament through 3 meters of PTFE). And meanwhile I know what it is.
My solutions
Clogging: Simple dust filter and filament oiler (WD40 is my friend). I came to that because of… obviously the clogs, but also because of a Protopasta blog. They advised for vegetable oil, myself as a Chemist… I don’t care. WD40 really smoothed movement in the PTFE tubes and collected quite a lot of dust. But clogging was not my biggest concern. Just keep in mind that the filament is hanging a lot more around with a MMU2s as without it. Simple math. https://www.thingiverse.com/thing:3248173
Unloading issues: PLA and the extruder with lots of loading/unloading steps and retractions will suffer of heat creep. What you experience is stuck filament in the PTFE tube down to the extruder, lots of grinding in the MMU gear case and hence greatly increased cleaning sessions. Plus probably failed prints due to opening the bondtech gear box at the hot end and sooner or later ruining a print.
I simply don’t discuss the topic anymore, I call it a fact by experience (I run the printer in an temperature controlled enclosure at 30 degrees Celsius). I found out about it the stupid way and I can understand many users denying the fact (because it might not be there). The stupid way happened to be a totally messed up print again and I got the printer on my desk (instead of standing in a corner). There I restarted the print several times and it would run till… I left the room. Stalled more or less straight away after 10 minutes or so (unloading issues). Don’t ask how I felt, I wanted to ask Josef whether it got a person detector installed. The trick was simple: Because of the summer temperatures I had a small fan running (the 120 mm AC Infinity with USB connector) at my desk attached to my computer screen. Everytime I left my room I switched off the monitor, hence the fan as well. It is not a massive fan, I just stirs the air a bit. After looking and experimenting I concluded that the extruder does not need cool temperatures but AIRFLOW. Which makes sense with such a small surface. So, the solution was an active cooler hat for that extruder, such as https://www.thingiverse.com/thing:2975582 . I installed the same Noctua fan as came with the Prusa. And the result: No unloading issues anymore. That reduced my error rate by something like 98%, but not good enough as I still had lots of manual interventions.
Loading issues 1: The last of my errors were loading issues. Obviously we need to cover the tips. Actually, no, we don’t… at least not in the extent most search for their salvation. The tip needs to be clean and without too much stringing. It shouldn’t break off, but it does not need to fit easily thorough the PTFE tubes. My tips are thick, but regular and barely make it through the back PTFE tubes to the (in my case non existent) buffer. The bond tech gears are strong as I said and would probably drive a nail into a wall. The only thing I did was to increase the ramming moves in the Prusament PLA profile +1 and upped the temperature during print to 210 °C. The tips look good and too thick and it doesn’t matter.
Loading issues 2: The real loading issues I had came later, but I had some before. The root cause was the same. My prints would all run for 1-2 days without hassle. After that things got a problematic. I just recently found out the reason, the very same I had before, but the trigger was different. It is the IR sensor or rather the lever… and the missing LED to see what is going on (the menu won’t help you will never look at it when the problem starts). First of all it needs to be perfectly adjusted. It should not flicker with loaded filament although it most of the time loads. So, in my case it was adjusted to the very right (looking from the front). It seemed ok and the first one or two days proved I was right. No loading issues. But the further the print advanced the worse it got, till the moment loading was pure luck (in numbers, 10-20 loads would go through, than an error occurred). What happens is that the PTFE tube bends the chimney a bit, so that the lever gives an intermittent signal (not loaded although loaded). To counteract this one would naturally move the chimney further to the right, but mine was already at the limit. The only way to give it the necessary depth into the sensor: Find a piece of plastic crap (0.3-0.5 mm) an push it under the left side of the chimney when loose and tighten the bolt. Not a permanent solution, but a working one. Another reduction of the error rate.
Result
With these solutions I got the printer to run nearly 24/7. I emphasize nearly as statistics aren’t so great when a print runs 3-5 days. So data points aren’t that quickly acquired. I admit I got a few more modifications, but those could not directly be tracked back to any root cause/error, so I consider them as rather cosmetic improvements. I will gain more experience with the second machine that I will setup in the very same way.
Feel free to share some (positive) experience as well. I hope future PRUSA models might incorporate some improvements or at least check my solution. I strongly believe the machines in the factory running perfectly well, I just do not think they are rugged enough for some common environments: heat creep within an AC room with air flow might not happen, but it happens in my flat, e.g.
Next steps
- Redesign of the chimney to give the freedom of adjustment
- Soldering LED to IR sensor (soldering is pretty easy, it is rather the placement of the LED)
- Maybe the use of a proper filament buffer (although this is not really a solution to any issues). Prusa, please rethink the buffer, the ‘sandwich’ is not really the best
RE: MMU Experience - from no chance at all to an all week running machine
NICE write up! Thanks!!!
RE: MMU Experience - from no chance at all to an all week running machine
@cybrsage
thx
RE: MMU Experience - from no chance at all to an all week running machine
@michael-t66 can you please post here pictures how did you place/incorporated that DUST FILTER to MMU2S deployment? I'm not sure where and how to place it...
MK3S + MMU2S (@BMG + MOSQUITO), MINI, ANET A8
RE: MMU Experience - from no chance at all to an all week running machine
@kumters
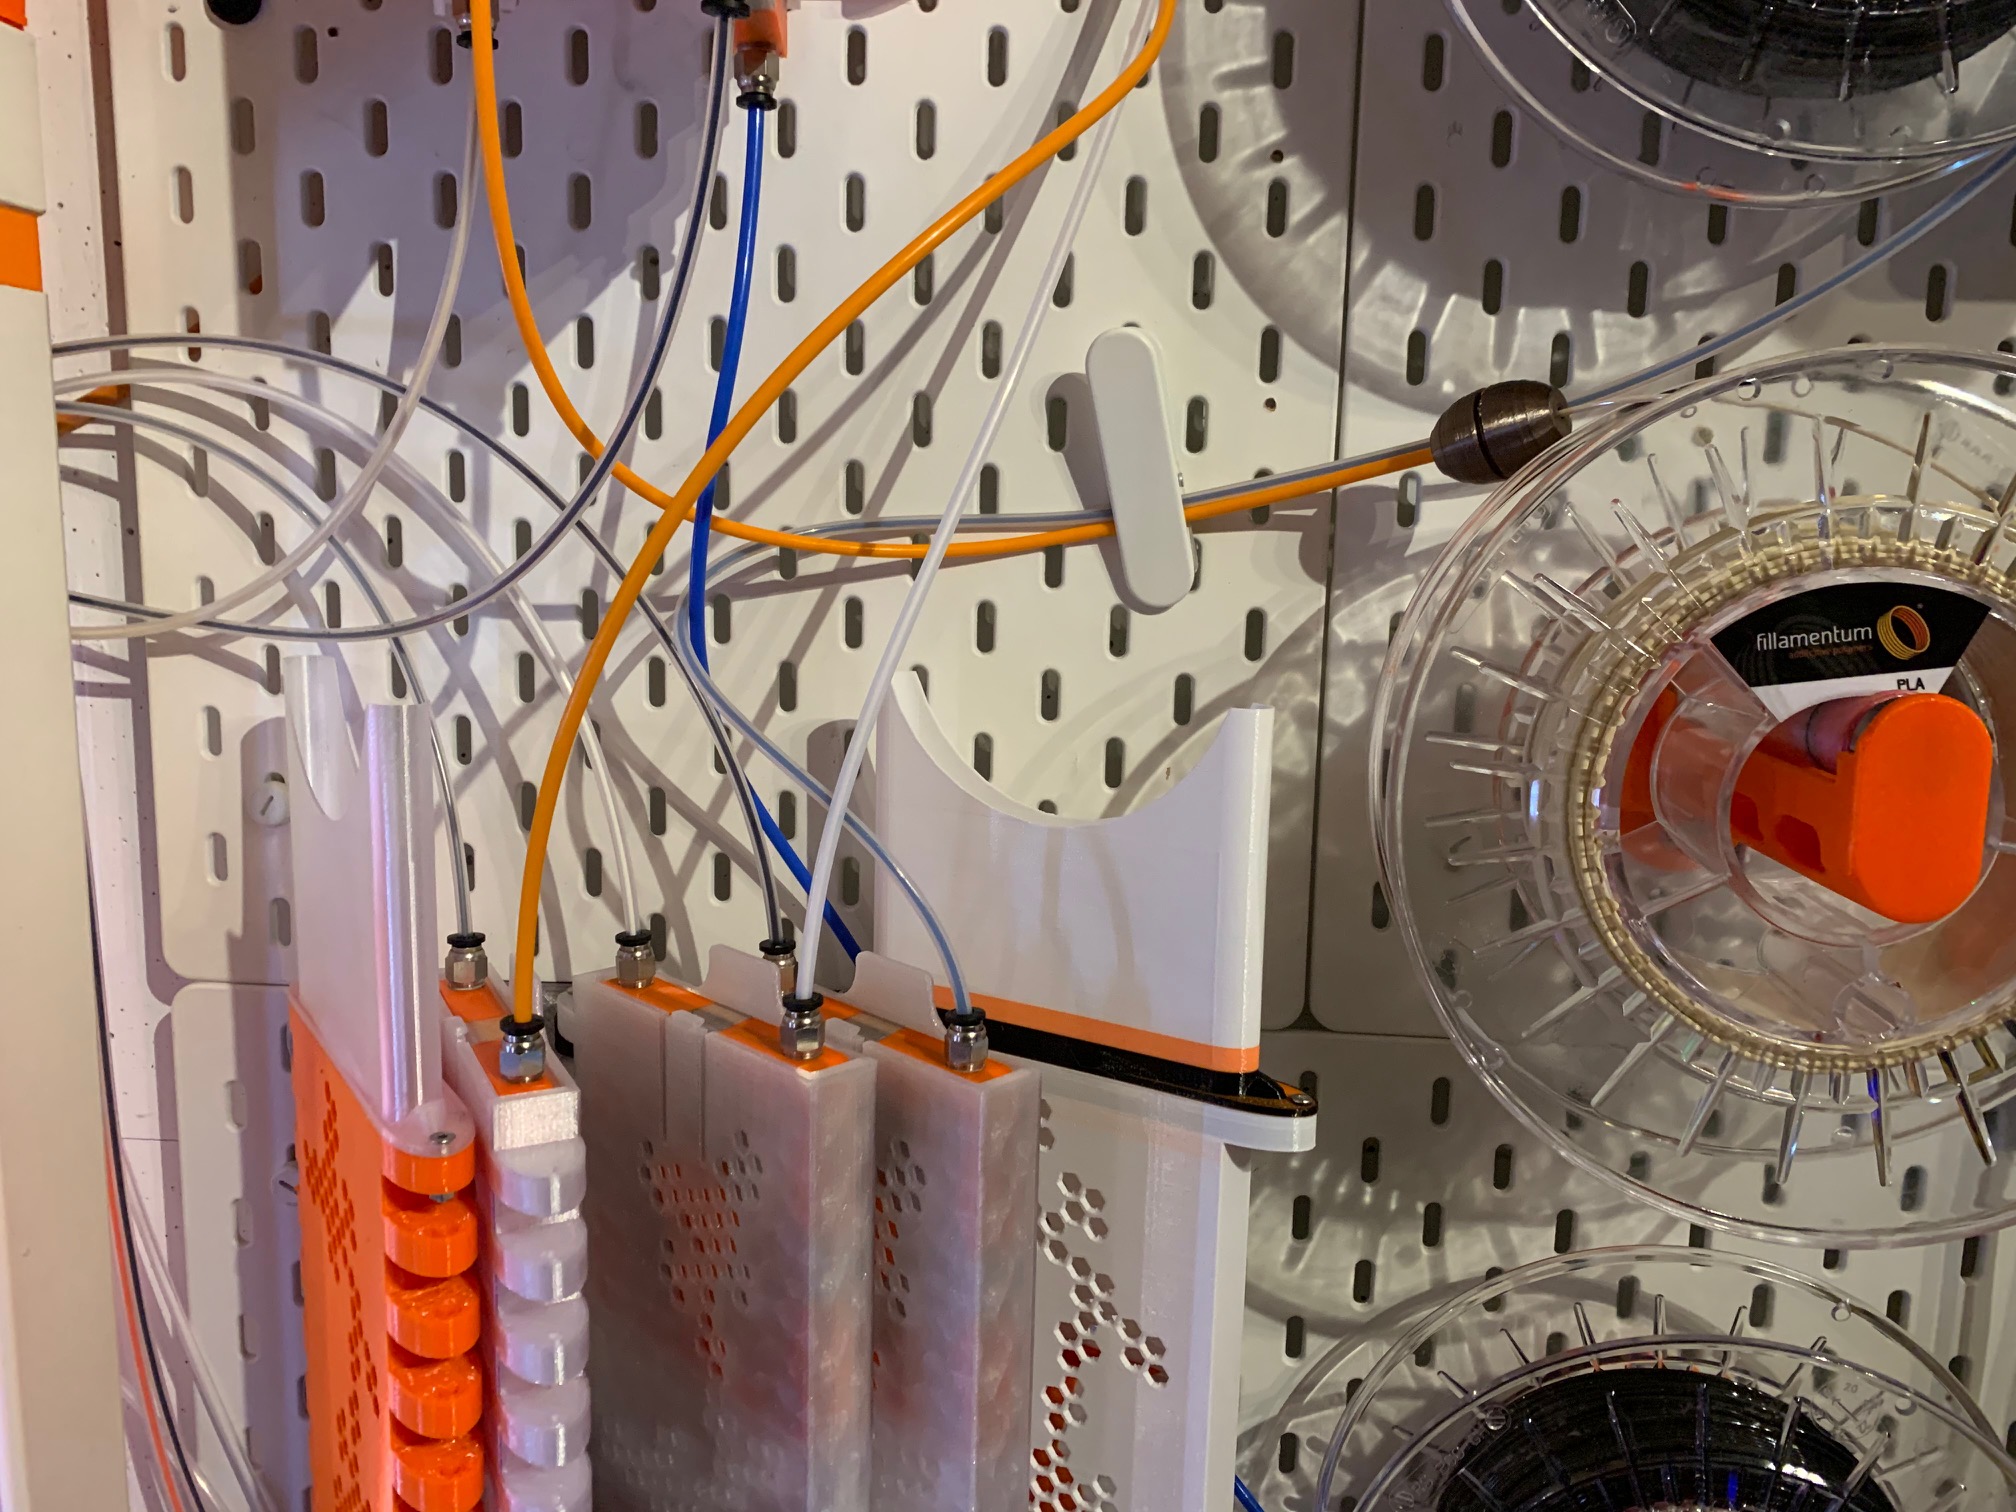
ok, a bit of a search riddle: It is one of those brass eggs (original file can be found on thingiverse, anything will do). So, right after the filament spool and before any PTFE tube seems easiest. With my open non-buffer solution it was incorporated into the PTFE interface.
RE: MMU Experience - from no chance at all to an all week running machine
@michael-t66
.....
Next steps
- Redesign of the chimney to give the freedom of adjustment
- Soldering LED to IR sensor (soldering is pretty easy, it is rather the placement of the LED)
- Maybe the use of a proper filament buffer (although this is not really a solution to any issues). Prusa, please rethink the buffer, the ‘sandwich’ is not really the best
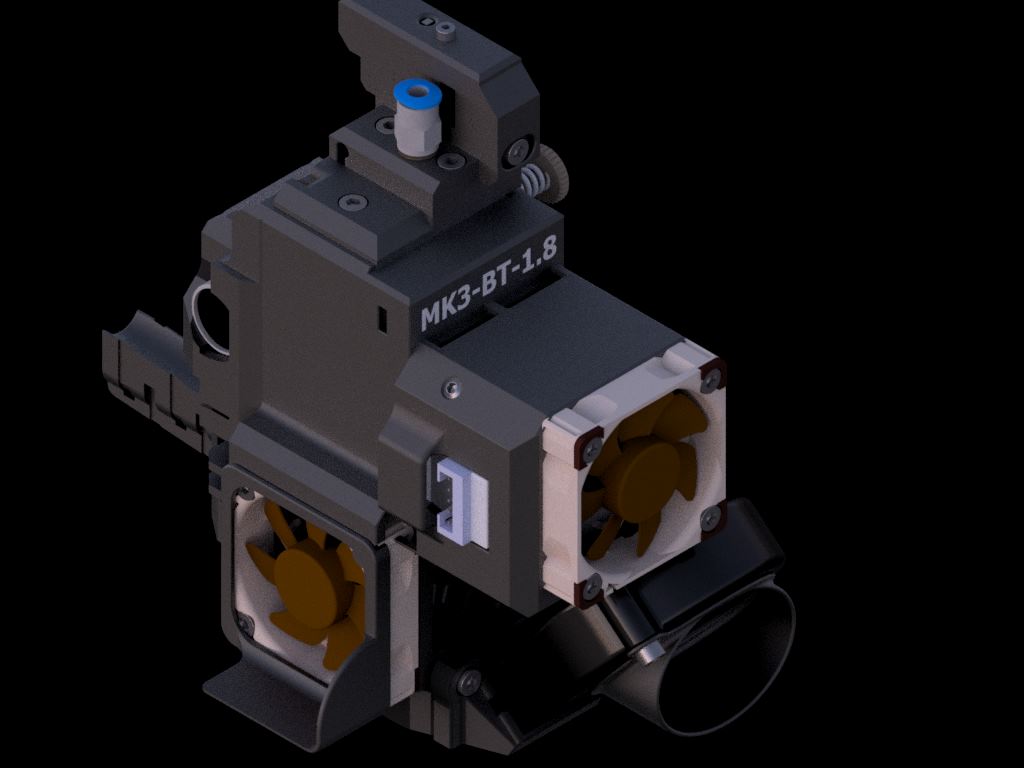
A possible solution..
I redesigned the chimney for my BT Extruder to be able to fine-tune the sensor. The BT is built on the Bondtech, but also redesigned:

Printed with black PA12 (Nylon) from APRINTAPRO.
Statt zu klagen, dass wir nicht alles haben, was wir wollen, sollten wir lieber dankbar sein, dass wir nicht alles bekommen, was wir verdienen.
RE: MMU Experience - from no chance at all to an all week running machine
@karl-herbert
thx for the inspiration. As I cannot edit my original post, I couldn't add that the modification were done, some parts I already uploaded. One really good addition was the open extruder idler door which kept debris out. That really did the trick. So basically I am done with tinkering as the machines run somewhere in the range of 2-4 weeks without any interventions/issues (beside changing filament and cleaning the bed).
RE: MMU Experience - from no chance at all to an all week running machine
@michael-t66
Thank you for the write up. The fan trick took all of 5 minutes to test and my MMU2s went from unusable to making hundreds of tool changes.
Still on long prints, it starts having issues, around 12 hours and beyond, and with increasing frequency. I’m wondering if maybe it’s your loading issue 2. But the explanation of it is not exactly clear. Would you be able to upload an image that shows what exactly that problem is and how you fixed it?
RE: MMU Experience - from no chance at all to an all week running machine
@adam-m43
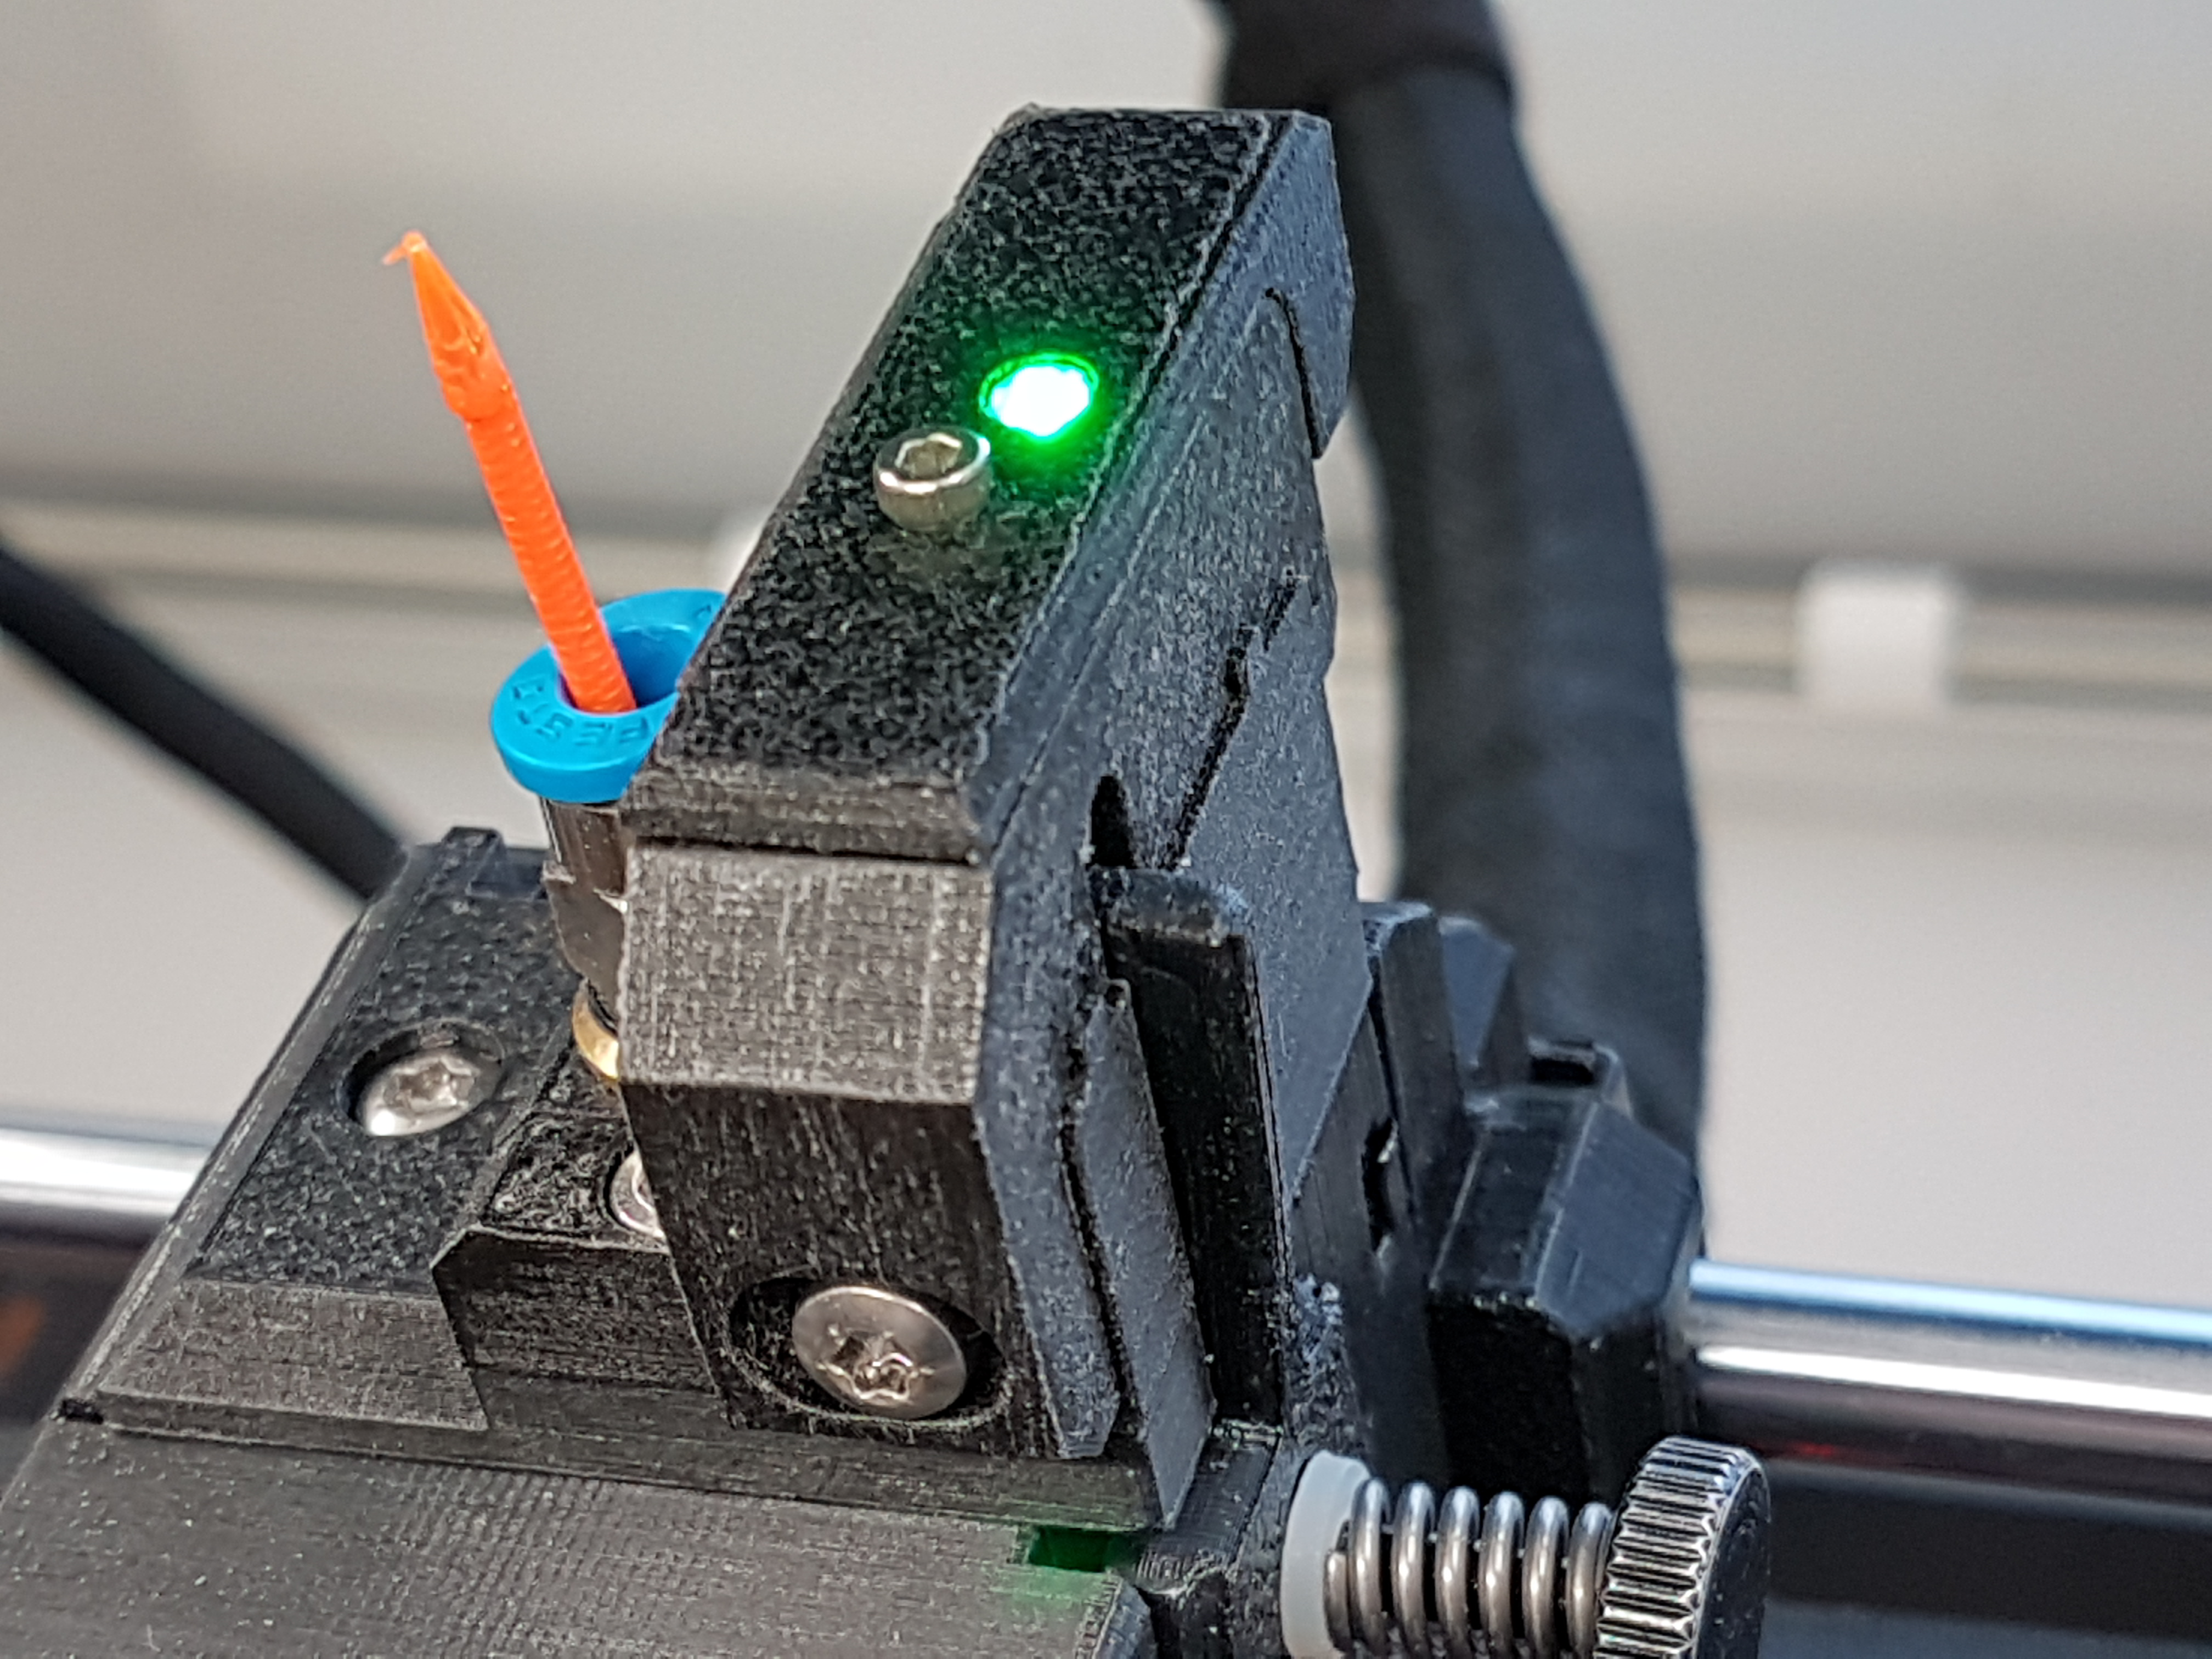
No problem at all. I'll try to elaborate it further and if I know what you are looking for, I can upload some pictures. The loading issues are mainly caused by the two sensors (in rare or other cases by the tips themselves, but I rather doubt that). I guess you are not having an LED soldered to your IR sensor (aka extruder filament sensor at the idler door)? What quite a lot of people figured out is that the calibration of the sensor is rather tricky. In the case of non-MMU this is rather not of any importance, but for the MMU mode it is.
In my experience there is no way to guarantee a proper functioning from the sensor reading in the display for a dynamic loading situation. Plus, it seemed that the display is sort of lazy or smoothing some flickering. This is even at the moment for me totally apparent and transparent and can be corrected on the fly with the setup I have (the soldered LED indicator). I guess your are not looking for the technical implementation, but rather the root cause.
The thing is this: If this IR sensor is not properly working under all circumstances (I will come to that) it is one possible cause of loading issues. For all those that have an LED indicator I bet they all know that. Now, calibrating the sensor under static condictions with the display might work well and seem to look good, but it might also be totally pointless. The effect of the sensor is most sensitive at the unloading/loading procedure of your weep tower, hence the x/y/z coordinates of the head differ at least in z, but most of the times in x/y as well. With the LED you can go through all these positions and check what your sensor is indicating. What you might experience in the case of loading issues: The Indicator gives false positive and negatives during loading in correlation to some positions as the PTFE tube and filament are quiete rigid and bend the whole setup a bit. In my case (at the time of writing) this happened for different z's (I meanwhile, whenever the sensor calibration is on the edge, had basically every correlation). But, the sensor can be calibrated to endure those situations, which is partly calibration and partly the built of the head. I might just have had an extruder door that was rather borderline, so I needed a different solution (shifting the chimney of the sensor head a bit and fixing the PCB inside). Meanwhile, I uploaded an open extruder idler door that solves one issue more (no chimney change needed anymore, the adjustment range is enough for calibration).
The other thing causing loading issues is (and someone might look into the firmware here) a discrepancy between the feed predicted and realized under some conditions (not the slow feeding to get that value, but the quick feeding). Obviously, if the IR sensor does not properly trigger you aren't getting to this one. If the PINDA does not work properly you basically cause the same thing, just that the PINDA has different issues. An open selector mod with magnet helps a lot, in my experience necessary rather for PETG than PLA. It is basically the stringing that causes the trouble. Those strings need to be extracted of the selector and a magnet might help to have the PINDA working for a longer period of time despite stringy tips and strings piling up. With that loading issues should be rather seldom.
Added: As for the LED indicator: Forget the most important thing: You simply see online real-time what the sensor is doing and even passing by the printer I can tell that everything is good to go. It is most convinient.
RE: MMU Experience - from no chance at all to an all week running machine
@karl-herbert
Hi there, I like your solution with the sensor mount and the status LED, is this also compatible with the stock BT extruder?
would you share the STL files?
best regards
RE: MMU Experience - from no chance at all to an all week running machine
@steve-richter
You can find stp data for the whole Extruder here:
https://grabcad.com/library/prusa-mk3-bt-1-8-bmg-extruder-v2-1
Statt zu klagen, dass wir nicht alles haben, was wir wollen, sollten wir lieber dankbar sein, dass wir nicht alles bekommen, was wir verdienen.
RE: MMU Experience - from no chance at all to an all week running machine
mods solving three of my main issues with the MMU , in no particular order:
buffer
https://www.prusaprinters.org/prints/22066-improved-mmu2-buffer-for-prusa-enclosure-v2
adjustable IR sensor flag
https://www.prusaprinters.org/prints/22067-adjustable-ir-flag-for-prusa-mk3s-mmu2s
selector
https://www.thingiverse.com/thing:3688458
longest print so far was 5 days , 2000+ layers and and 2000+ filament changes with zero issues