RE: Experiences with split or dual part cooling fan shrouds?
I ended up printing the delta-p fan duct, and after some extensive testing with it, I wasn't impressed.
Overhangs were awful all around. PETG overhangs were blobby and messy, and even PLA overhangs had issues.
This is a benchy printed using the Delta-p duct
Was that Benchy printed using the gcode provided by Prusa? or your own settings?
How did Benchy print with the original shroud?
Your overhang looks like the ones I had, but when I printed the Benchy using Prusa's gcode, it came out perfectly (the first thing I printed after assembling the kit).
This Benchy was printed using my own settings. I tried it in several orientations, to see if the delta-p duct prefers overhangs on the front, sides, or back, but there were only insignificant differences between them. When printed with the stock duct, the bow looks perfect. This is in PLA, with 100% fan speed.
Since you changed only 1 variable (the duct) and the results degraded, I agree it is clear the delta-p duct is inferior to the original duct.
Prusa i3 MK4S Kit in Lack Enclosure
RE: Experiences with split or dual part cooling fan shrouds?
It is just like @brandon-r9 mentions that the parts does not get stronger with 100% infill. It's just a waste of material and time.
Here is an interesting video from CNC Kitchen.
Thank you for that link; Stefan is very analytical and reminds me of statics and dynamics classes while at university 40 years ago (has it been that long?).
I am convinced I should concentrate on perimeters and layers, rather than just on infill.
Prusa i3 MK4S Kit in Lack Enclosure
RE: Experiences with split or dual part cooling fan shrouds?
I will try again with just the 1 rear leg of the 5-legged part and see how it does.
My bad print of the 5-legged part was made with the same default PLA settings, so it will be interesting to see the result; the only difference(s) will be the fan shroud and a partial-object print.
I printed a portion of the worst leg of my 5-legged part, using the same default PLA settings that were used when the print originally failed, but were successful in printing my LowerShell project. This portion had the overhangs at the rear, but the melted parts are at the left and right of the rear.
The reprint was a failure and looks just like the photos I submitted earlier; the shroud did not improve the print. I am at a loss as to why the print is a failure; perhaps I need to redesign the ends of the legs on my project?
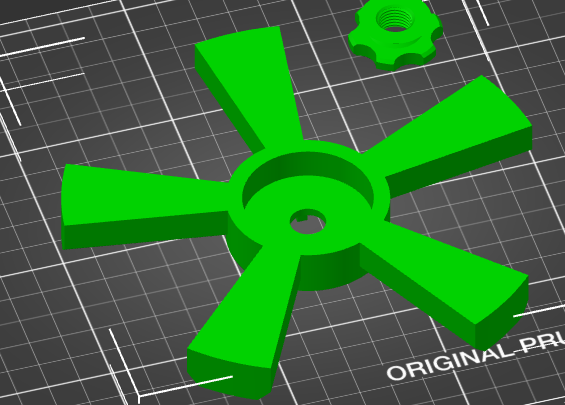
turntable base (stub).stl
Does anyone have any suggestions on how to print this part (as oriented)? The print failed with the default PLA (Prusa or Prusament) settings in PrusaSlicer.
turntable base (stub).stl
- redesign it to remove some or all of the overhang?
- increase perimeters?
- decrease infill (the part is for stability; there should not be much bending load)?
- other setting changes?
Prusa i3 MK4S Kit in Lack Enclosure
RE: Experiences with split or dual part cooling fan shrouds?
@t5montecarlo
I would
- flip the model so the larger area is on the print bed to remove the overhangs.
- increase perimeters to 4
- decrease infill to 20%
- uncheck dectect thin walls and uncheck ensure vertial wall thickness.
RE: Experiences with split or dual part cooling fan shrouds?
Thanks @brandon-r9. I can't flip the model because the center hub is hollow on the bottom and is critical to be flat inside. I don't think it would print well with such a large unsupported area. In the slicer, I flip it 180 degrees (not flipped in the picture) before slicing.
The infill for the 5-legged base was always 15% and thin walls wasn't selected; those were the settings I had for the other project (LowerShell).
I did revise the end of the legs to remove most of the chamfer, which was for aesthetics. Here is the STL of the stub that I verified prints without failures, so I am happy now.
turntable base (stub, revised).stl
Prusa i3 MK4S Kit in Lack Enclosure
RE: Experiences with split or dual part cooling fan shrouds?
@t5montecarlo
I'm glad to hear you got it working. I'm still curious about what was causing the issue. Once I finish this print order I plan to give your model a try just to see for myself. I also plan to print a benchy to see if my delta p duct is showing similar print imperfections.
@brandon-r9, I had 2 similar failures, where part of an overhang failed to print properly when it occurred on the far side of the extruder. The 2 failures were similar, but not resolved by the same solution.
The 5-legged base project was resolved by removing most of the overhang. The parts of the model that printed poorly had the same melted appearance, but already had 15% infill, so I chose to remove most of the overhang and remove the problem. The overhang was for aesthetics (and to use less material), only, so I can live without it. By the way, where I most recently wrote "(not flipped in the picture)", I should have written "(already flipped in the picture)".
The LowerShell project was resolved by changing the infill from 100% to 15%. Your theory about there being too much plastic at the area where it looked melted, seems to have been the issue. The cooling may still be inadequate, but adequate enough to cool when the plastic is not too dense.
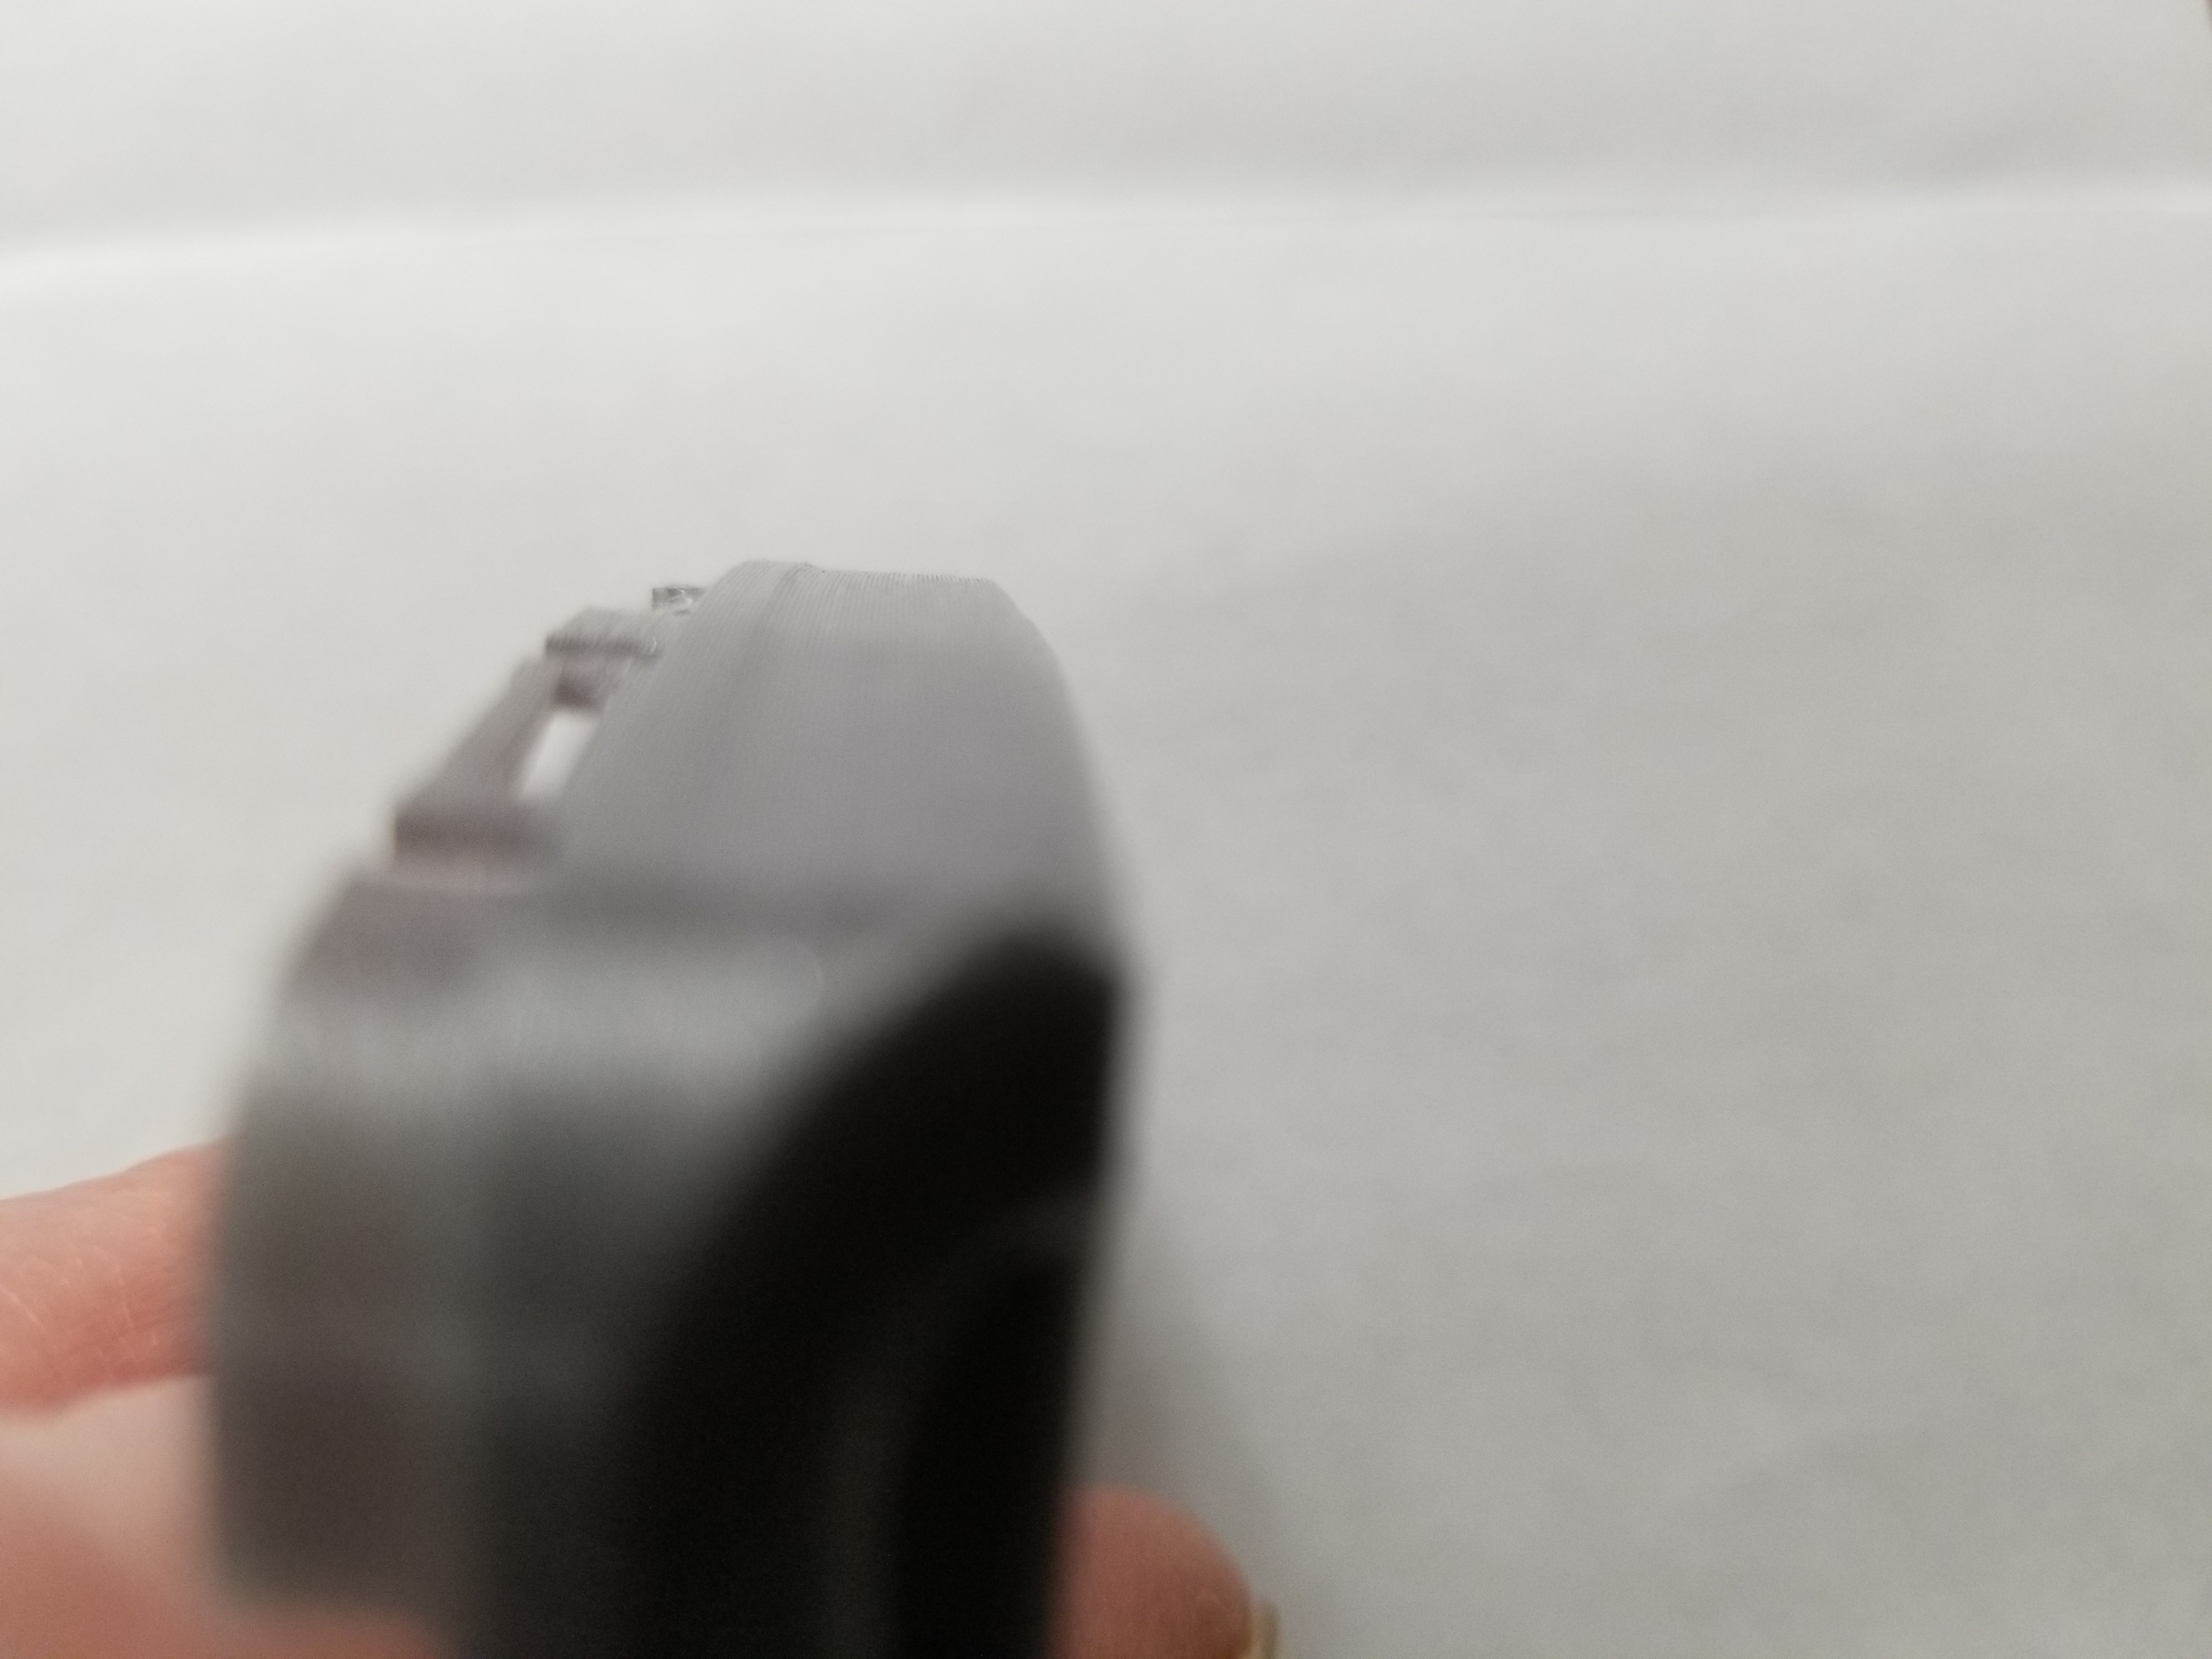
A different issue has now occurred with the LowerShell project. After reducing the infill, one of the long sides of the object is narrower where the 15% infill is. The affected side is the one facing the rear of the machine. The long side facing the front of the machine printed OK. The picture is poor, but you can see the effect. The right of the picture is the bottom of the part. As you move to the left of the picture, you can see where there is a wider band, which is made of solid layers above the infill (the base also has solid layers, but a chamfer is likely hiding the effect). The cause is not a shift in layers as it does not present itself as a reduction on one side and an increase on the other side, just a reduction on one side (the other side is even). Interestingly, the issue is also on the far side of the extruder.
Do you suspect the infill has an effect on shrinkage/expansion of the sides that the infill touches. Would more perimeters make the side more stable to the shrinkage? Currently, there are 2 perimeters.
I am currently using the RHD CS duct on an MK3S. I just printed the duct hoping it would resolve the issues I was having with the overhands, but the results were similar to those with the original duct. It was @lp0101 who was trying the delta-p duct and got poor results on the Benchy.
If you arrive at any new ideas, I would be happy to hear them.
Prusa i3 MK4S Kit in Lack Enclosure
RE: Experiences with split or dual part cooling fan shrouds?
@t5montecarlo
What brand/type of filament did you say you were using for this print?
Where is your printer located in your house? Are there drafts? Is it cool or colder than typical room temp? How old is the filament? Have you dried your filament?
Sorry for all the questions but this part seems really finicky, printing it should be pretty straight forward so I'm wondering if there are outside conditions that could be contributing to the problems.
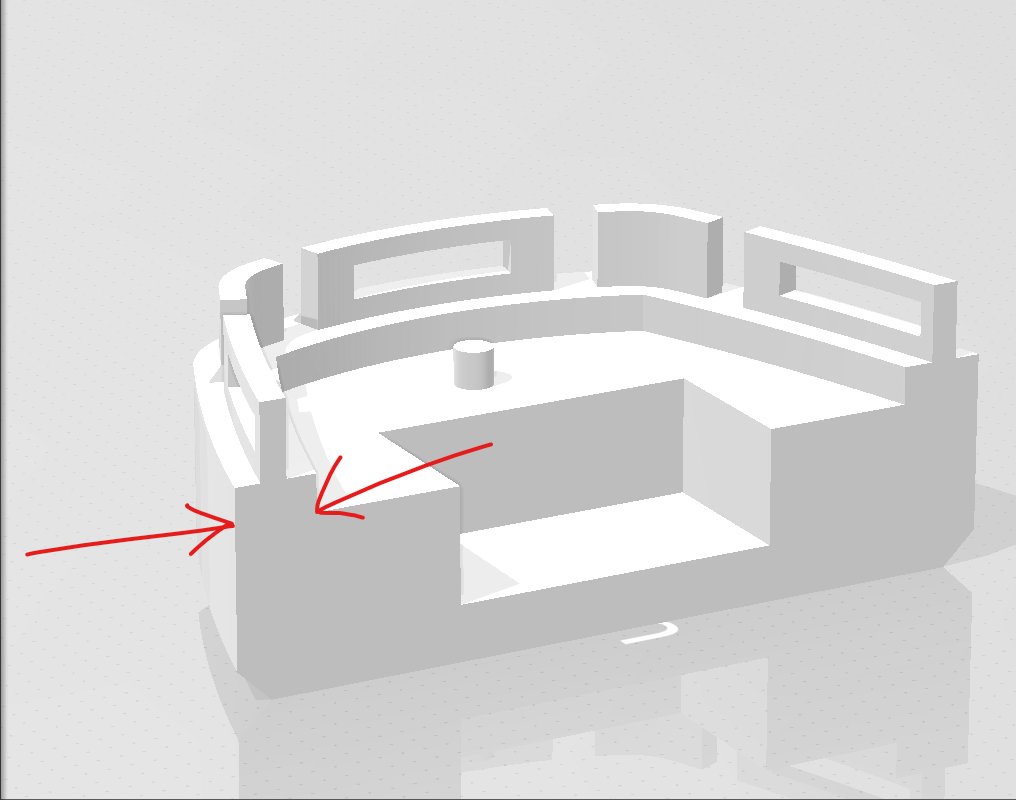
I'm guessing this is being caused by the inset on the opposite side of that wall or the large flat deck on the inside. See below. Personally I'd increase the perimeters to 4-5 and see if that helps.
RE: Experiences with split or dual part cooling fan shrouds?
@t5montecarlo
If you want to keep your "turntable base" design, you can improve the print quality by adding a 1 mm radius to the edge you are having trouble with.
Laser cutting, water cutting and even 3D printers perform better if sharp corners are replaced by a small radius. The machine then does not need to stop to change direction since the radius is only an extension of the transport path.
Bear MK3 with Bondtech extruder
RE: Experiences with split or dual part cooling fan shrouds?
@t5montecarlo
What brand/type of filament did you say you were using for this print?
Where is your printer located in your house? Are there drafts? Is it cool or colder than typical room temp? How old is the filament? Have you dried your filament?
Sorry for all the questions but this part seems really finicky, printing it should be pretty straight forward so I'm wondering if there are outside conditions that could be contributing to the problems.
I'm guessing this is being caused by the inset on the opposite side of that wall or the large flat deck on the inside. See below. Personally I'd increase the perimeters to 4-5 and see if that helps.
Thank you for the questions and feedback, @brandon-r9.
What brand/type of filament did you say you were using for this print?
Unbranded Galaxy Silver PLA that came with the MK3S kit (only says "Filament made for Prusa Research"). The spool is clear, not a black Prusament spool.
Where is your printer located in your house?
In my home office, in a corner of the room, and inside of a Lack enclosure with the doors shut.
Are there drafts?
We have forced hot air heating, but the enclosure doors are shut and the enclosure is not near a door.
Is it cool or colder than typical room temp?
No; temp is about 70F/21C.
How old is the filament?
Opened ca Jan 1 2020. Humidity in the house has been about 25% since then (winter; quite dry).
Have you dried your filament?
No
I'm guessing this is being caused by the inset on the opposite side of that wall or the large flat deck on the inside.
Yes, that is the affected area. There is no infill in that area since it is so narrow. That area is about 3.55 mm (0.140 in.) wide.
Personally I'd increase the perimeters to 4-5 and see if that helps.
OK; I will give it a go and report back.
Prusa i3 MK4S Kit in Lack Enclosure
RE: Experiences with split or dual part cooling fan shrouds?
@t5montecarlo
If you want to keep your "turntable base" design, you can improve the print quality by adding a 1 mm radius to the edge you are having trouble with.
Laser cutting, water cutting and even 3D printers perform better if sharp corners are replaced by a small radius. The machine then does not need to stop to change direction since the radius is only an extension of the transport path.
Thank you for the tips, @rhdreambox.
I will give the 1-mm radius a try, later today, and report back. It would be good to be able to retain the large chamfer. The point about tool path is very good; I will keep it in mind.
In your picture, the print on the left is already much better than I was able to print. Did you print it with the large end facing the rear of the machine (worst case)? I can see the improvement in the print in the right.
Prusa i3 MK4S Kit in Lack Enclosure
RE: Experiences with split or dual part cooling fan shrouds?
In your picture, the print on the left is already much better than I was able to print. Did you print it with the large end facing the rear of the machine (worst case)? I can see the improvement in the print in the right.
Yes, the large end facing the rear, cheap PLA and Prusament PLA standard settings.
Bear MK3 with Bondtech extruder
RE: Experiences with split or dual part cooling fan shrouds?
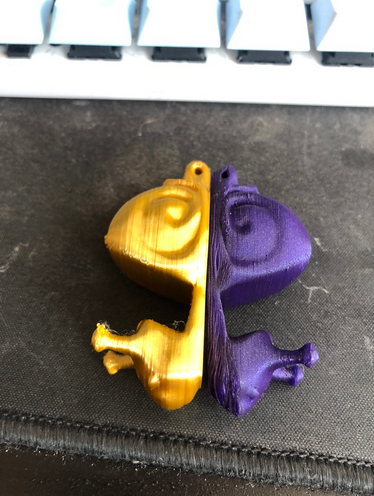
Just one more comparison with the delta-p duct. Different filament used, but the results should speak for themselves. Gold is stock, purple is delta-p

RE: Experiences with split or dual part cooling fan shrouds?
Quite a contrast! The purple is terrible. Did it also lift off of the plate? (it looks curved)
Prusa i3 MK4S Kit in Lack Enclosure
RE: Experiences with split or dual part cooling fan shrouds?
@t5montecarlo
From what I can tell, the adhesion was fine. It looks like the overhang drooped down to the previous layers and deformed them
RE: Experiences with split or dual part cooling fan shrouds?
@lp0101
This is interesting. The overhang (bottom) areas are not good on the purple print, but the portions of the upper layers on the purple print look better than the gold print. I've found that even the same brand filament varies from color to color. I'm not implying that your testing is invalid or that the Delta P is better than stock (as mentioned in previous posts) but this does reinforce the importance of doing to temp tower even when just changing colors.
RE: Experiences with split or dual part cooling fan shrouds?
@t5montecarlo
2. Print a temp tower to find your ideal temp settings for the filament you are using. I like this one because it provides the Gcode with changing temps. https://www.prusaprinters.org/prints/20652-temp-tower-pla-petg-abs-mmu2s-compatible .
Unfortunately, the gcode for that temp tower seems to only work on an MMU2 machine. My machine prompts me that the code is for a different machine.
The source it was remixed from seems to be for the standard MK3/MK3/S. I am starting the job now. It appears to be running slower than other prints; even the bed leveling routine was slower. I would like to see the print turned 90 degrees to see the difference in performance between ahead and behind the extruder, so I have aborted the print.
https://www.prusaprinters.org/prints/4667-all-in-one-temperature-bridging-tower-pla-petg-gco
I don't see any way in PrusaSlicer to adjust temperatures at different layers. Do I need to install Simplify3D and set the temps at different layers, as done by Tronnic?
Is this tower something recommended to print for each spool?
Prusa i3 MK4S Kit in Lack Enclosure
RE: Experiences with split or dual part cooling fan shrouds?
Is this tower something recommended to print for each spool?
I find doing it once per type per manufacturer is usually adequate. If I start to notice problems with overhangs, I may do it for a specific spool.
RE: Experiences with split or dual part cooling fan shrouds?
Thanks very much, @bobstro. I will have a detailed look at your site, later today.
Prusa i3 MK4S Kit in Lack Enclosure
RE: Experiences with split or dual part cooling fan shrouds?
I've got a partially documented example using PrusaSlicer here. You'll want to adjust the temperature range and heights for the model you're using. Basically, you insert custom layer change gcode to adjust temps based on current layer height.
@bobstro, your "Other Custom G-Code" example was very helpful; thank you.
On the Temp Tower in question, the base measures 1.2mm thick and each temperature test range is 10mm high (based on gcode).
Would you please confirm the accuracy of following custom gcode for the Temp Tower in question (assume PLA)?
https://www.prusaprinters.org/prints/20652-temp-tower-pla-petg-abs-mmu2s-compatible
(the first line differs from your sample code, as I wanted the temp to be correct for the first layer):
;BEFORE_LAYER_CHANGE
; layer_z is height of current layer in mm
G92 E0.0
;[layer_z]
{if layer_z <= 1.2}M104 S215
{elsif layer_z <= 11.2}M104 S190
{elsif layer_z <= 21.2}M104 S195
{elsif layer_z <= 31.2}M104 S200
{elsif layer_z <= 41.2}M104 S205
{elsif layer_z <= 51.2}M104 S210
{elsif layer_z <= 61.2}M104 S215
{elsif layer_z <= 71.2}M104 S220
{elsif layer_z <= 81.2}M104 S225
{elsif layer_z <= 91.2}M104 S230
{endif}
Will I have to remove this code, manually, after exporting the gcode? or will it be deleted when I close PrusaSlicer?
Prusa i3 MK4S Kit in Lack Enclosure