126% build volume (26,5 cm build height) + easily exchangeable extruder head! WORKING!
Hello!
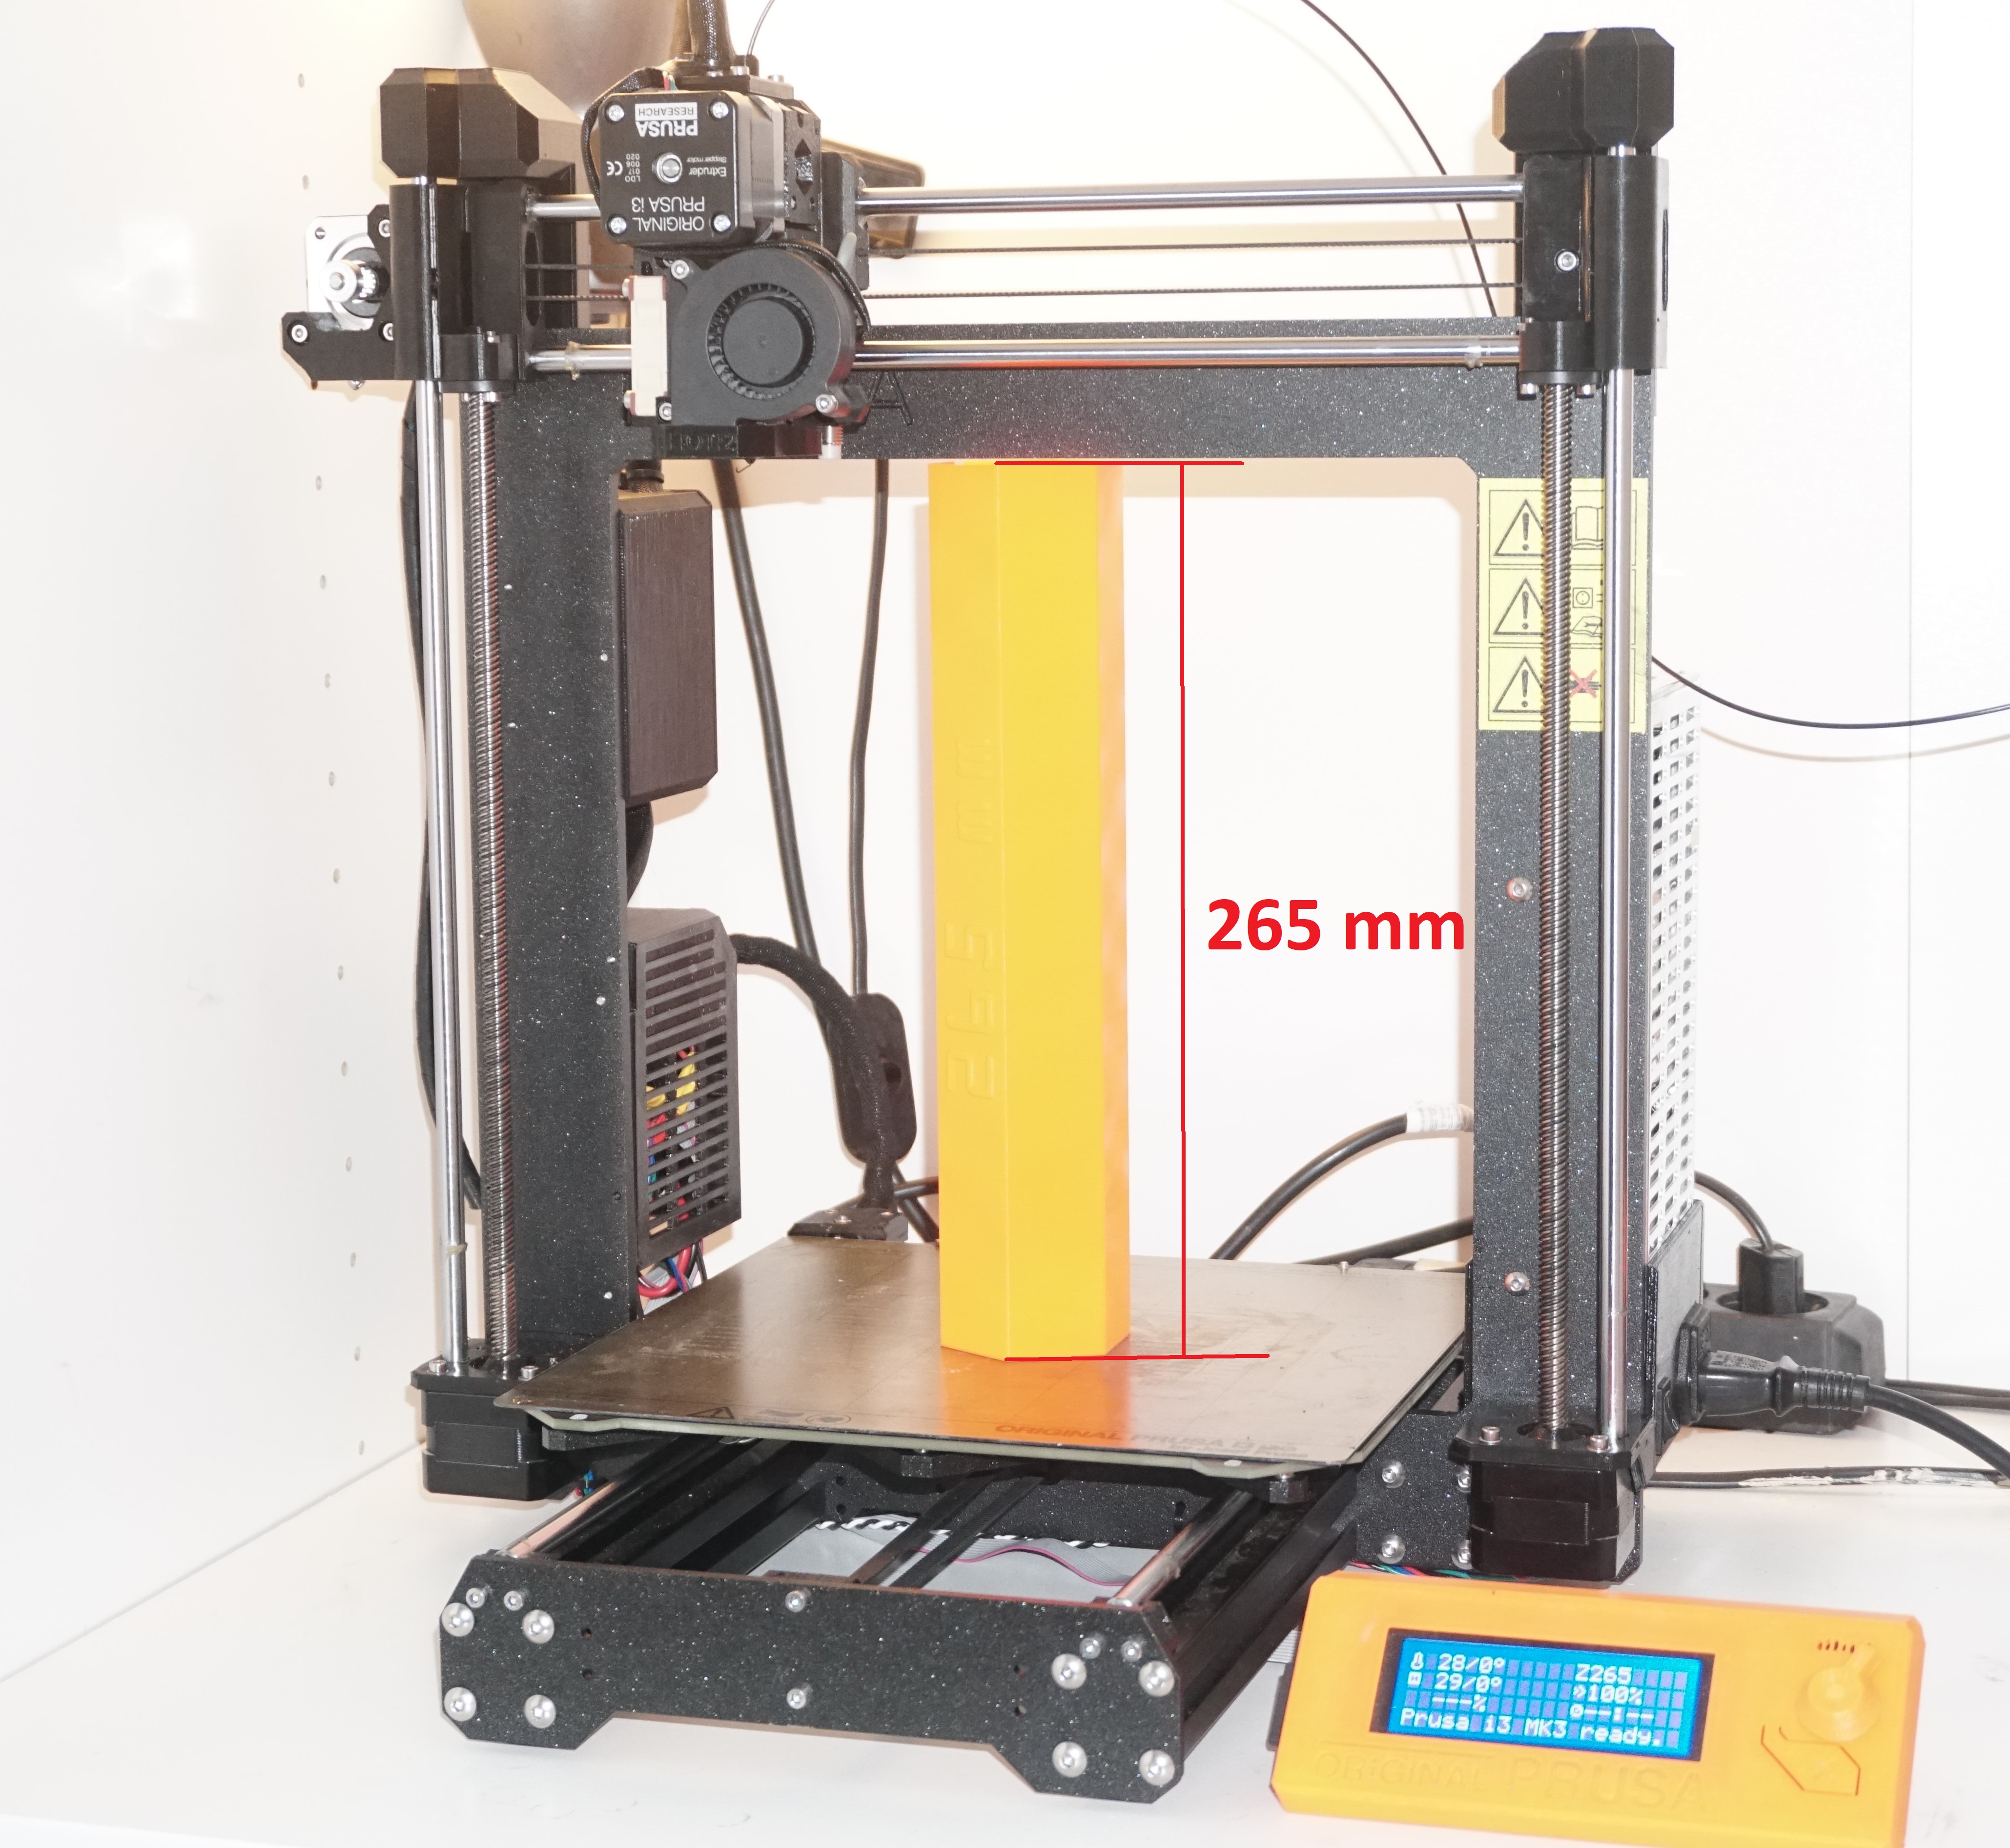
Since I entered 3D printing with the MK2 a few years ago, I always wanted to improve that beast. Several things came in my mind, two of them are presented with this mod, which base may be known to some of you for the MK2 (130% more build volume mod). Take a look at the results:
1. More build height (z-axis): 26,5 cm in total or 126% of the original build volume!
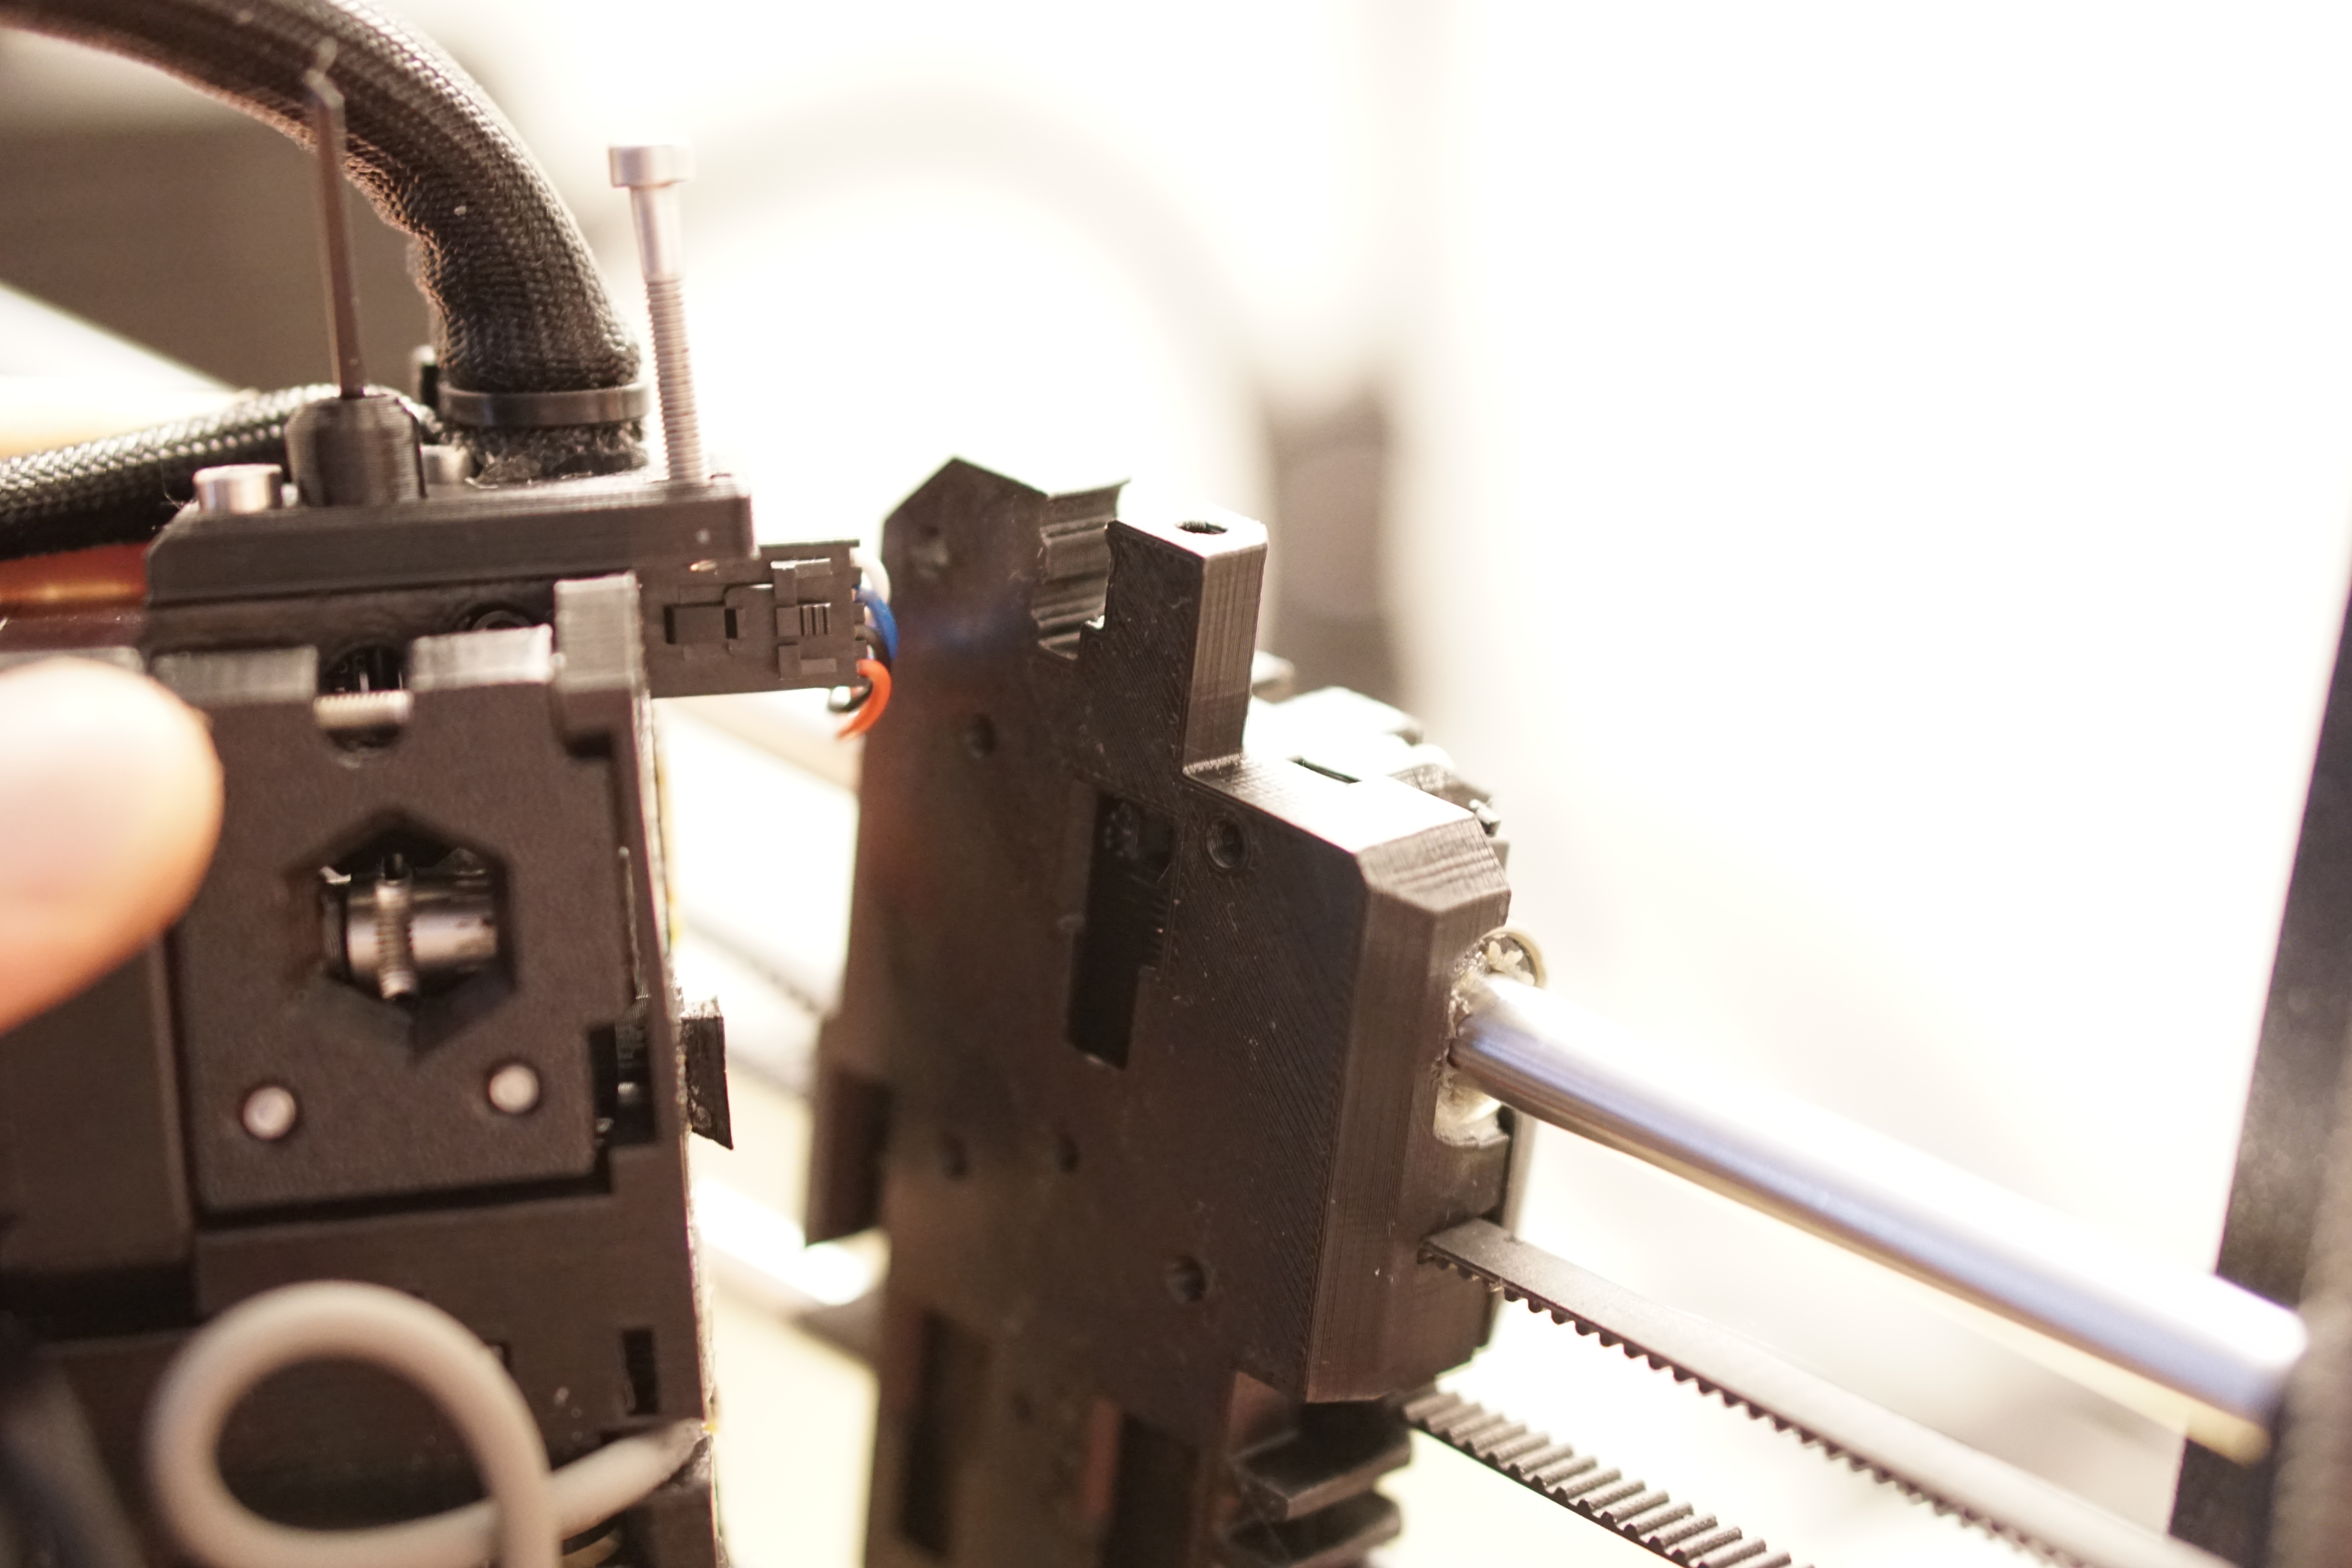
2. Easily exchangeable extruder head! You may also notice the aligned x-axis belt btw.
Before you read on: This mod is a significant modification of the original MK3. Please make sure you have some basic skills in building/rebuilding the MK3 and also considering electronics ("just" soldering or crimping) and that you can modify the firmware ("just" one codeline) or at least flash it.
What parts do I need?
Yeah, that's it! Pretty cheap isn't it? 😉 Okay. I forgot to mention that you also need some soldering skills and some time. Let's dive into it:
Where can I download the printable parts?
On thingiverse with this link:
https://www.thingiverse.com/thing:2947340
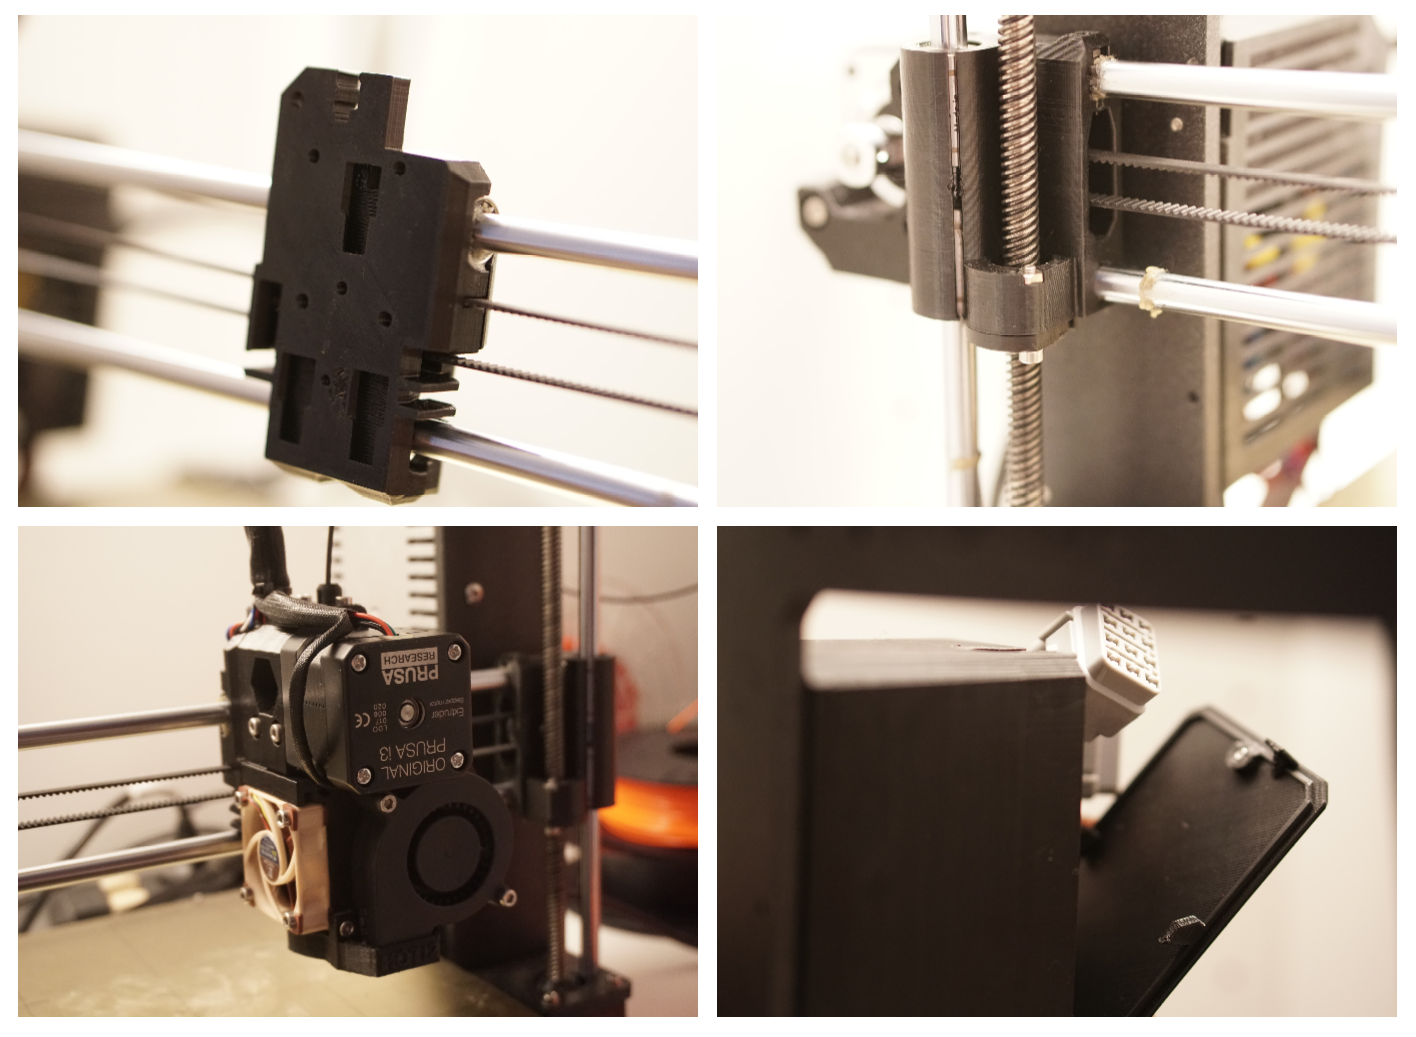
How does the mod look like in detail?
Like this:
How do I build the mod?
Okay, as this only will be a short presentation, just a short overview of the building steps so that you see how much time it takes:
1. Print all the parts of this mod.
2. Take the whole z-gantry, x-gantry and the extruder apart.
3. Rebuild the x-gantry with the new parts (x-end-idler, x-end-motor, x-carriage).
4. Rebuild the z-gantry with the new parts (z-axis-top).
5. Rebuild the extruder with the new parts and the new cable management (extruder-body, extruder-cover, filament-sensor-cover, extruder-body-shoes).
6. Cut the cables of the extruder quite close to the connectors. Make extension cables with the connectors.
7. Your choice: Solder the cables back together or build (solder) a connector in between. I choosed a car-connector. You may want to design a specific holder depending on your connector or you use the generic solution provided by me, based on the pcb box v2 of MMU1.0.
8. Update firmware to a max z height of 265 (mm). You may use the hex file from thingiverse, see information there.
9. Literally plug in the extruder and print!
How do I use the mod?
It is very easy to replace the extruder now. As I have 3 hotends from 3 upgrades I will build one hotend for each application: 1x with 0.25 nozzle, 1x with 0.4 and an extruder only for food-grade plastics. With a second MK3 on the way, this mod makes even more sense as I can swap the extruder heads in between the two printers. Just as a suggestion.
Let's be honest: What are the drawbacks?
There are no serious problems or drawbacks. A brief overview of possible annoying things for you:
Do the longer rods affect print quality in a negative way?
Yes and no. The answer is, I haven't done a wide range of tests on the modded printer. However, I printed the tall 265mm object in vase mode and it turend out fine - no wobbling or shifting or something like that on higher layers. But that was vase mode. I just did not had to print such large objects since the last days when the mod was done.
However, I did print the z-axis-top parts with the modded printer (used z-axis-top parts from the old MK2 130% mod). They printed such as fine as with the usual MK3. No visible difference. Same goes for the connector box.
The thing is, although the rods are longer and one can say the are more flexy, the former support was more or less hinged, while it is fixed with this mod, allowing less movement caused by torque. So it may be even better now 😯 . Coming to an end: I just think you won't notice any difference.
Is it possible to only use the height upgrade or the exchangeable extruder?
It is possible to only use the exchangeable extruder upgrade. You then do not need to print and install the z-axis-parts, so you don't need to use the height upgrade. However, this does not count vice versa: If you want the height-upgrade, you also need the extruder upgrade.
Re: 126% build volume (26,5 cm build height) + easily exchangeable extruder head! WORKING!
That's awesome, well done 😛
A few electrical details from me:
-With the new 24V system, you'd only need a connector that's rated to around 2A. That increases the selection. Didn't fly with the MK2, 4A connectors were often bulky.
- Cables will get in the way at some point, they tend to snag up on something unexpected, or drop when lots of heat comes into play.
My Titan cable mount printed fine for a year, then it drooped due to the heat when i started printing ABS. 100 degrees bed didn't take well to the PETG part the cables were moutned to, cable weight pulled it down. But your cable string is coming from the top, so this should not be as much of a problem.
- Connectors for the motors are quite dangerous for the motor drivers, if there's a slight disconnection between the motor and the driver while it's on (aka, slightly loose connection) the driver will get irreparably damaged, resulting in a broken board. Only the DUETs have built in protection against disconnecting motors while powered on.
Also shame Prusa went with the old metal z frame on the MK3, extrusions all the way (Haribo/Zaribo or Bear upgrade ftw) would have been wonderful. But they had so much of these things in stock, that they drilled new holes in them and continued to use them for the MK3.
Re: 126% build volume (26,5 cm build height) + easily exchangeable extruder head! WORKING!
Thank you!
Interesting details I should have taken into account. Sometimes it has manifested that I need a hiigh current connector, just did not have the 24V in mind.
Your explanation about harming the drivers when disconnecting whilst running also is very crucial. And I one time really wanted to test out what happens when I disconnect it 
And the metal frames - so that is the reason they still use them! Simple. Maybe it changes in future.
Re: 126% build volume (26,5 cm build height) + easily exchangeable extruder head! WORKING!
hi marvin, how have things been going with this mod? i was recently thinking about having a taller frame laser cut, and just replacing the rods. have you had any print problems with the longer rods? where did you get them?


