First vs Top Layer
In my attempts at trying to rid myself of ripples I have increased my nozzle height and am using the following standard settings from the latest driver pack. It seems to have worked at removing the ripples but now notice the top layer vs bottom layer.
Print Setting - 0.20 mm Normal
Filament Setting - Prusa ABS 2.85mm
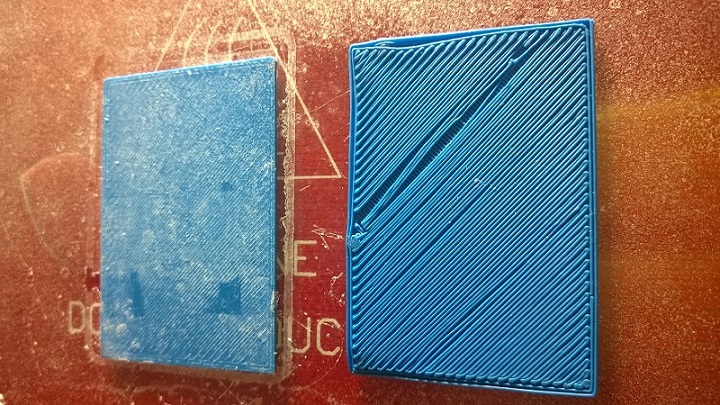
The bottom layer is stringy and not binding together. The top looks fine with the exception of it pealing off the bed at the corner.
What is causing the stringy bottom?
Do you see anything else odd with this print?
Re: First vs Top Layer
Hi, there is a delicate balance having the distance between the nozzle and the printbed right for the first layer. The amount of the plastic is always the same, so if the nozzle is too low, material doesn't have a place to go and it looks "overfilled", or it just lays on top when nozzle is too high and won't stick to bed.
We have a guide how to calibrate it http://prusa3d.dozuki.com/Guide/Calibrate+i3+Plus+LCD-SD/4 did you go thru it?
The firmware comes pre-calibrated, steps per mm are calculated and set for every axis in our firmware. If you download the source code on our drivers page http://www.prusa3d.com/drivers/ you can look at the configuration file and see all the values.
Re: First vs Top Layer
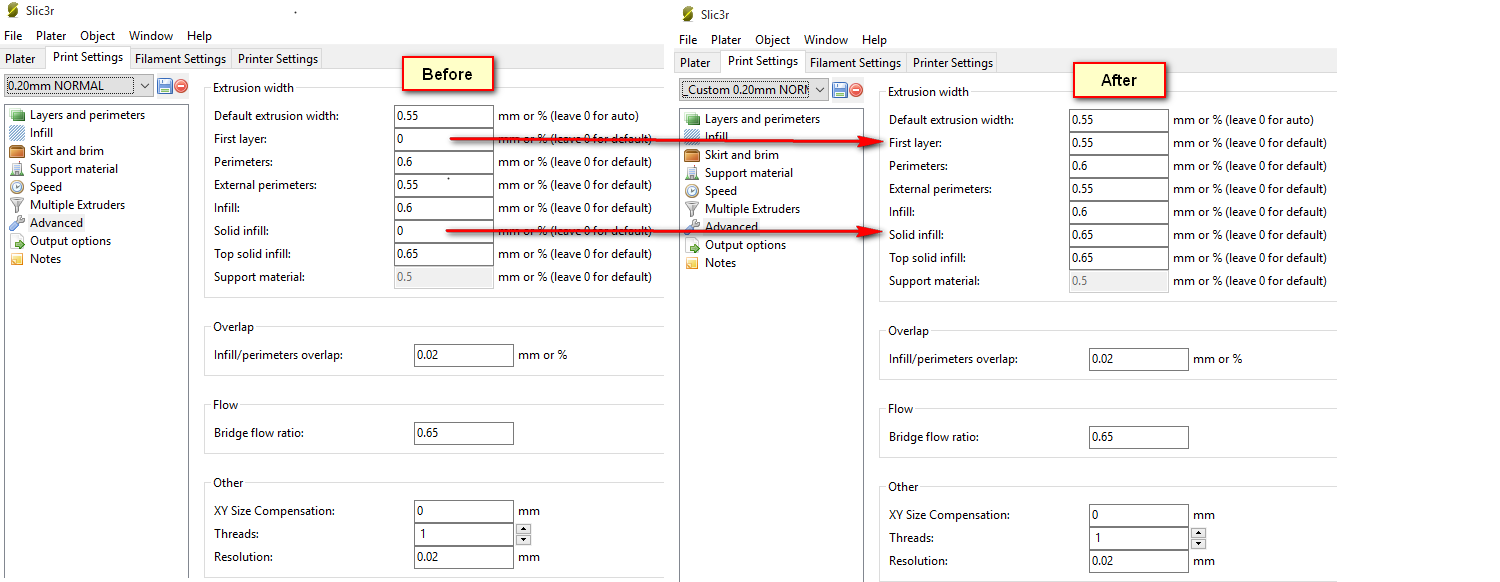
A minor but significant change to Slic3r settings yielded a very high quality print!!
Noticing the that on Print 1 the first layer was different from the top, so I began looking through the Slic3r settings. I remembered a post on Google+ where someone discovered that 0 for default settings in Slic3r caused unexpected results so I simply updated the "First Layer" property from 0 to 0.55. 0.55 is the setting for the "Default Extrusion Width" property so it made sense to use the same value. I also updated the "Solid Infill" property from the default 0 equal to the "Top Solid Infill" property. Seemed sensible.
I also increased the bed temp to 110 in hopes of preventing corner curls and that seemed to work.
The print on the top of the following image shows is just after print and bed cool-down. I placed the first print next to it so show the difference in top layers. No bumpy corners or lift off curling occurred in this print. I am attributing the corners not lifting with the increased bed temperature of 110 vs 100 in the earlier print. The corners do not have those annoying bumps on them either which I think is a result of the print settings.
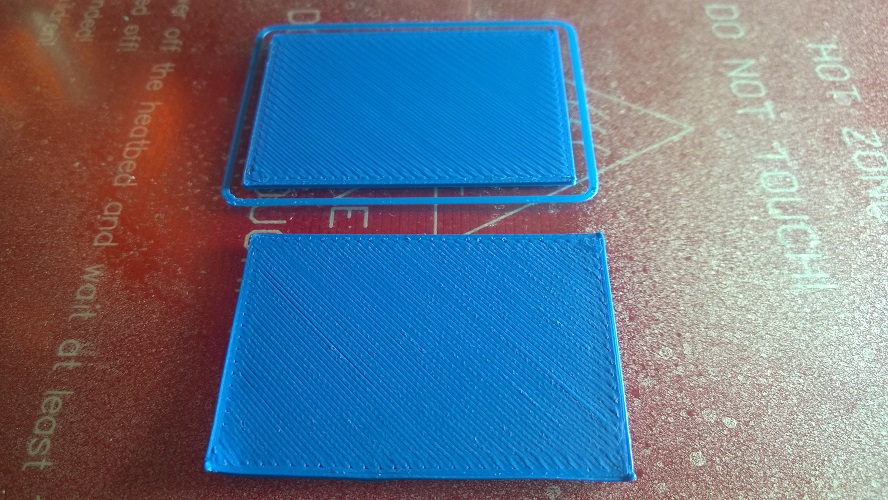
Changing those 2 settings showed incredible differences in first layer. The first layer is smooth and tightly put togther - no stringy mess!
P.S. I did go through your calibration settings... many times actually.
Re: First vs Top Layer
The overall quality of this print can be summed up in this picture comparison. No light showing through this new print!
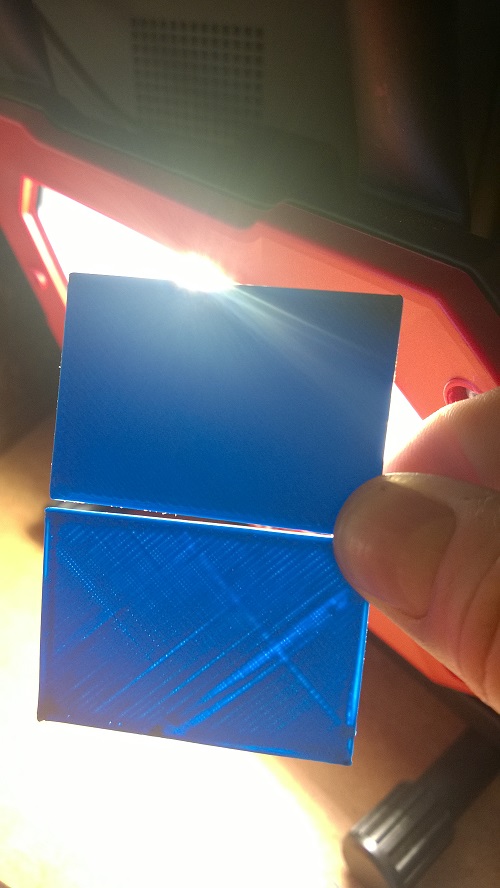
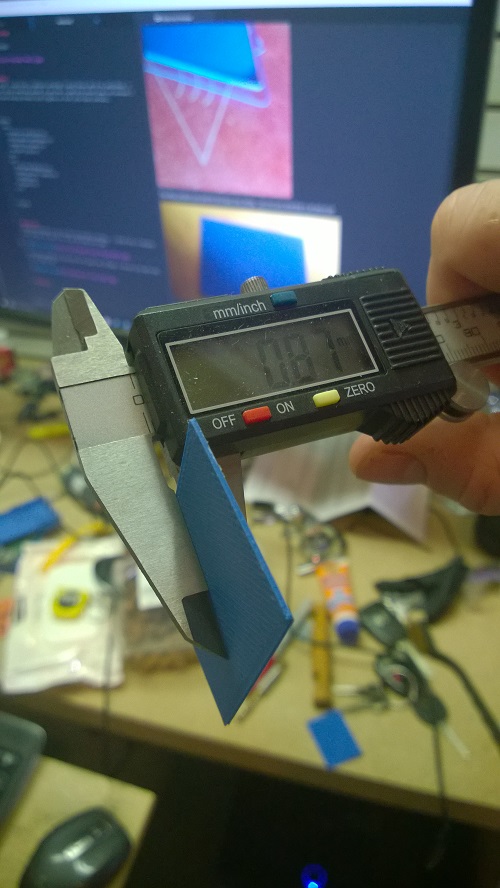
A final measurement of the thickness shows a ~.87mm compared to the CAD drawing which called for .8mm thickness.
Re: First vs Top Layer
If you download latest drivers, all the line widths are set to same value 🙂
The drivers are up for almost two weeks.
Re: First vs Top Layer
I did download within the past couple weeks but ill do again. Jakub informed me about that.
Re: First vs Top Layer
What do you think about the print quality in those photos. Is there anything that looks like it could be improved??