First print via v2calibration gcode - no bueno
Last night, I finally was able to pass the XYZ calibration test with total success (as well as the Z calibration, etc.). Feeling optimistic, I proceeded to run the v2calibration print test - my first ever print! I used the Prusa-supplied filament, did a preheat, loaded up the filament, no problems there. Before starting, I noticed a little blob of plastic had formed on the extruder tip, so I gently pulled that away then started the test.
Hm... not good. After laying down a sort of zig-zaggy initial line, I used the z-axis adjustment to lower the extruder head a bit. Eventually having to choose 0mm as the adjustment.
For the rest of the test, the printer laid down a wispy, spider-webby, inconsistent type of line that barely stuck to the bed. It looked like it wasn't getting enough filament material or something. So, after the test finished, I checked out the hot end and it was clear. No obstructions I could see. Filament path looked okay too. Re-ran the test and got the same results - way too little material was deposited. It's like something's plugged up or it's not getting enough material for some reason. But it's all brand-new and looks to me to be just fine.
Z-axis issues aside, any ideas how to diagnose and fix this problem? I'd really like to print something real, but if I can't even print a few lines on the bed, it's not auguring well for that.
Thanks.
-K
Re: First print via v2calibration gcode - no bueno
😛 welcome to the honorable club of i3 mk2 users 
you are not the first and probably not the last to get into the problem with the live z adjustment and the v2calibration file.
now here are some advice:
make sure that the extruder pulleye sits tight at the axis of the extruder motor and that the two springs that push the bearing against the filament and the extruder pulleye are tightened enough (rule of thumb: both springs should be squished to 13 mm).
clean the printing surface very thoroughly with acetone or acetone based nail polish remover. you need to get rid of any remainders of your (greasily) fingerprints during assembly.
the v2calibration.gcode only lays a very thin zig-zag line down the pei sheet... and often it simply won't stuck. 👿
in fact, the way to find the correct live z-adjustment level with the v2calibration file is very... let's be polite: "insufficient".
what's the heigth difference between the tip of the nozzle and the tip of the pinda probe ?
it should be between 0.6 and 1.0 mm (meanwhile i prefer 0.7 mm).
if you got nothing to measure, use a credit card (should be 0.8 mm thick).
after (re) adjusting the height of the pinda probe, you'll need to do a x/y/z calibration again.
➡ then start the v2calibration.gcode once from the sd-card. don't be disappointed when nothing will stick... you do this only to get rid of the message that your live z adjustment needs to be set.
with the pinda approximately 0.8mm above the tip of the nozzle, you can safely set the live z-adjustment to an initial value of -250µm.
🙄 if you like, you can start the v2calibration again to see if something has improved (probably not).
➡ then download the calibration_surface_75x75@200um_v3.zip from this thread (read the thread once or twice) and go through the procedure until you've found the optimal live z-adjustment level for your assembly.
btw: the more negative the adjustment value is, the more the nozzle moves down to the surface.
dem inscheniör is' nix zu schwör...
Re: First print via v2calibration gcode - no bueno
Jeff, thanks for the very helpful post! I'll do these very things tonight after I get home from work. I already knew the distance between the extruder tip and the PINDA probe is crucial, and mine's pretty close, but I hadn't heard any exact length - and more importantly, how to measure it! A credit card is a good idea (esp. after I measure it with my calipers to get a more exact reading).
As for the springs, they should be compressed to 13mm exactly, since I set them to that during construction using digital calipers and haven't messed with them since. But I'll double check to be sure.
And today I first read about your alternative calibration gcode and had already planned to give it a go tonight. So, I'll definitely do that. 🙂
Finally, thanks for clarifying that -Z = closer to the printing bed. 😀
Regards,
-K
Re: First print via v2calibration gcode - no bueno
Well, no luck. Tonight, I made sure the bearing springs were set to 13mm, cleaned the printer bed with acetone, lowered the pinda probe down to within .8mm of the extruder tip, then did a new XYZ calibration and ran the v2calibration gcode again. Here are the disappointing results.
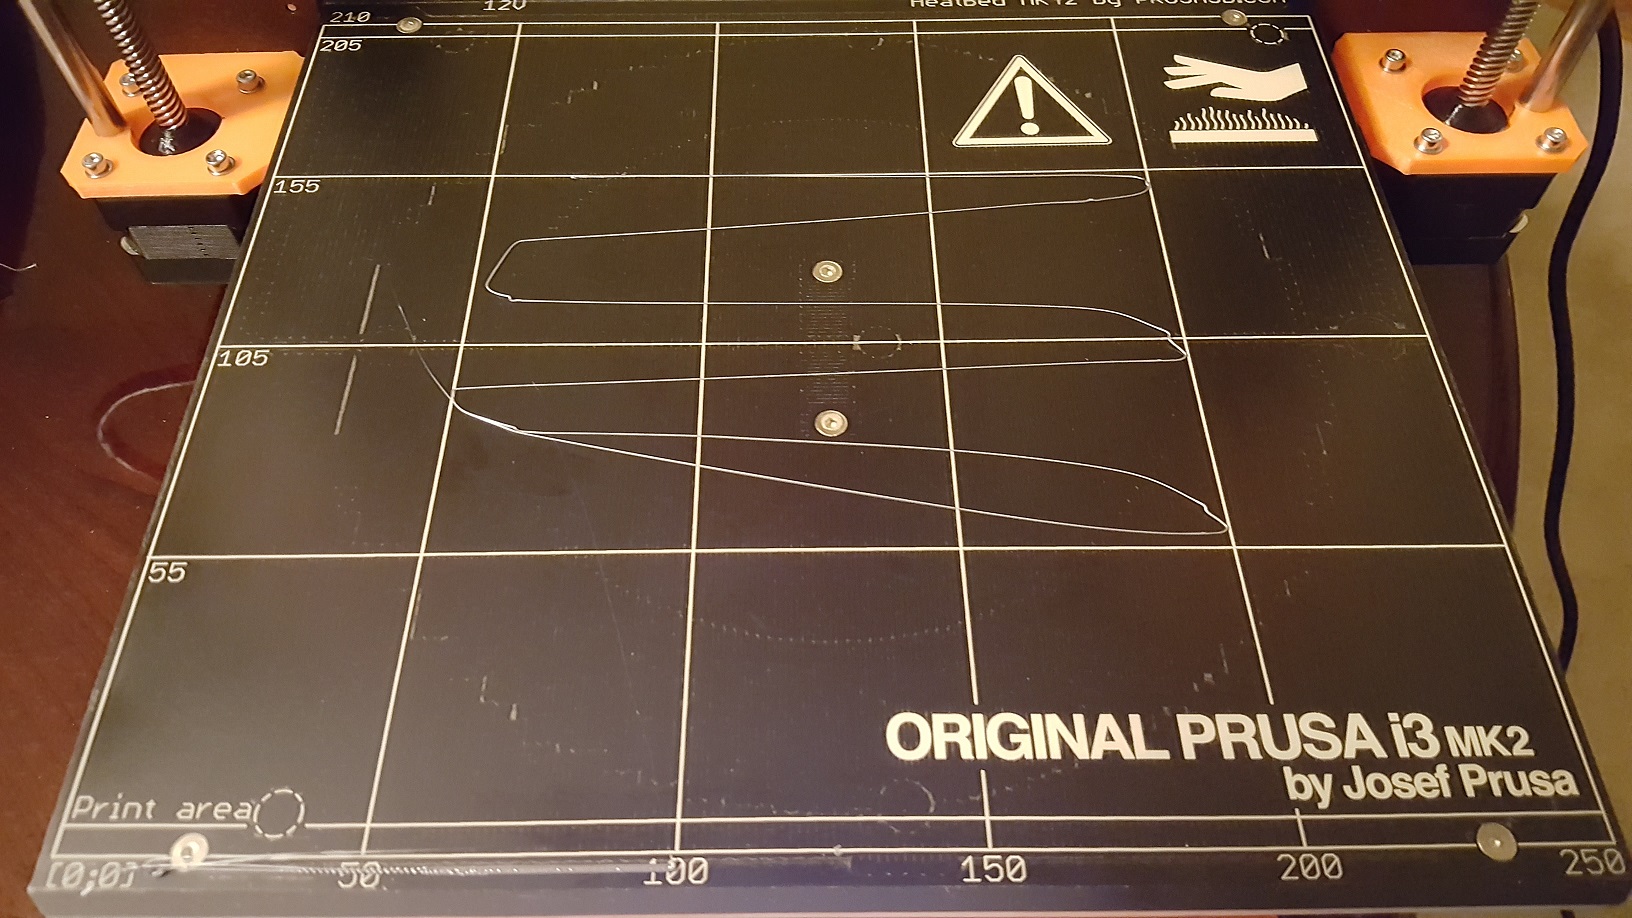
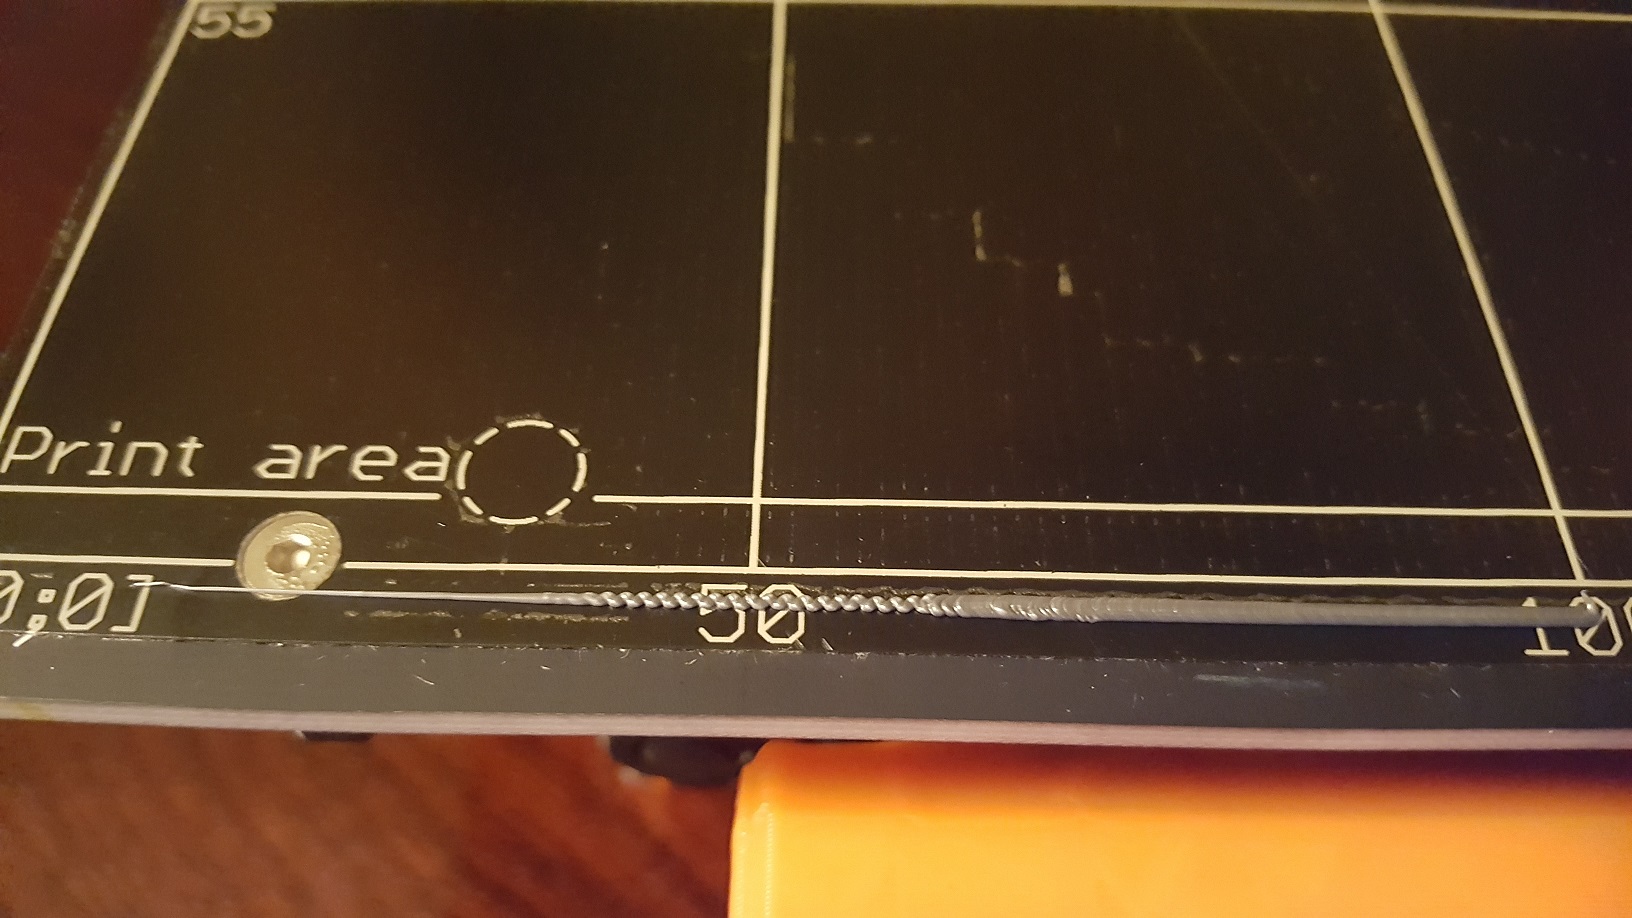
I'm stumped. All the calibration tests come out great, but when I try to print, I just get junk.
Re: First print via v2calibration gcode - no bueno
You're printing to high, much to high, for the first layer. Try to calibrate the z-axis while printig the first layer.
Thomas
Re: First print via v2calibration gcode - no bueno
😕 yeah, that's the way it looks when the z-live adjustment level is far to high !
➡ the nozzle still "lays the filament down", but doesn't squish it to the print surface.
➡ make it (much) more negative. so if your adjustment level actually is 0.000 make it at least -0.300.
dem inscheniör is' nix zu schwör...
Re: First print via v2calibration gcode - no bueno
I live-set the Z-axis to -.900mm and still am not getting a good print. There's something wrong. How can the print head still be so high up when the pinda is less than 1mm from the nozzle and I got a successful XYZ calibration?
Re: First print via v2calibration gcode - no bueno
if everything is fixed and nothing loose, then the heigth distance between nozzle and pinda is to low.
that's good for a successful calibration process, but you then risk that the pinda probe hits a printed object when there is a small warping or the filament curls upwards at a low rising edge (i think about the legs of the little treefrog).
just move your pinda probe 1/2mm upwards (approx. half a turn clockwise of the upper nut when you look from above).
dem inscheniör is' nix zu schwör...
Re: First print via v2calibration gcode - no bueno
Okay, after messing with the pinda probe height over the last few nights, I think I've finally found the right height. On my printer, the pinda probe has to be a fair bit higher than .8mm, otherwise, the extruder tip ends up too high above the print bed. By slowly raising the probe height and re-running the XYZ calibration test over and over again, I've found the best height I can get without it touching a piece of paper laid on the bed while running XYZ calibration.
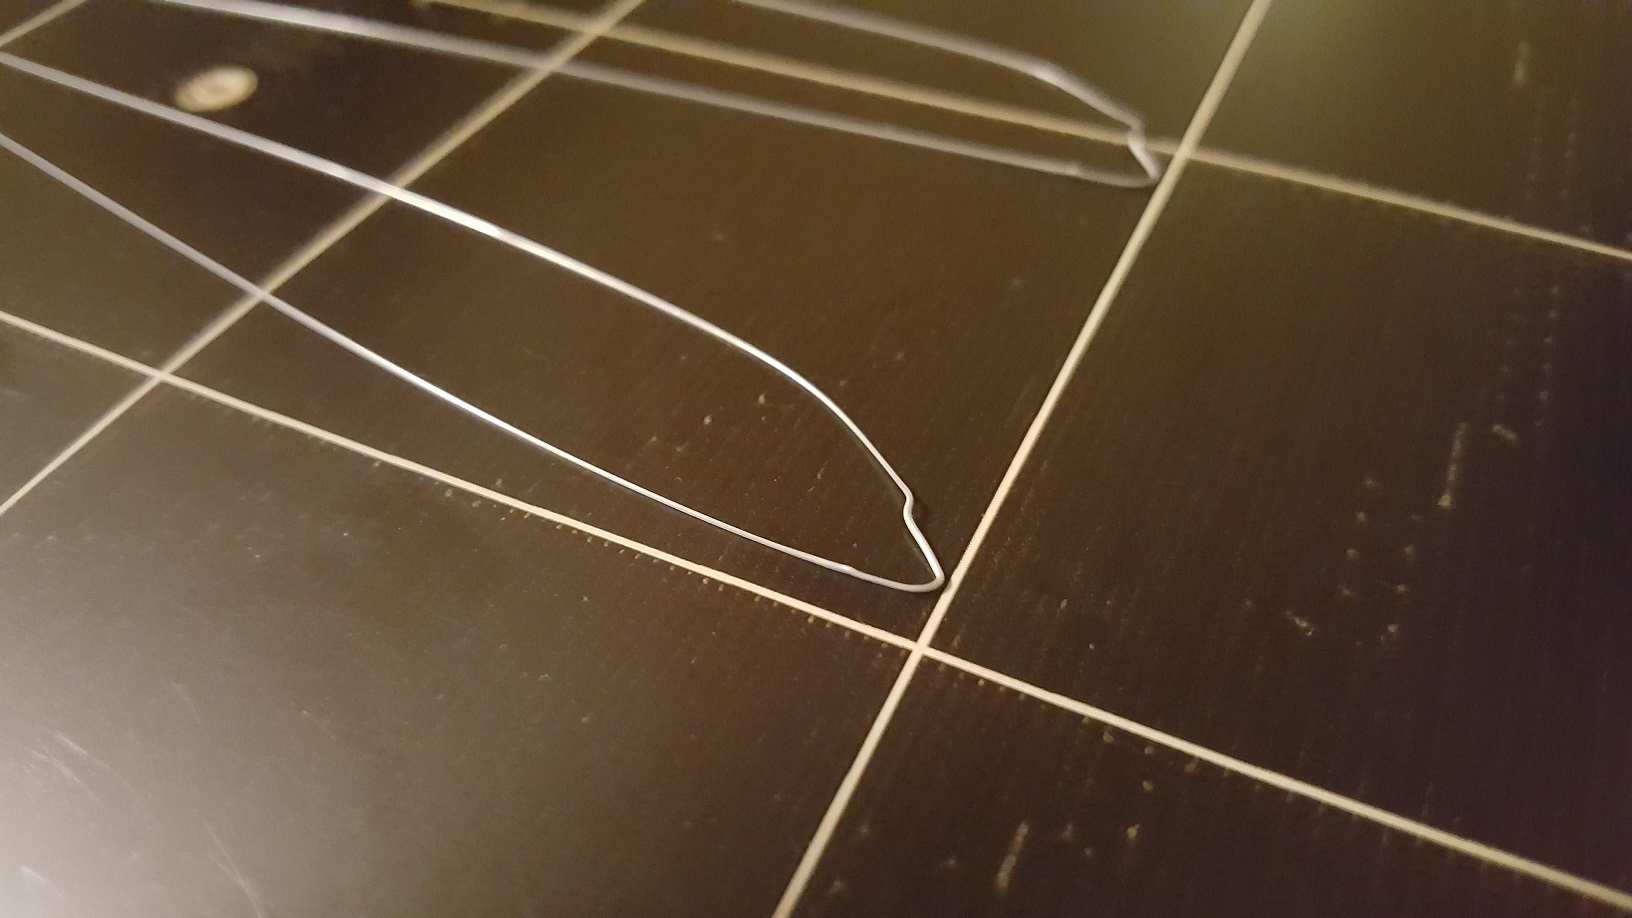
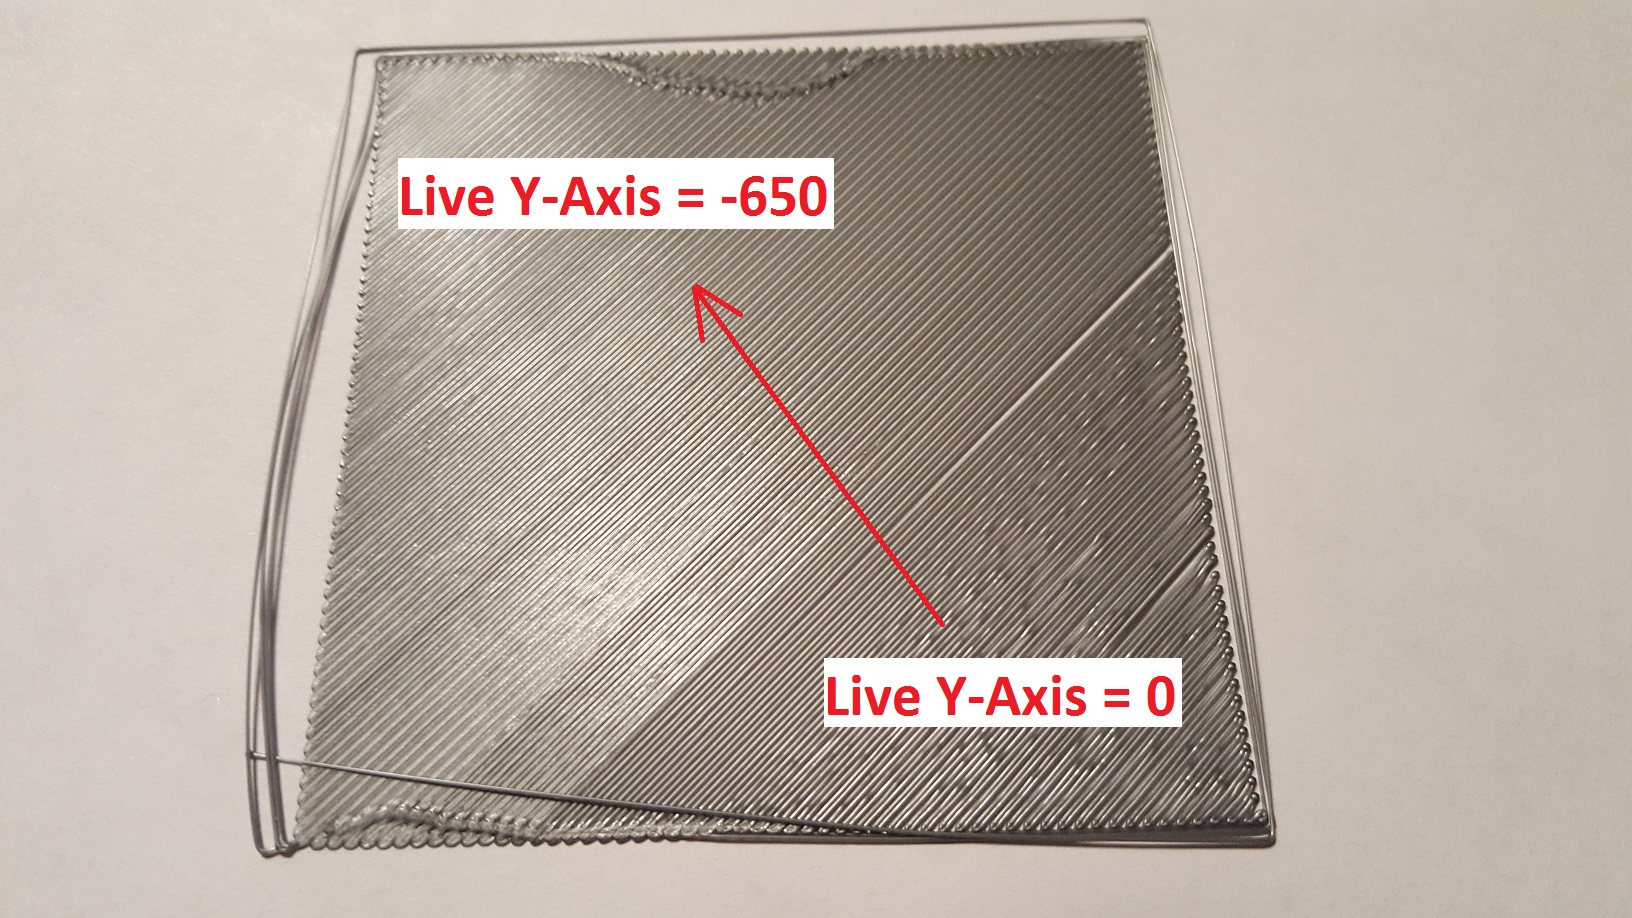
Then, after running the g2 calibration test, I ran your test (Jeff) and thank you for that! It made adjusting live Z values much easier than the g2 test. I started with -250 and going down in -.050 increments, I ended up at -650 before I got worried about the tip getting too close to the bed. Even so, I'm not 100% sure I shouldn't lower it even more. Although on close inspection, the printed lines look fairly flat, as you can see on the second picture, when I hold it in my hand, the strands still separate, meaning they're not very attached to one another. Of course, this might be the nature of this print. Should the strands be glued together against one another more firmly, or is this normal?
Thanks!
Re: First print via v2calibration gcode - no bueno
... Should the strands be glued together against one another more firmly, or is this normal?
the strands should form a closed surface and it should be a single sheet, there should be no separation beween the strands.
just keep on lowering the nozzle !
don't be afraid that the nozzle will be to close to the bed or hitting the bed. as long as you can extrude filament out of the tip, you shouldn't be able to damage the pei sheet during the print attempt. (furthermore: the printbed on top of the y-carriage shows some elasticity).
the frightening pictures you may have seen from a nozzle "digging" into the printbed during the calibration process (especially at calibration point #4) has other reasons (and should hopefully been fixed at firmware 3.0.10).
and don't be afraid of the absolute live-z adjustment value. it's only a relative value which depends on the heigth difference between pinda probe and nozzle tip and the sensitivity of the pinda itself (some of them are very sensitive, others are a little bit deaf) and will be specific to your build.
💡 another advice to adjust the pinda height to an appropriate level:
use two smartcards (they usually have a thickness between 0.6 and 0.8 mm), or credit cards without embossment.
➡ lay the first card at the print surface under the nozzle and lower the height of the extruder until the tip of the nozzle hits the card and holds it in place at the surface.
➡ now place the second card on top of the first card, but under the pinda probe, and adjust the height of this sensor in the way that it touches the 2nd card, so that you can feel the pinda is just touching the card when you withdraw it.
dem inscheniör is' nix zu schwör...
Re: First print via v2calibration gcode - no bueno
Jeff, thanks for the advice. I'll try readjusting the extruder yet again tonight until I get a solid square. I really hope this does it - I'd like to be able to actually print something more fun than a square. 😉
As for the pinda probe height vs. extruder tip - I think you nailed it when you said some pinda probes are more sensitive than others. I tried your clever smart card height-adjusting trick earlier, but when i do that on my printer, the extruder tip ends up way too high off the bed. (Filament spills out of the extruder like squeezing toothpaste out of a tube.) By trial and error, though, I think I'm very close to finding the exact optimal height my extra-sensitive pinda probe requires. However, since I'm having to use such a high -Z axis live adjustment (-650mm) and the tip still isn't low enough, I might try raising the pinda another quarter or half screw turn. I have to be careful though; raising it much higher than that results in the tip snagging on the paper when I do an XYZ calibration. The optimal spacing window for my printer is apparently VERY narrow! I almost wish it had a micro-adjustment knob on it like a microscope.
Re: First print via v2calibration gcode - no bueno
If you have to use a very negative value for Live Z, then the probe is too far from the nozzle, not the other way around; which means you should try lowering it, not raising it.
That being said, if your probe is working fine and detecting all the 9 points, there's no real reason to move it - just use Live Z Adjust until it's printing fine. The printer doesn't really care if it's set at -0.1mm or at -1mm. 🙂
- Gab
Re: First print via v2calibration gcode - no bueno
...That being said, if your probe is working fine and detecting all the 9 points, there's no real reason to move it - just use Live Z Adjust until it's printing fine. The printer doesn't really care if it's set at -0.1mm or at -1mm. 🙂
😉 yep, as i mentioned before ....and don't be afraid of the absolute live-z adjustment value. it's only a relative value...
dem inscheniör is' nix zu schwör...
Re: First print via v2calibration gcode - no bueno
Guys, thanks for your advice. Last night, I ended up finally micro-adjusting my printer to the point where the extruder couldn't reach the front of the Y-axis. Every XYZ calibration was a fail. 😥
So, tonight, I resolved to revisit the alignment fundamentals. I discovered that over time, I had slowly adjusted the big bottom screws to the point where they were only 96mm from the back (instead of the 100mm or so) - not good. I adjusted them back, made sure the threaded rods were bottomed out in the frame, and then made sure Y-axis was square and true. First try, I scored a perfect XYZ calibration. I made sure the pinda probe was adjusted properly, used Live adjust and finally got a nice, smooth, cohesive square test print. Right now, I'm successfully printing off the tree frog - my first real print on the Prusa! I had half convinced myself that I had built an expensive boat anchor, but the answer was just getting back to the fundamentals.
Just wanted to thank you again for your patient help and advice. This forum is a very valuable resource - hobbyists helping hobbyists!
Cheers!
Re: First print via v2calibration gcode - no bueno
Your test prints look similar to mine. Gives me hope, that one day I will overcome!