RE: What about this issue ? How to improve ?
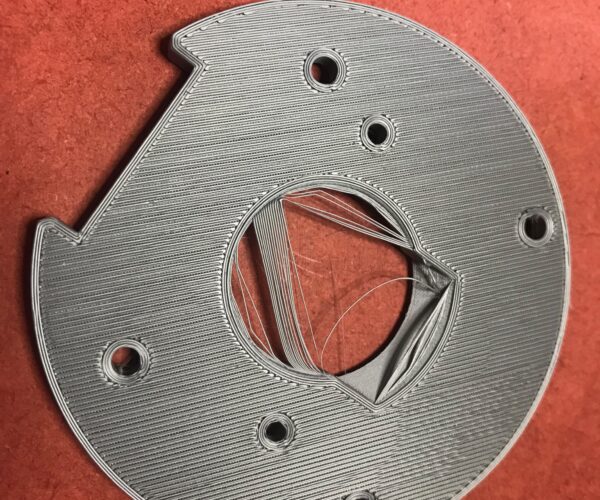
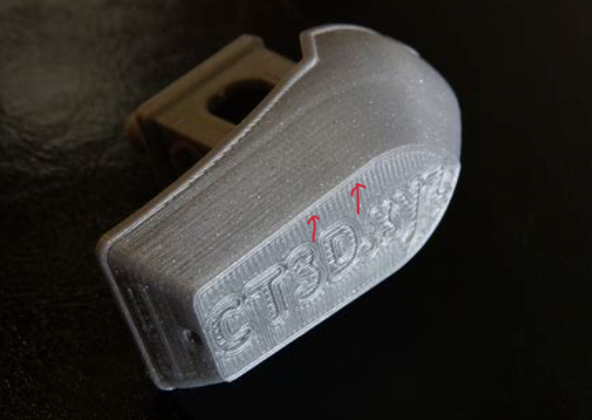
Looks like you have 2 things going on. Your z-offset is still putting your nozzle too high and needs to go more negative. The picture below is what you are aiming for on your bottom layer. Your lines of fill should snug up to the perimeter.
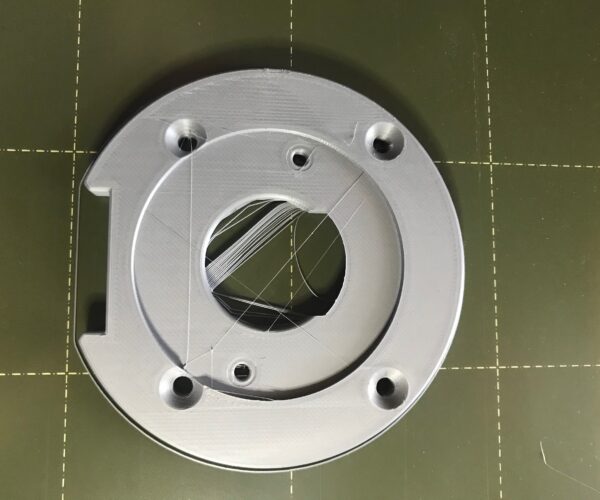
Also it looks like you have overhangs which are causing the loose lines in the middle. Please ZIP your .3mf and post. (It has to be ZIPPED or it won't get attached to your post) so we can see what is going on there and suggest ways to improve your print.
Mk3S+,SL1S
RE: What about this issue ? How to improve ?
Thanks for your help ! I will move the nozzle lower but thought it was ok... Here is the zipped file. Yes, overhang is another problem.
RE: What about this issue ? How to improve ?
Thanks. No overhangs so hopefully dialing in your z-offset will fix the loose strands in the center. I notice you are printing this with a layer height of .1 You probably don't need to make the layer height that small, and a height of .2 would print faster.
Mk3S+,SL1S
RE: What about this issue ? How to improve ?
Ok, thanks, I'll make another try asap, next year ! Maybe 0.2 would be enough, I don't know. My goal is to print as accurate as possible because this printed object must exactly fit the diameters of my Makita router and other tools. No matter the time needed but the precision has higher priority.
The question is : which settings must be configured to get a printed object corresponding 100% with the CAD drawing ?
Other (stupid?) question : do I have to eject the filament when the print job is finished at every power off ?
I which you a very Happy New Year anyway !
RE: What about this issue ? How to improve ?
If you need to be accurate, I recommend digging deeper into calibrations. This is a good place to start: https://help.prusa3d.com/en/article/extrusion-multiplier-calibration_2257
In the PrusaSlicer, enabling print perimeters before infill can help with accuracy, but it is not guaranteed. You may also want to do some experimenting with xy compensation.
Happy New Year and Happy Printing.
Mk3S+,SL1S
RE:
Also holes tend to print smaller so you might want to increase their diameters in your cad program to compensate.
You can leave your filament loaded at power off. You only need to unload when you want to switch to a different filament.
Mk3S+,SL1S
RE: What about this issue ? How to improve ?
The question is : which settings must be configured to get a printed object corresponding 100% with the CAD drawing ?
100%? Good luck. But you can get pretty close in most cases. I'd start by perusing superb Bob's notebook at https://projects.ttlexceeded.com/3dprinting_techniques_calibrating_filament.html#filament-calibration. It's a treasure trove of no-nonsense information and should help you get your printer calibrated as good as possible.
Formerly known on this forum as @fuchsr -- https://foxrun3d.com/
RE: What about this issue ? How to improve ?
You should get your print to match the needed makita dimensions. One thing to check is the extrusion multiplier. This can affect wall thickness and overall dimension. Search in prusa knowledge how to calibrate.
Nothing is ever 100% but you should be able to get within fractions of a mm.
i3 Mk3 [aug 2018] upgrade>>> i3MK3/S+[Dec 2023]
RE: What about this issue ? How to improve ?
Also holes tend to print smaller so you might want to increase their diameters in your cad program to compensate.
You can leave your filament loaded at power off. You only need to unload when you want to switch to a different filament.
Yes small holes are annoying especially anything smaller that 3mm. Why can’t the slicer work this out?
i3 Mk3 [aug 2018] upgrade>>> i3MK3/S+[Dec 2023]
small holes are annoying especially anything smaller that 3mm. Why can’t the slicer work this out?
It's not the slicer, it's almost always the design software translating to polygons. The vertices are placed on the calculated perimeter but in consequence the chords cross the concaves. The more polygons you use the closer the approximation but it will never be perfect.
Calibration and carefully chosen tolerances are the route to follow. If you have the tools, deliberately undersizing and machining to fit is an excellent alternative.
Cheerio,


