Uneven finish top of overnight large print
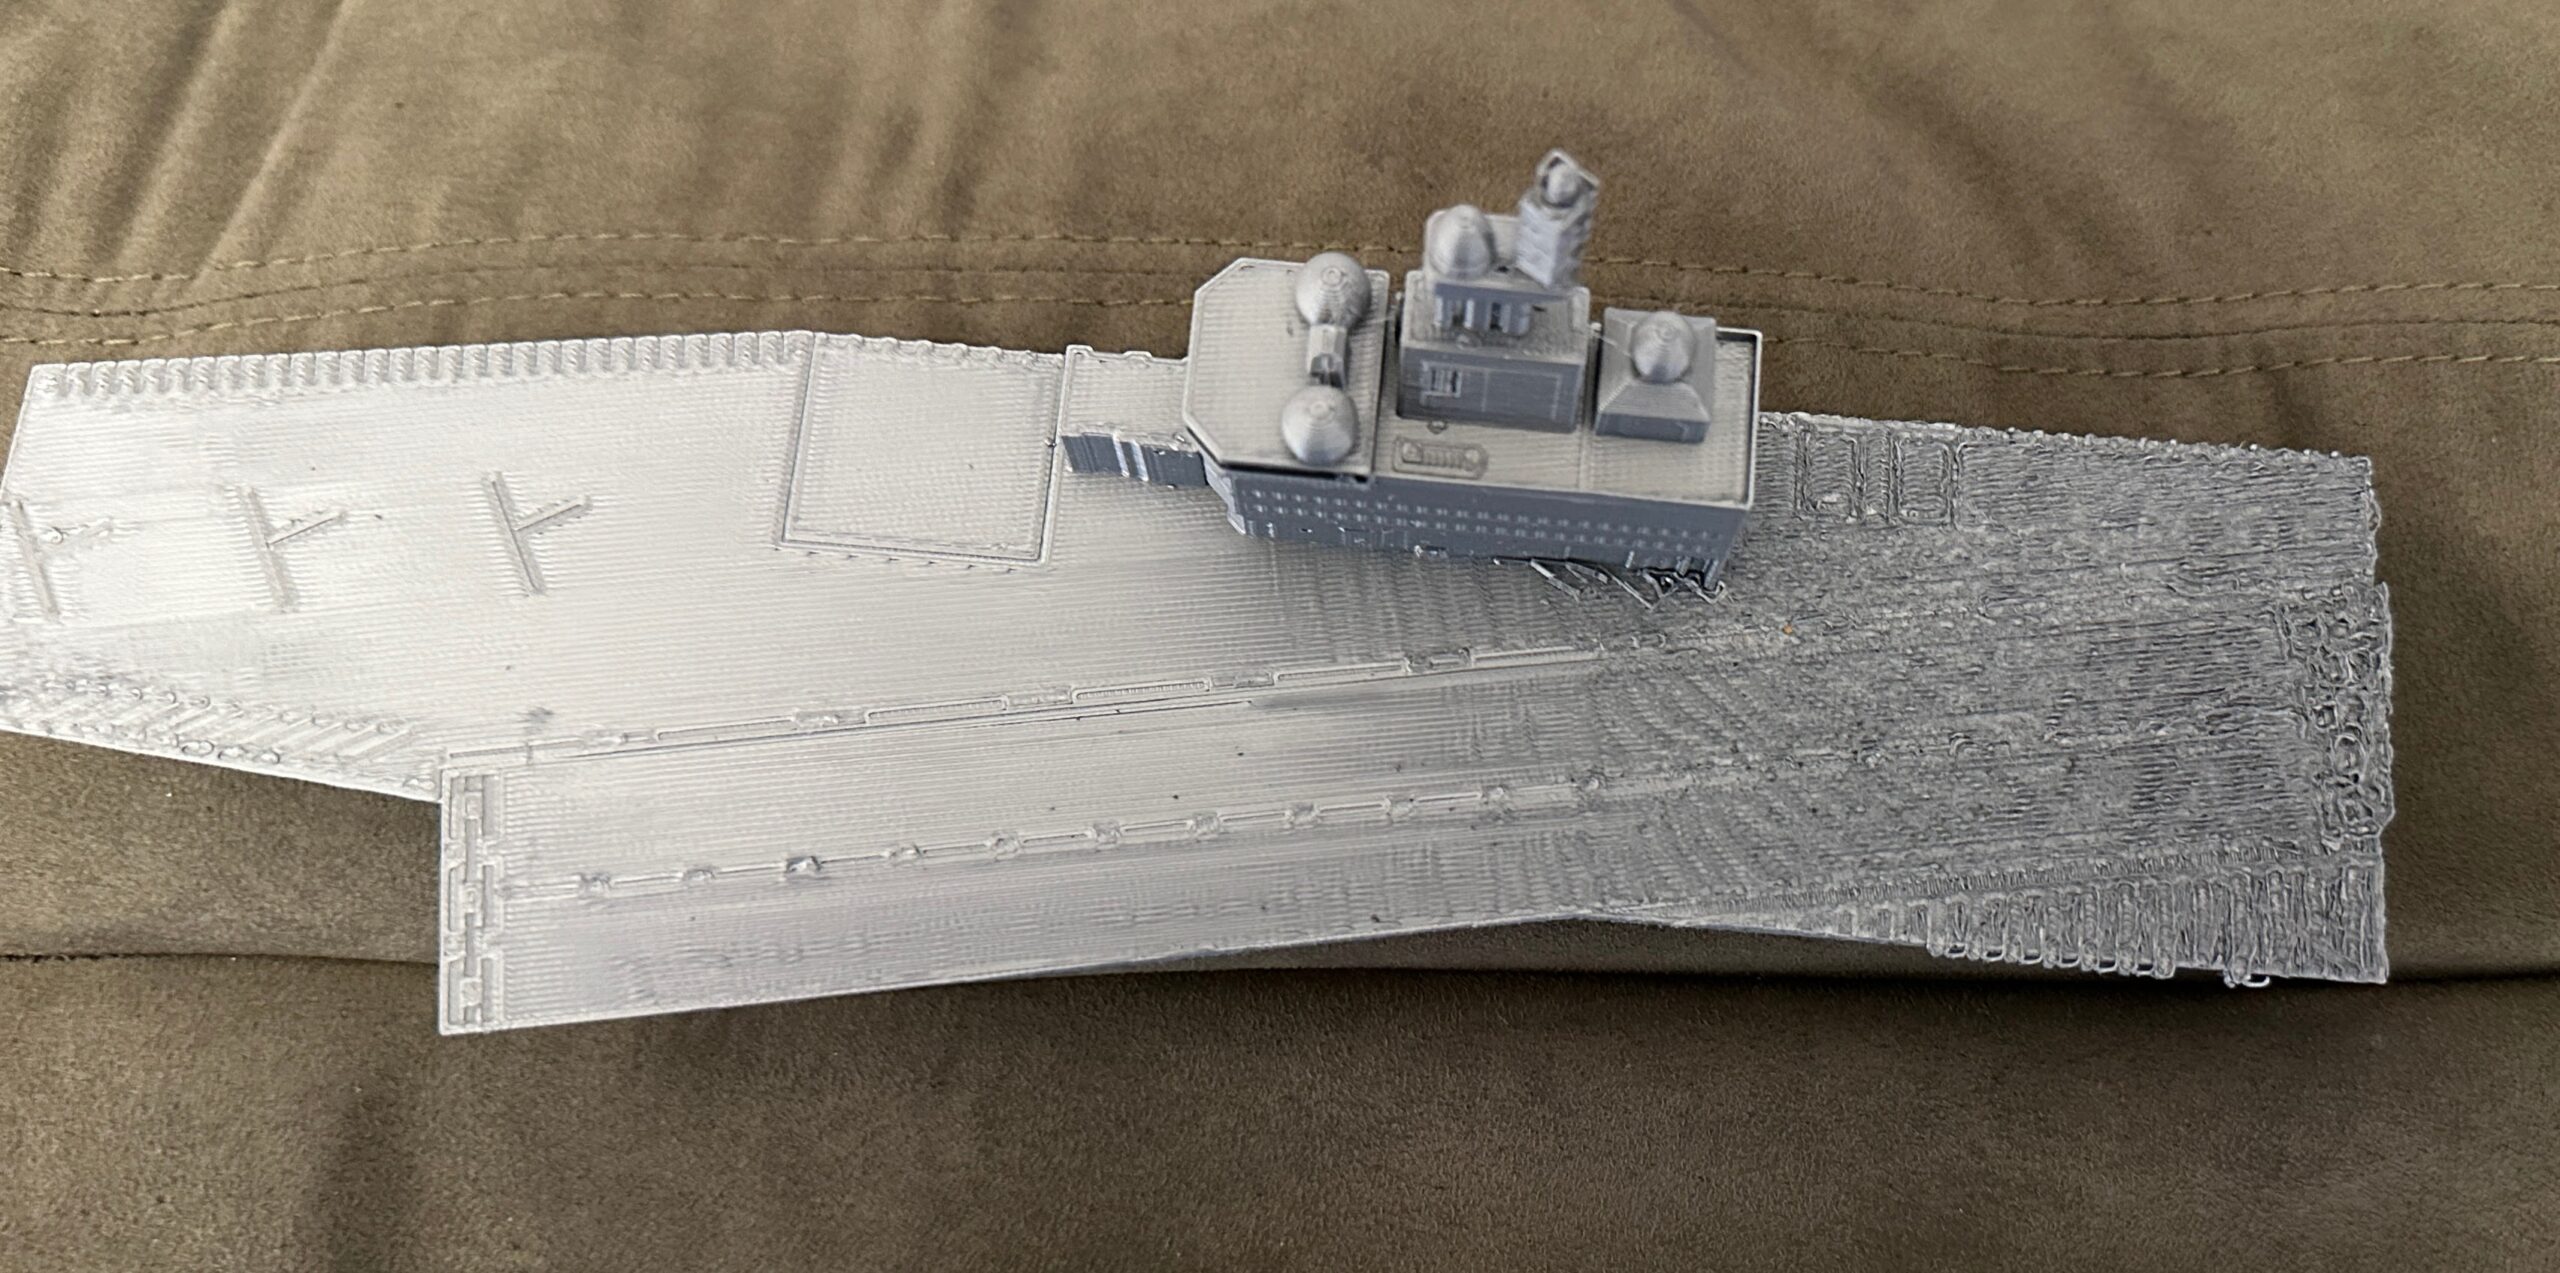
In the model below I have a section that printed oddly and with a rough finish. I'm curious if anyone has recommendations on how to fix/avoid this error in printing. This was laid out to make it as large as possible relative to the build plate.
I have a new Prusa i3 MK3S+ that came assembled. I've run through the usual setup procedures and have had several successful prints. I wanted to print a toy for my son based on the model here https://www.printables.com/model/110454-small-aircraft-carrier-toy.
This was an overnight print. The print was printed on 0.20mm speed settings on the simple setup in the prusaslicer. The print overall seemed to go well and had good adhesion to the plate.

Best Answer by RandyM9:
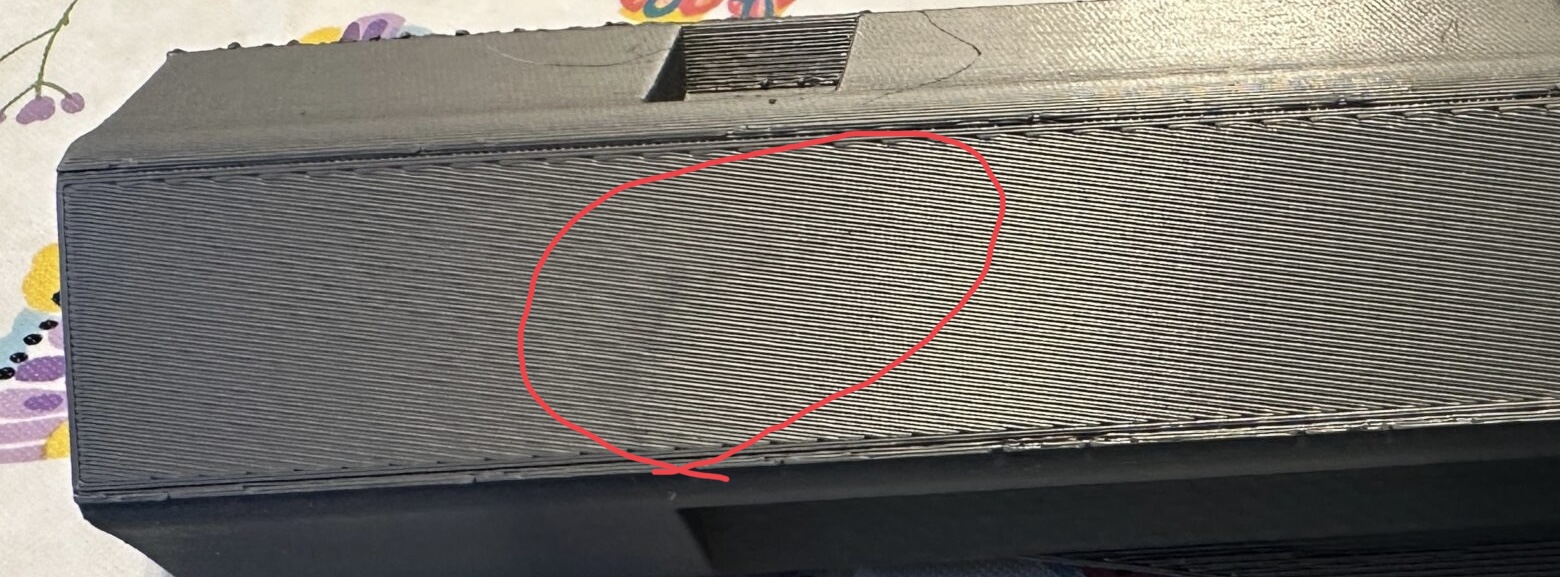
This - look carefully at the bottom of the print in this area. It looks like this is where the warping begins. Turn it different angles in good light to see it. I could be wrong but this is my gut feeling.
Cheers
RE: Uneven finish top of overnight large print
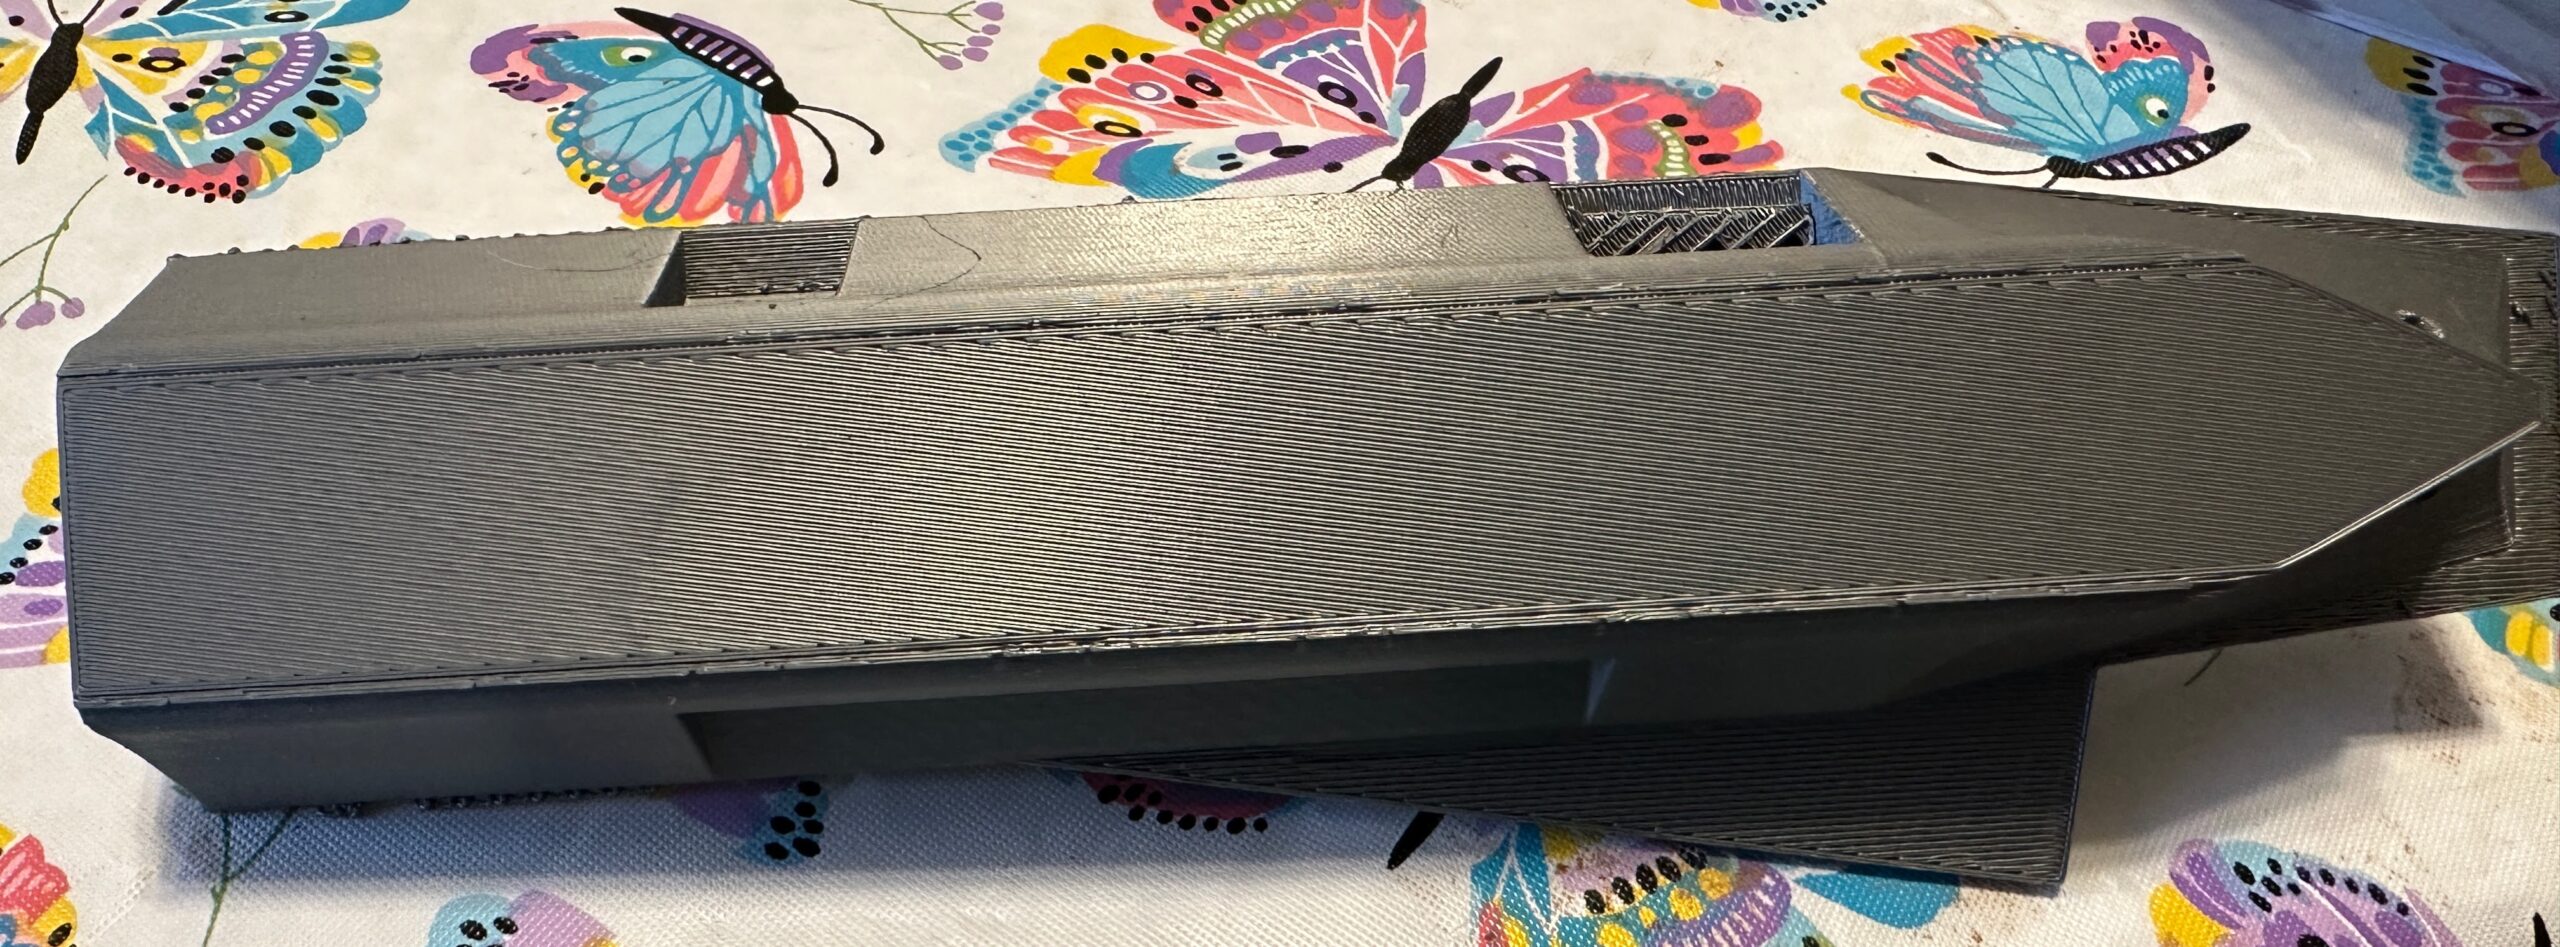
Can you post a pic of the bottom of the print?
I suspect that this large, flat print may have warped at one end, even if it looked like it stayed flat. If it lifted off the bed, even fractionally, it will cause upper layers to be over compressed and ruin the final layer(s).
Cheers
RE: Uneven finish top of overnight large print
Sure thing. Here is the bottom.
RE: Uneven finish top of overnight large print
This - look carefully at the bottom of the print in this area. It looks like this is where the warping begins. Turn it different angles in good light to see it. I could be wrong but this is my gut feeling.
Cheers
RE: Uneven finish top of overnight large print
Id agree with Randy, also that first layer is not low enough, needs more squish. Those filament strands should be fused into a solid unbroken sheet. Until you get that sorted out you are going to get issues like this. You will see the same advice time and again, get your bed clean and your live z dialled in, its because without that solid base anything else just doesn't matter.
Also even after you do, for large flat areas like on that model then upping the infill % up to 30-40 and making sure there's enough top layers is another thing to do as even without warping up if there's insufficient infill the initial top layers can sag and subsequent ones cant recover.
RE: Uneven finish top of overnight large print
Thank you for the call out. My son has been playing with it a lot already so I’m not sure if it’s an artifact from printing or his play but it’s a good chance you’re right. I also noticed that looking at it the bottom isn’t perfectly smooth and does twist ever so slightly.
RE: Uneven finish top of overnight large print
Thanks @neophyl for the call out on the squish. I’ve been working on dialing in the z-axis offset for the line. I was finding that the lines were looking more stranded than squished. I’ll keep experimenting with it. Just having the feedback that it still is too far apart is a good calibration point for comparison.
RE: Uneven finish top of overnight large print
@robert-chapman -
The additional advice from @neophyl is spot on, I should have mentioned that.
The built-in Z calibration is fine for getting into the right general area but read this link and download the files which will give you a much better way to fine tune your Z height.
As for large, flat prints in PLA, a proper Z height and a squeaky clean print sheet are essential, as @neophyl states. Increasing infill percentage, increasing bed temps, adding a brim or Mickey Mouse ears, using an adhesion booster / release agent like Layerneer, Magigoo, hair spray, glue stick, or others can also help with a tough print.
The model you printed could also be cut horizontally, just below the deck, and printed as two parts that are then glued together. You can do this in PrusaSlicer.
Glad your son is enjoying it! Have a Happy Holiday!
Cheers