Trouble with this print on overhangs. Organic angles without support (38 Degrees overhang) AND toruble WITH support too?!..why?
Hello all,
I'm relatively new to 3d printing, so bear with me.
I've made this part in solidworks so can edit its shape if needed....however, I've made it to learn about design and printing, so hoping I can find a solution with print settings rather than changing the design.
My part has two sections I'm struggling with.
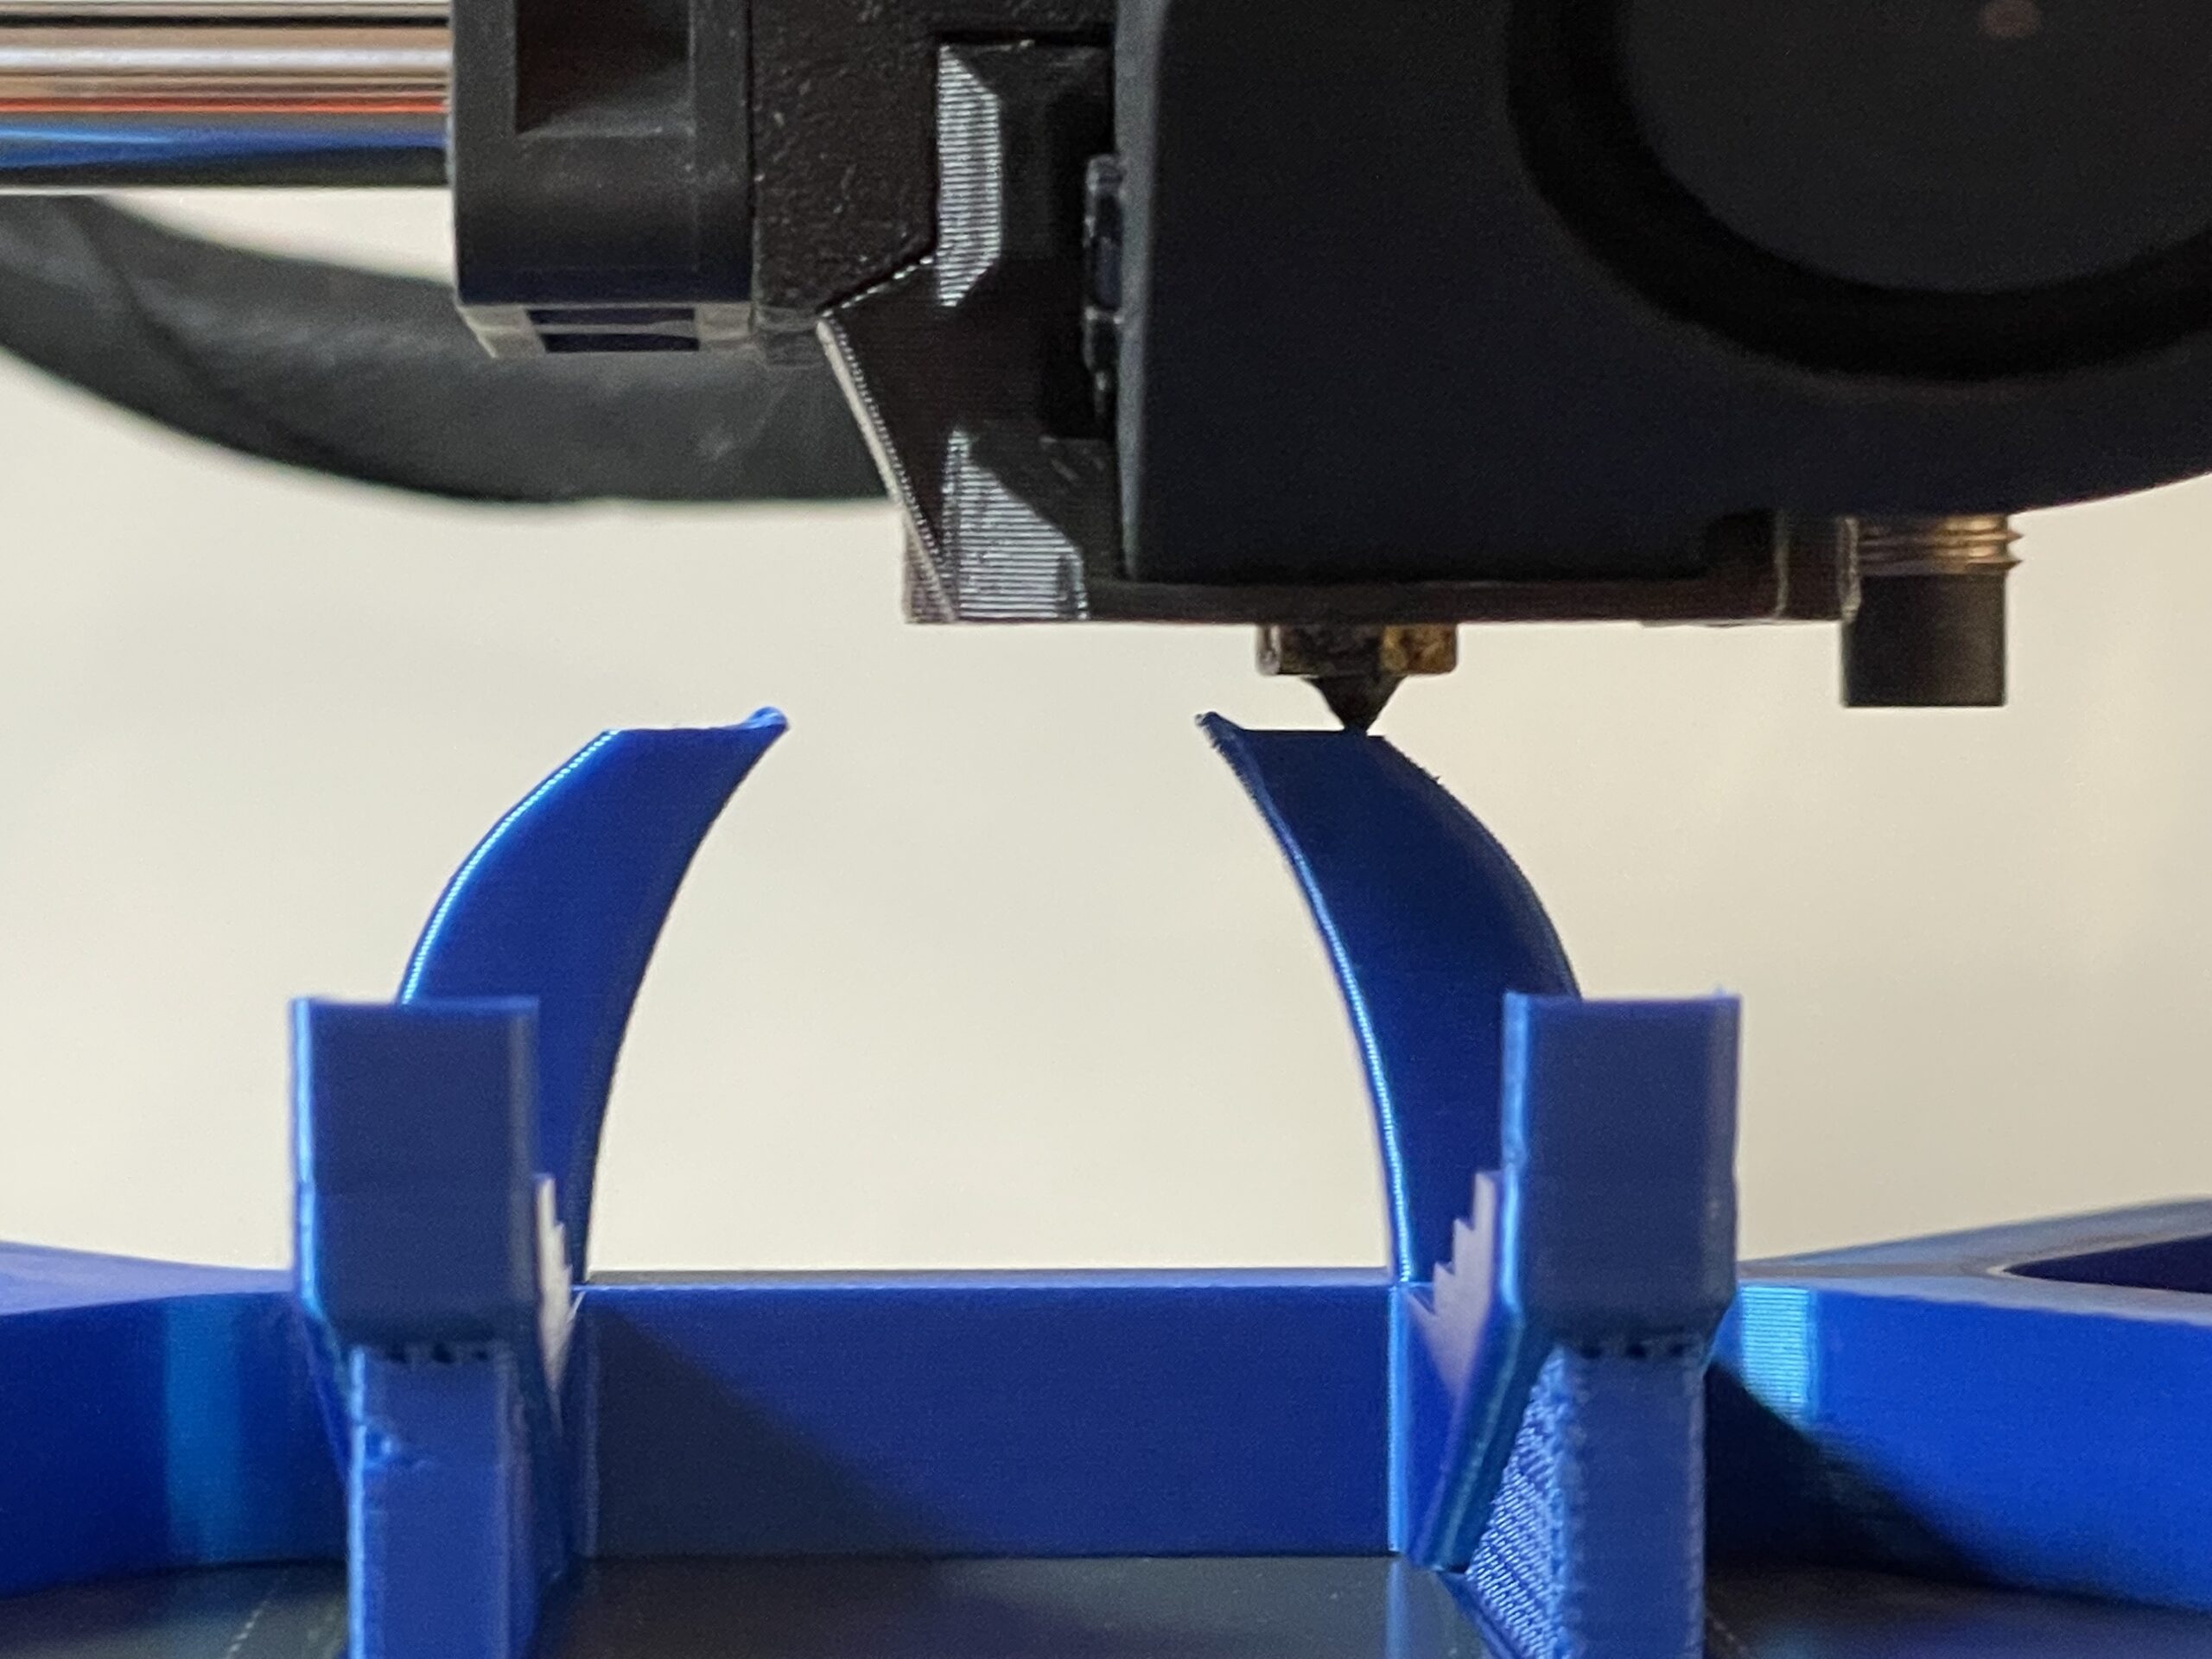
1. I'd like to print the Helix portion without support, but every time I try, there is a significant amount of artefact. I have tried .2 mm height, 0.1mm Height, and variable height....they all result in unsmooth prints. The slope is about 38 Degrees (which I know breaks the 45 degree rule).
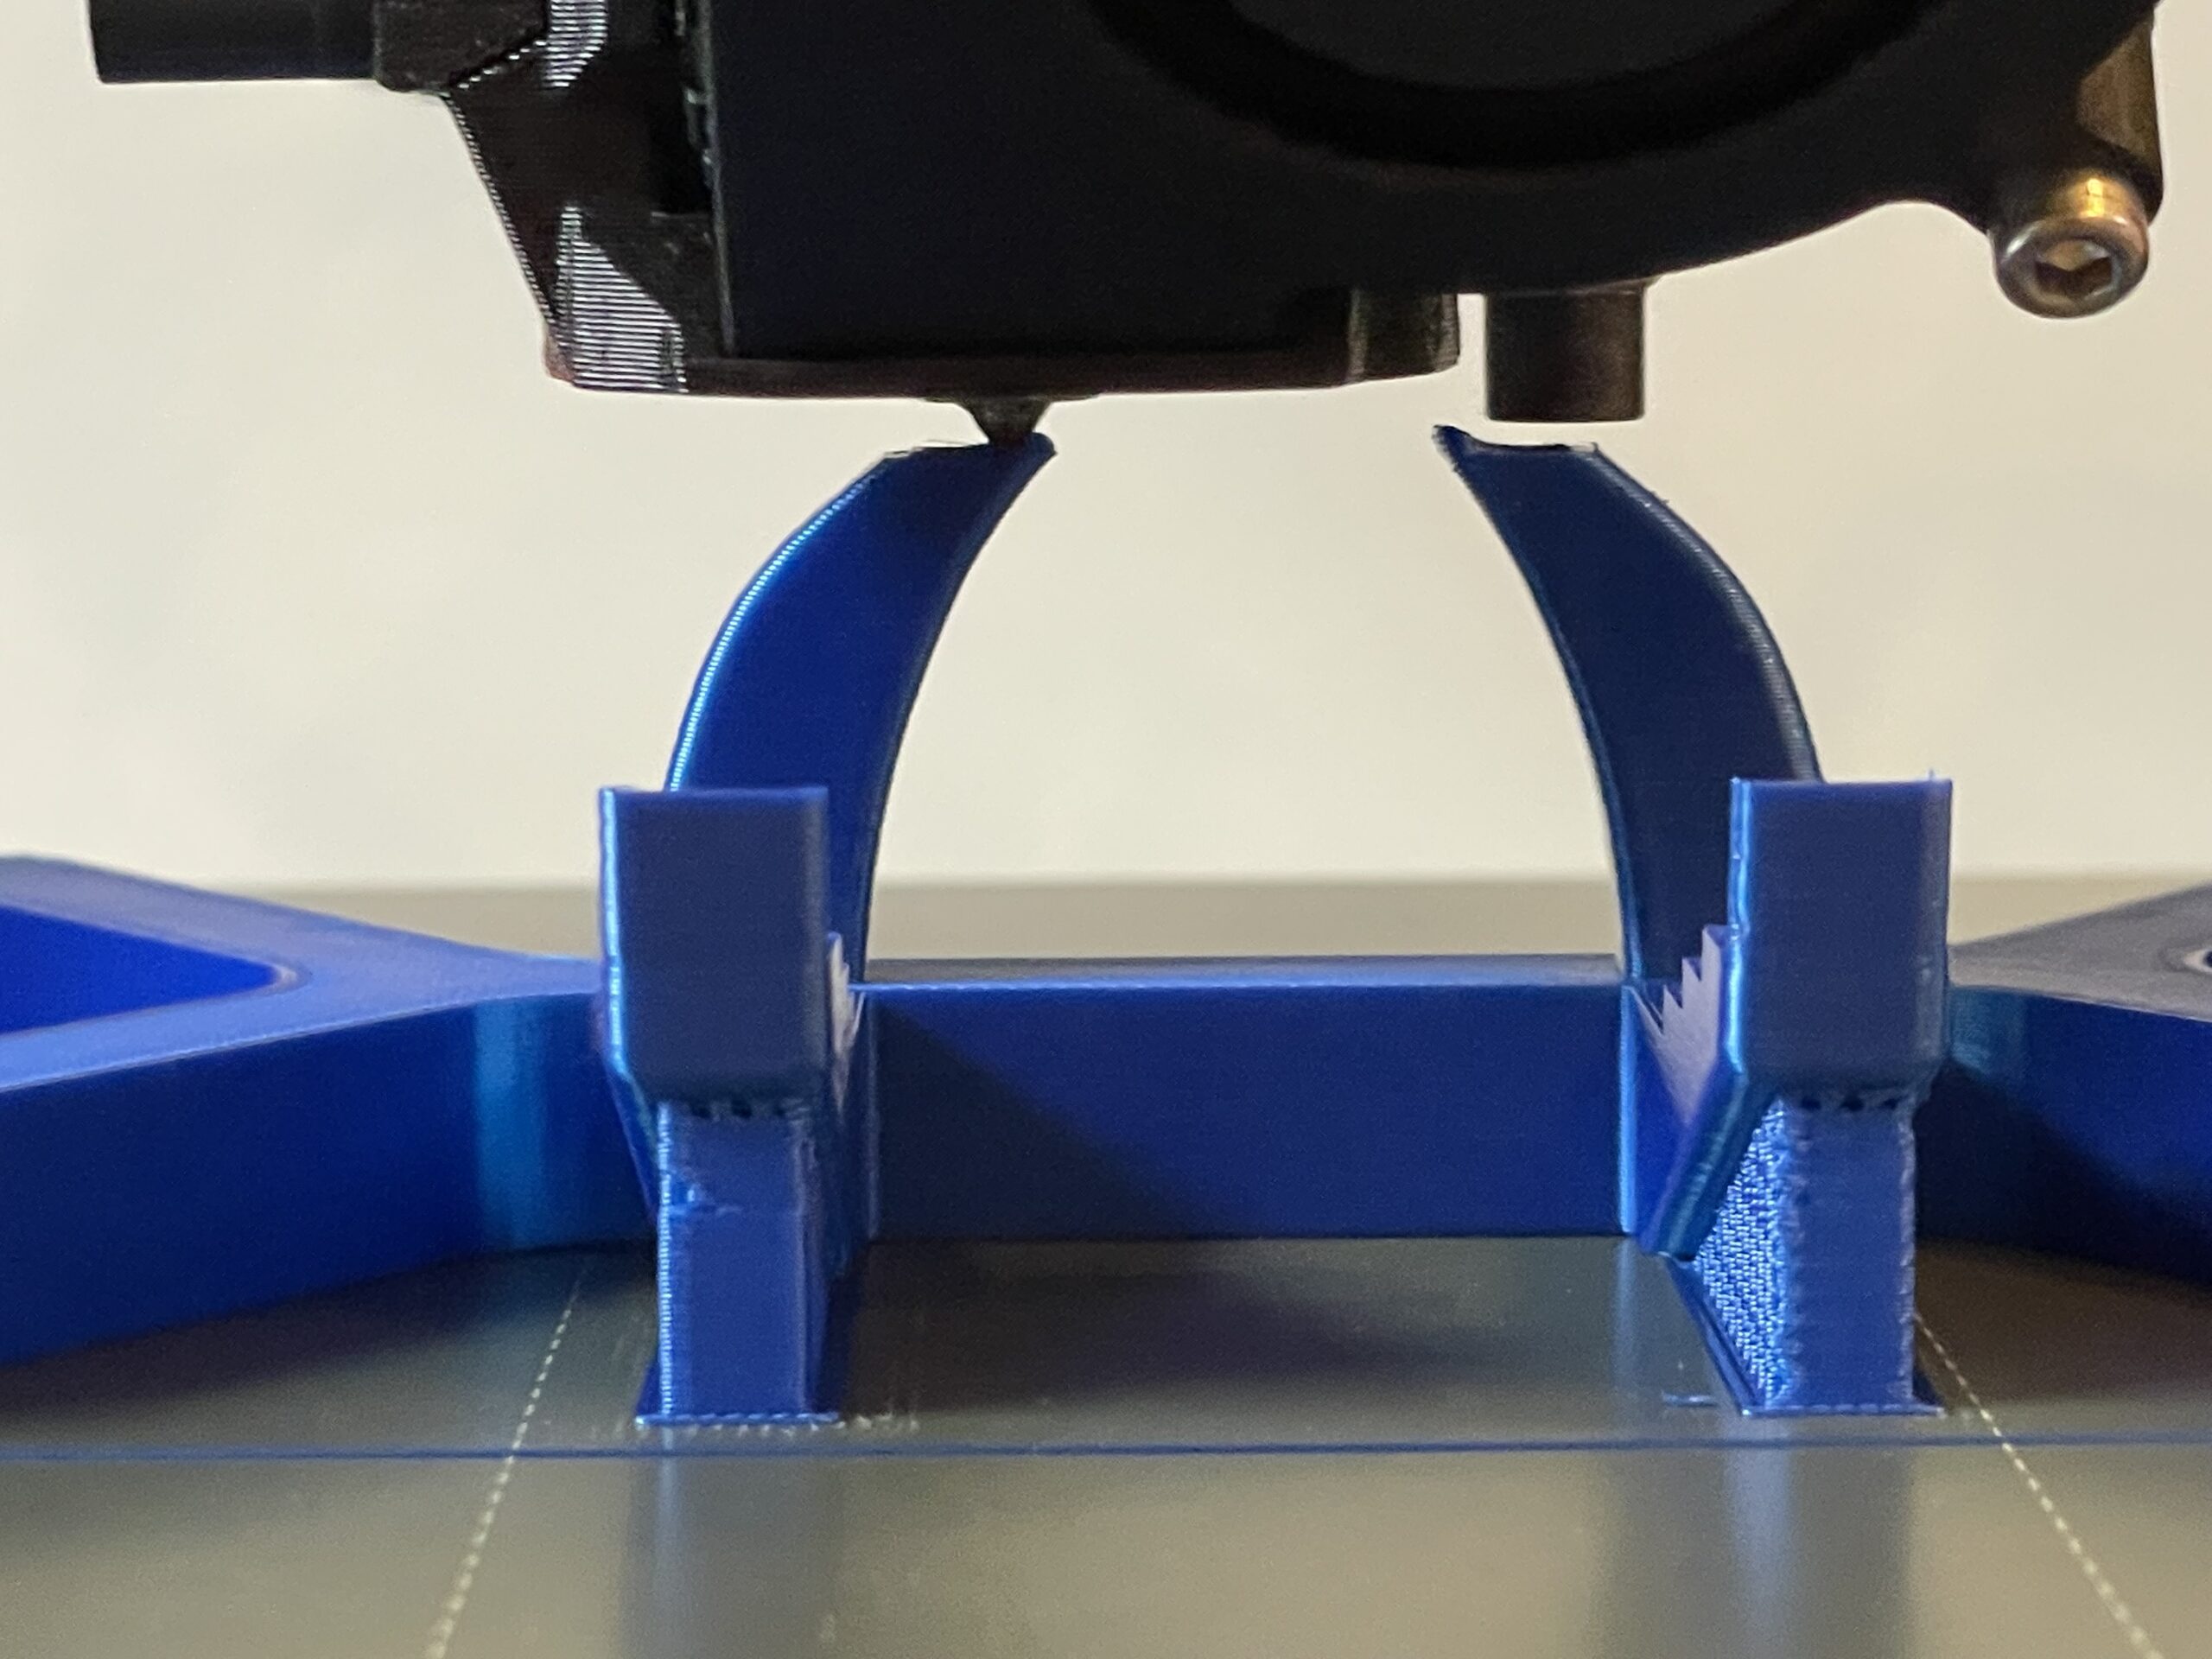
2. The bottom stepped section has a support, but even though its supported, it's print is VERY poor quality. I have tried rectilinear and concentric and various interface layers....nothing makes a difference.
Can you suggest what I might try to help print both these sections so they turn out smooth?
Thanks in Advance!


RE: Trouble with this print on overhangs. Organic angles without support (38 Degrees overhang) AND toruble WITH support too?!..why?
@robin-2
To much heat and your printing top fast, the overhangs aren't your problem, those angles are very printable.
Slow those sections way down and reduce the hotend temp in those areas.
Enjoy
Swiss_Cheese
The Filament Whisperer
RE:
Thanks. I am using Prusament PLA Royal blue and have tried Galaxy black with same results using the default prusa slicer Prsuament PLA temp and speed settings for both:
- Hotend Temp 215
- Bed Temp 60
- Perimeters 50mm/s
- Small perimeters 30mm/s
- External perimeters 35mm/s
- Support Material 45mm/s
- Support interface 80%
Can you recommend a hot-end temp and speed for these sections?
I am surprised by the supported section as there is a lot going on between layers, so expected this to print very well....should these sections be slowed down too?
RE: Trouble with this print on overhangs. Organic angles without support (38 Degrees overhang) AND toruble WITH support too?!..why?
Swiss did not mean your settings in general, the default settings work nicely in general, especially with Prusament filaments. But in your case just for the problematic sections you need to modify speed and hot end temp. Just add a big modifier box in PS and move it up until only the small upper part are covered, then reduce the print speed (try 20) and lower the hot end temp 5° and try again. You can also just test print only the upper section until you get it right before printing the whole thing.
If you save, zip and post your project from PS everybody can load it and you might get a modified version with the proposed settings posted back...
If at first you don't succeed, skydiving is not for you.
Find out why this is pinned in the general section!
RE: Trouble with this print on overhangs. Organic angles without support (38 Degrees overhang) AND toruble WITH support too?!..why?
@robin-2
If your willing to post a Zipped up .3mf project file exported from PrusaSlicer, I'll take a look and see if I can make more specific suggestions. The .3mf file should be setup as you would when trying to print the part and will allow us to see all the settings as they pertain to the model in your project.
Note if you do not Zip the file the forum server will not allow it to be posted.
Regards
Swiss_Cheese
The Filament Whisperer
RE: Trouble with this print on overhangs. Organic angles without support (38 Degrees overhang) AND toruble WITH support too?!..why?
@swiss_cheese @robin,
Attached 3mf. Any help you can give would be appreciated.
This was my latest attempt this morning which was improved on the helix but worse on the supported section. I added a modifier box to change the speed and added a temp change with Gcode when the helix begins. (couldn't see how to change temp with a modifier).
RE: Trouble with this print on overhangs. Organic angles without support (38 Degrees overhang) AND toruble WITH support too?!..why?
@robin-2
This is how I would print this, I think you'll be pleased with the results, however I'm posting this for your education. You should take the time to study the Project's setup and try to understand the why's and what for's. There's A lot to learn in this file.
This was not a file for a beginner, and if your the designer you may want to consider a few changes that will help the model Print better, beyond what I've done here. When you open the file and it asks if you want to enable "Bridging perimeters" be sure to select "NO". Don't change anything in the file Print it as is and compare.
(Adjusted Project File)
Tensegrity Cell Holder Top_V8 Swiss_Adj.Zip
Regards
Swiss_Cheese
The Filament Whisperer
RE: Trouble with this print on overhangs. Organic angles without support (38 Degrees overhang) AND toruble WITH support too?!..why?
@robin-2
The first file I uploaded didn't have the temperature changes added, not sure why they didn't get added, however I have added them to this file and double checked so it's good. Please ignore the first upload as I can't edit that post.
FIXED
(Adjusted Project File)
TEMPS ADDED Tensegrity Cell Holder Top_V8 Swiss_Adj.Zip
Regards
Swiss_Cheese
The Filament Whisperer
RE: Trouble with this print on overhangs. Organic angles without support (38 Degrees overhang) AND toruble WITH support too?!..why?
To get a few ideas to improve your design for 3d printing you might want to start here:
The sacrificial bridging explained in this video could be used to support the surfaces with the hole in your model (the ones Swiss_Cheese supported with the slant blocks).
If at first you don't succeed, skydiving is not for you.
Find out why this is pinned in the general section!
RE:
@robin (the boy wonder)
This area is not a good candidate for sacrificial bridging, have you printed the part?
Regards
Swiss_Cheese
The Filament Whisperer
RE:
Wow thank you very much, there is a LOT of changes made!
I am just about to start printing Swiss_Cheese's improved version and will post the results after.
I would really like to learn and understand everything that has changed with your adjustments, and WHY you made the changes. I will be looking at it in very close detail. Thanks for the reference video too.
I have printed the portions with the holes with normal supports with success in the past, but I like the sacrificial support idea better!
Quick Questions:
1. When adding custom G-code into a layer, the slicing colours showing the different types of extrusion are no longer shown....is there a way to get them back?
2. I have made a slight modification to the way the inside tubes run in this model. Is there an easy way to replace this STL with the updated one without having to redo everything Swiss_Cheese has done?
RE:
@robin-2
Use the View menu in the lower right corner of slicer and select "Feature type".

Regards
Swiss_Cheese
The Filament Whisperer
RE: Trouble with this print on overhangs. Organic angles without support (38 Degrees overhang) AND toruble WITH support too?!..why?
Perfect thanks!
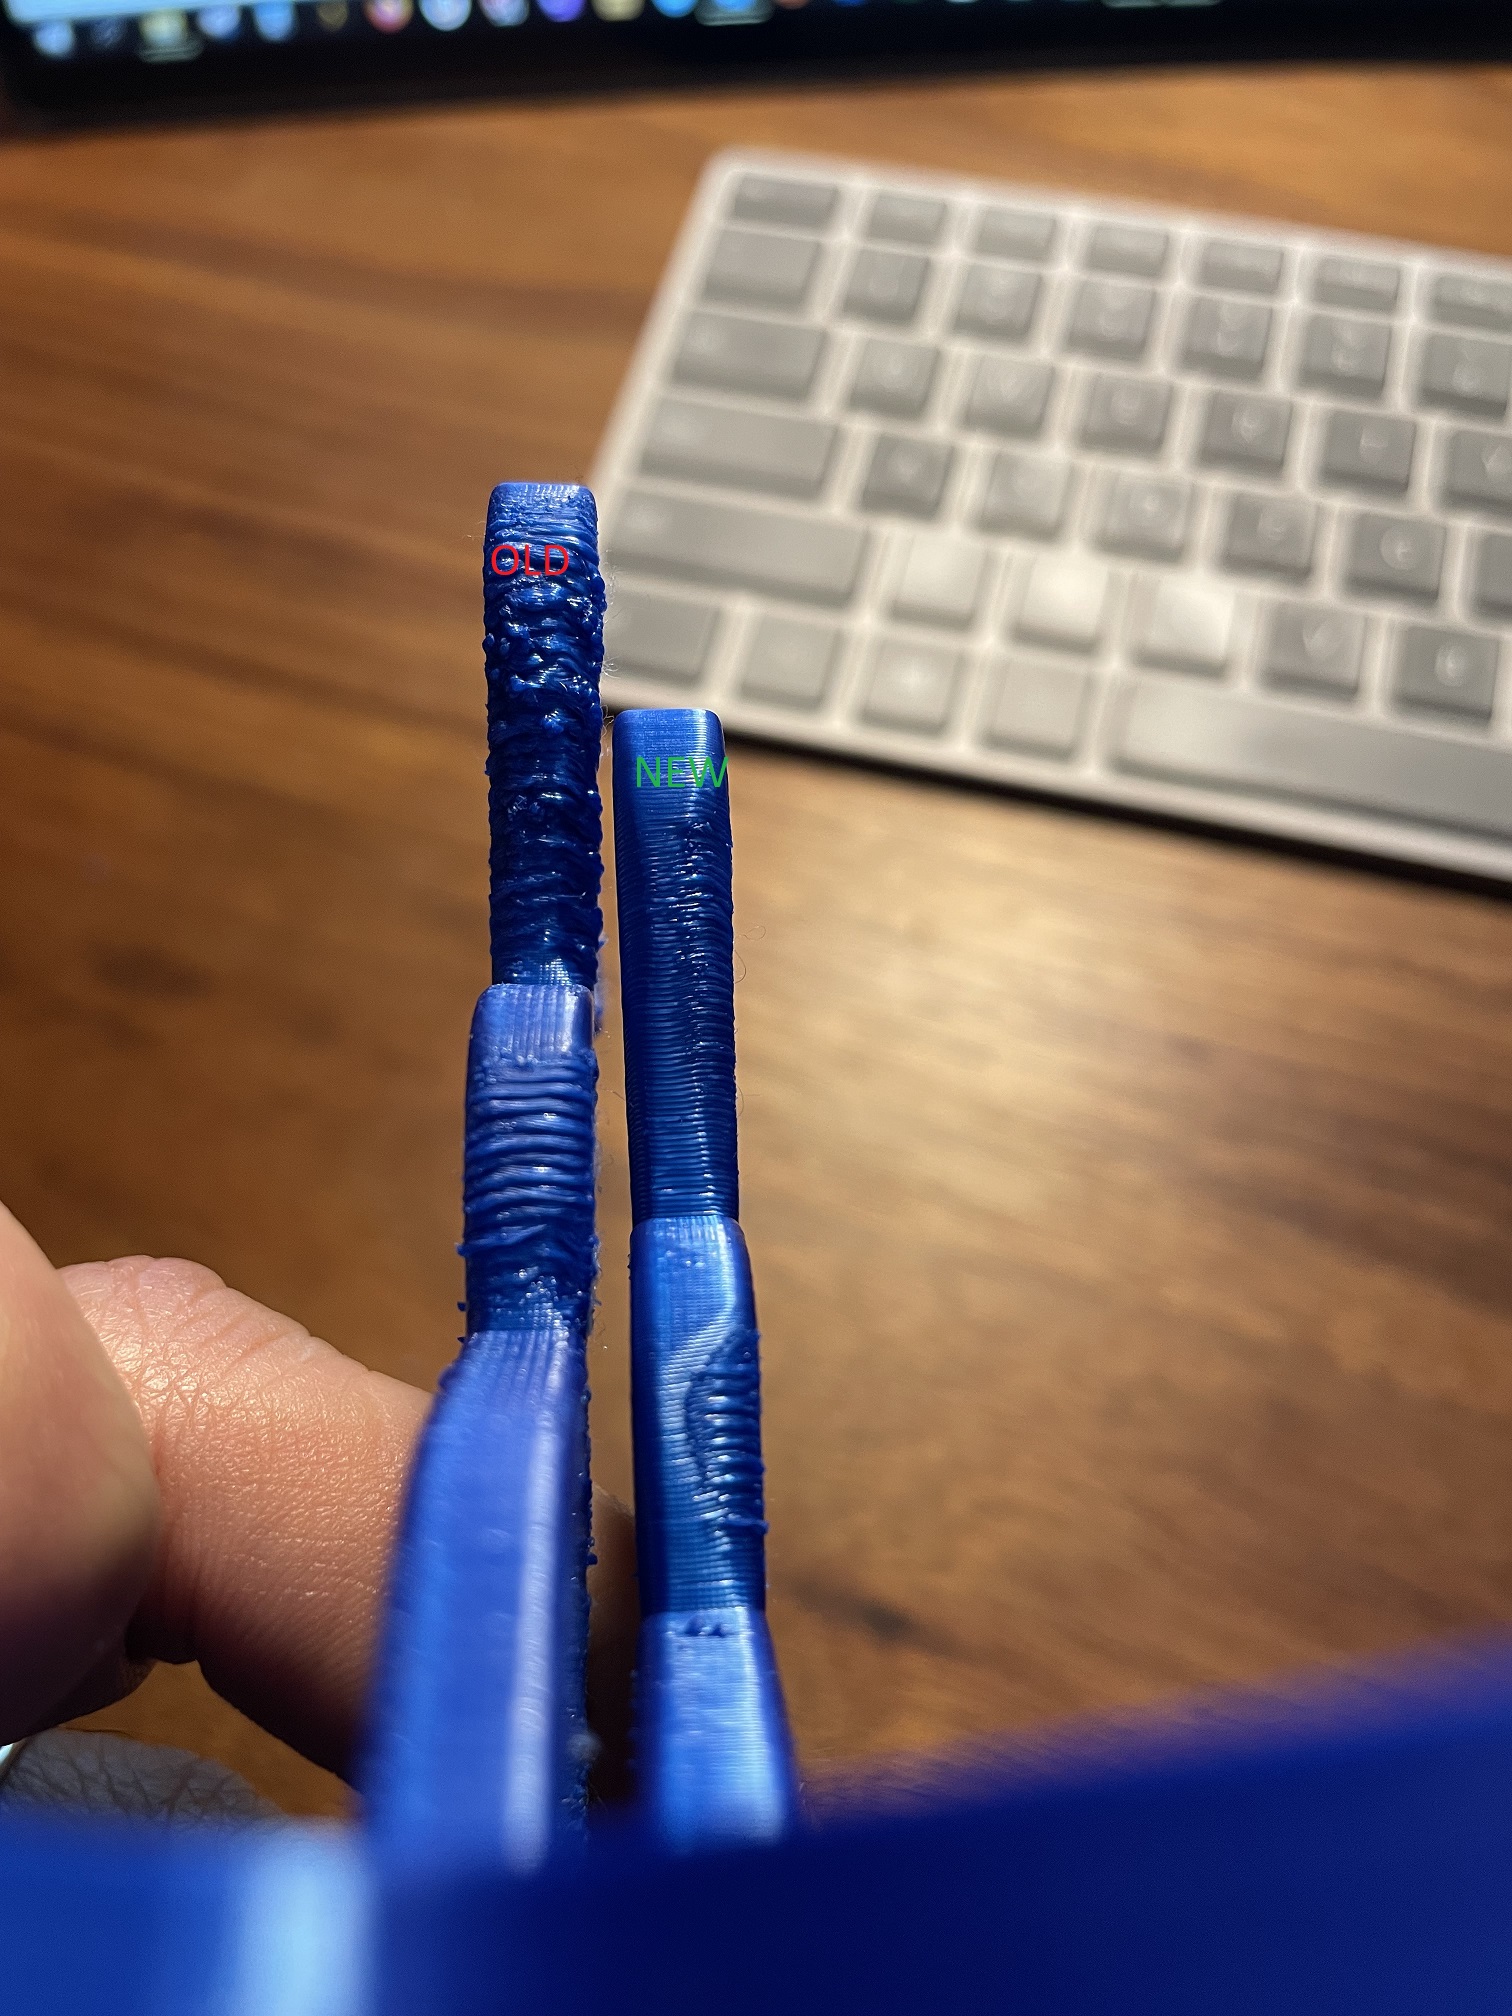
And here are the results! An amazing improvement over my original print. Some things to note:
1. The supported areas worked perfectly thank you! I am really going to check deeper into what you have done here to make this work so well.
2. The perimeters on the holes at the bottom are slightly different (old = 3, new = 2) this may be because I sent you an updated version of the file, but the hole size is the same (the tube inside is smaller). There was a slight defect on the hole, and it is important a fishing line can fit through (which it can. I will monitor this to see if this was a one off).
3. The helix is much improved but there is still some melting happening. This was evident during printing with the little uplift of the plastic on the overhang, this was just about hitting the pinda sensor during printing. How cold can PLA or PETG go vs the recommended settings? I noticed in this iteration you went from 215C to 195C.
If you have more suggestions I am eager to learn more!
And most importantly, is there an EASY way to replace the model in PrusaSlicer with an updated model, without having to redo all the fine adjustments?
Thanks a million in advance! I hope you don't mind me taking advantage of your time and knowledge!


RE:
@robin-2
I'm not sure whats going with that one hole in the bottom, the one that's bad could be from the filament not sticking in that area, just a guess but I also notice that the part your holding up as (old) has 3 perimeters the file you uploaded has only 2. I don't think that's the problem there though.
As for the Helix area at the top I really have no idea, you may need to dry your filament, or maybe a mechanical issue (loose belt?) I can't diagnose that from here. I did notice curling in the photo and you don't want that, it can cause the blemishes your seeing in the helix area.
I'm including my results for comparison.
(Click for larger images)
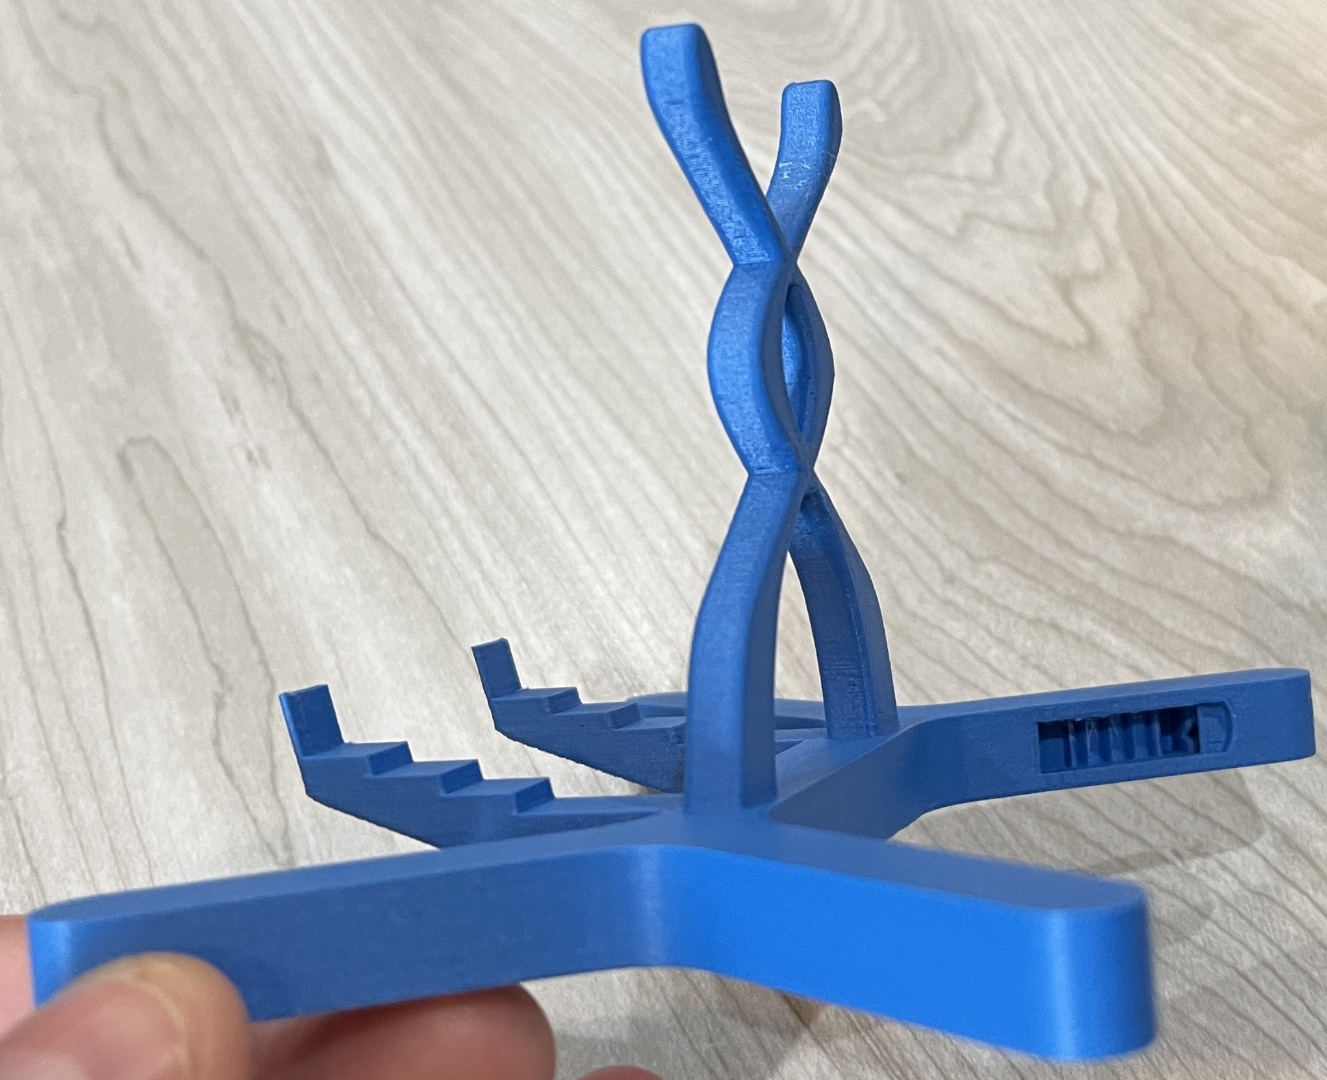

All the bottom holes came out good.
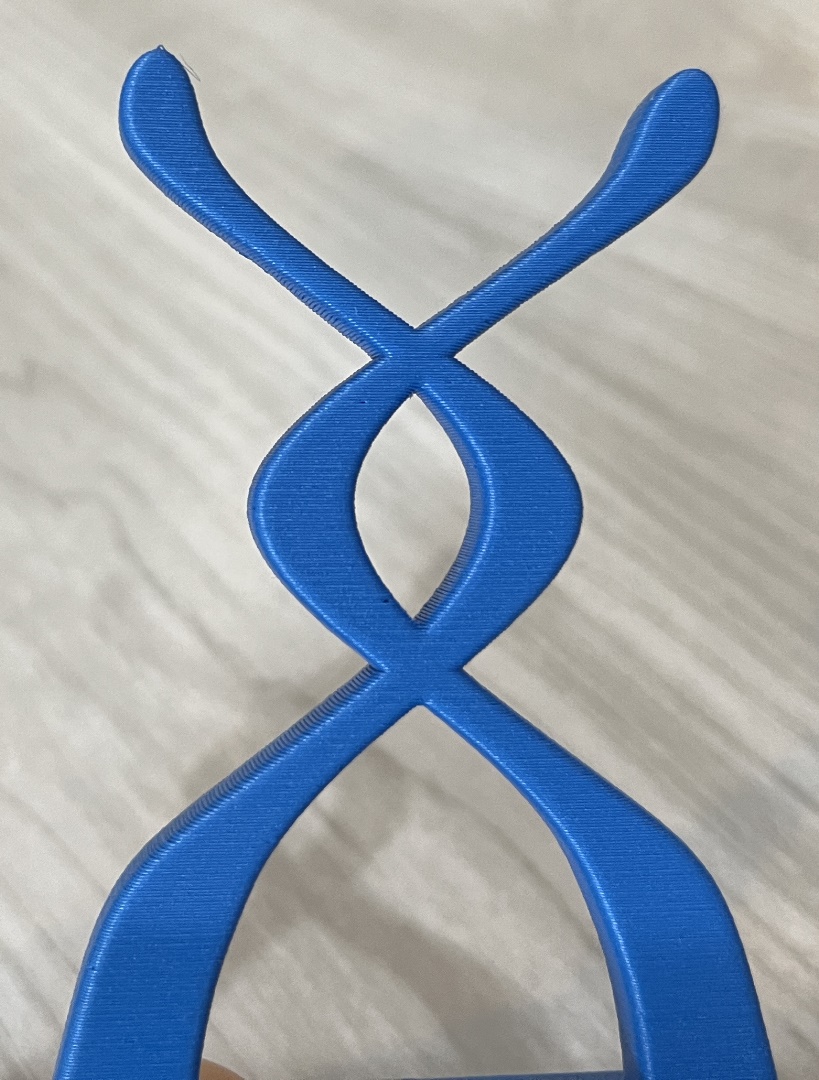
(Front Helix)
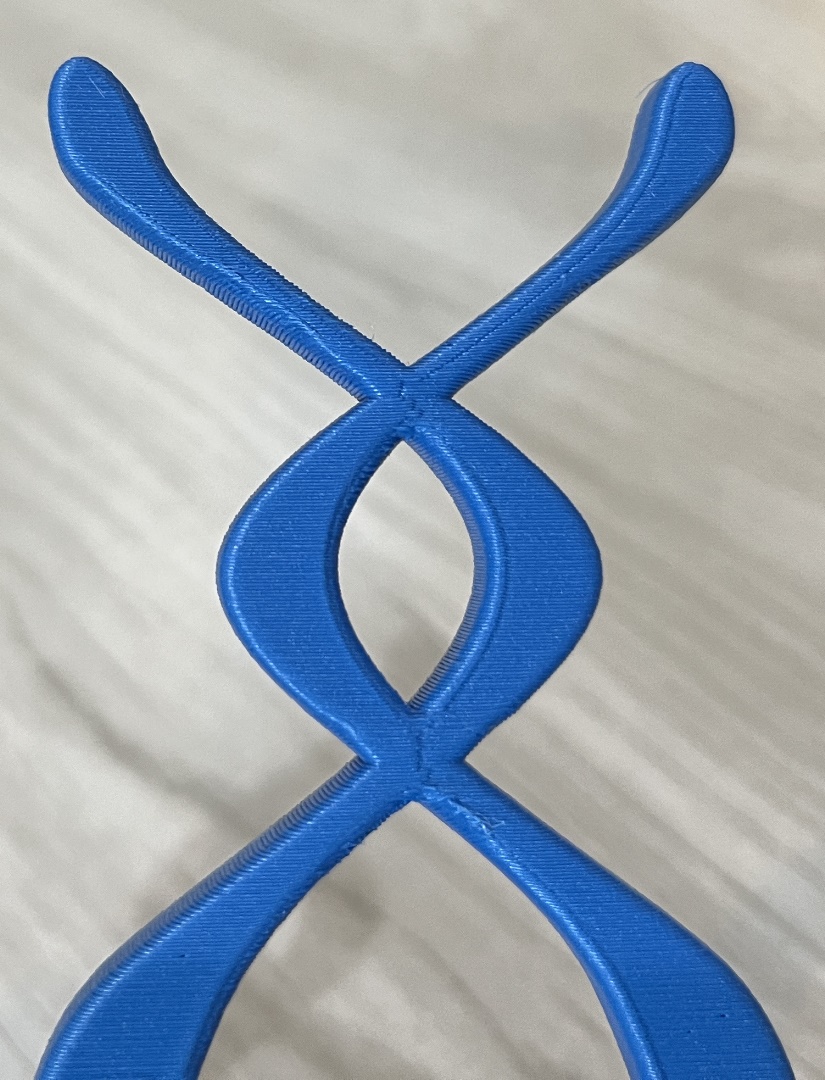
(Back Helix this is where the seams are)
Overall it printed very well for me, while I'm sure it could be tuned a bit better, I think something else is happening on your end, you did print the (TEMPS ADDED Tensegrity Cell Holder Top_V8 Swiss_Adj.Zip) and not the first one that I uploaded in error, right?
Regards
Swiss_Cheese
The Filament Whisperer
RE: Trouble with this print on overhangs. Organic angles without support (38 Degrees overhang) AND toruble WITH support too?!..why?
Yup I used the new file.
Wow yours really did turn out well! There's a cell phone holder for you! I should send you the rest of the files so you can assemble the entire design.
I will try again with another filament and maybe that will highlight the issue. I'll check belts etc too. I haven't had any problems with other prints except this one. (but this is the most complicated one with overhangs etc.
RE: Trouble with this print on overhangs. Organic angles without support (38 Degrees overhang) AND toruble WITH support too?!..why?
This has been educational for others as well Swiss Cheese. Thank you for your patient tutelage.
Regards,
Pete
RE:
So here are some interesting findings.
I printed the helix portion only to see how a different filament would work (Prusament PLA - Lipstick Red). I updated the file to capture the speed and temp changes after lowering the model. And the print turned out much better (not like @swiss_cheese but significantly improved...so I did the full print afterwards....aaaaaaand....it goes back to having the initial problems. I'm baffled. Thoughts?
(its not evident in the pictures, but the one underneath is the full print)


RE: Trouble with this print on overhangs. Organic angles without support (38 Degrees overhang) AND toruble WITH support too?!..why?
@zombipach
Thank you Pete, I liked hearing that, it helps.
@robin-2
I was waiting to see what the new results would be, they really aren't much better in the areas in question. Do you have any PLA filament that's not Prusament? examples Hatchbox, SunLu, Overture3D, etc,,. the idea being to print with different PLA and compare results.
If you do and you get a different result (a better result hopefully) that could tell us that you need to turn the temps up or down maybe turn the cooling down if it's curling to badly, to achieve better results with the prusament. Unfortunately I don't have any Prusament PLA here to test with, I currently only have Prusament in types PC Blend, PC Blend Carbon Fiber, PETG, and ASA.
Regards
Swiss_Cheese
The Filament Whisperer
RE:
@Swiss Cheese
I’m consistently humbled by members of these communities and YouTube. Not just by their knowledge, but also by their willingness to selflessly give to their fellow hobbyists. I imagine at times it might be frustrating often repeating the same things over and over (across different threads, no disrespect to this OP), or sharing a detailed, informative response and never hearing from the OP again or getting the well deserved Thank You. I hope folks like you can take heart that through the posterity of the internet and search engines(as long as there’s electricity), your advice will continue to help others for years and years. Even if you’re not directly aware of it:-).
Pete
RE:
Wholeheartedly agree with @ZombiPach! It is because of people like @swiss_cheese that make these communities have people coming back. Thank you!
I don't have any none-prusa branded filament as I am still working through what I initially ordered when I got the printer this January, but I have a friend who has, so will get some tonight and test again. I have Prusament-PETG if you think its worth testing. I have some Prusa PLA Silver (which is not "prusament").
Since we've gone through all this so far, I feel it only fair to share the rest of the files for this project so everyone can benefit.
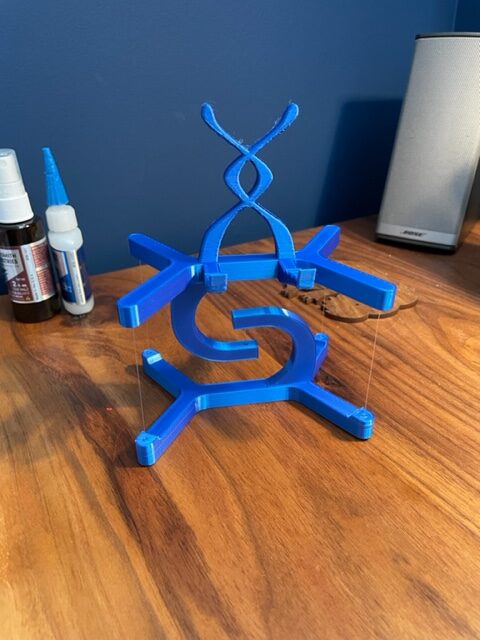
This is a 'floating' cell phone holder.
I saw pictures of a model like this online, so I am not the original concept designer, but could not find any STL files, so decided to model my own version. This is still a work in progress, so try it at your own peril. I have tried to design all parts so supports were not needed except on the top overhangs as discussed in this thread. ZIP attached below.
I used 17-lb fishing line for the middle and 6-lb for the corners.
Print instructions:
- All parts can be printed as-is except the Clamps and the Top. Clamps require support. Top requires serious attention to detail as seen in @swiss_cheese modified 3mf.
- The tensioner requires "enable thin walls" detection, otherwise the little wings don't print properly. Check your sliced layers on this part before printing to ensure they are fully defined.
Assembly instructions:
- Tie the 17-lb line to the top, through the middle of the two little triangles. A little knowledge on how to tie fishing line is helpful here. Make sure the line is coming out of the bigger of the two bottom rectangle holes.
- Thread the line through the two middle, and bottom section.
- Connect the middles to the top and bottom.
- Use a small clamp to hold everthing together, by clamping the two middle overlapping sections together. They will separate on their own later when tension is applied.
- Tie the 17-lb line to the triangle section of the bottom similar as was done to the top. Try to make it as tight as possible. I can provide instructions on a good knot for this if needed...just ask.
- Tie the 6-lb line to the triangle of the bottom.
- Thread the line in the numbered order on the bottom. 1-2-3-4. The line will go from #1, through the top, back to bottom through #2, through the bottom over to #3, back through the top, and finish at #4.
- Tie the end of the 6-lb line to the tensioner through the little hole on the tensioner.
- Insert the tensioner into the hole and carefully tighten.
- Once tightened, make sure the top is parallel to the bottom by sliding it as needed.
- Install the clamps to hold the top in place.
This was designed, so that in the event that the lines should break, they could be replaced in future, so no glue allowed in my design.