tall object with small footprint
I have a problem printing a part for the 3dSets Landy. The first try at printing the hood/bonnet almost worked. It looks like there was a layer shift but it could be that the part came loose at one side from the bed. The shift is larger on one side than on the other. And the highest part of the print isn't looking that nice either.
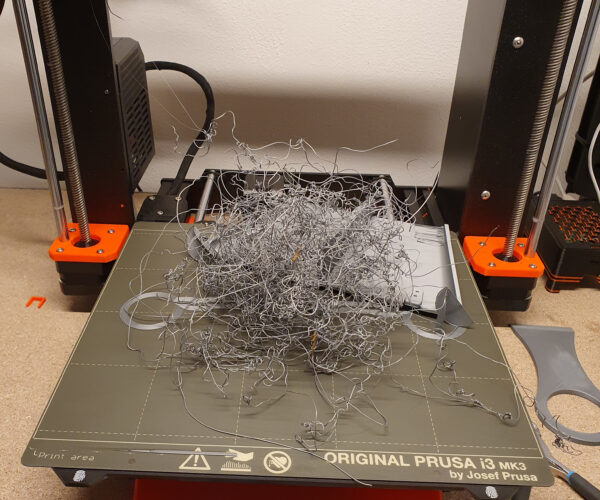
To me it looked like the tall part moved to much during printing. So I added an extra support on the inside of the hood to stabilize it. And like in the first print I added mouse ears to the corners. But that one failed completely. This is what I found in the morning.
Like before the last 2 try's I cleaned the bed with soap and water. Resliced it just incase and tried again. It looked fine for a long time till I saw a line on the optopi cam again. Now I could see that the added support had come loose of the bed and that whole part was wiggling around.
I'm I expecting to much of it and does it need a bigger foot print? Or maybe place the part in line with the Y-axis? Or can this really be a bed adhesion problem and not just because of the part design?
It is printed with the grey PLA that came with the printer on the smooth sheet at .15mm layer height.
The first try is usable but I want a cleaner part and learn from the for the future.
RE: tall object with small footprint
Placing it along the y would help. Also using a proper brim too. For that I’d use 5-8mm rather than just ears. The support you added is also a good idea, especially when it gets higher.
RE: tall object with small footprint
I forgot to mention that. I used a 5 mm brim. It can be seen in the spaghetti picture.
RE: tall object with small footprint
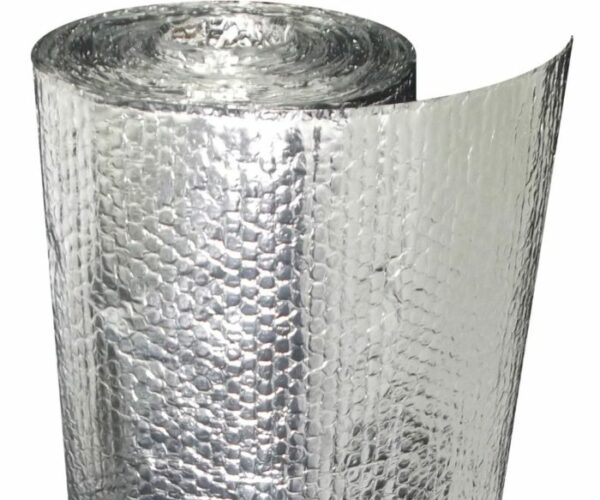
You might do well to orient the print 45 degrees |\| to the print bed (meaning corner to corner) in the upright position as you have it in your pictures, also your layer shift looks like it could be from the result of model curling/bending upward as you print it. these kinds of shapes have a tendency to do that, I find that slowing down the print can help with that, as well printing shapes like these in an enclosure will help also. If you do want to use an enclosure and don't have one handy I've found the Mylar bubble wrap insulation works really well.
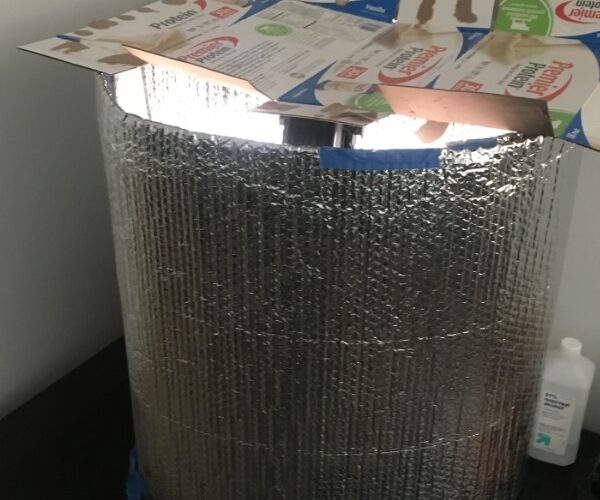
This is how I used it in a pinch to print ABS, and it worked great, Since then I've printed difficult shapes in PETG, ASA and Nylon with success. just make sure if you use this method that you cut a big enough piece to leave room for the movement of the bed and cables.
If your printing PLA you probably wont need to cover the top it will get to hot in there.
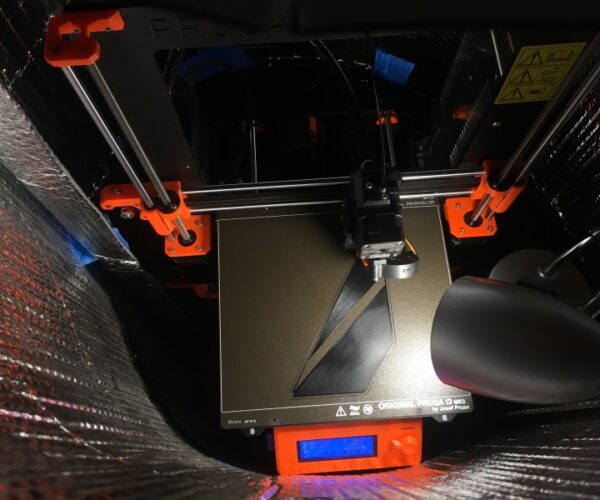
A look at the inside
Good luck
The Filament Whisperer
RE: tall object with small footprint
In your spaghetti picture the brim is still attached. That tells me that you are falling foul of the default Prusa elephants foot setting. The whole elephants foot process on Prusa slicer is sub optimal anyway, it’s much better on Super Slicer as it’s decoupled from the brim settings.
They have the defaults set to 0.2mm which moves the first layer in by that amount to compensate for the first layer squish. However they do NOT move the brim in by the same amount. This is to stop the brim completely fusing with the first layer. However with a 0.2mm elephants foot it’s very common for it to to be attached to the part at all making it functionally pointless. I have mine set to 0.1 in PS usually. So reduce your elephants foot value and try a test print part with a brim to make sure it’s actually attached before doing your next attempt.
In Super Slicer the brim is moved is the same amount as the first layer , there is then a separate setting for brim offset that you can use to push it out slightly if it’s attaching too much.
RE: tall object with small footprint
Clean bed very good, helps with sticking.
Make the first layer 100%, this helps with sticking.
Turn model in Y axis. Make more or possible better support, y axis moves and extruder can hit model if filament sticks on a wrong place,
do a heat tower to see what the best temperature is and no blobs/stringing happens.
Use a very big brim attache to model line 8.
Use glue stick, if needed.
First layer, print hotter and slower to get more sticking.
For the whole print make bed a little hotter.
Slow down the print speed so y axis does not move so fast, the big model will move less.
RE: tall object with small footprint
Thanks all.
I'm having another go at this part at the moment. I did all the easy changes for now.
Elephant foot compensation at 0.1mm.
Raised the bed temp 5 deg C.
Raised the nozzle temp 5 deg C for the first layer.
Lowered most of the speeds.
Rotated the part 90 deg.
Only just noticed that I forgot to change the brim. Still at 5mm instead of the 8mm I wanted.
I had seen the gap in the first layer between the brim and the real part before and thought this was normal and it worked fine before. But will keep an eye on this now especially with taller parts.
This will be just a test as I'm running out of the grey filament during this print.
But will finish it was a different color.
And may try some of the other suggestions you gave.
I like the idea of a temporary enclosure. Going to use that for sure in the future.
The slower speeds are adding a lot of time. PS shows 11h37m now instead of the 9h it was before. But better do one print that takes longer than 3 shorter failed prints. 😉
RE: tall object with small footprint
the only speed you really had to lower was the max volumetric speed, that would have handled everything. I normally wouldn't use any elephant foot compensation on anything that your adding a brim to, set it to zero.
The Filament Whisperer
RE: tall object with small footprint
This time it worked fine. There are some things I have to work on, but looks fine and finished without problems.
Around 7 hours after it finished and cooled down the print was still stuck firmly to the bed and had to bend the plate to release it.
The first one that finished I only had to tap a little to release it from the bed about half an hour after it finished.
Not bad for the 3 year old cheap black filament.
RE: tall object with small footprint
I think the slower speeds aren't needed and the only thing that was messing it up was the fact the brim wasnt attached making it useless, all down to the elephants foot compensation. The fact that the 0.2 inwards was also making your first layer one perimeter less and reducing the parts footprint on such an already thin part just makes it almost certain to not attach well.
RE: tall object with small footprint
the only speed you really had to lower was the max volumetric speed, that would have handled everything.
I had a quick look at that and I see I have a lot to read and learn.
But I think this only changes print speed, not the travel speeds that could have been a problem with this print.
RE: tall object with small footprint
I think the slower speeds aren't needed and the only thing that was messing it up was the fact the brim wasnt attached making it useless, all down to the elephants foot compensation. The fact that the 0.2 inwards was also making your first layer one perimeter less and reducing the parts footprint on such an already thin part just makes it almost certain to not attach well.
That is what I thought too, but I think it helped with the print quality.
RE: tall object with small footprint
I'm glad to see you were able to work it out. 😎 the part looks good from your picture.
The Filament Whisperer


