RE: Small object printing
I recommend always giving the PEI sheet a good clean (wash under tap water with Dawn dish soap or your local equivalent, scrub with a plain paper towel and dry with another) and THEN double-checking your Live-Z (recommend Jeff Jordan's "Life Adjust" method) any time you encounter adhesion issues. You can always apply glue stick or other adhesion enhancers later, but they can only improve adhesion, not create it if the filament is not flat on the bed with appropriate squish on the 1st layer. Grease under a layer of glue or adhesive can still cause problems.
I've been able to print incredibly small parts on a leveled, clean PEI sheet with both PLA and PETG. If you find that the parts aren't shaped to adhere (e.g. rounded undersides), then adhesion enhancers like MagiGoo or gluestick can certainly be used. A brim might be appropriate for some parts, esp. if warping is an issue.
and miscellaneous other tech projects
He is intelligent, but not experienced. His pattern indicates two dimensional thinking. -- Spock in Star Trek: The Wrath of Khan
RE: Small object printing
Are those pins flat on the bottom like they are the top ? What contact surface do they have with the bed in the preview ?
RE: Small object printing
I always print small round items like that using a raft and supports.
RE: Small object printing
The point being is if they were placed with that flat part on to a clean smooth sheet bed with a correct live z height adjustment then they would print, stick and not need any other addition like glue or anything.
That surface is flat enough to print, which is probably why they were designed that way and not be perfectly round. There is absolutely no need to use a raft or supports on those parts.
The more pertinent questions are , smooth pei or textured pei sheet ?, live z adjusted correctly ? Completely clean and free from all oils and grease ?
RE: Small object printing
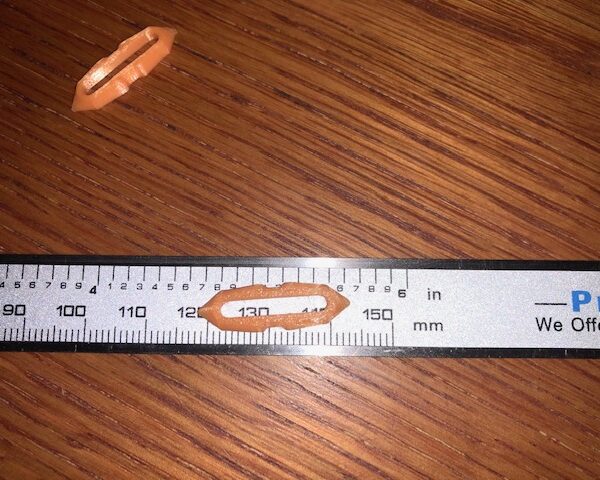
- You're looking at the bottom surface. Each leg is about 1.4mm to 1.6mm at its narrowest.
- I religiously wipe down the bed with isopropyl after every print
- As I mentioned, I'm happy with prints prior to this. Just to check, I printed the 3x3 1st layer test and I think it's fine.
- I have had to change the M92 E value during my calibration / setup. This helped a lot
- I'm using the Prusa textured pei sheet
- I've tried this print with Hatchbox PLA and Standard Prusa PLA. Both are really 1.8mm diameter for me, so that's what I use.
RE: Small object printing
[...]
- You're looking at the bottom surface. Each leg is about 1.4mm to 1.6mm at its narrowest.
At quick glance, it looks like those should adhere and print just fine. Save a 3MF project file, zip it and upload (attach) it here for specific part suggestions. Curved undersides can be tricky, but it's hard to judge in pics.
The textured sheets vary in terms of adhesion, particularly with PLA. If it held well well before, a good clean should restore it completely.
- I religiously wipe down the bed with isopropyl after every print
- As I mentioned, I'm happy with prints prior to this. Just to check, I printed the 3x3 1st layer test and I think it's fine.
- I have had to change the M92 E value during my calibration / setup. This helped a lot
- I'm using the Prusa textured pei sheet
- I've tried this print with Hatchbox PLA and Standard Prusa PLA. Both are really 1.8mm diameter for me, so that's what I use.
and miscellaneous other tech projects
He is intelligent, but not experienced. His pattern indicates two dimensional thinking. -- Spock in Star Trek: The Wrath of Khan
RE: Small object printing
Thanks. I'll work on the deep clean later today. The object came from http://www.thingiverse.com/thing:213946 - I've pulled out one of the pins as best I know how. It is a flat bottom surface.
So in general, it sounds like just my regular iso wipe down is not sufficient?
RE: Small object printing
ok, that file type wasn't allowed - try this...
RE: Small object printing
so Fusion 360 archive or STL weren't allowed...
RE: Small object printing
You need to zip most file types to add them.
for debugging we tend to prefer the saved project from Prusa slicer if you are using it as that contains all the settings too as well as the model.
RE: Small object printing
[...] So in general, it sounds like just my regular iso wipe down is not sufficient?
Probably not as your primary cleaning method. Here are some notes I put together summarizing the wisdom passed on to me by others and from my own experience with the Mk3 over the last few years...
The riddle of adhesion
You’ve probably seen some of these guidelines before and may have wondered exactly why these simple sounding steps work. Here’s an unscientific breakdown.
-
Isopropyl alcohol and acetone work as solvents , breaking apart grease molecules. These solvents do not completely dissolve grease, but do break it down far enough that it can be removed from surfaces easily.
-
The more concentrated the solvent, the more effective it will be at a given volume. Those little 70% isopropyl wipes do work… on a shiny new PEI sheet. They’re just not effective dealing with larger amounts of accumulated grease. This is why 91%+ alcohol is recommended.
-
Acetone is even more effective, breaking up oxidation on the PEI surface, but can make the PEI surface brittle and prone to cracking if over-used.
-
The amount of grease that any solvent will effectively break down is directly proportional to the volume of solvent to grease. The more you apply, the more grease it can effectively break down. The more concentrated the solvent, the more grease a given quantity can break down.
-
Alcohol, acetone and any other solution you apply directly to the bed is just going to move those broken-down grease and grime molecules around. Some will be picked up by wiping with a clean towel, but some will remain on the PEI sheet.
-
A dunk under the sink with Dawn dish soap is the most effective method of cleaning. Dish soap is a surfactant , not a solvent. It works in a fundamentally different way, bonding both grease and water molecules to wash away contaminants.The reason this is so effective is not because Dawn is “stronger”, but because there’s simply a much greater volume of Dawn and water and the grease is washed away from the PEI sheet.
-
Windex, a wipe of finger grease, talcum powder or specialized release agents can be used to reduce adhesion when using hot, sticky materials that grip the PEI surface too firmly such as PETG. It is still a good idea to clean the PEI before a print to get an even surface, even if you will be applying a release agent for pritning with sticky materials.
A bit of trivia - The reason higher concentrations of alcohol seem to be harder to find is that isopropyl alcohol is most effective against bacteria at roughly a 71% concentration. A bit of distilled water helps slow evaporation, making the alcohol more effective. If you're looking in pharmacies, that's why 91% and higher seem to be hard to find.
and miscellaneous other tech projects
He is intelligent, but not experienced. His pattern indicates two dimensional thinking. -- Spock in Star Trek: The Wrath of Khan
RE: Small object printing
OK
RE: Small object printing
Let me finish up a couple of PETg prints and I'll switch to PLA and try one of the pins.
RE: Small object printing
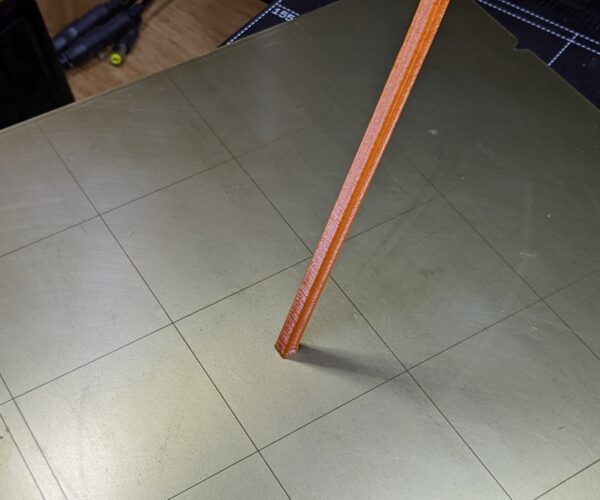
That's an easy print for the Mk3. Here's a quick test with 3 year old PLA on a smooth PEI sheet that was washed a couple of weeks ago. Other than avoiding touching the print area, I haven't applied any treatment:
As a proof of concept to show that small parts can be printed readily on PEI surface with no other treatment than the Dawn wash technique, I tried printing 500 pegs measuring 1mm x 3mm high:
Here's an older pic of the adhesion challenge print:
No matter what you're printing, you will always have the best odds of success by ensuring the foundation of your print -- that 1st layer -- is printed on a clean and level bed.
and miscellaneous other tech projects
He is intelligent, but not experienced. His pattern indicates two dimensional thinking. -- Spock in Star Trek: The Wrath of Khan
RE: Small object printing
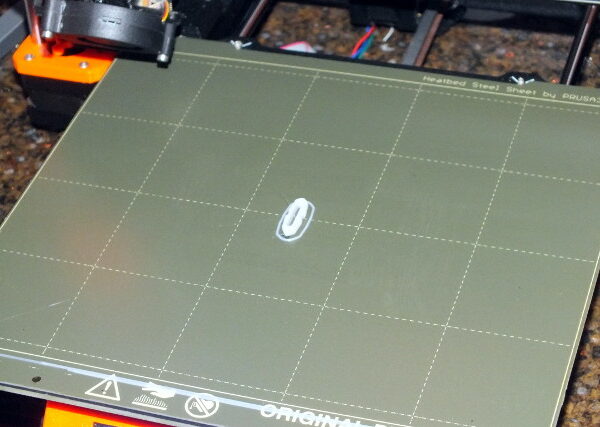
Here's your pin.
It printed just fine with no special actions. This is Solutech white PLA.
Some minor stringing (typical of the Solutech) but nothing serious.
Bottom photo is the bottom surface of the pin. The black spot is my fault. I neglected to brush off the nozzle before this print and I had just finished some prints with black PETg, a small blob of which probably fell from the nozzle.
A couple of days ago I thought that the pin would need a raft, but when slicing, it was obvious that it had enough of a flat bottom to stick reliably.
No adhesion methods except for the remainder of some Layerneer Bed Weld that was applied several prints ago.
RE: Small object printing
You need to zip most file types to add them.
for debugging we tend to prefer the saved project from Prusa slicer if you are using it as that contains all the settings too as well as the model.
Ah - didn't originally know what that file extension was - Thanks!
RE: Small object printing
So gave the plate a quick wash - problem solved! Thanks very much to all!
Mike
RE: Small object printing
Love that pin pic Bob. Can I save that one for use later too 🙂
RE: Small object printing
So going forward, the ideal workflow would be print, flip, print, wash, repeat?


