Seam
Hi,
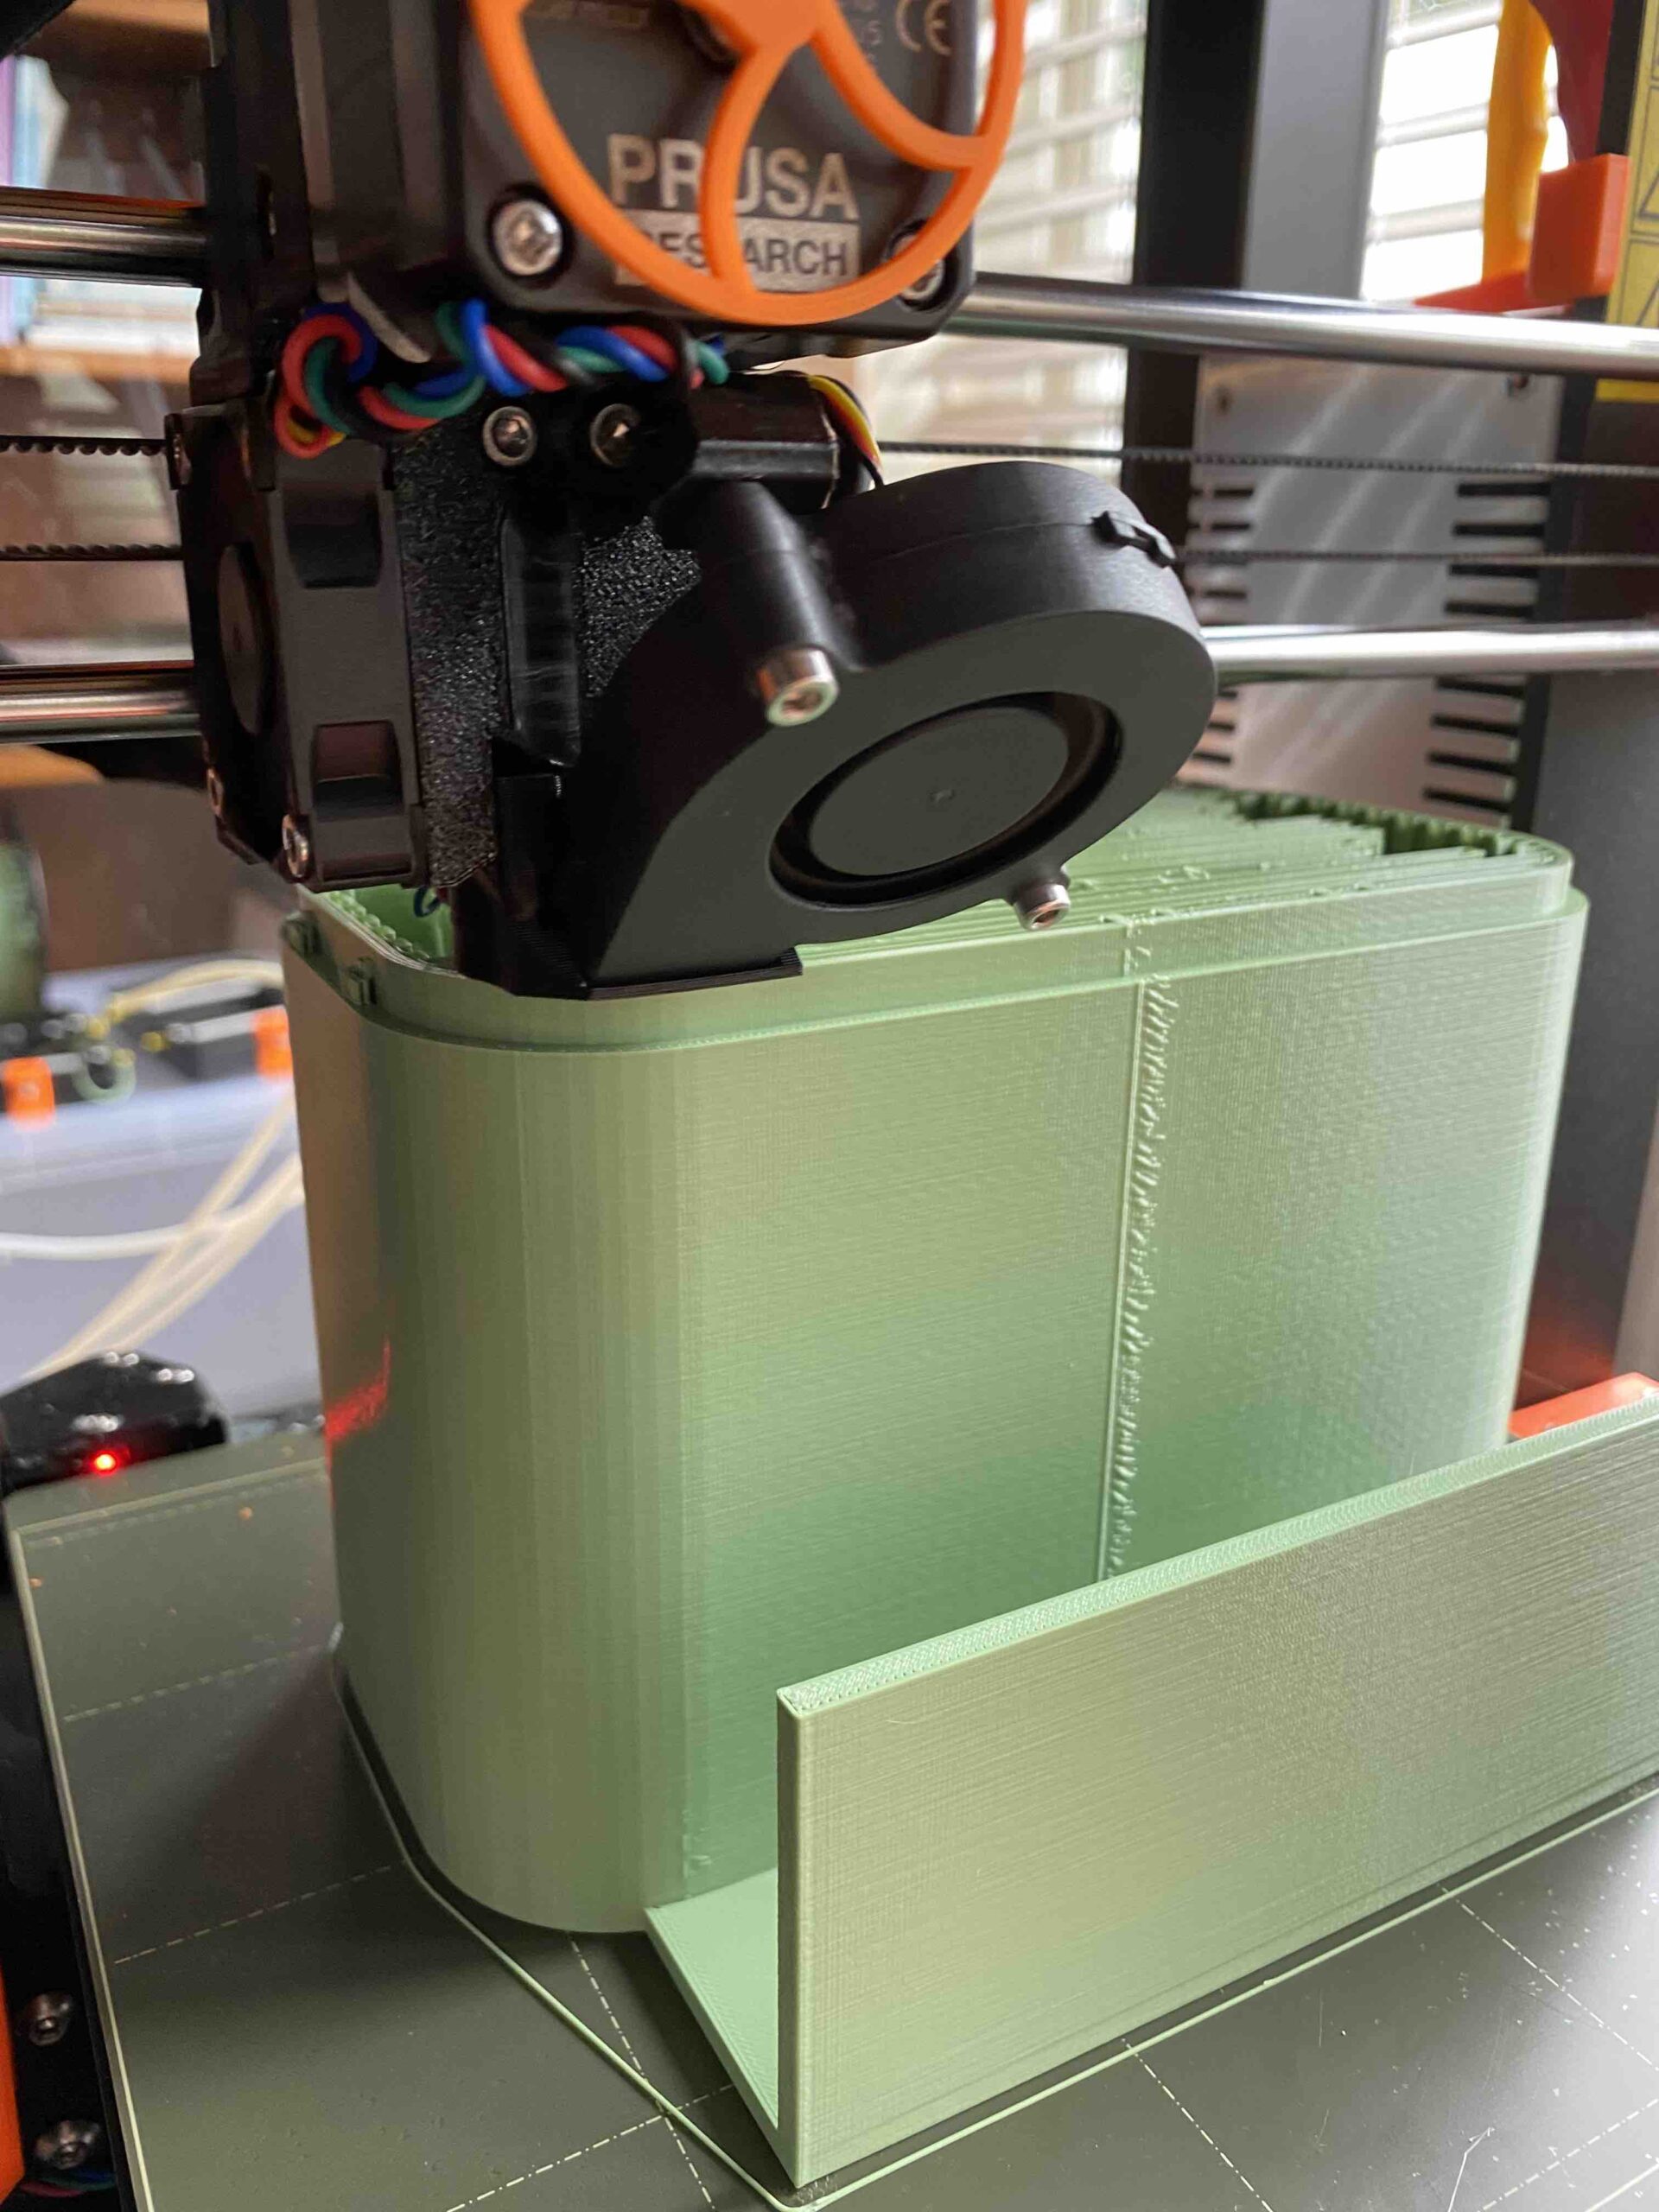
Can anyone tell me how the irregular pattern beside the seamline arise?
And maybe give some advice how can I prevent this?
Sliced with PrusaSlicer. Seam Position: Nearest.
Filament: Prusament PETG with temp of 230 degrees. Flow: 98 %.
Thank you!

@ja
Can you provide a Zipped up .3mf project file, this will allow us to see your settings as they apply to the model, so that we can make informed suggestions. pictures are helpful in some cases, however in this case more information is needed.
Enjoy
Swiss_Cheese
The Filament Whisperer
Zip file
Thank you for your reaction!
This is the zipped project file. Hope it will help.
Try repositioning z-seam
Try changing Print Settings->Layers and perimeters->Advanced->Seam position to Rear. If the defect moves, it's your z-seam. You can move the seam around, but you can't completely get rid of it with current consumer-grade FFF printers. You can minimize the effect by calibrating your extrusion multiplier and linear advance settings for different filaments.
@ja
I believe you may have had several settings causing this issue as well the Travel path may have been contributing to the effect, you had the file set up for MMU, and had several filament profiles/extruders loaded, but appeared to only be using the PETG Profile, this in turn was locking in certain retraction settings in filament overrides that could only be reset after removing the other 4 extruders, I made several changes as well I reoriented the model, fixed the bottom, applied different infill & support settings decreasing the print time to 21 hours 37min from 1day 7 hours and 41min.
I did not take the time to test this print however I believe it will point you in the right direction for a proper print
The model itself has several issues but I only took the time to fix the bottom.
Good luck, I hope this helps
Swiss_Cheese
The Filament Whisperer
RE: Change your outside perimeter
The simplest solution is to change your outside perimeter in the Print Settings->Layers and perimeters->Advanced-> of PrusaSlicer.
Check the box this box. It is the latest option of the settings tab, The outside perimeter will then be printed first of every layer.
This way the layer stops inside the model en give you a smoother outside.
@swiss_cheese
Thanks for the effort!I'm going to study it. Sounds like my settings are a mess 😊 .
Incidentally, I have a mmu so I understand that point at all.But that may be due to a lack of knowledge on my side or on my understanding of english ....
Thanks
@bobstro: Thank you, I'm going to check it out and try. I used your suggestions for the support setting, I had read in an earlier forum post. Works quite well!
@Ruud: Thanks, indeed, that sounds sounds like the simplest solution. I will use, also with other prints...