Rounded Overhangs
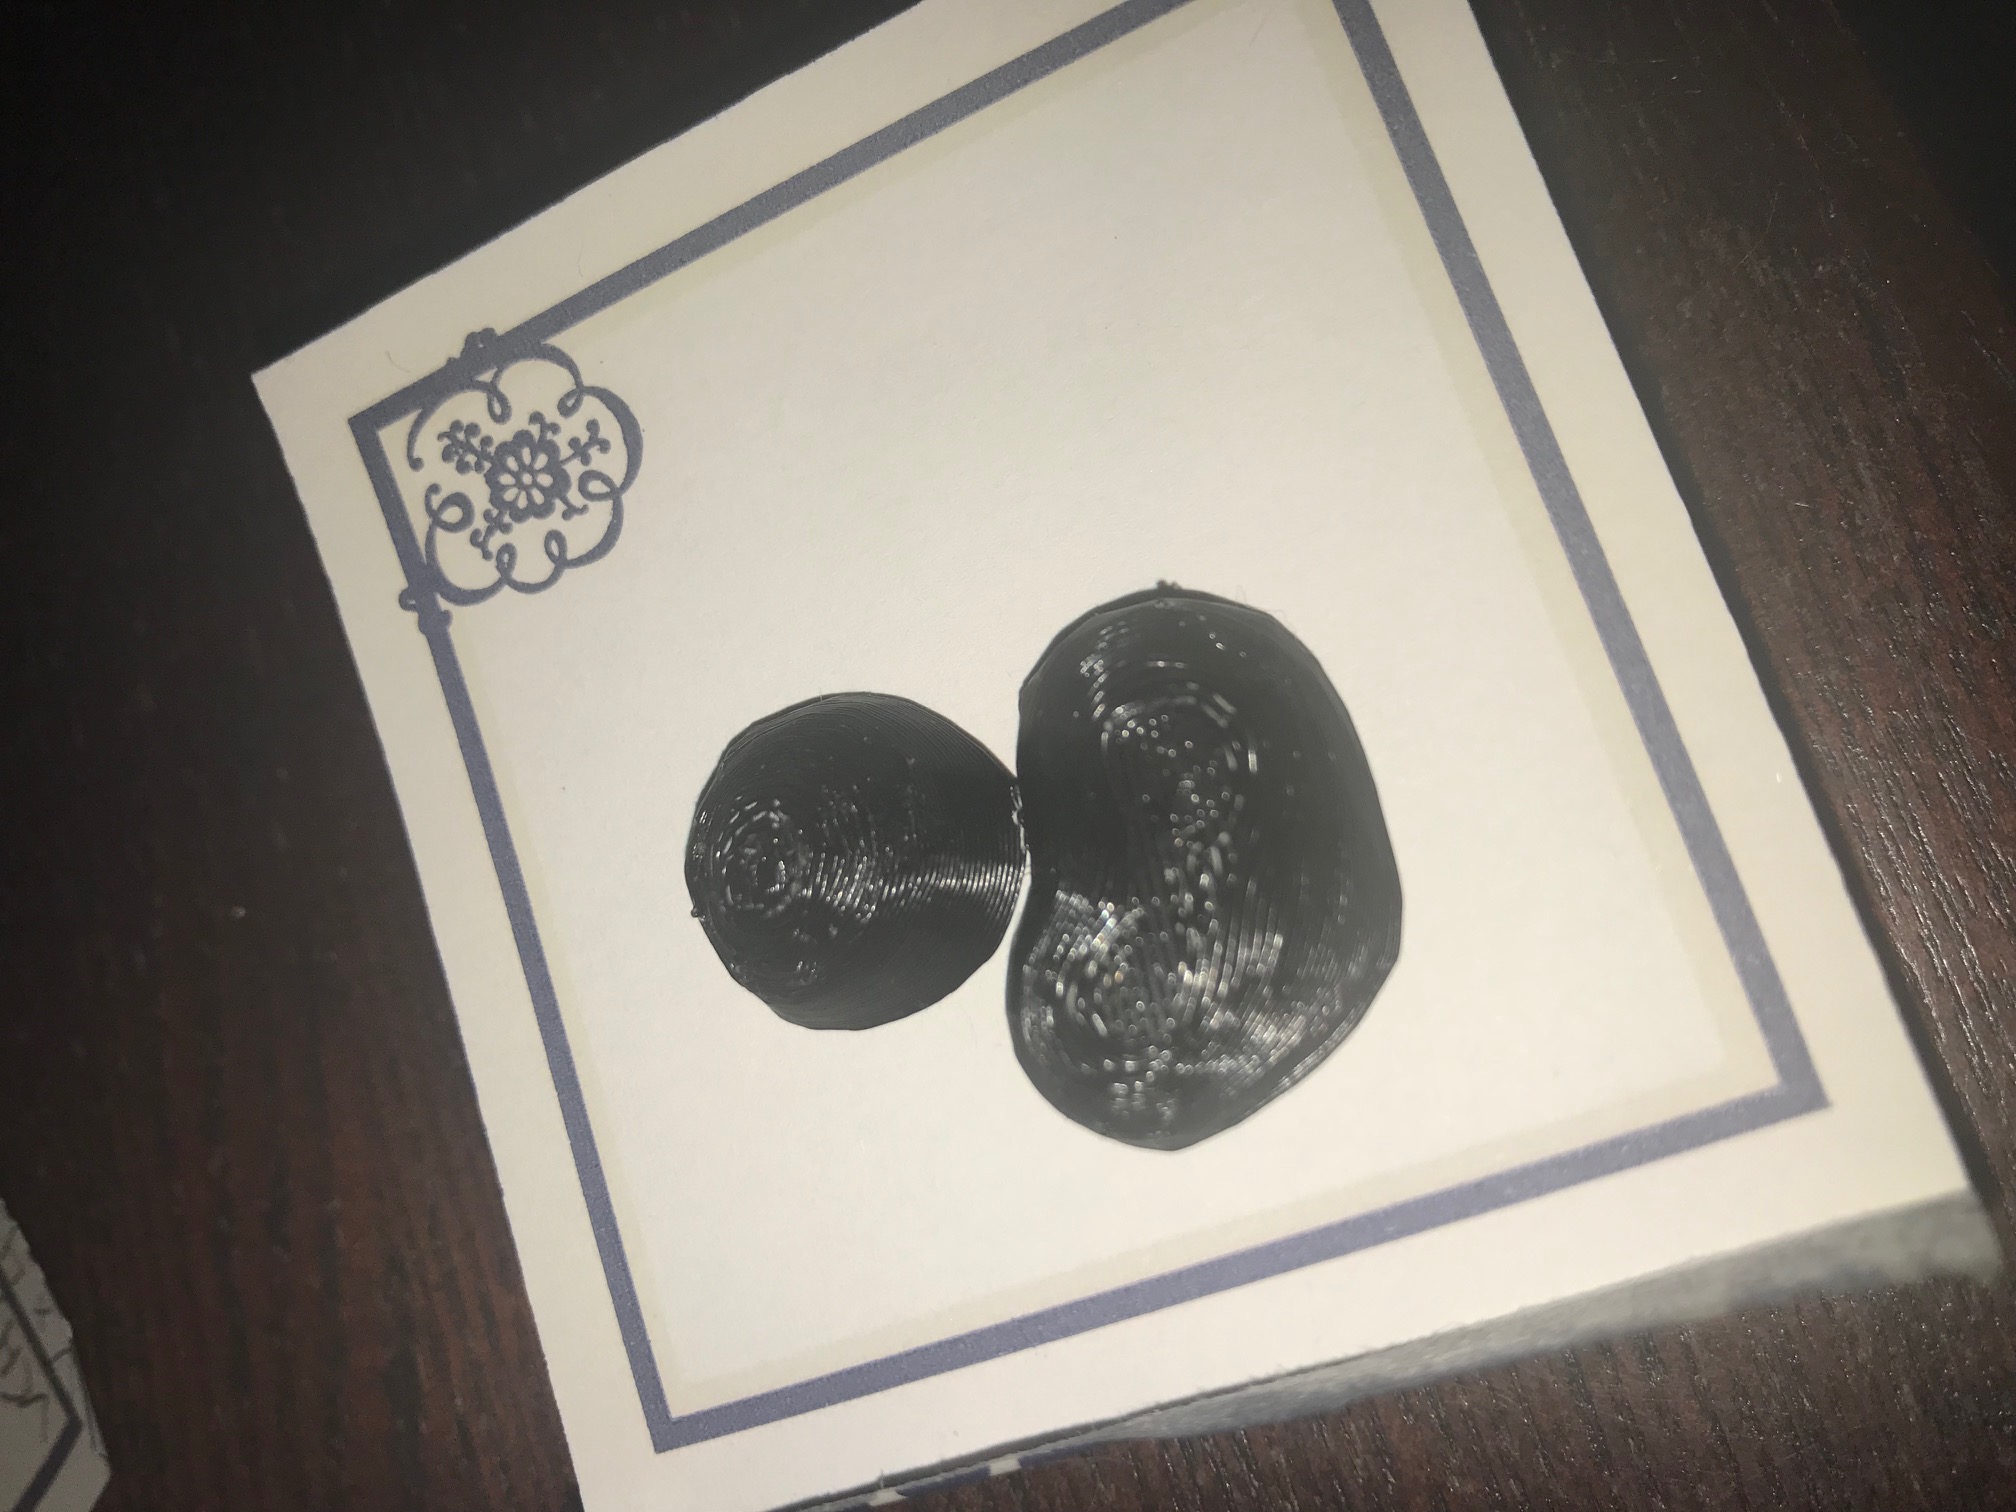
For some reason I have had no luck at all getting overhangs to print on my Mk3. Most stuff comes out really, really good, but simple near-spheres have horrid bottoms:
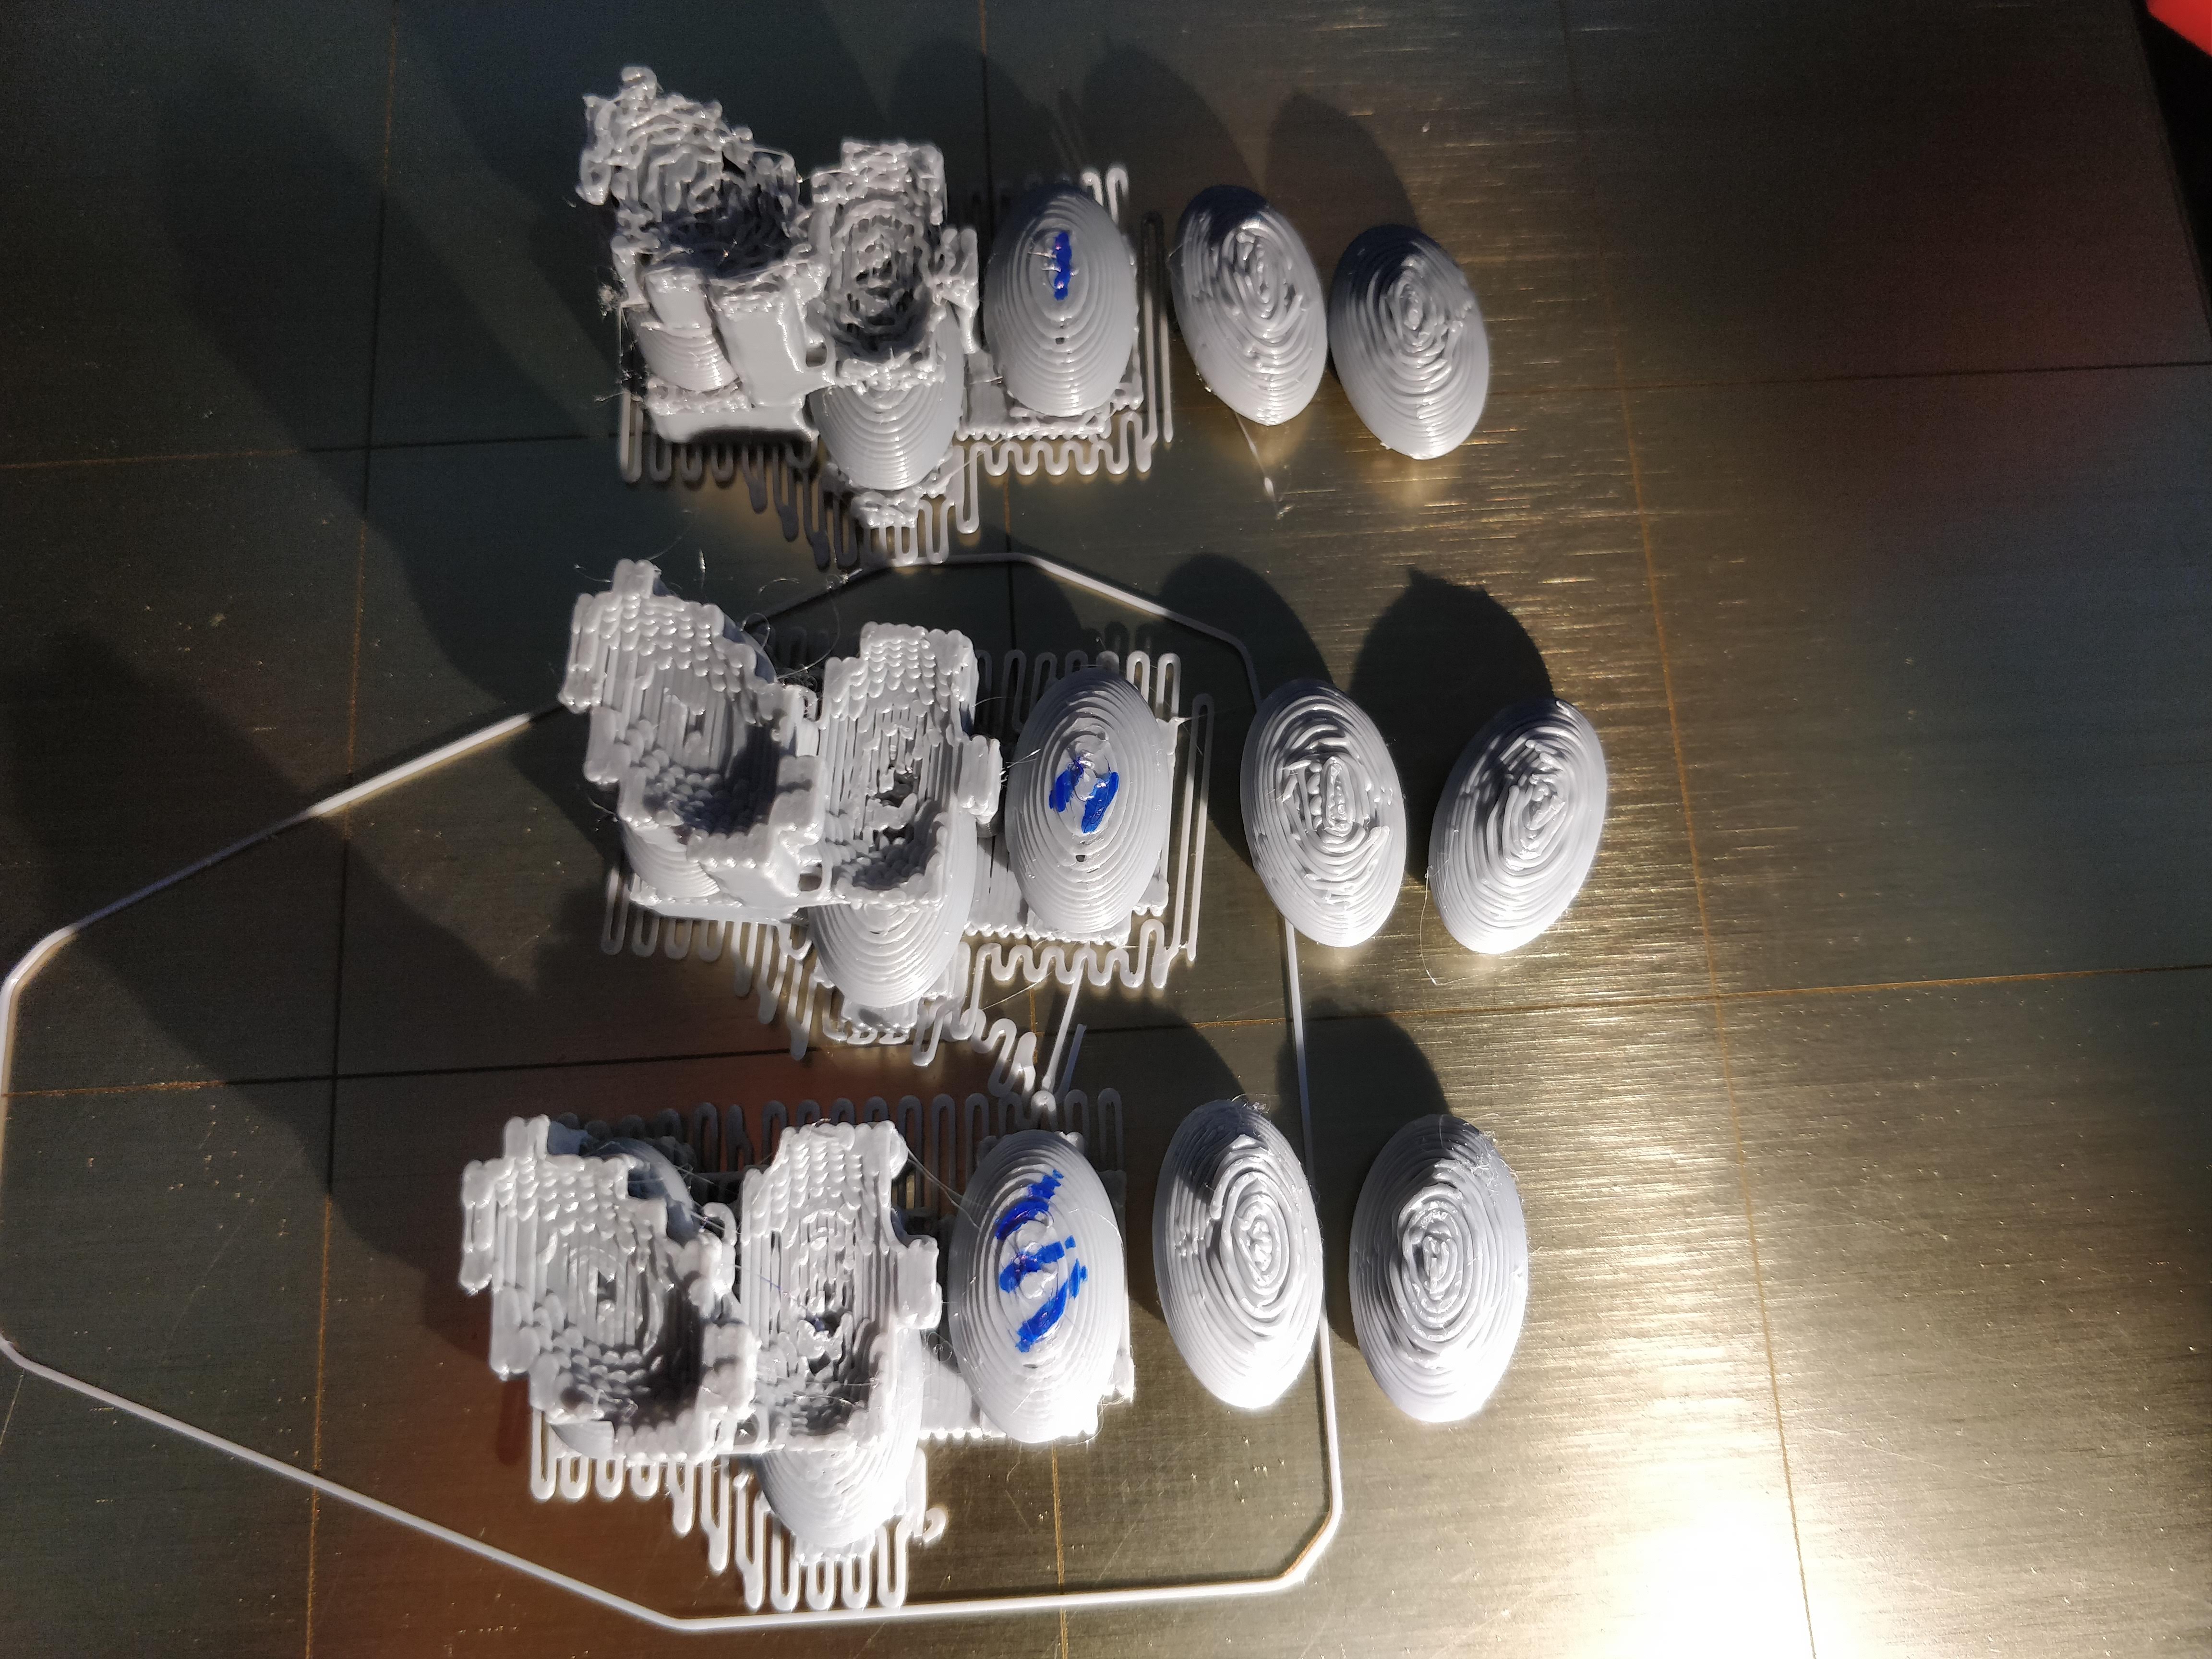
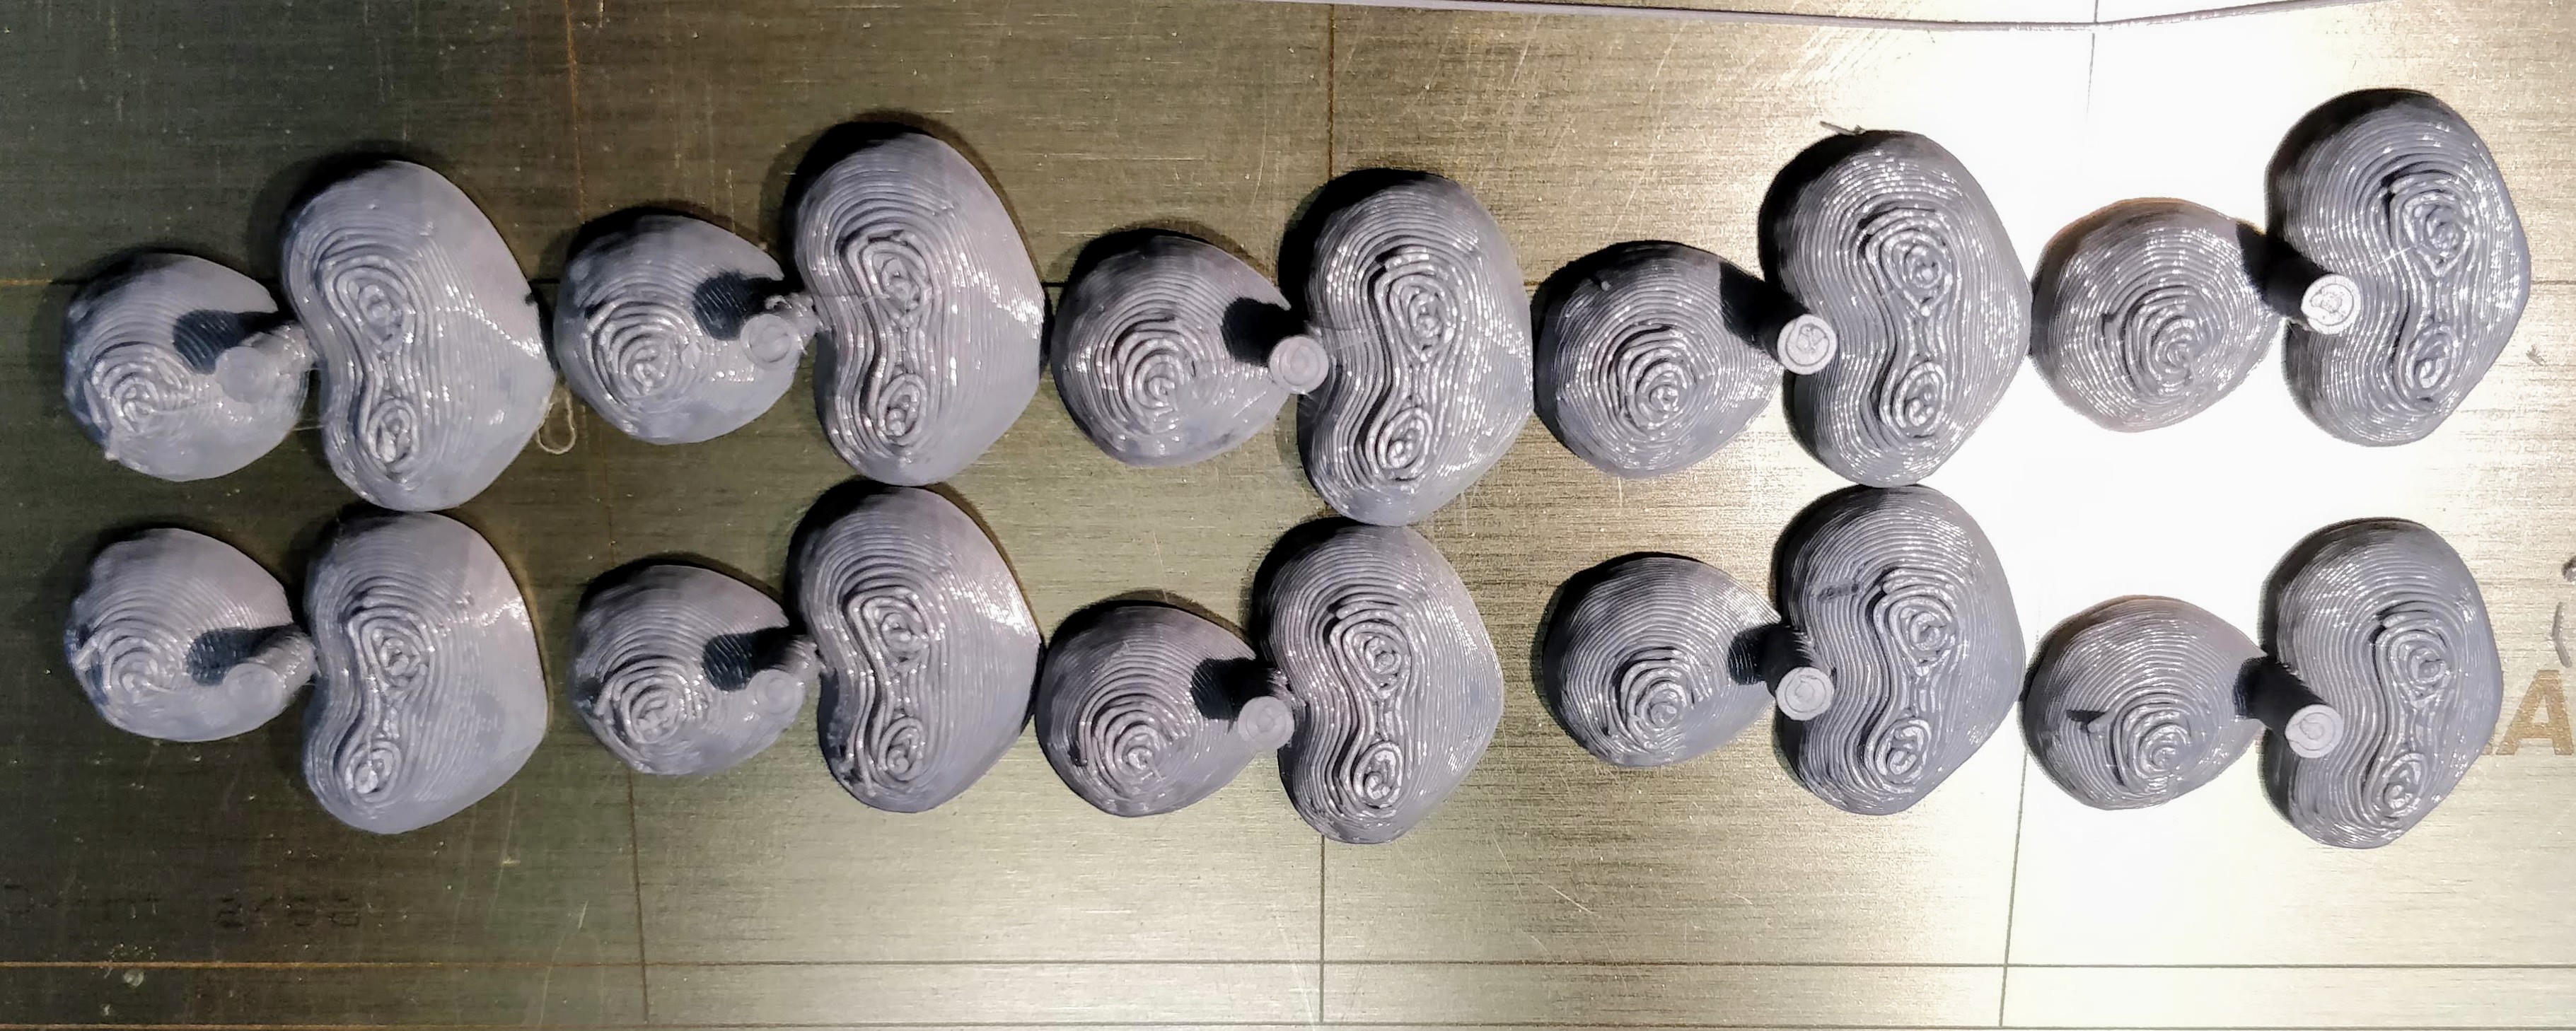
These were all printed with a 0.6mm nozzle, 0.25mm layers, 0.2 mm support Z distance. Overhangs at 45 Degrees (crazy cause I often use 28), speeds all under 50mm/s except infill at 100. I've had similar results with 0.4mm nozzle.
#1 has interface loops
#2 has no changes
#3 has "Detect Bridging Perimeters"* on and "Sheath around Support" off.
I've probably printed 10 more sets of these balls, the bottoms always looks like they were deposited from an inch away. I've turned temps from 200-215 and also seen no improvement. I'm really stuck here, what can I do?
* See this thread for a related discussion: https://shop.prusa3d.com/forum/hardware-firmware-and-software-help-f64/bridge-detection-weird-slicing-fatter-extrudes-on--t23721.html
I maintain an informal list of San Diego, CA 3D printing enthusiasts. PM me for details. If you include a contact email and I can add you to the informal mailing list.
Re: Rounded Overhangs
I had the same problem when using Simplify3d and Prusa Control. In S3D I found that setting under Supports. Dense Supports at 70% and about 5 layers worked wonders for me. These are like end caps for your regular support structures. Any place the top or bottom touches the model then you get a tighter support add-on. And it seems to make support removal much easier.
Maybe your slicer has something like it.
Neal
Re: Rounded Overhangs
I've been using Silc3R PE, though previously was using S3D and CURA. I hope it shows in the picture, there are already tops on the supports ("interface layer"), I only use it 2 layers thick (0.1mm gaps to leave grooves for better adhesion), but as they are continuous and not moving around I don't see why I would use more.
I did try interface loops, but it seems like perhaps it's more of an issue where x-y clearance takes precedence over z?
In CURA there's a specific option, so you can keep your Z supports tight. I can set the x-y distance very tight, but then end up with support marks on the side.
I maintain an informal list of San Diego, CA 3D printing enthusiasts. PM me for details. If you include a contact email and I can add you to the informal mailing list.
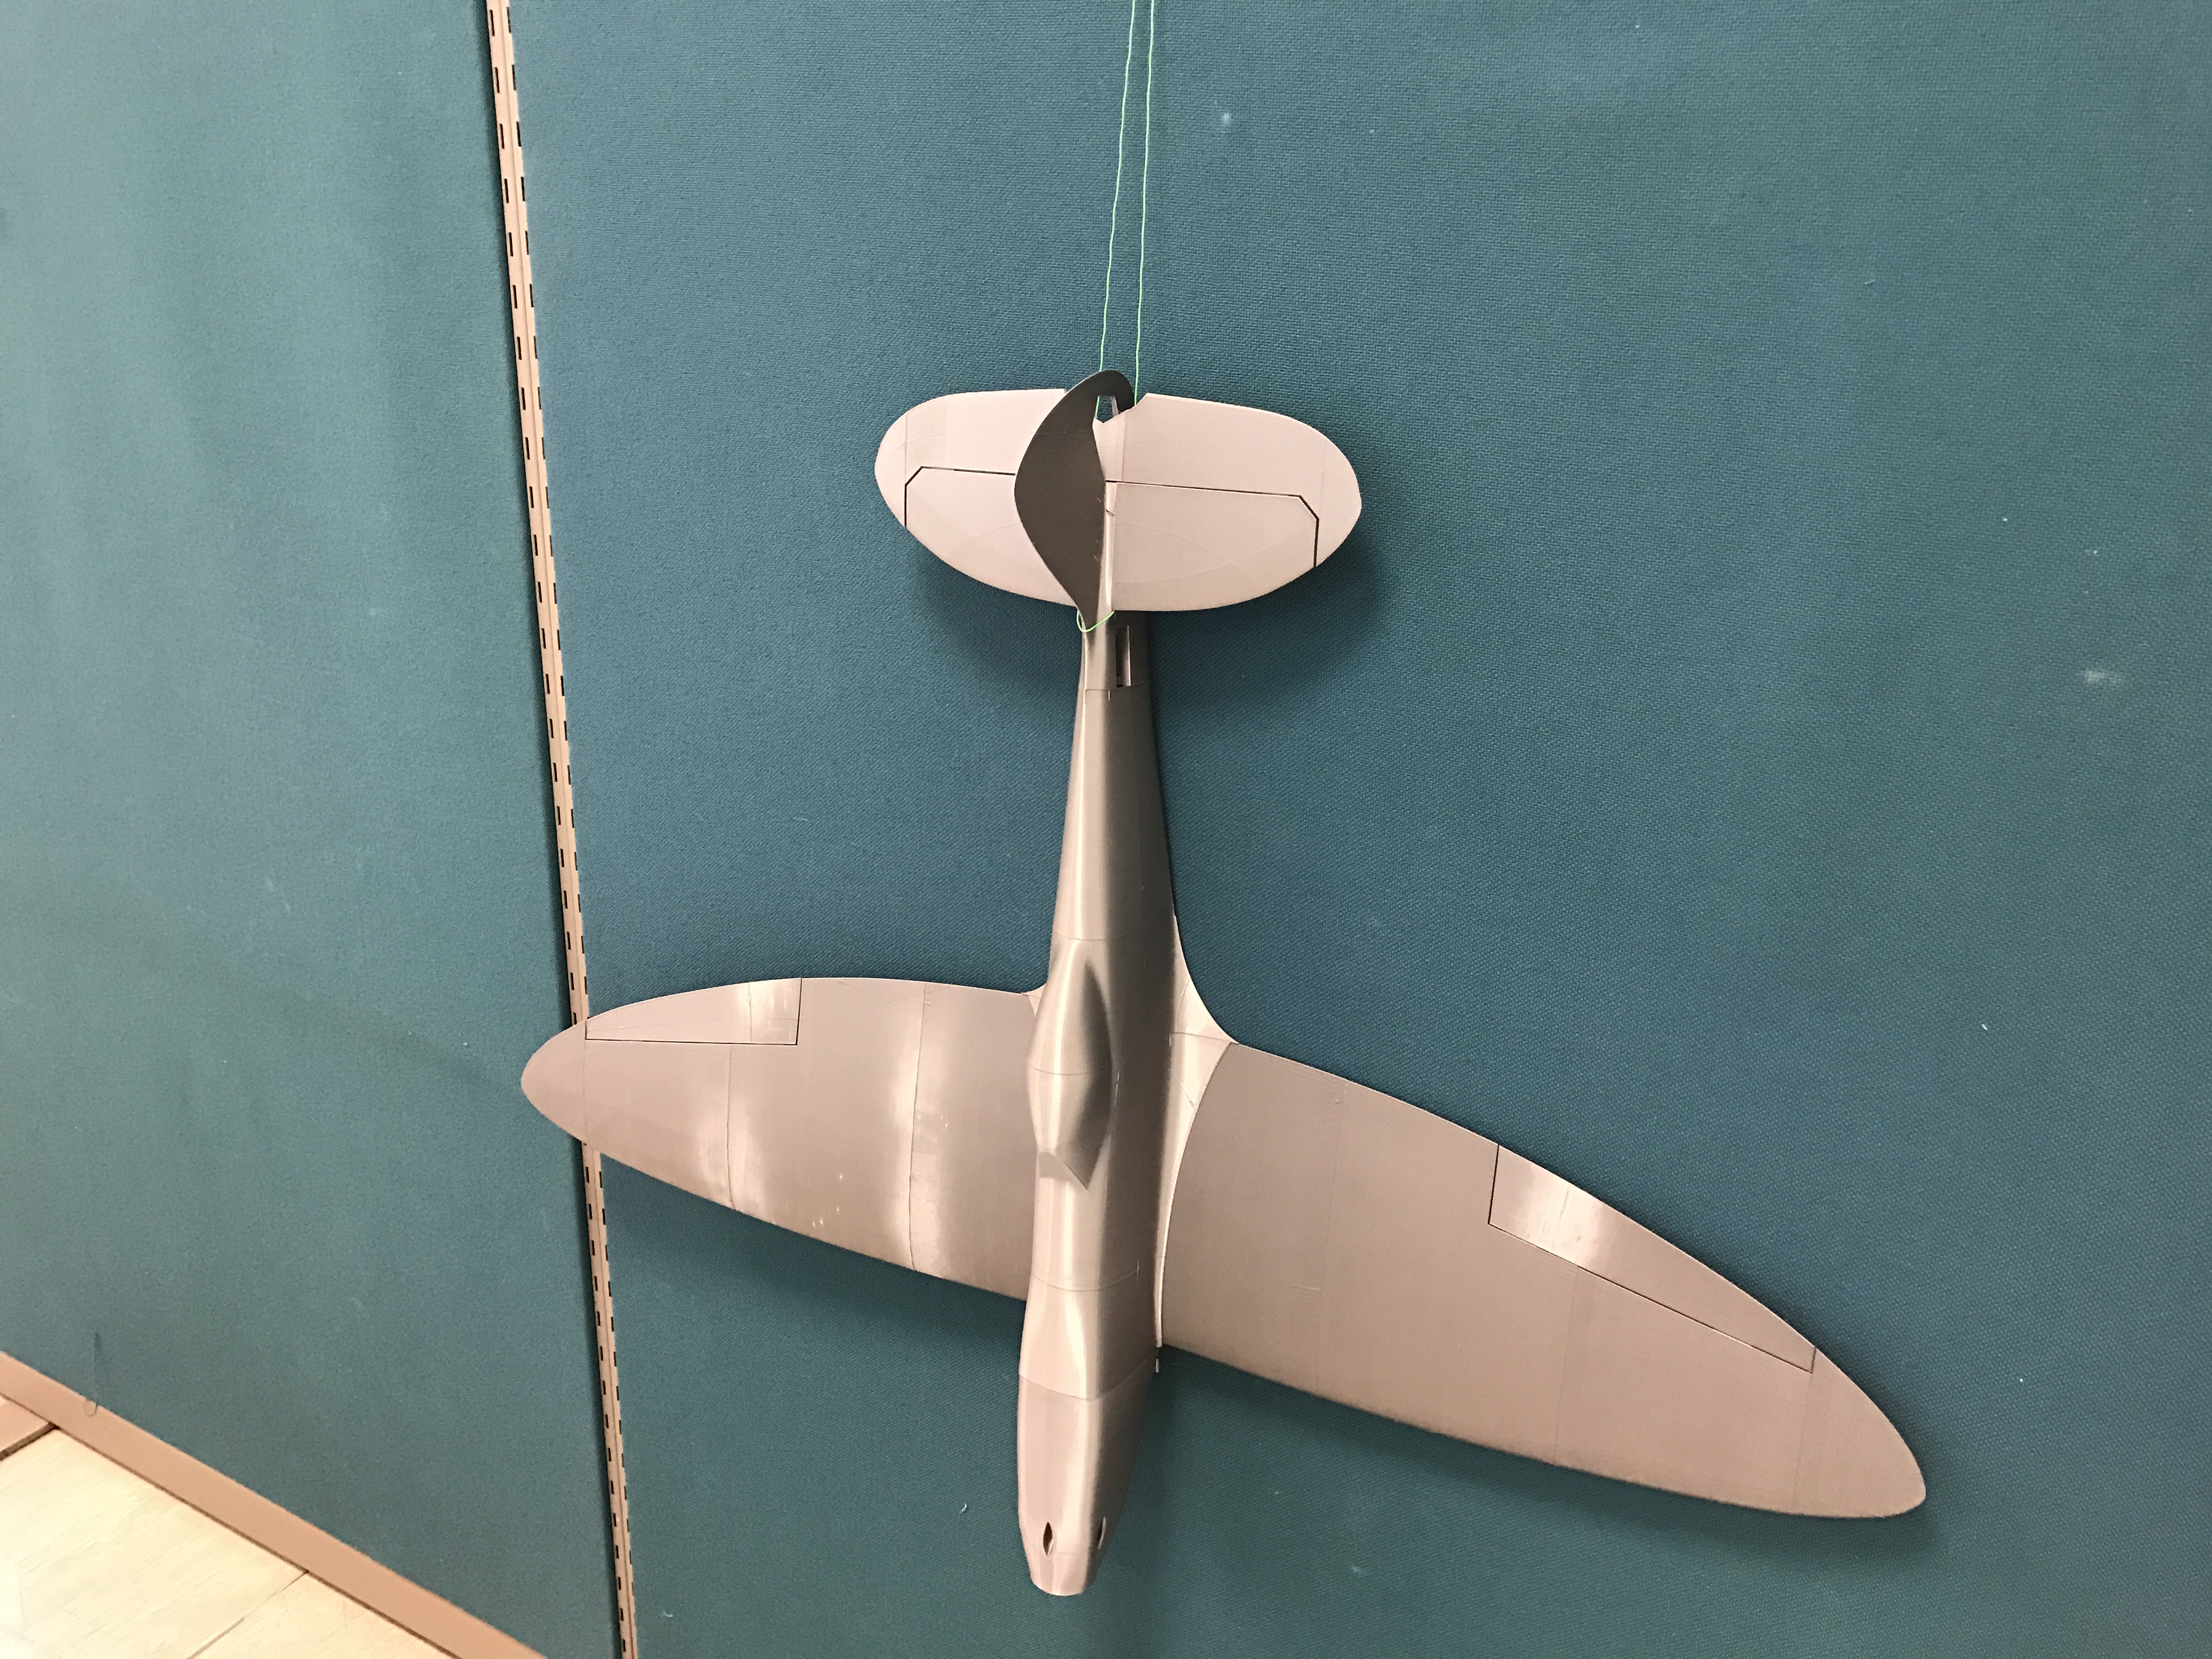
Re: Rounded Overhangs
I printed these, one with and one without overhangs. Both of these go in 5 degree steps with the largest platter being 75 degrees from horizontal.
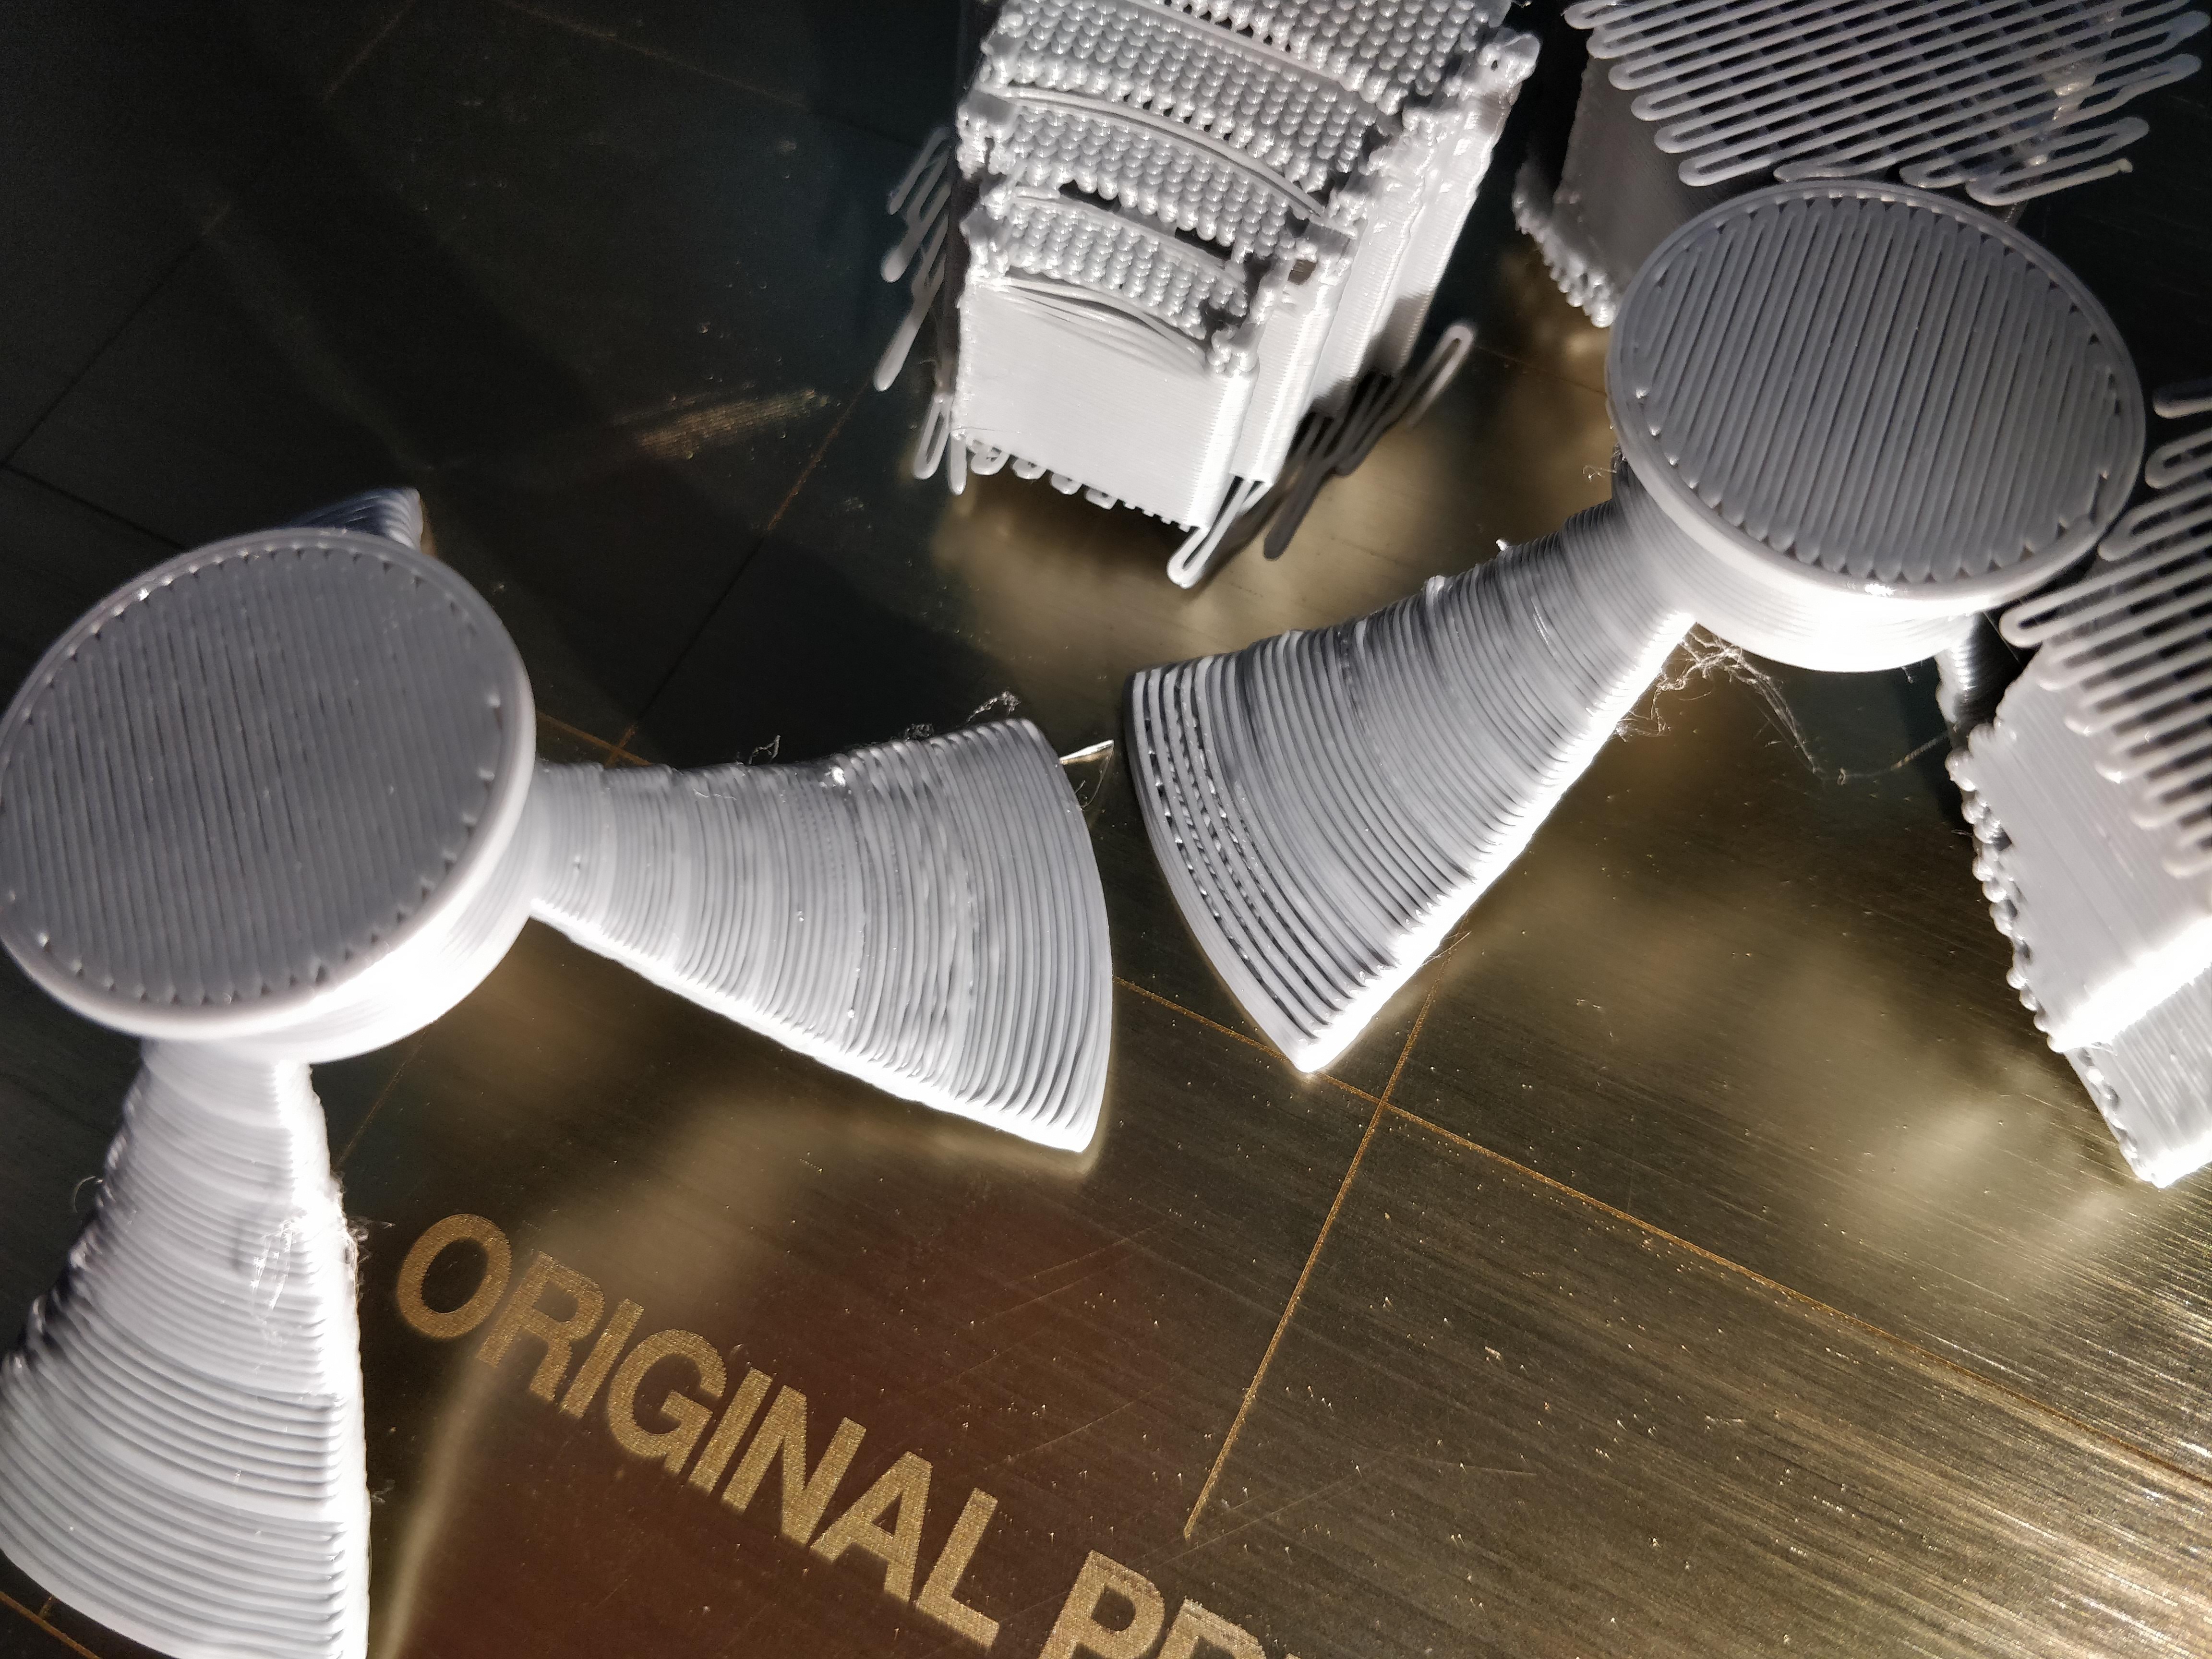
Both have been turned upside down for photograph.
You can see the one printed with supports has big ugly missing pieces in it, every other extrusion leaves a gap that you can see the next higher layer through. The one printed without supports looks a LOT better.
If things print better without supports, how do I print something which doesn't touch the bed? I would like to make my 5 balls print come out nice so I can move on to other things...
I maintain an informal list of San Diego, CA 3D printing enthusiasts. PM me for details. If you include a contact email and I can add you to the informal mailing list.
Re: Rounded Overhangs
If the last pics were the bottom of your prints I think you need to lower your Z some. Unless that is raft material? The only other thing I can think of is maybe more perimeters.
Sorry I'm Not More Help,
Neal
Re: Rounded Overhangs
I've attached a very small test print

which I would love to see someone print well, and tell me what they used.
Bonus points if you do it with a 0.6mm nozzle at 0.25mm layer heights.
Here's a pic of the setup
It's only a couple CC's, so should print fast. I put a pole in the middle to hold them together, it's proud cause I have poor style. 🙂 Speaking of, same with the off z-cal on the other pic - I keep switching nozzles and didn't bother setting it, it's since been corrected.
Neal: What about more perimeters? You think that will help? I'm only using 2 perimeters with 3 tops and 3 bottoms. Since it's the outer layer I didn't think more layers inside/above would help?
I maintain an informal list of San Diego, CA 3D printing enthusiasts. PM me for details. If you include a contact email and I can add you to the informal mailing list.
Re: Rounded Overhangs
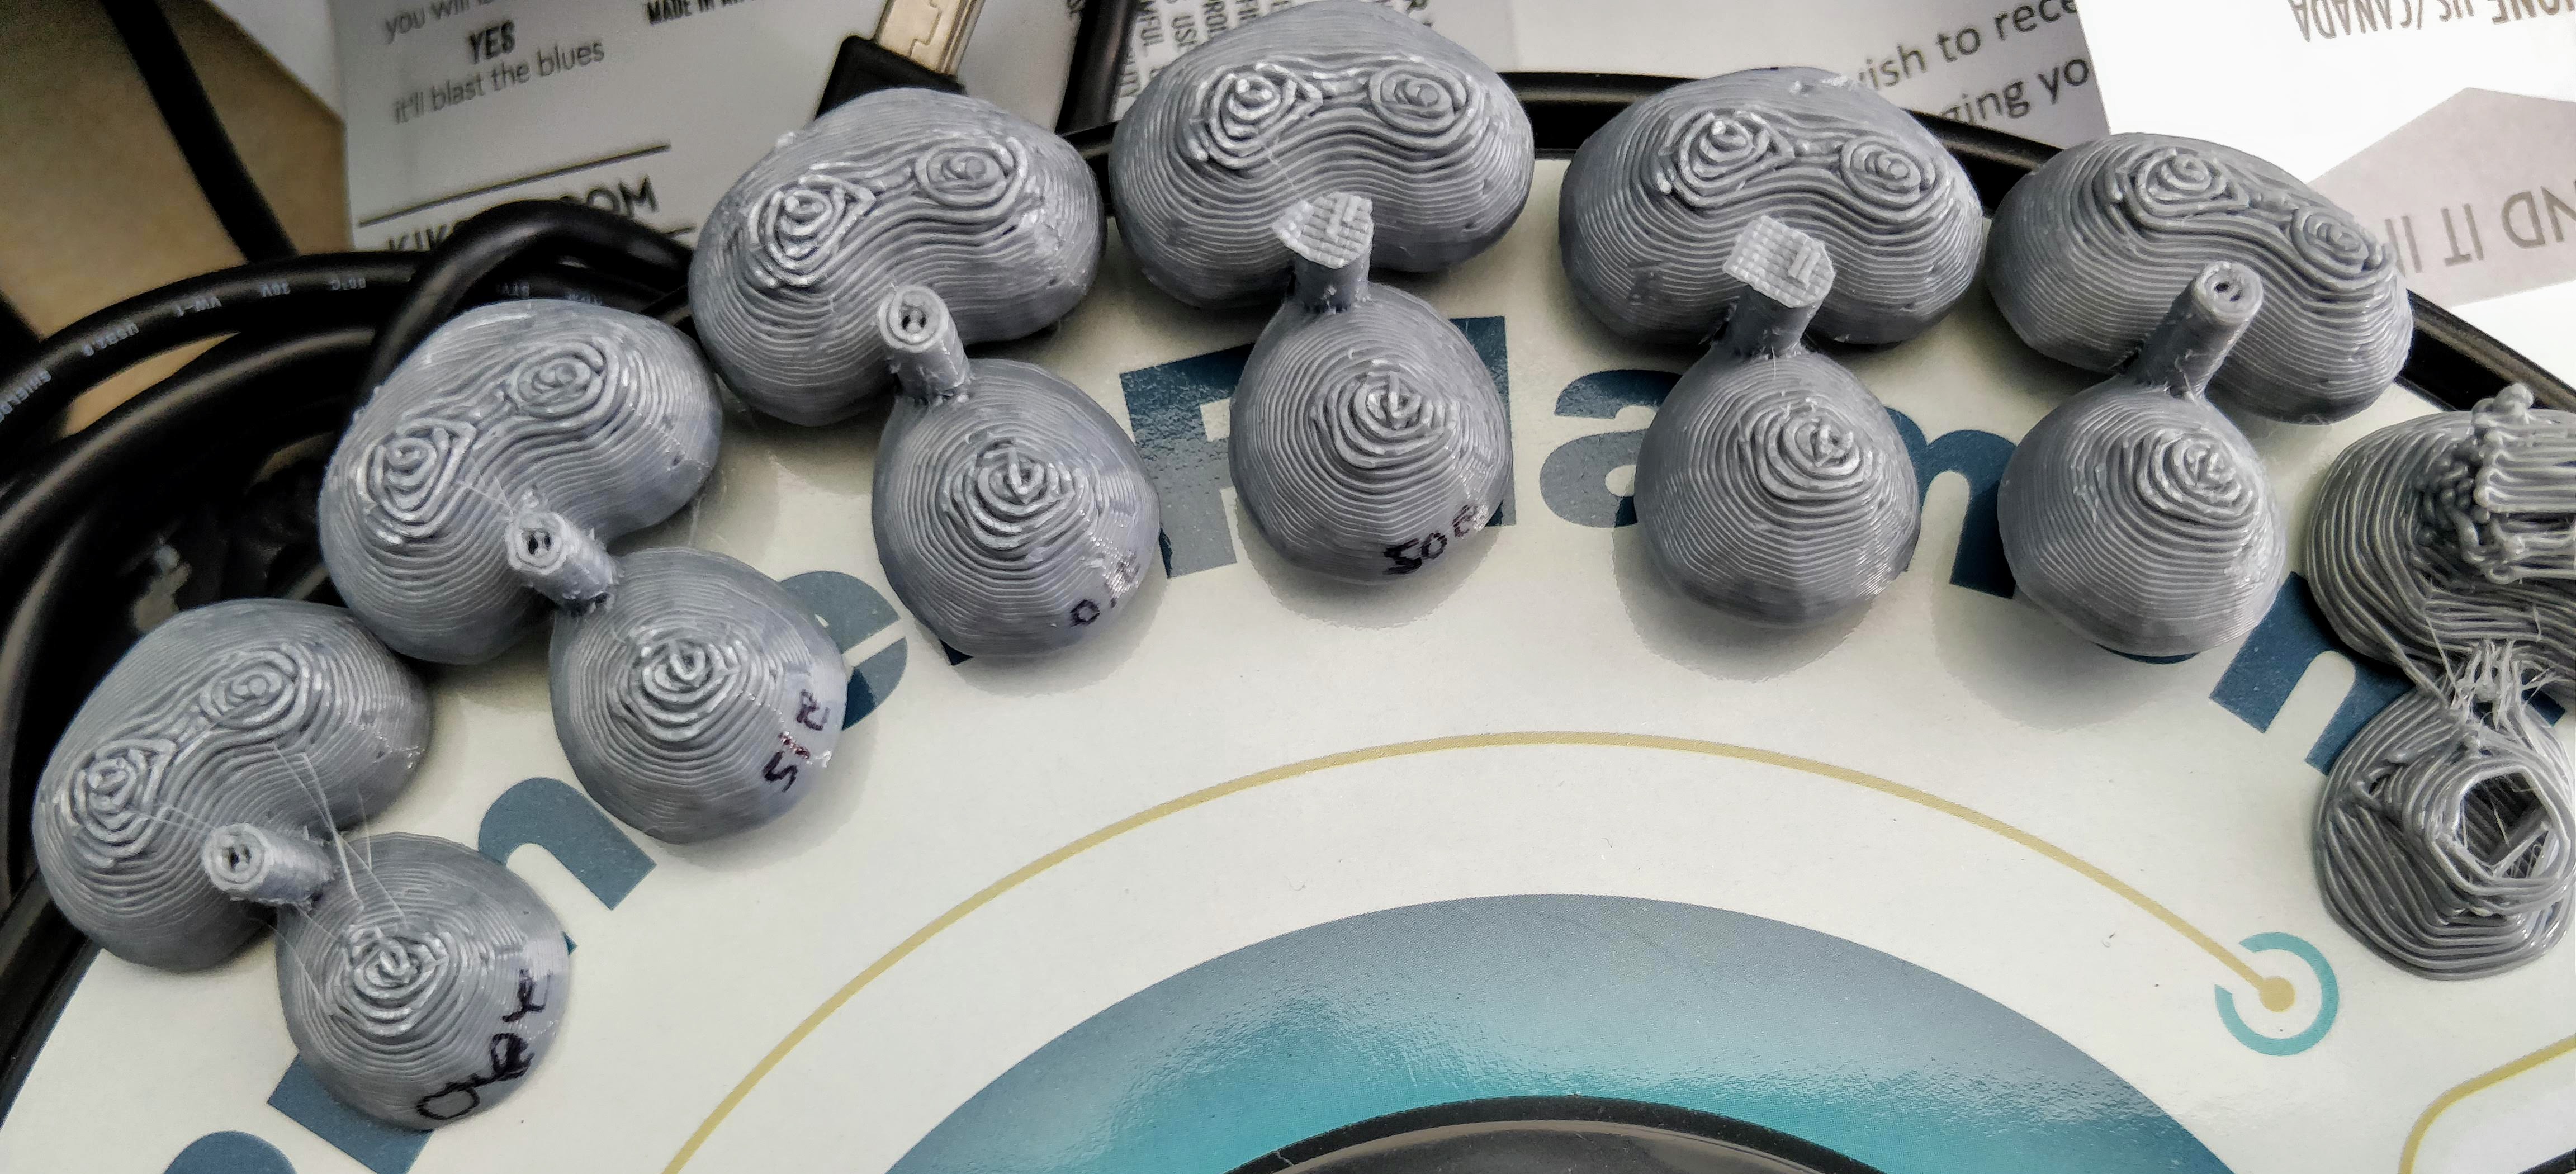
I've played with some settings, like detect bridging perimeters... Here's what I set up:
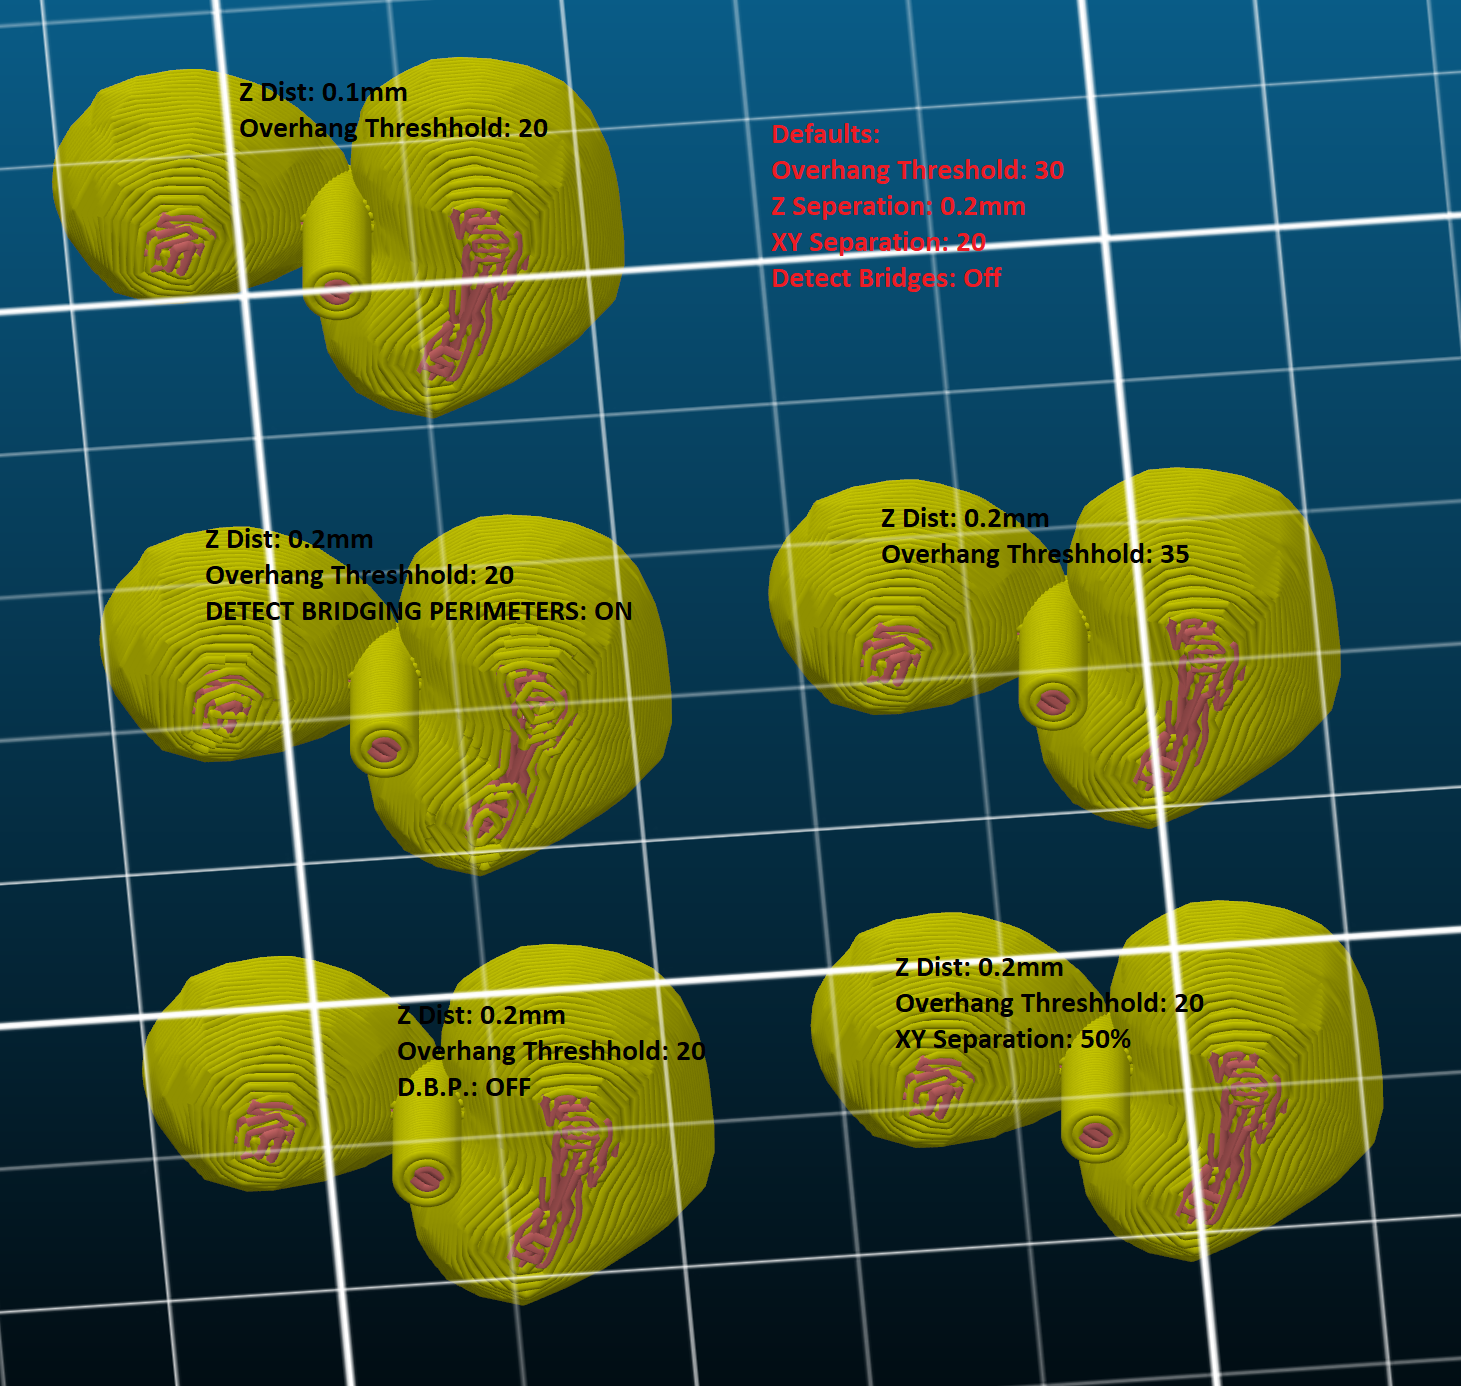
And here's what I got:
The funky bottoms on the scren come across as funky bottoms on the part - although not quite the SAME funky bottoms.
I maintain an informal list of San Diego, CA 3D printing enthusiasts. PM me for details. If you include a contact email and I can add you to the informal mailing list.
Re: Rounded Overhangs
Here's my print. Its not much better, but it is somewhat better. After thinking about what you are trying to do, I think the big issue may be that you are trying to create a very small smooth round surface with a .6 nozzle and .25 layer height. Is there a reason you are trying to do this?
After downloading your model and realizing the size, personally I would be going to a .25 nozzle and a .1 layer height. You are trying to achieve a smooth curve on a tiny object without giving the machine the resolution it needs to do so.
Also, as was mentioned above, have you tried adjusting Live Z down a bit? Have you done a full calibration square? The very bottom of your object is touching the build plate, but its not squished hardly at all. This may help as well.
Re: Rounded Overhangs
With small prints you need to get the heat away quickly to stop the build up of heat in the part and allow the filament to go down correctly. As said its a small print for a big nozzle.
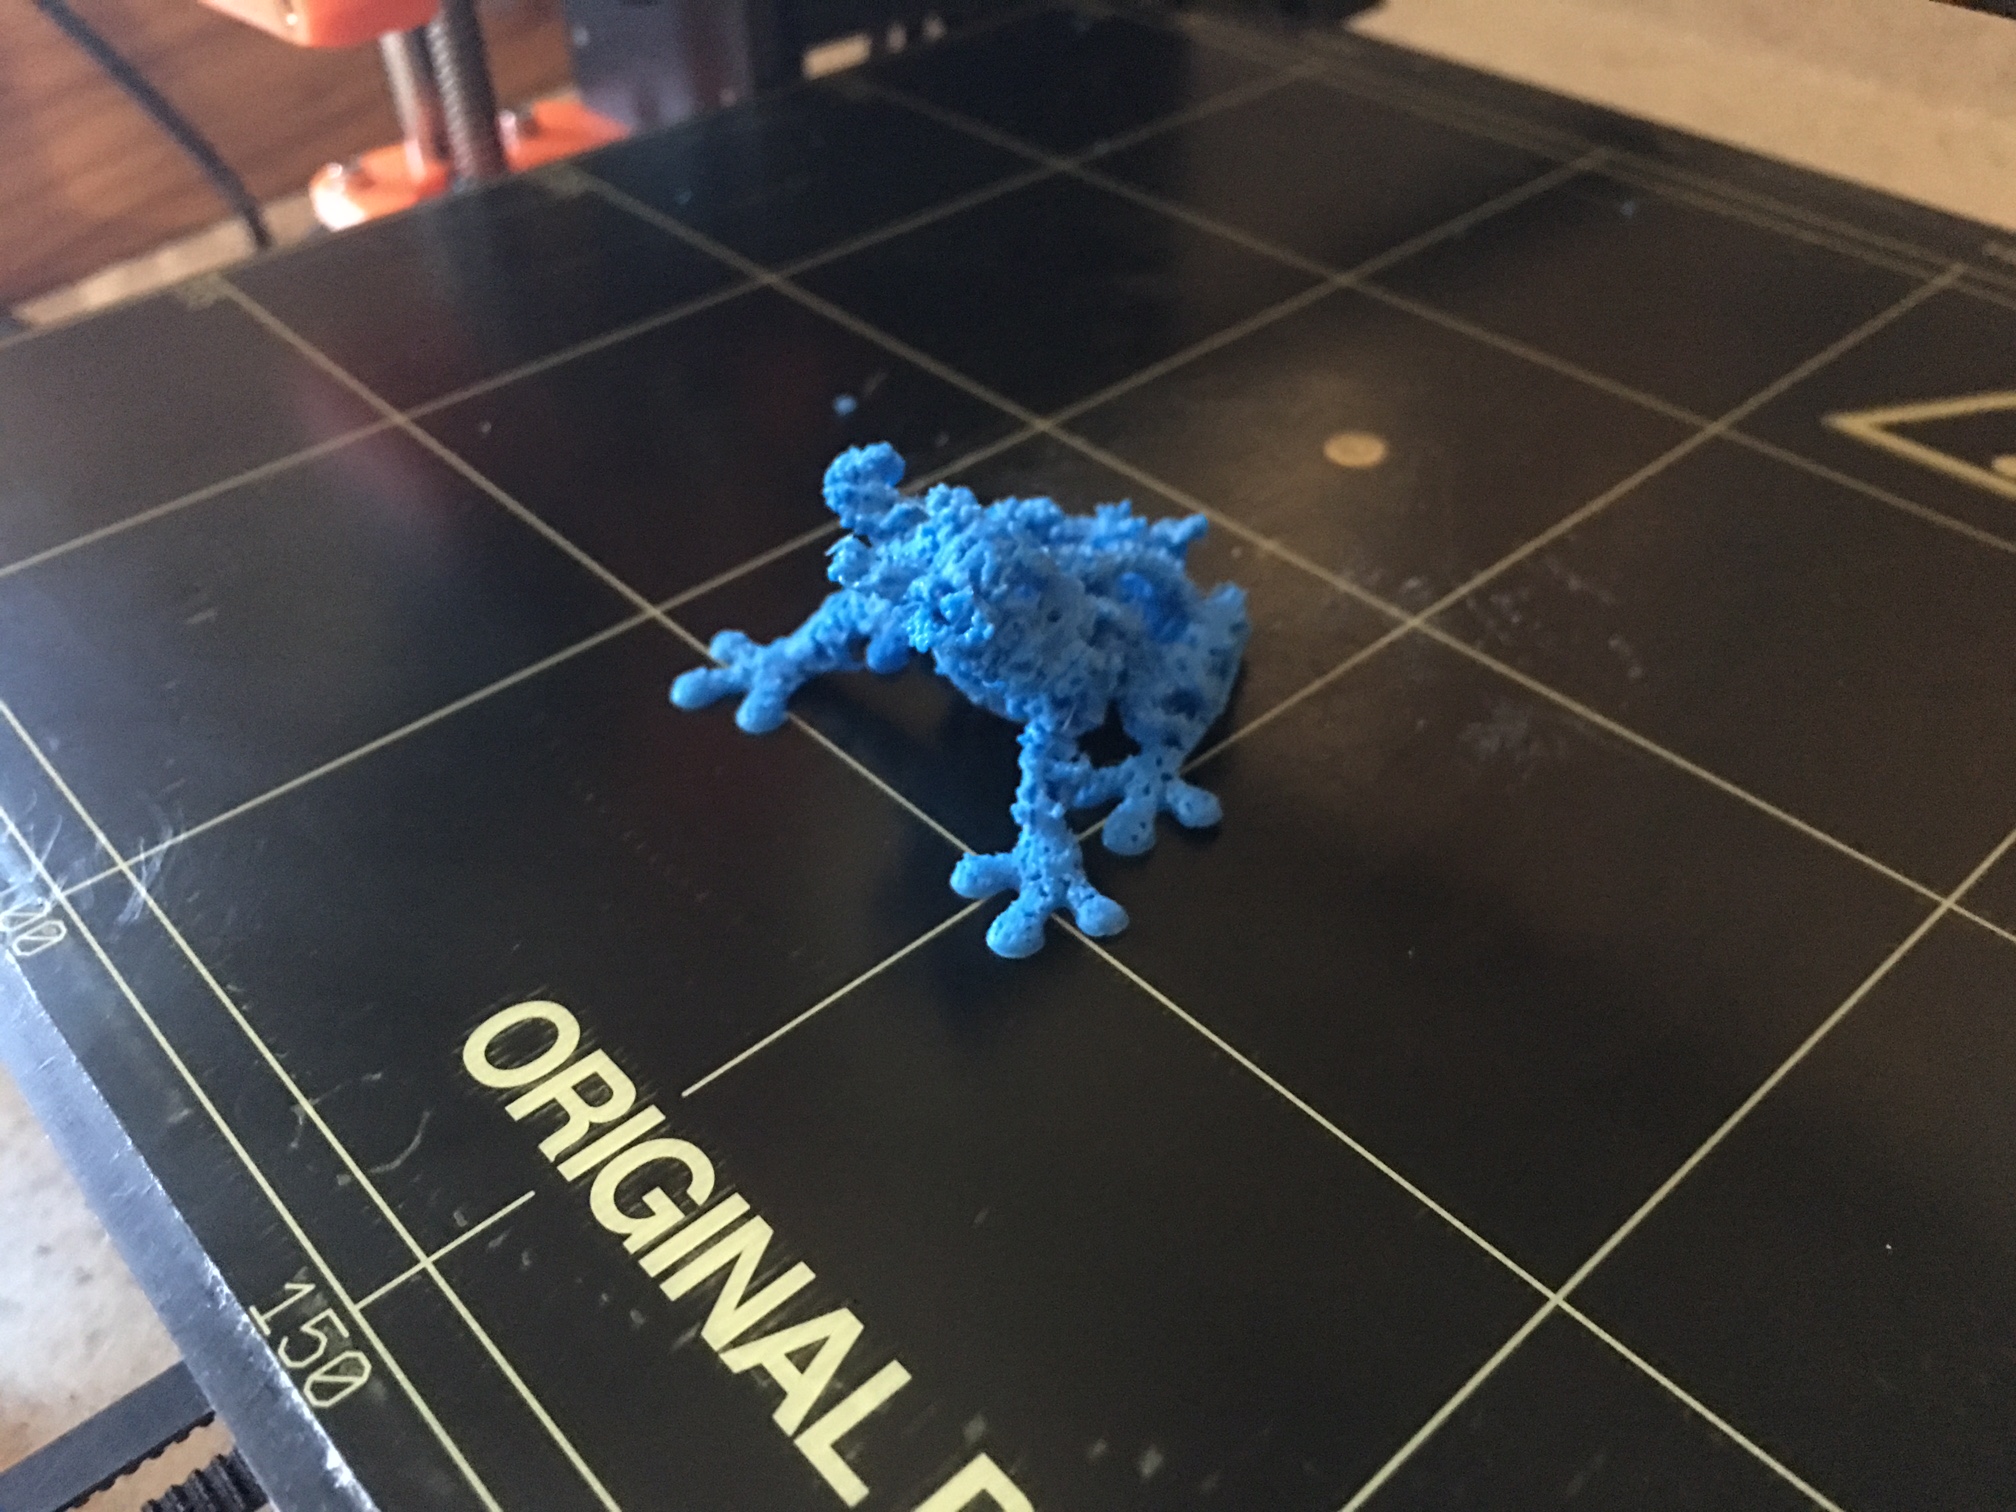
My first overhang was by accident as i didnt know anything about them. I copied a centre cap from a wheel and just printed it. The first pic is the first print. lots of blobs but not bad as it was just done as a normal print with standard settings in Slic3r PE. I spent a lot of time chasing the problem down without understanding that the overhang was quite a big angle. eventually i was pointed in the right direction. The final print was much better , sorry no photo. Most of the problem was down to heat either warping the print or just to hot for the area it was laying down onto.
It was finally done with the bed heater off and the filament temp reduced.
Re: Rounded Overhangs
Thanks for all the pointers and attention everyone!!! I really appreciate it!
The shared model is just a tinsy portion of a bed-filling print, just representative portions. I save 3/4 of a KG and 20-30 hours every time I print just a little test piece. 🙂
I'm pretty happy with my Z-distance now, and the poor structures are some 10-20 layers up so I'm hoping they don't get too much positional influence from the bed.
The temps are another thing, and I will try it. You're thinking something like fan speed all the way up, print speed down, perhaps waiting?
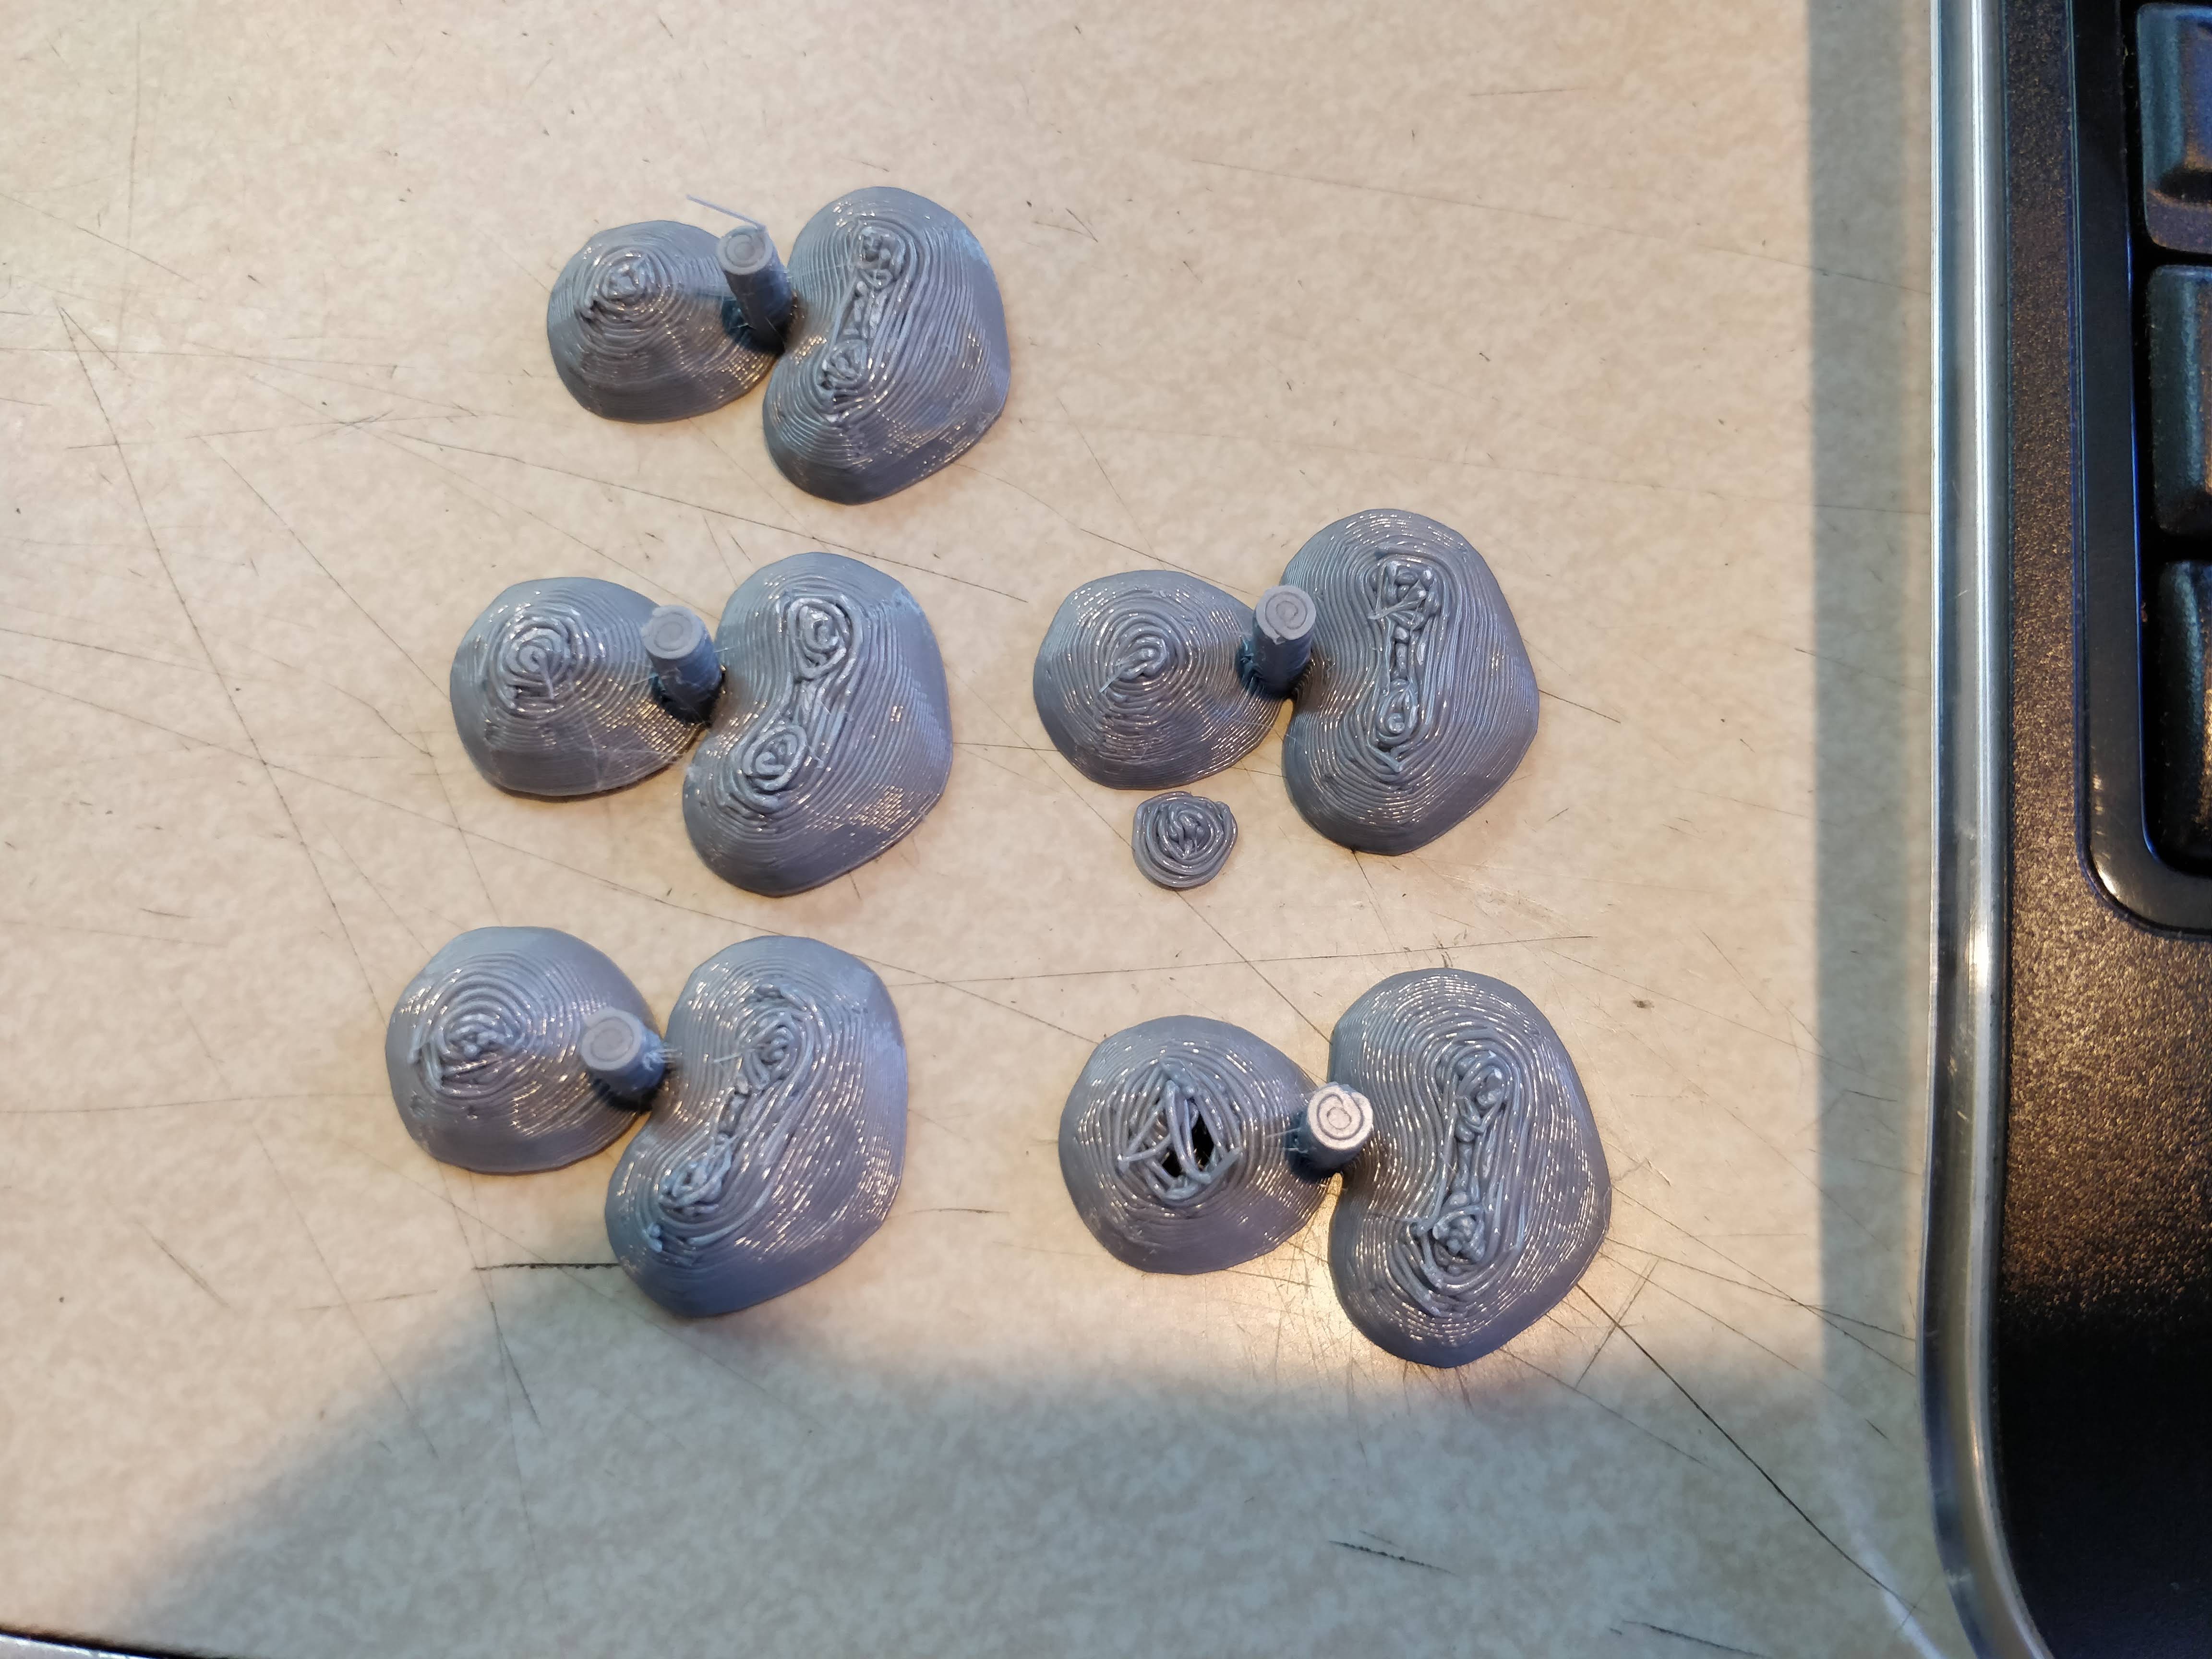
This print is the same as before, with solid interface layer (instead of 0.1mm spacing) and no Z-hops. I put the parts in the lower row, shared settings with the row above (from previous picture).
One last thing:
Phil: In your pic, there's no central tower? Ah, 3mf's never come in quite right. I'm attaching the STL, which should let your part come up off the bed like mine do. What settings/setup did you use? 0.6/0.25? I don't see threads hanging down, so they look better than mine.
I maintain an informal list of San Diego, CA 3D printing enthusiasts. PM me for details. If you include a contact email and I can add you to the informal mailing list.
Re: Rounded Overhangs
I'm doing some temperature towers, so far it's not looking like that's the issue.
I just feel that the prints look TOO bad just because of a big nozzle? I was concerned earlier that the 0.4mm nozzle was a bit over it's ideal height, and that 0.6 was appropriate (layer height ~40% of nozzle diameter, comparable to a 0.4mm nozzle printing at 0.16mm layers. I would think that's ballpark?)
The other thing is that I'm effectively printing ISLANDS, I'm not sure if that's really my issue. It seems to be two things:
1) Outer perimeters coming unstuck. Maybe too much fan? Can I turn that off on small islands?
2) Stacking changing. This seems like the second layer stacks on the first ok, but maybe the 3rd not on the 2nd?
Dunno, still looking for ideas.
I maintain an informal list of San Diego, CA 3D printing enthusiasts. PM me for details. If you include a contact email and I can add you to the informal mailing list.
Re: Rounded Overhangs
Certainly not JUST temperature
I maintain an informal list of San Diego, CA 3D printing enthusiasts. PM me for details. If you include a contact email and I can add you to the informal mailing list.
Re: Rounded Overhangs
For information, Prusa is working on support issues as there are a lot of improvement to be done. You can do some small improvements but the slicer is responsible of part of it.
https://github.com/prusa3d/Slic3r/issues/102
Re: Rounded Overhangs
Here's my latest. Printed with a 0.6 nozzle as requested. I think this may be the best you get without some post processing (sanding, putty, etc). If you want this better, I could definitely make it better with a 0.25 nozzle.
You may want to consider breaking your big print into multiple parts that you glue together afterward. Print the high detail points with a small nozzle and the big structures with a 0.6. Just a thought.


Re: Rounded Overhangs
Phil - Thanks!!! It's nice to see I'm not crazy. I'm guessing's that's Prusa's filament? I've switched to some $12/kg stuff till I get reasonable results - occasionally checking that my issues don't stem from the filament by switching back.
I thought perhaps wiping was causing the issue, or retraction on layer change, I've already tested the first and am working on the second.
For information, Prusa is working on support issues as there are a lot of improvement to be done. You can do some small improvements but the slicer is responsible of part of it.
https://github.com/prusa3d/Slic3r/issues/102
Welp, huh! That's good to know. It's a shame, since Silc3R sure makes for nicer prints overall... But perhaps this is just the motivation I need to give CURA another shot, or try out the S3D profiles.
For some reason, even with the Prusa profiles, my CURA stuff was pretty mediocre before.
Anyway, that thread is a whole ton to think about, trying some of the weird math/work arounds now. Big thanks for the pointer!!!
I maintain an informal list of San Diego, CA 3D printing enthusiasts. PM me for details. If you include a contact email and I can add you to the informal mailing list.
Re: Rounded Overhangs
You may test the support improvements in the Slic3r 1.41.1-beta . I am curious, whether these changes help you to achieve better print over supports quality.
https://github.com/prusa3d/Slic3r/releases/tag/version_1.41.1-beta
Re: Rounded Overhangs
Is there/can you compile a package for Win10 (64bit)? Can I keep both versions at once for stability?
I just put it on a couple days ago and am still getting things sorted.
I did find that, while ugly on screen and somewhat representative of reality, the defects are better with Detect Bridging Perimeters on than with it off.
I maintain an informal list of San Diego, CA 3D printing enthusiasts. PM me for details. If you include a contact email and I can add you to the informal mailing list.