Rough top layer surface on new prints after recent z-axis calibration
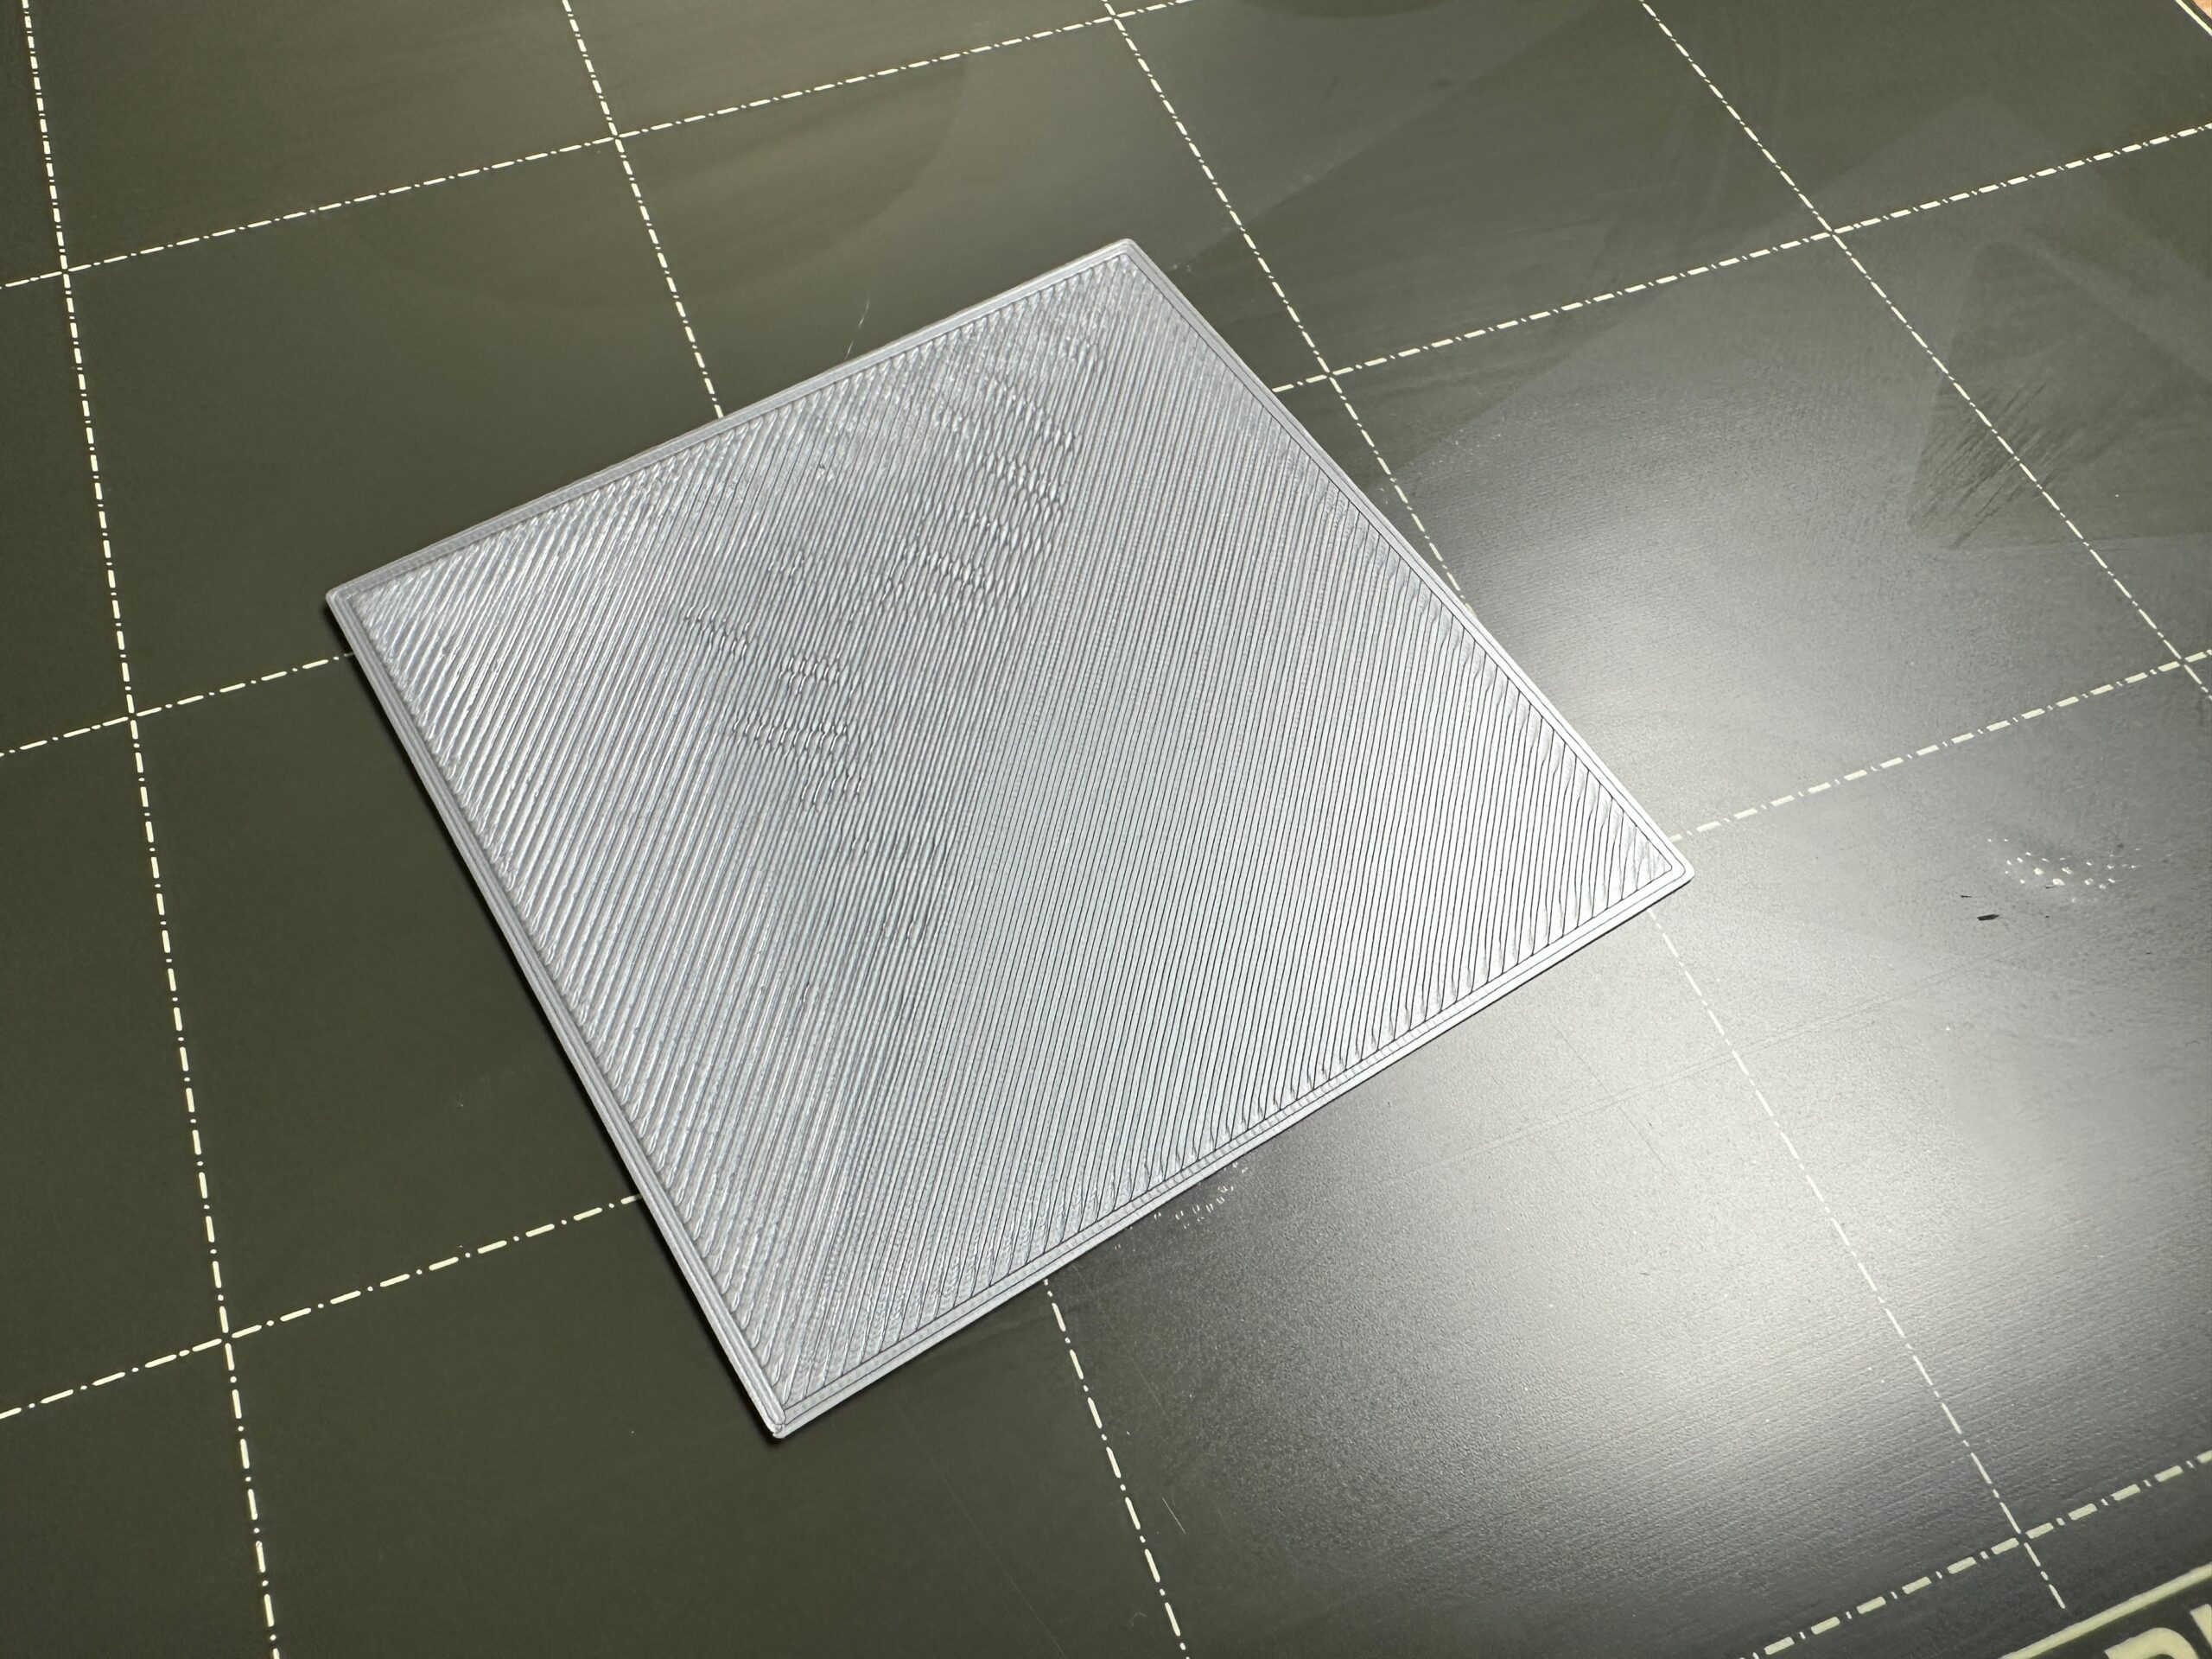
I recently performed a z-axis calibration on my new i3 MK3S+. You can see the photo attached. The rougher side is where the z-axis was too low and the smooth side is from where I raised it to about -1.650. Several prints have come out very smooth and adhesion issues disappeared.
The last couple of prints have shown odd surface issues when completing. Searching forums I see discussions of pillowing but I've not adjusted any extrusion characteristics or heat. I'm using the standard PLA settings that came with the printer. What might be causing the sudden finishing issues? Is is the z-axis too low again or something else?
Notes:
- Print Design: https://www.printables.com/model/63523-laptop-stand/files
- Using octoprint with arc welder enabled
- Standard prusament filament
- No other system settings to heat or extrusion


RE:
You are confusing z-axis calibration and first layer calibration. But don‘t worry, you are in good company…
You first layer calibration looks good, on the right side it is exactly as you want it to be. First layer calibration does not impact the last layer of your print (that’s why it’s called first layer calibration) nor does the z-axis calibration which just makes sure both sides of the x axis are on the same height by driving all the way up to the end stops of your z-axis. If you had a z-calibration issue your printer would tell you after aborting the mesh bed levelling.
To troubleshoot your last layer, a zipped project file of your slicer project would be needed. (Save in slicer, zip it, otherwise the forum won’t except it and attache to your next post).
Did you modify your extruder in any way?
Did you print that exact model successfully before?
If at first you don't succeed, skydiving is not for you.
Find out why this is pinned in the general section!
RE: Rough top layer surface on new prints after recent z-axis calibration
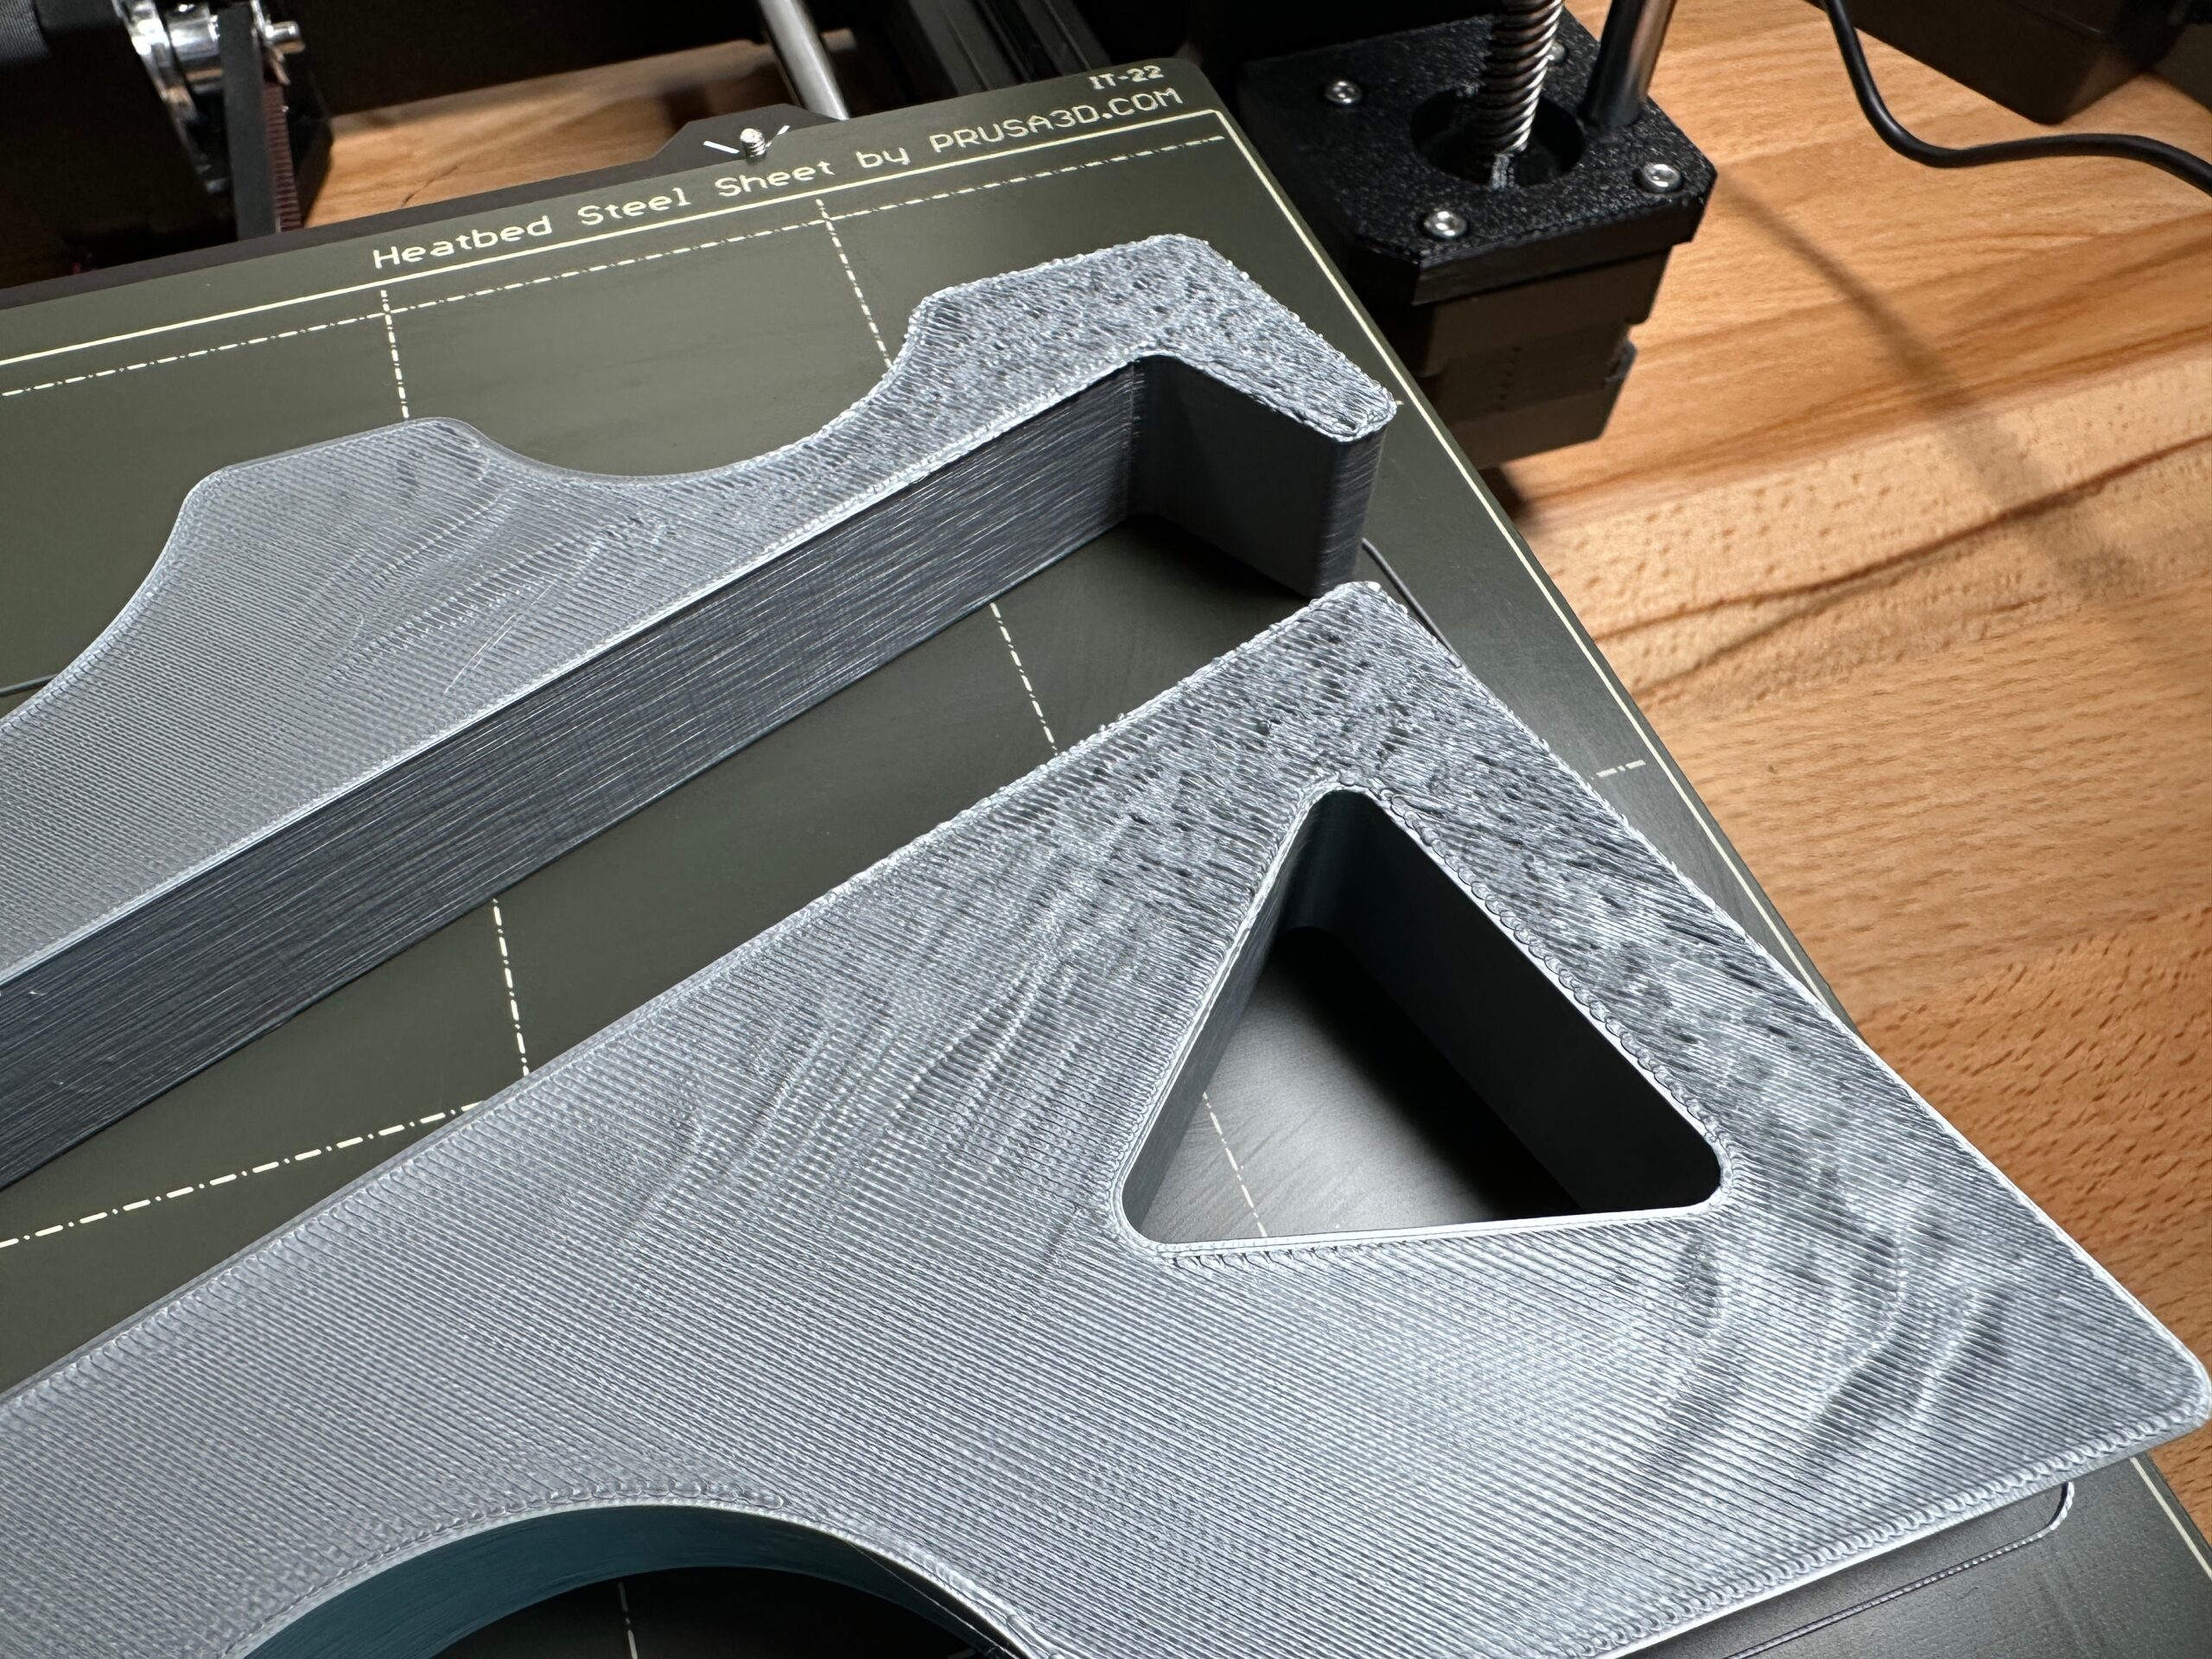
That looks like what you would get if the part was bowing up due to loss of bed adhesion on the ends. Check your bottom layer for evidence of this, you can usually tell when examined closely in good light. If it is that the part bowing up compresses the higher layers as its printing and can cause all sorts of problems.
Its why we stress correct z adjustment and an absolutely clean grease/oil free print surface to make sure adhesion is at maximum.
Of course Robin is right and that it could be other things like insufficient infill to support the top layers etc but you would probably see the same in the middle of the part too in that case which is why I suspect its curving upwards.
RE:
Hi Robin - Thank you for the reply and helpful notes on terms. Since the function was called live adjust z I meant to imply the z height calibration but I can see how that would be confusing with the other general z calibration you called out. It's also helpful to know the platform would abort on the one you mentioned.
I'm curious about the mention of the first layer not impacting the last layer. Several of the posts I've seen and the last one that I submitted had feedback that first layer calibration issues can dramatically affect print quality up to the last layer. I understand that the first layer and last layer are different but I was hoping to understand any potential issues related to first layer calibration if it was still present. If I've misunderstood then my apologies.
I have not modified the extruder. It came assembled and aside from loading filament I have not adjusted it.
This was my first time printing this model.
I've also attached the zipped file as requested.
RE: Rough top layer surface on new prints after recent z-axis calibration
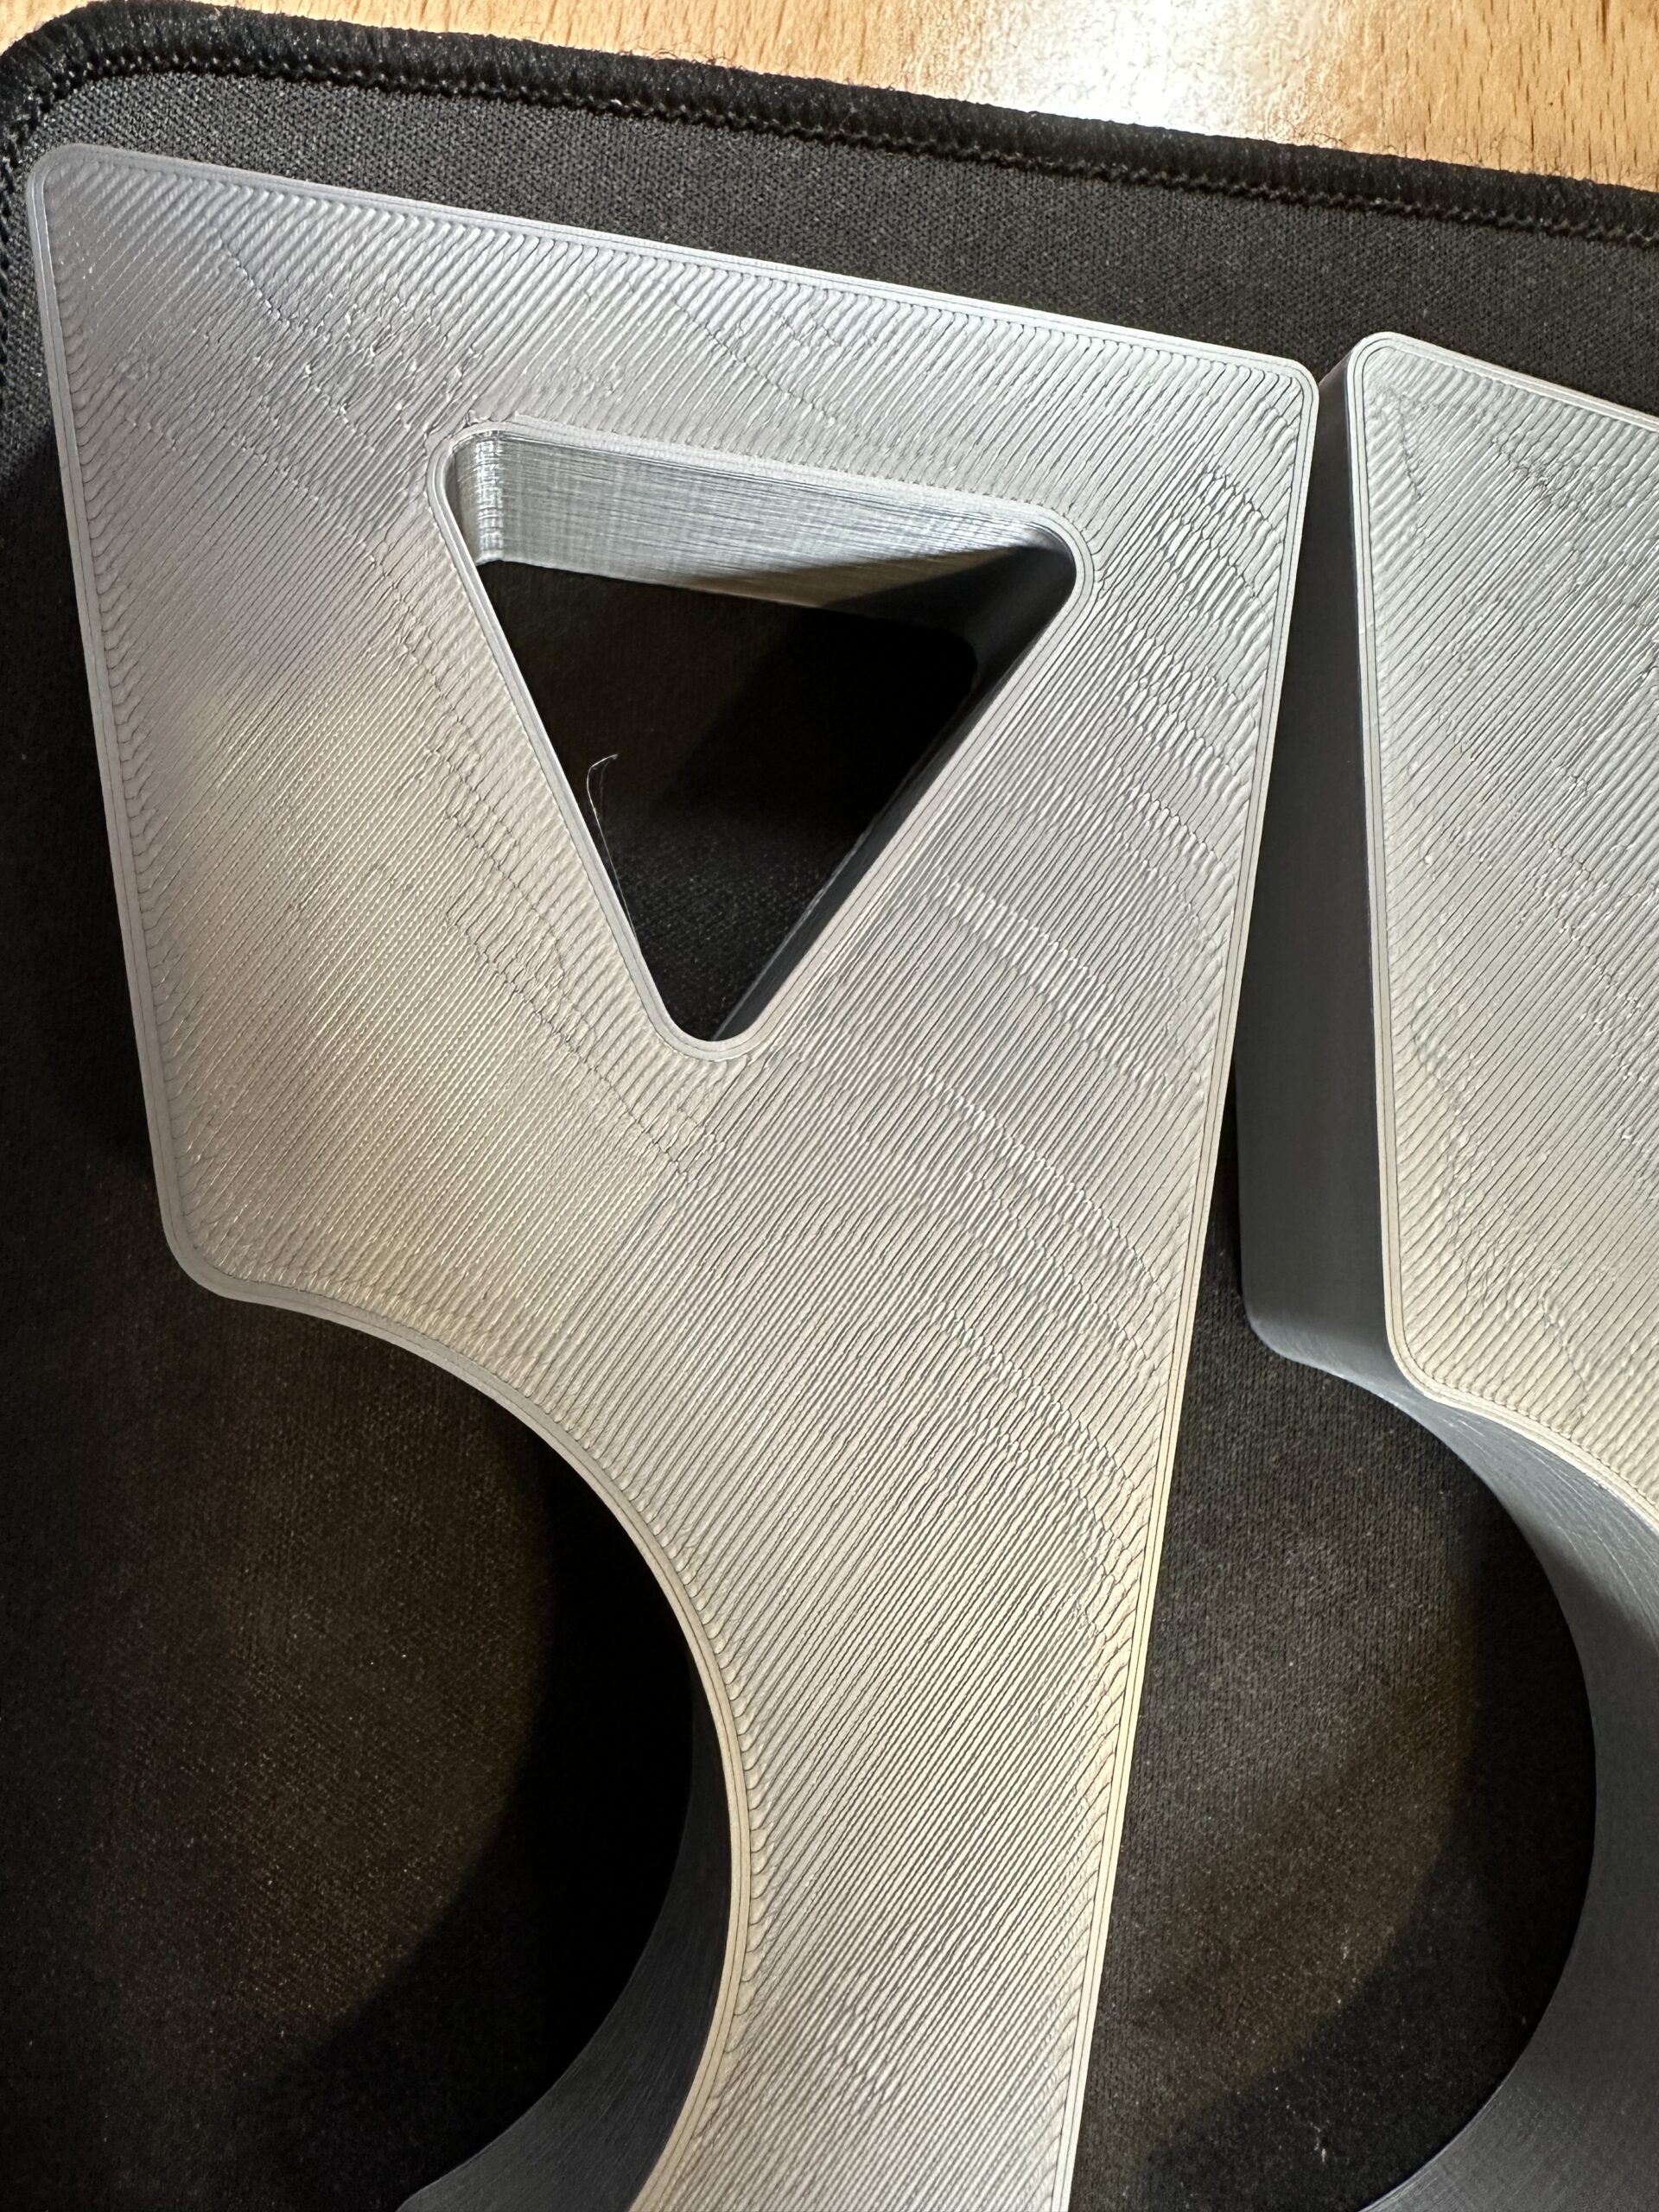
@neophyl thank you for the note. That makes sense. I have some photos here that I just took on the smooth side that was against the bed. It was not popped off in a discernible way when I pulled it from the bed but it could be there.


RE: Rough top layer surface on new prints after recent z-axis calibration
I didn't see the zip posted above. It may have gotten lost in an edit. Attaching again just in case I missed it.
RE:
Your defect doesn't look like pillowing to me, due to insufficient infill or top layer too thin. And usually first layer defects don't propagate to higher levels but man, that first layer looks bad. From the ripples it looks like your live z is way too low. I would first try to get a really nice first layer. I use this https://www.printables.com/model/105404 to dial my first layer in.
I would probably also check my extrusion multiplier with a hollow 1 perimeter wide cube to make sure I don't have overextrusion.
Formerly known on this forum as @fuchsr -- https://foxrun3d.com/
RE:
Thank you @fuchsr for the feedback. I can mock up a cube in fusion but if you have a link to one you like I'll try it out. Also thank you for the recommendation on the first player calibration. I've run a number of them over the last week on the 75mm square. I keep coming back to -1.650 as being about the sweet spot. More than that and it starts getting warped and less than that and it's not fusing together and there's lots of light bleed when I hold it up to look at it. It also tears apart really easily.
I think that's the thing that's so odd is when I do the first layer calibration like the example swatch above I get feedback that it looks good but then when I do these prints the comments point to it being an issue. It's weird that other than an alcohol cleaning between nothing is really changing.
RE: Rough top layer surface on new prints after recent z-axis calibration
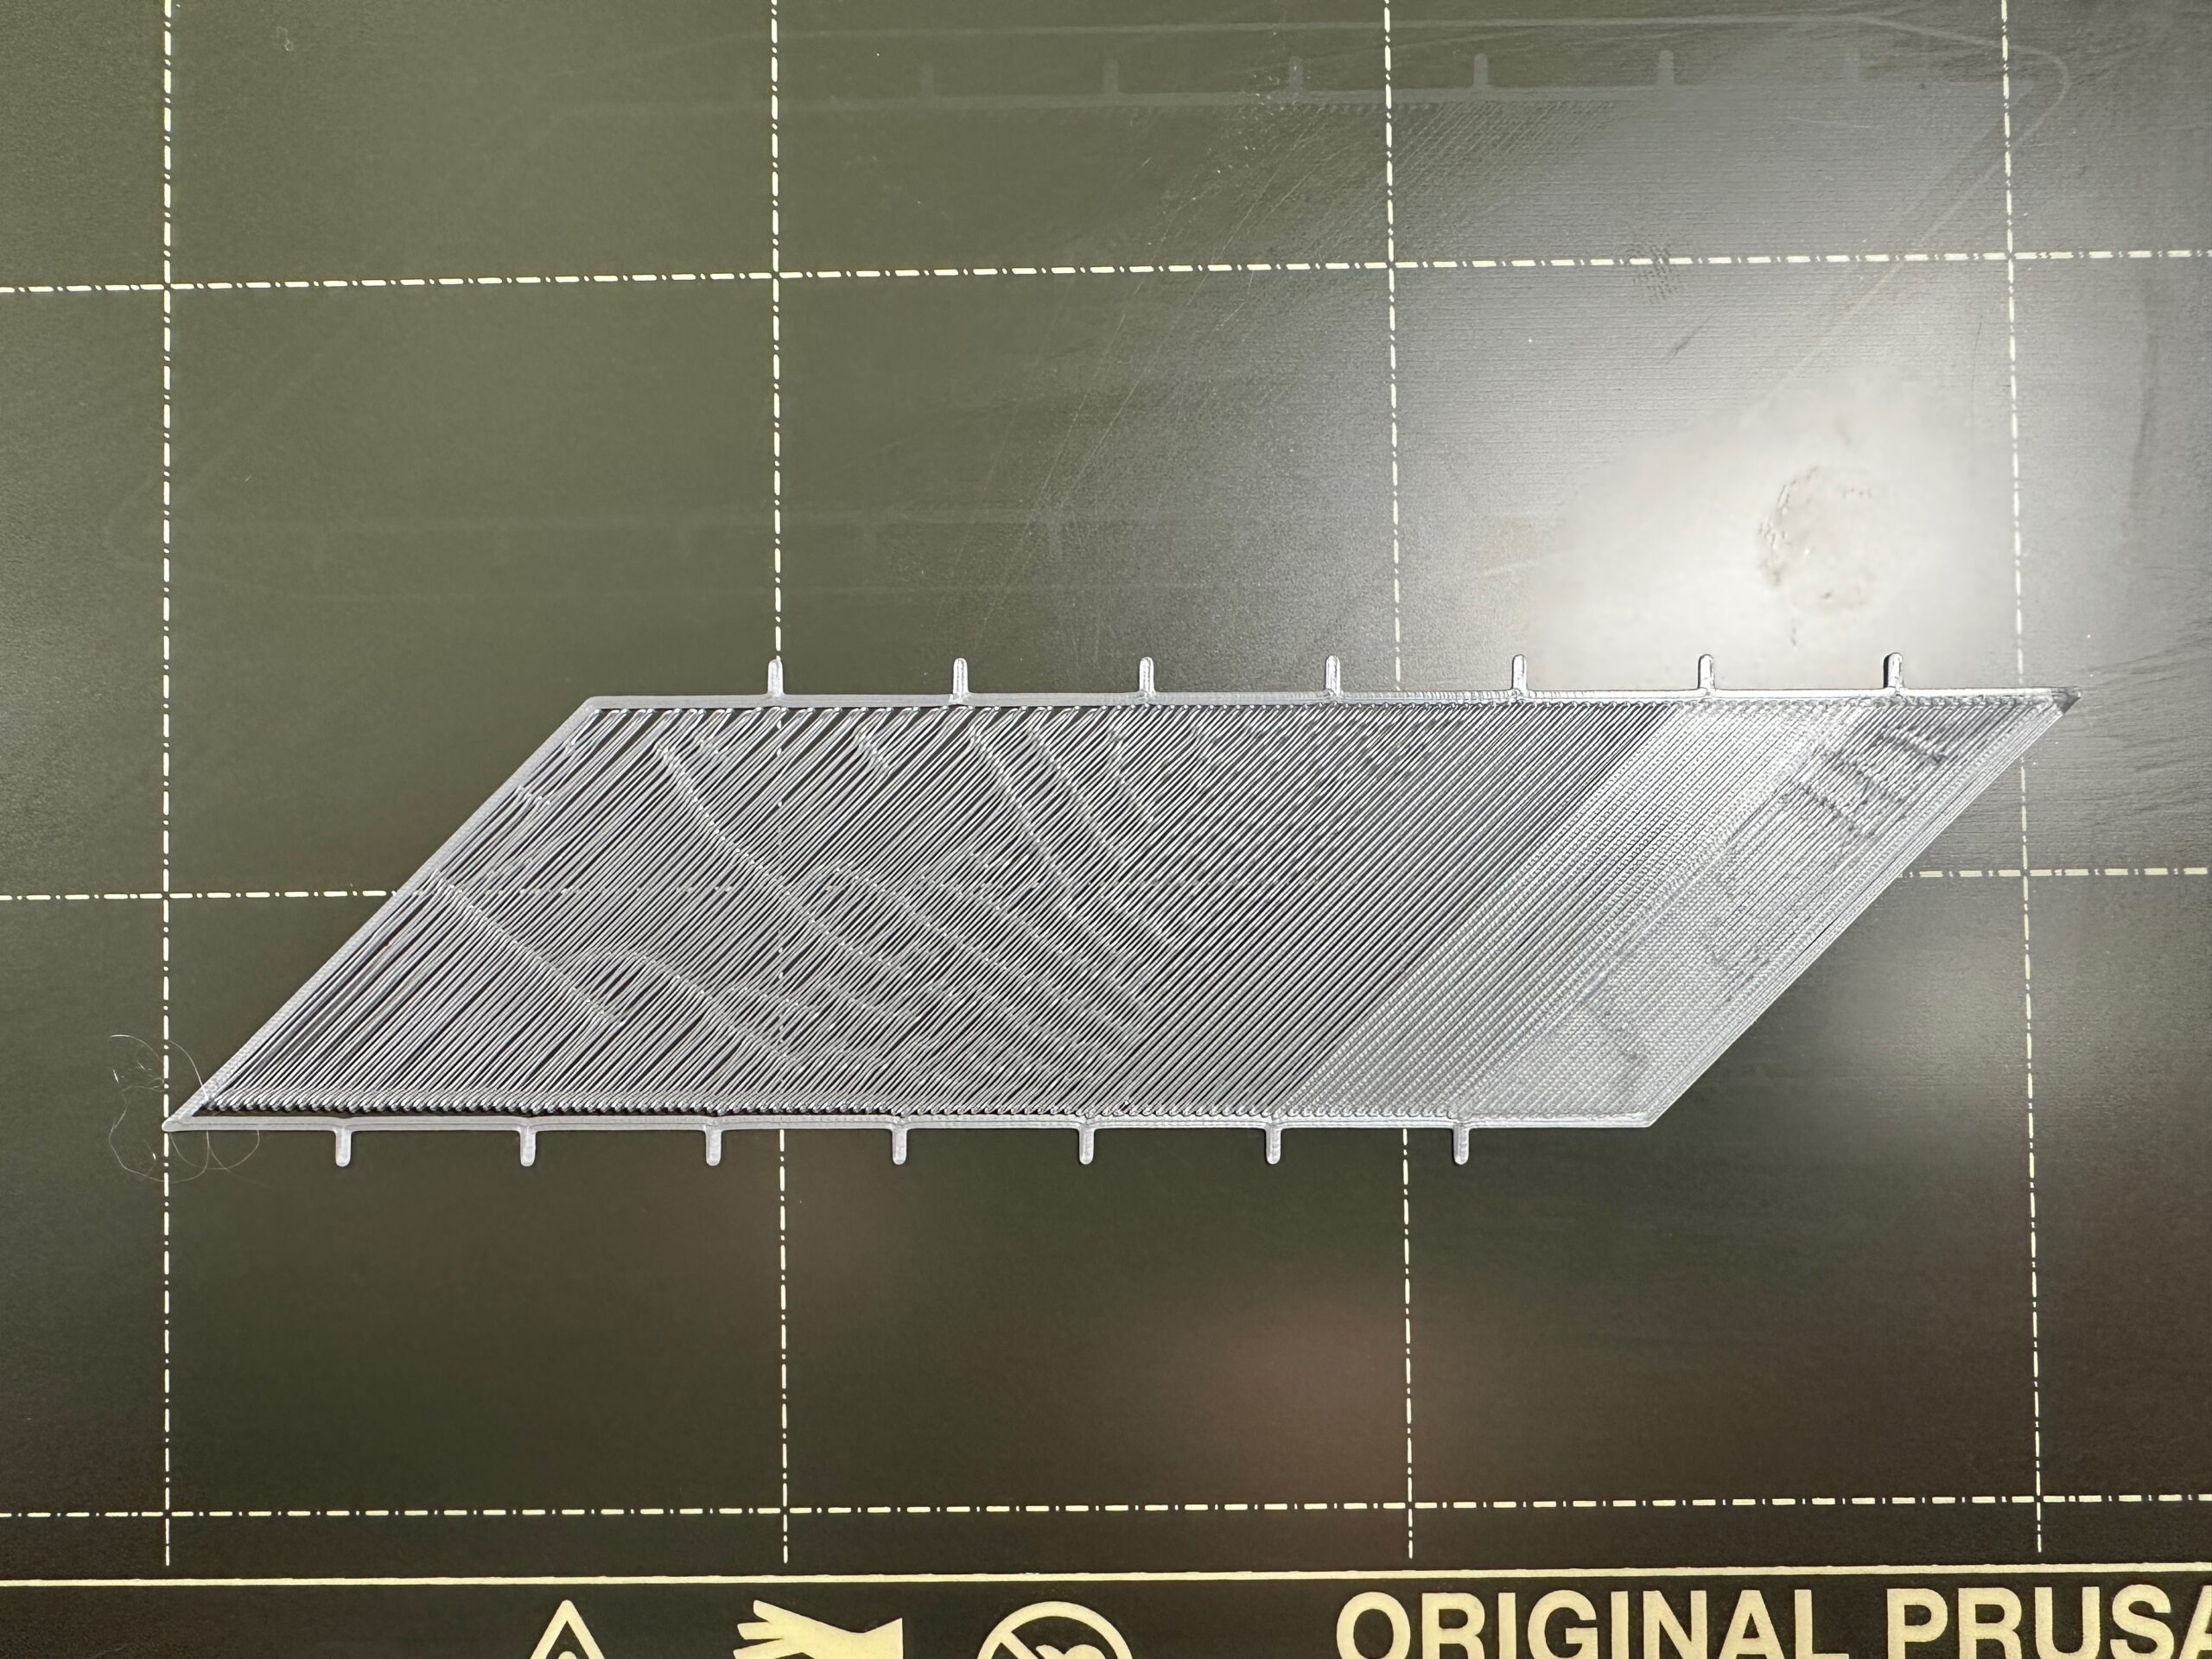
Here is the first layer calibration run from the link you shared @fuchsr. The far right is starting at -1.660 and moving down by .010 each time as it moves left. It appears to me the -1.650 to -1.640 that I had come to before appears to be consistently the right height. Thoughts? I'm also include the reverse side that adhered to the bed.


RE:
Yea, looks good.
Okay, then why do you get waves? Is 7x7 bed leveling turned on? Did you clean the sheet with hot water and dish washing soap?
Formerly known on this forum as @fuchsr -- https://foxrun3d.com/
RE:
I ran another test moving from -1.700 to -1.000. It's interesting seeing the spiderwebbing coming out as it moved to a higher z height. Not sure if that's a symptom of something else worth looking into.
I have the default 3x3 turned on that runs before each print. I have not cleaned with hot water and soap after each time but I have done it. Usually I wipe it clean with alcohol pads between prints.
RE: Rough top layer surface on new prints after recent z-axis calibration
700 is a massive difference, its 0.7mm. Also your terms for up and down are reversed. -1.700 is Closer to the bed (and therefore 'down') compared to -1.600. When you get close to the right range then even -0.005 makes a difference between good and perfect 😉 Your -1.700 is a bit close but the waves from being too close arent bad so id still say between -1660 and -1680 would probably do it.
One other thing to keep in mind, is that the pinda sensor is temperature dependant. If the sensor is at different temps it can give different readings. They are supposed to be 'temperature compensated' but I'd suspect like all electronic components some are better than others. The best thing you can do to get a consistent level is to make sure you always level at the same temps.
So preheating the bed and letting it soak through to let physical bed thermal expansion take place and using the bed to heat the pinda up by positioning it 10mm or so above and in the middle during that preheat phase. Its one reason I prefer my older Non super pinda. It has a built in thermistor and you can then make your start gcode wait until the pinda is at a known temperature. It can give you a really good first layer every time. These issues seem to crop up more during the winter so anecdotally the lower ambient temperatures are probably causing the pinda probes to behave a bit worse for some people.
So make sure your system is at roughly the same temps when you do a calibration and also when you print.
Also go into your lcd menu and change the mesh levelling from 3x3 to 7x7. You get a better map of the bed that way.
The patterns you see when you are too far away that also look like waves are the same effect as being too close but reversed. When too close the nozzle pushes excess material along until it sticks and you get waves, when its too far away it doesn't stick to the bed so is dragged along until it happens to stick to some filament which as its now thicker does grip the bed and ta-da you also get a wave pattern.
On your pictures you posted of your part bottoms, the first one
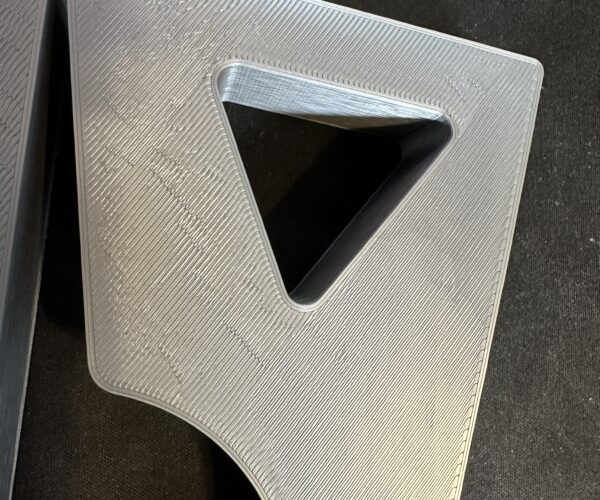
On the right side of the triangle hole about halfway along the edge you see the faint line that goes from right to left, thats where your part is lifting from the bed. Alcohol wipes just move skin oils around and can leave a nice thin film behind which pla and the smooth sheet doesnt like. If you do use IPA then bottled IPA and clean paper towels work better than the presoaked wipes. More IPA. So I think you have the classic non clean bed and a z that is still off.
You don't have to clean with detergent every print. If you are paranoid about touching the bed with your hands and make sure you don't at all you can actually go for weeks without. As soon as you forget though and do touch it, back to the sink it goes.
RE: Rough top layer surface on new prints after recent z-axis calibration
@neophyl thank you for the helpful feedback. As far as the callouts on reversed terms I meant to imply absolute values of moving from -1.700 to -1.000 but you're right and I understand that -1.7 is close to the bed than -1. I made the first layer calibration with the wider variation to call out the clear differences that led me to dial it in at at the -1.650ish range of numbers that I used in the earlier example with the finder increment changes.
The callout on the heat soaking is a good one and one that I have not been doing. I've been trusting the platform to be ready to print with the standard warming ramp up but that may be a good thing to change. I'm curious what a good soak time period would be. Are we talking single digit minutes or longer?
I will definitely change to the 7x7. I will also ditch the pre-soaked cleaning wipes and go for the spray and paper towels with periodic soap wash. I do not try to handle the plate much but will be more mindful going forward of it.
Thanks again for your help.
RE: Rough top layer surface on new prints after recent z-axis calibration
pre-soaked cleaning wipes
Yeah, they're cute… and that's all the positive things to say about them. A good spray of 90+ percent isopropyl alcohol (I usually use pure, i.e.99%, and don't bother to dilute it) between prints, "look, mom, no hands", and a good scrub with fragrant-free dish washing soap every now and then is all that's needed.
The heat soaking suggestion is an interesting one. There's clearly nothing wrong with it (hey, it comes from neophyl, so duh, of course), and it's worth a try. On the other hand, I have never bothered with it, and I don't see any MBL issues, so YMMV. Maybe because my printers are in a basement workshop where miraculously it's 69 degrees F, literally every day of the year.
Formerly known on this forum as @fuchsr -- https://foxrun3d.com/
RE: Rough top layer surface on new prints after recent z-axis calibration
Yeah Fuchsr, if you have a stable temp then the primary condition is met, you are always working with the same values. And a lot of people wont have to bother as things 'just work' for them. Unfortunately due to the nature of things the forum fields all the problem cases, its rare for people to come here and just post - hey my printers working great - lol.
I'm in dreary old England and my room with the printer in can vary from 8 to 28 deg C depending on the time of year. In winter like now I might have to preheat for 5-10 minutes initially to get to my normal working temp on a first print. In the summer it can be 30 seconds. That's the advantage of the older pinda, it measures the temp of itself so the gcode startup I'm using (based on Bobstro's naturally) just waits till it gets to a specific temp, no guessing and no fixed time.
Is it a bit of a pain in winter waiting - yeah it is, but the flipside is that I have to do something stupid with a slice to not get a rock solid print and my first layers are VERY consistent.
I used to have prints that varied on how good the first layer was squished all the time in the early days. Until Bob posted the temperature sensing pinda technique. It made absolute sense and I added it to my startup routine and haven't had an issue since.
When you think how long most prints take anyway then 5-10 minutes at the start of a printing session is just a drop in the bucket.
RE:
My printer is currently in the basement in the US Southeast so like fuchsr my expectation and experience is that the temperature is pretty stable. I think it's still something I will try just to see if it helps.
So my takeaways are:
- enable 7x7 (done)
- bin the alcohol swabs and get real alcohol
- heat soak
- stick with the -1.650 to -1.680 level for first layer
Thanks again to everyone that responded and provided feedback.
RE: Rough top layer surface on new prints after recent z-axis calibration
Two additional things:
- don’t buy the IPA at the drugstore, get it on the internet or at the hardware store. (You do not want it to be soft on your skin a.k.a. added oils)
- do not write down the numbers when done, forget them. They will be different with you new PEI sheet or after your nozzle change or extruder maintenance…
If at first you don't succeed, skydiving is not for you.
Find out why this is pinned in the general section!
RE: Rough top layer surface on new prints after recent z-axis calibration
Hi Robert, did you ever get a fix for this, i have a K1 Max printer and am getting the exact same artifacts as you!
Thanks
Josh