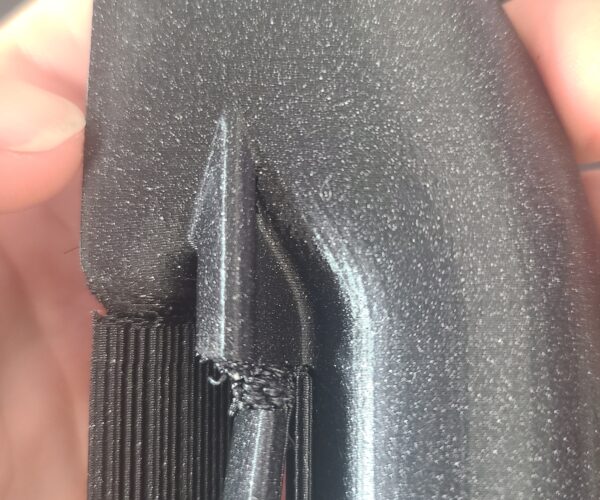
Bed adhesion is a frequent culprit
You should not normally need to use painter's tape if you've got your 1st layer adhesion working properly on a Prusa. What often happens if not is that the part lifts slightly and eventually gets knocked loose or moves into the nozzle path far enough to create the "spaghetti monster" effect. Take a look at the bottom of that failed print and see if it's even or if it has lifted along the edges.
My first thought would be to ensure that your Live-Z is properly set and bed properly cleaned. Here's an info dump on the topic. Read through it and see if any of this might apply to your situation:
and miscellaneous other tech projects
He is intelligent, but not experienced. His pattern indicates two dimensional thinking. -- Spock in Star Trek: The Wrath of Khan
bed adhesion
no doubt. Although the print seems to work well with out the blue tape, I have found that i never have any issues at all when I use blue tape. So I default to it and have the Z height set accordingly. There is no lifting/etc of the part.
Wups -- Here's the info
Missed the window to paste this in...
-
Part warping or lifting along edges.
-
Bumping or knocking noises as the part moves under the nozzle.
-
Uneven vertical surfaces and bulges caused by print lifting and compression of overlying layers.
-
Spaghetti resulting from parts moving during printing.
-
The dreaded "blob of doom" caused by the part lifting and sticking to the nozzle as it extrudes filament.
-
A dirty PEI print surface. Even if you don't think this is the cause, it's always a good idea to make sure your PEI surface is clean before trying any other fixes. If it's a smooth PEI sheet, take it to the kitchen sink and give it a good dunk with Dawn (original formula, no vinegar or hand softener variants) dishwashing soap or your local equivalent (e.g. Fairy in UK). Use a clean paper towel to clean it off, and another to dry it. Avoid using any sponge or cloth that has been in contact with grease. Above all else, avoid touching the PEI print surface. Once it's good and clean, you should be able to use 91%+ isopropyl alcohol between prints, 100% acetone when that fails , and another dunk when acetone fails. Worst-case, use a 3M 7445 ScotchBrite (1200-1500 grit) pad or equivalent on smooth PEI to give it a very light buff, but only infrequently. If you've got a textured powder-coated PEI print surface, the official instructions are to use 91%+ isopropyl alcohol on it only. Rumors persist that some have had good luck getting started with these sheets by giving them a wipe with 100% acetone and a dunk with Dawn. Either way, there's no real warranty on these sheets. YMMV.
-
Improper Live-Z adjustment. If you have not already done so, try Jeff Jordan's "Life Adjust" procedure for calibrating your Live-Z setting. It is much easier to use and understand than the onboard routine and much easier to make mid-print adjustments accurately with. In general, start high (less negative) and work lower (more negative) in large increments (e.g. 0.1mm) until the filament starts to stick on its own. When you've got your Live-Z setting adjusted properly, you should be able to gently rub the extruded lines on the PEI surface without dislodging them. Then start lowering (more negative) the level until there are no gaps between layers. You should not be able to peel the lines apart after printing, but the top should be regular.
and miscellaneous other tech projects
He is intelligent, but not experienced. His pattern indicates two dimensional thinking. -- Spock in Star Trek: The Wrath of Khan
Suggestion
@jordonmusser
I'm going to suggest that this is caused by a partially clogged nozzle.
From the look of your last image your getting some under extrusion a few layers before the failure, in two or three places. At what layer height are you printing? and is it possible for you to post a zipped up .3mf file exported from Prusa slicer? it will allow us to see all your settings as they pertain to the model, and allow us make better informed suggestions.
Good luck
Swiss_Cheese
The Filament Whisperer
Try rotating the part
no doubt. Although the print seems to work well with out the blue tape, I have found that i never have any issues at all when I use blue tape. So I default to it and have the Z height set accordingly. There is no lifting/etc of the part.
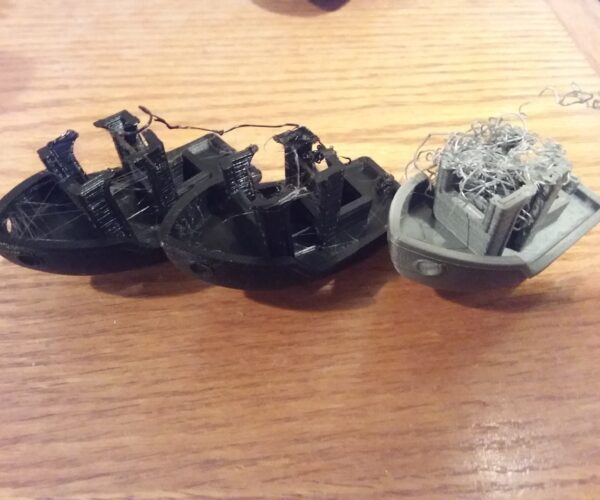
Wups - I was editing as you posted. If it's snarling at the same location each time, that's very similar to the problem people see in the Benchy prints at the start of the overhangs at the top of the doorway. I had my own problems with this.
I'm understanding that you're consistently seeing this problem at the same height and print features. Is that correct? If so, rotating the part might help pinpoint the issue. If it's mechanical, the problem will usually be random or stay in place on the bed if the part is rotated.
If you observe the print at those locations, do you see the filament lifting?
and miscellaneous other tech projects
He is intelligent, but not experienced. His pattern indicates two dimensional thinking. -- Spock in Star Trek: The Wrath of Khan
...
For sure its not a bed adhesion issue. sucker is stuck on there and not lifting
It does seem to manifest itself in roughly the same area, and as you noted you can see where it was starting to have problems but "made it" a bit farther.
I have tried to observe the print in those areas, but its tough to time right. I haven't seen anything failing until its too late 🙁
see attached file. I may try printing in a different orientation just to see what happens, might be a good data point. drivers seat vent2
sorry
Sorry for the super slow responses. I reply quickly but I guess because I am new all my posts are moderated.
0.05mm layer heights can be a challenge
[...] see attached file. I may try printing in a different orientation just to see what happens, might be a good data point. drivers seat vent2
I notice you're specifying a 0.05mm layer height. While it sounds great, layers that thin are prone to a variety of problems. I'd consider that an ambitious print. For a model of this size, 0.1mm should provide plenty of good detail, especially if you use a filament that hides the layer lines a bit (e.g., matte). Personally, I'd try printing it with a larger (0.15-0.2mm layer height) and if that works, try variable layer heights. That way, it will print with finer layer heights where needed, but use higher layers where it can speed things up.
and miscellaneous other tech projects
He is intelligent, but not experienced. His pattern indicates two dimensional thinking. -- Spock in Star Trek: The Wrath of Khan
@jordonmusser
we understand about the form for new users, it's unfortunate but it does help prevent a reasonable amount of spam, this will pass as you post a bit more.
I'm examining your .3mf and I agree that a layer height of 0.15 to 0.2 would be best for this print, I did notice that you said you were printing with PLA in your original post , however your .3mf is set to PETG, which plastic are you intending to print this with?
This will effect recommendations.
Regards
Swiss_Cheese
The Filament Whisperer
Welcome to the forum Jordon,
Unfortunately, as has been mentioned, new users are moderated for the first few posts, to reduce spam.
you will soon be out of moderation, and able to post normally, you will also be able to private message other members.
most of the moderators on the forum, are volunteers from the community so we have no fixed working hours or response times.
there is also a very short window of opportunity to edit your posts, if you miss the opportunity to modify a post, or perhaps you put it in the wrong forum, either contact a moderator or report the post, with a message saying what the issue is, and we will do our best to assist.
regards Joan
I try to make safe suggestions,You should understand the context and ensure you are happy that they are safe before attempting to apply my suggestions, what you do, is YOUR responsibility.Location Halifax UK
...
I printed the little benchy boat and it printed perfectly.
@swiss I can give that a go for sure, but would that explain why it seems to print perfectly until it gets into that one section? Or do you think the layer height will help with that overhang?
thanks.
Thinner layers can cause problems with under extrusion, possible curling and thus snags
Very thin layers can cause under extrusion or surface irregularities. If a bump lifts high enough to snag the nozzle, it can throw things off, leading to the spaghetti monster effect.
What layer height did you use for Benchy?
and miscellaneous other tech projects
He is intelligent, but not experienced. His pattern indicates two dimensional thinking. -- Spock in Star Trek: The Wrath of Khan
@jordonmusser
I've got one cooking right now, with the settings I'm suggesting plus some I didn't mention. it's got an hour and 13 min left. I'll post results and suggestions along with a Tuned .3mf for you to consider when I get home from work tonight.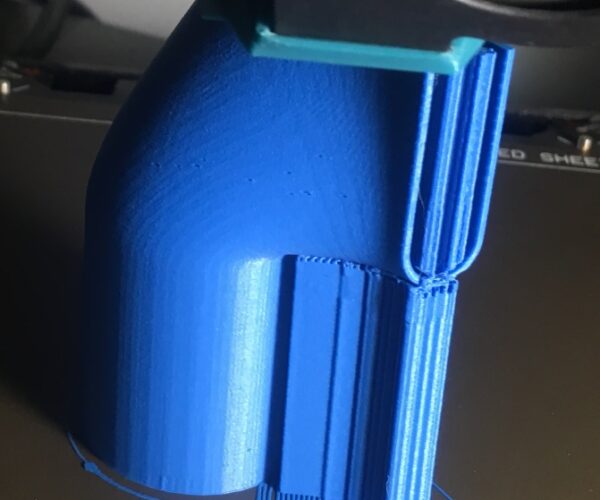
So far it seems to be printing well. it's a fun part to print.
Regards
Swiss_Cheese
The Filament Whisperer
Ran out of edit time
@jordonmusser
What Bob said, plus it can cause a back pressure in the nozzle depending on filament type & Brand, feed rate, extrusion multiplier, print speed, etc, etc..
It is possible to do, however the default settings sometimes cause this issue.
The Filament Whisperer
whoa
wow awesome thank you!
Overhang problem?
@jordonmusser
I Printed this in PLA since that was your original spec, you never answered the question from my previous post PLA or PETG, although I can imagine if your going to put this into service in a car you will need to print it out of PETG at a minimum. I would print this with ABS or ASA for long term use in a vehicle.
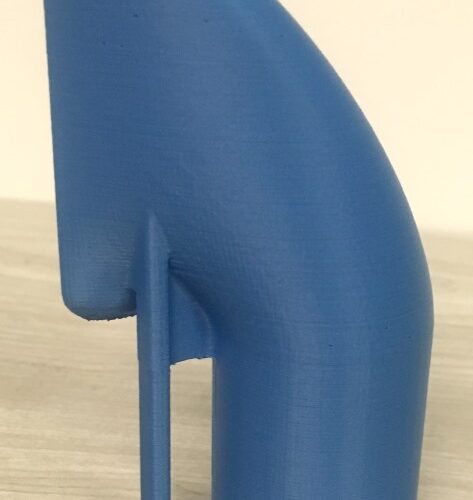
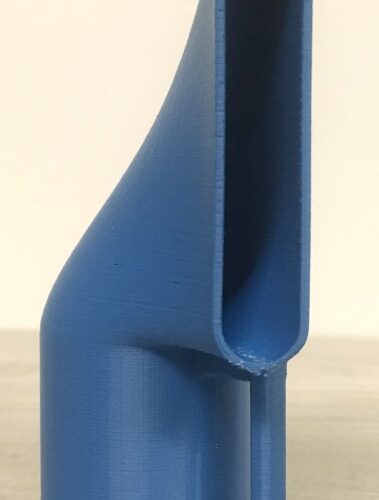
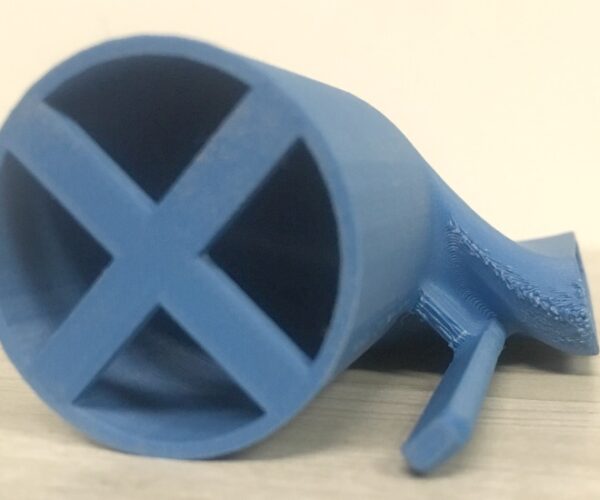
Keep in mind these are extremely close up photos.
This tends to exaggerate the look of any quality issues, aside for the contact points of the supports it looks quite good to the naked eye.
Several adjustments were make to the project file, to improve printability, I changed the overall layer height to 0.15, readjusted the supports using the paint-on support tool to minimize support contact area, employed the use of height range modifiers in two areas, one to correct an area that was bridging poorly (Bridging Angle change), and another to correct a print quality issue of a small part that prints separate from the rest of the model on top of support for several layers resulting in a malformed area near the discharge (Layer Height change).
I made adjustments to the "extrusion widths" of both the "external perimeters" and the "perimeters" to compensate for large areas of the model with strongly overlapped (forced together) perimeters. Many times I will try to reduce or turn off Gap Fill during this process however in this case it's beneficial.
You may notice the addition of a modifier mesh in the scene. This was used to add strength to the thin leg protruding from the area of the discharge, it was weak, so a 3rd perimeter was added and I increased the internal fill for this area.
Project File
Notes:
I did notice that you had your first layer speed set to 10mm/s, my guess is this is helping the first layer print on blue tape.
I changed this for my print as I was not using tape, and neglected to turn it back to 10mm/s before saving and zipping it's currently 20mm/s.
Important ! when you open the .3mf I posted, and it asks if you want "Bridging perimeters" turned on, select No.
If you do decide to print this in PETG you may want to adjust the supports for PETG they are currently adjusted for PLA you may decide you want to increase the "Contact Z distance".
Be sure to poke around in there and see how things are working, If you have any questions just ask.
Good Luck
Swiss_Cheese
The Filament Whisperer
thank you!
PLA is correct, I intend to later print in PETG after final fitment and testing is done. That is very generous of you, I will give it a go and report back!
PETG
Your results with PETG will likely be a little rougher.
--------------------
Chuck H
3D Printer Review Blog


