Optimize object to pervent warping PETG
I've been printing successfully for several years with my MK3S. No big issues. I don't generally have any issues but usually print smaller parts (< 4x4x4"). Reecntly I've been trying to print some larger things and have been having trouble. I had been running older firmware and older Prusaslicer because if it's not broke... But in trying to resolve this new issue, I updated the firmware to current, updated the slider to current, ran a XYZ calibration and reset my Live Z properly. I use a large (100x100x.2) square printing left to right where I dial Z in. My lines are well bonded, I have consistent flatness and no digging. I use a textured sheet that has been brush scrubbed with Dawn and fully rinsed in hot water, followed by a bath of 99% IA and a clean towel. Even scrubbed the soap stage a little with a mild used gray Scotchbrite. I've checked this new filament with a temp tower, ran and extrusion multiplier test and I've getting almost no stringing. I turned off stealth mode. That part looks good to me. So, for mechanical setup, I believe I've checked all the boxes. I do not have an enclosure.
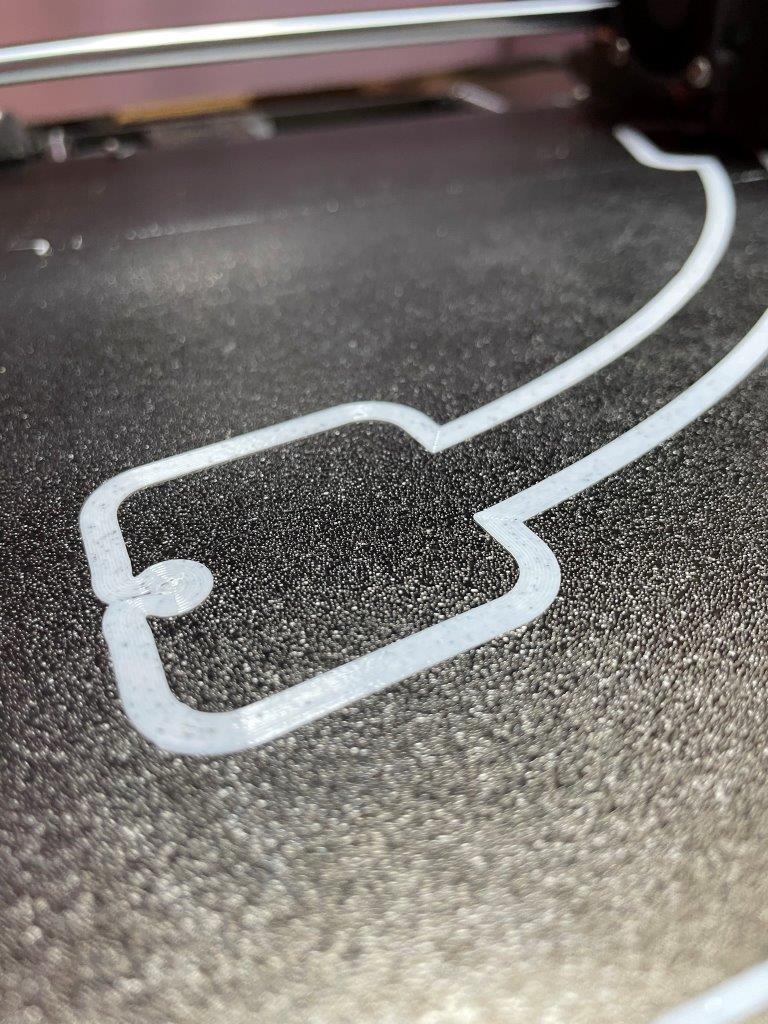
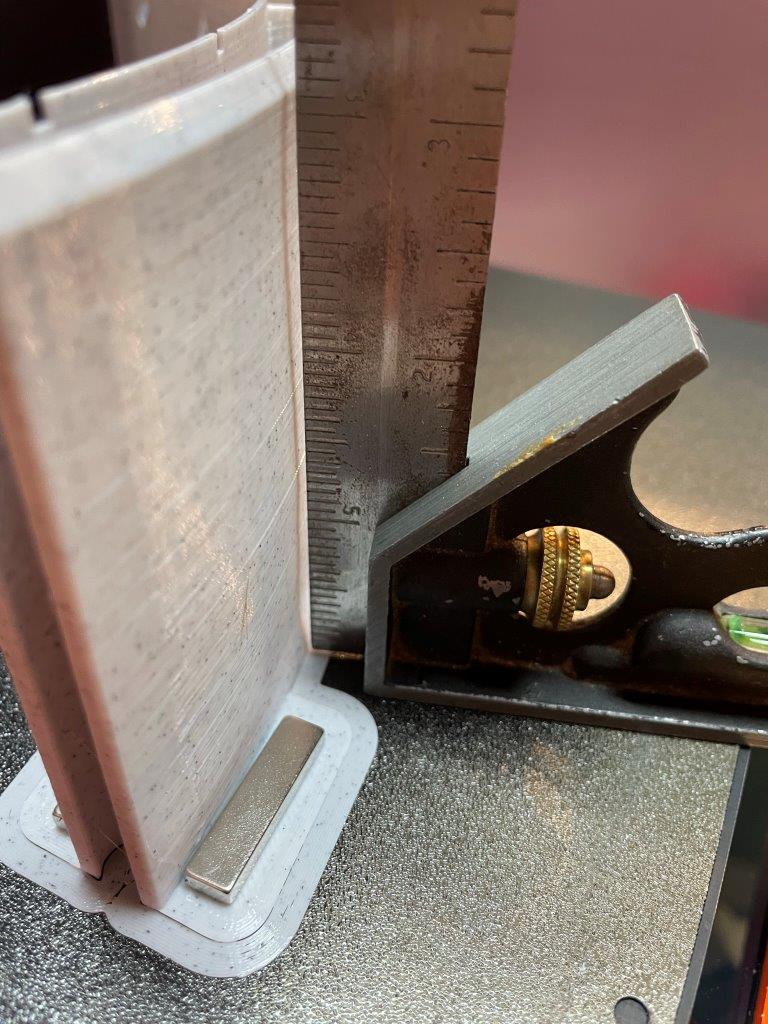
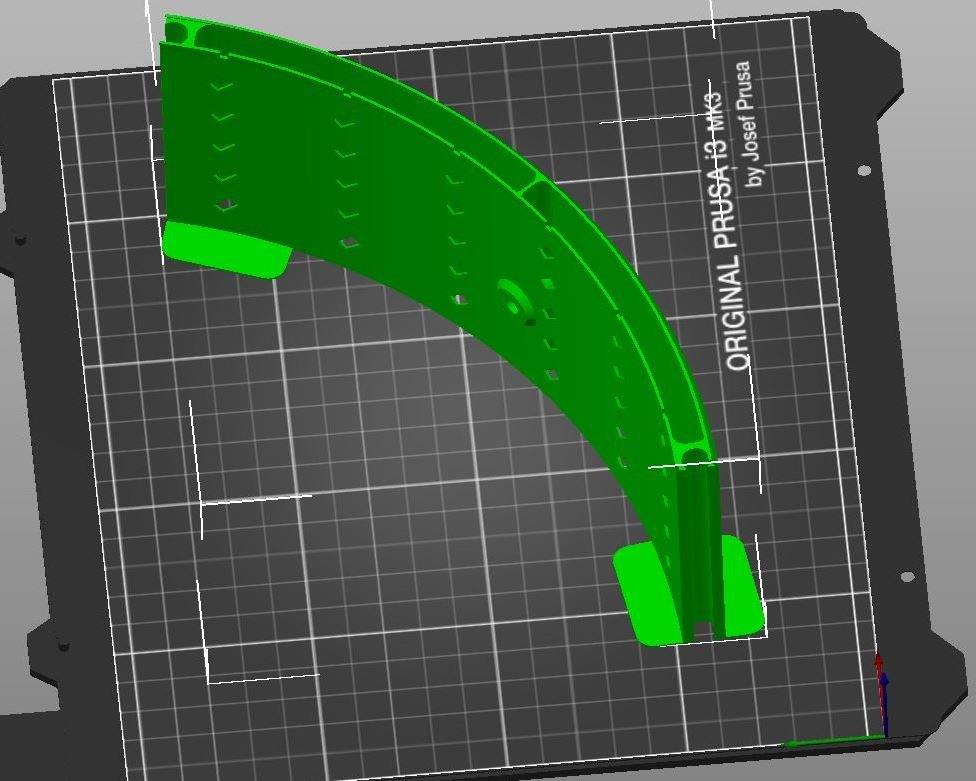
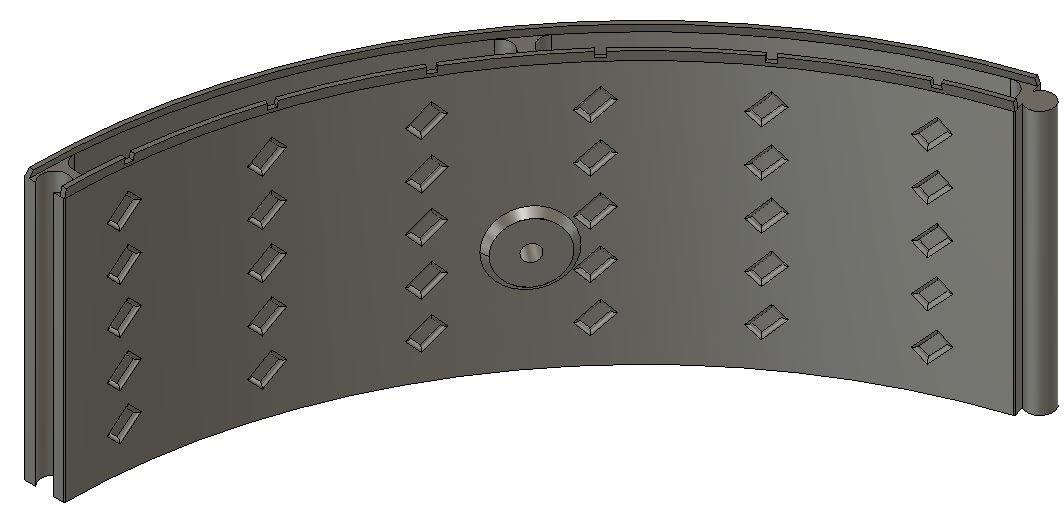
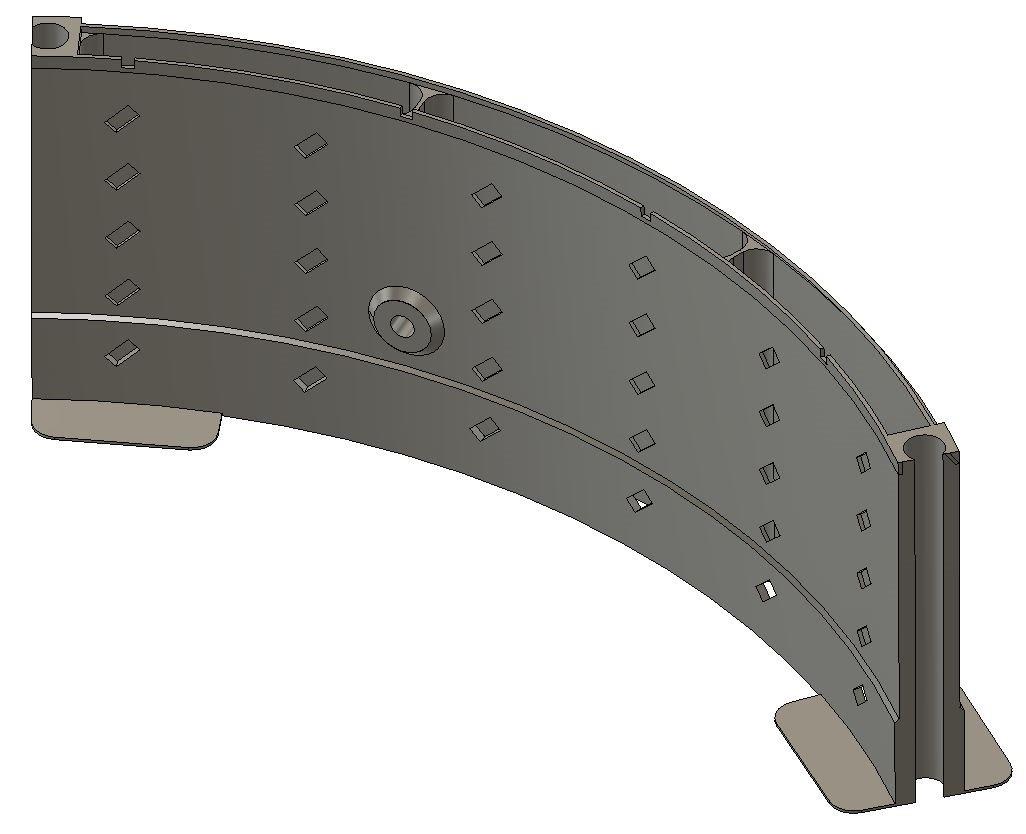
This PETG part is an curved part that when all 5 pieces are assembled forms the replacement walls for a dehydrator. The inner chamber of this wall segment is and air-flow chamber.
Initially I printed this part with my old settings and got terrible layer alignment. And some warping that allowed the ends to pull up and release. I got no layer shifting per se, but my vertical lines were pretty crooked.
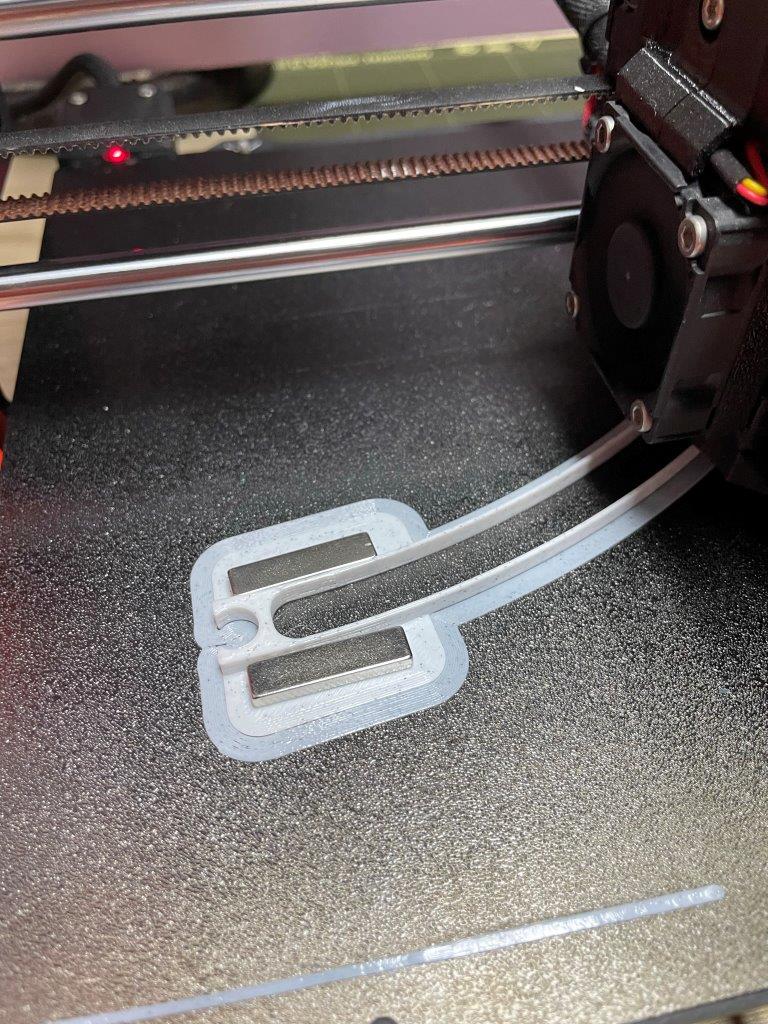
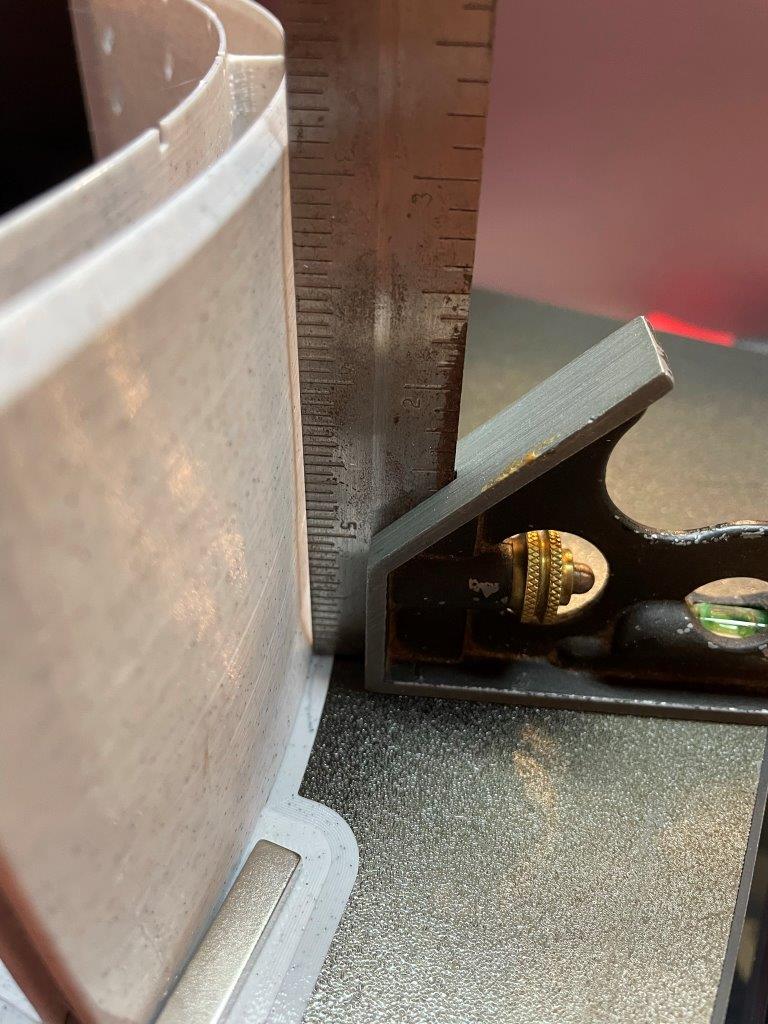
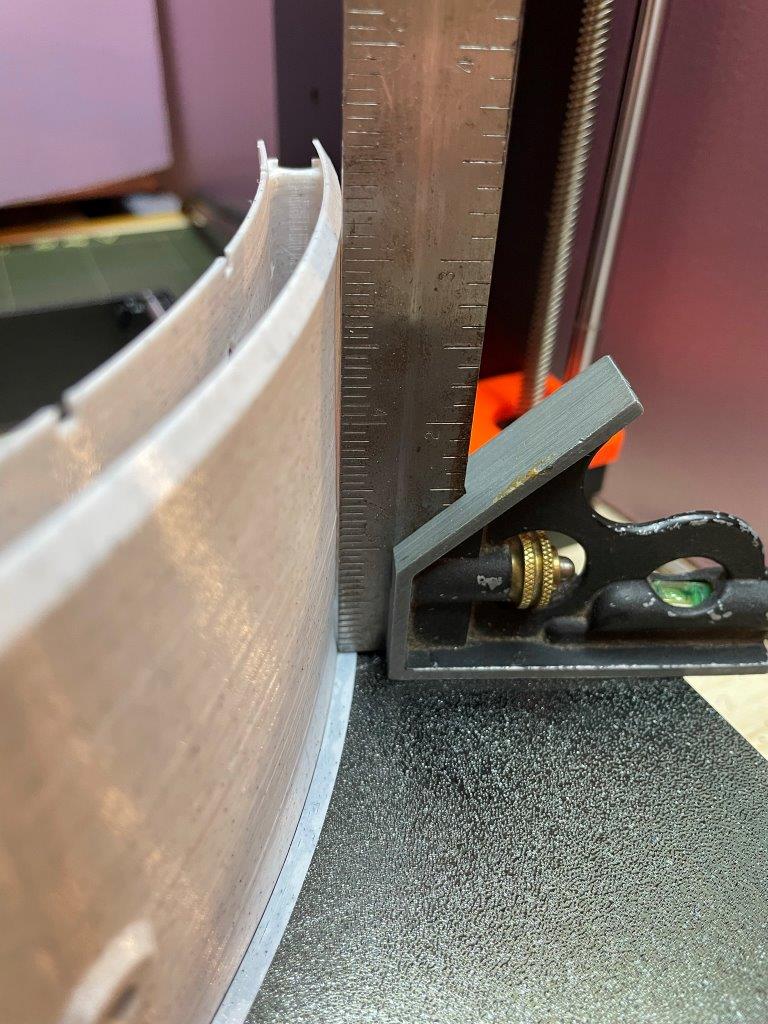
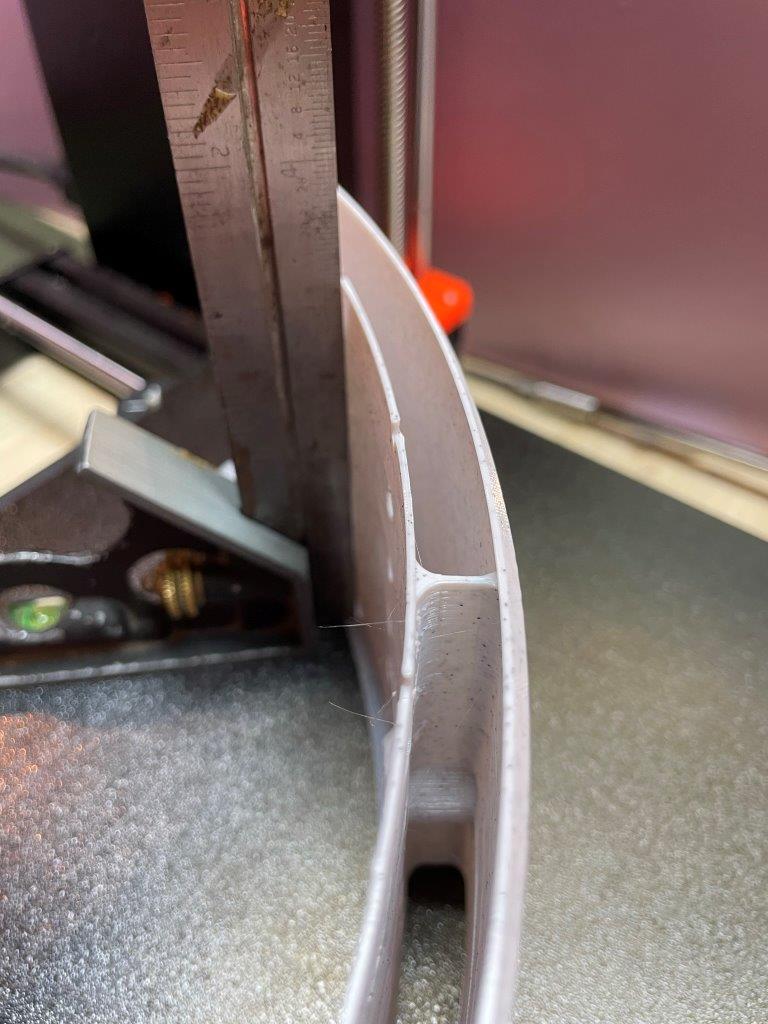
So I did all the above, added some "feet' to my part to accommodate magnets for extra hold-down, added a 5 perimeter raft in the slicer, narrowed the 2 walls of this part some more, increased the build plate temp hoping for more adhesion, and tried again. It's a lot better and I did not get anything released from the plate at the ends, although my center curve area may have come loose a little where I accidentally had too much separation with the raft setting. In this attempt I did get a small layer shift right in the middle only, not on either end. You can see that where there is a horizontal hole in the wall with a chamfered stick-out. So I conclude the middle of the part moved since both ends are still correct. You can also see in the photos where the outer wall leans in near the center and near the parts' bottom. I'm thinking maybe this is due to the warmer area near the print bed but that's a guess.
My question is, besides what I've tried, is there anything else I can do to try to get this part to print cleaner? I've changed the center double-wall support from one in the middle to 2 (even thirds). And I've made the inner and outer walls thicker by one perimeter near the bottom. It's a long print so I want to try to do what I can to fix it before trying again. In this last print, except for the inner middle area small layer shift, the inside wall does well, it's the outer wall that seems to be the bigger issue.
I gather from others that an enclosure might help. I don't have one and need to get this done before I can arrange for one, so barring that, what else can I do to help it? I do have a photo tent but it's pretty big, doubt it will help. I thought of adding some indents in the walls as they curve around, to give the print a "break" instead of a long straight arc.
Grateful for suggestions from those with experience printing things like this. Or if I missed anything.


RE: Optimize object to pervent warping PETG
Edit timed out while trying to get photos in right place. Can't edit. 🙁
What is your elephant's foot compensation value?
Cheerio,
RE: Optimize object to pervent warping PETG
Here's my "check list" for warping issues:
* Slow down print speed.
* Add Mickey Mouse ears to the corners. You can add a cylindrical part in PrusaSlicer, maybe 10mm diameter, change height to single layer height, then place the part at the corner. Repeat for each corner.
* Add a brim around the model. You did 5 perimeters. That's cute but I'd do at least 5 mm wide. Wider or 2 -layer high brims may be needed but may not work with the size of the model or may require being added in your CAD software.
* Use Layerneer Bed Weld ( https://www.amazon.com/Printer-Adhesive-Layerneer-Original-Filament/dp/B079984GV5/ ). You only need a thin layer.
* If you have design control over your part and it's possible considering the intended use, you can try to round the edges and/or add holes to the base of the model.
* Combination of above. Usually, brim/ears does the job, or some Layerneer if needed, but large, rectangular objects can be a challenge.
I my experience an enclosure doesn't make any difference. If an object wants to warp, it will.
One of my printers prints large, brick-shaped detection dog training objects pretty much every day. In addition to the brim and Layerneer I need to use binder clips to secure the steel sheet to the heat bed, or the force of the warping will just pull the sheet off the bed. *Most* of the time, that works fine. But I still get the occasional slight warp. (which I sell at a discount, they're still functional).
Formerly known on this forum as @fuchsr -- https://foxrun3d.com/
RE: Optimize object to pervent warping PETG
What is your elephant's foot compensation value?
Cheerio,
0.2mm. The default, I think.
RE: Optimize object to pervent warping PETG
Here's my "check list" for warping issues:
* Slow down print speed.
* Add Mickey Mouse ears to the corners. You can add a cylindrical part in PrusaSlicer, maybe 10mm diameter, change height to single layer height, then place the part at the corner. Repeat for each corner.
* Add a brim around the model. You did 5 perimeters. That's cute but I'd do at least 5 mm wide. Wider or 2 -layer high brims may be needed but may not work with the size of the model or may require being added in your CAD software.
* Use Layerneer Bed Weld ( https://www.amazon.com/Printer-Adhesive-Layerneer-Original-Filament/dp/B079984GV5/ ). You only need a thin layer.
* If you have design control over your part and it's possible considering the intended use, you can try to round the edges and/or add holes to the base of the model.
* Combination of above. Usually, brim/ears does the job, or some Layerneer if needed, but large, rectangular objects can be a challenge.
I my experience an enclosure doesn't make any difference. If an object wants to warp, it will.
One of my printers prints large, brick-shaped detection dog training objects pretty much every day. In addition to the brim and Layerneer I need to use binder clips to secure the steel sheet to the heat bed, or the force of the warping will just pull the sheet off the bed. *Most* of the time, that works fine. But I still get the occasional slight warp. (which I sell at a discount, they're still functional).
Thank you for the suggestions/checklist. re some of your line items:
- slow print speed: I don't have any experience with this. Slow how much? I'm set at 45mm/s for perimeters, 25 for external perimeters, and 80 for solid infil. My thin wall design only has 2 perimeters on a "wall" so I'd guess one is an "external perimeter", one is a "perimeter". If I up the wall thickness the middle one would be solid infill I think.
- I added some ears to the model in CAD already, that's what the magnets were on, they are 2 layers thick. I'll up the brim width to be sure. Although, I didn't have any release happening on my second try with magnets. Except in one spot possibly, near the middle, that was my fault due to setting the brim gap too big. Even then it wasn't' visually out of line FWIW, but will be sure that are is stuck well next print.
- re Layerneer Bed Weld, wasn't familiar with that, ordered some today. Thanks
- can't do much to the design for edges on this one. The inside is already hollow.
> I my experience an enclosure doesn't make any difference.
- that's good to know before I go spending $$ on one if it won't help.
RE: Optimize object to pervent warping PETG
Slow how much?
No hard rule but I'd try 50% of original speed first.
Formerly known on this forum as @fuchsr -- https://foxrun3d.com/
And set your elephant's foot compensation value to 0 for this part. This will reduce adhesion but ears and brim should compensate.
For low speed trials temporarily dial the overall speed down in the LCD menu.
Cheerio,