Need advice on tweaking some settings on a multi-part print
Hi all, I finally got printer up and running again after replacing the hot end and some of the other housing parts.
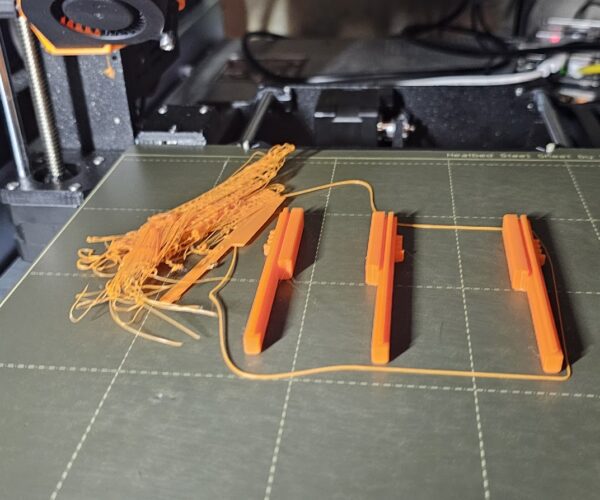
I've been trying to print a gatlin gun off printables.com that has about 10 or so parts per build. I'm trying to print as much as will fit on my tray and I continue to run into problems as its moving around the job. My printer knocks a part off and just drags it around until I stop.
Can I get some advice on tweaking this so I can get this thing off my list of items i'd like to print?
Settings
Nozzle: .4
Min height, .07
Max .25
.20MM quality print settings
15% infill
Standard PLA (1.75)
Original steel bed - (PEI?)
Thank you for the help!
RE: Need advice on tweaking some settings on a multi-part print
I don't think it has anything to do with print settings. Any of the standard profiles should be able to handle multi part prints. What you are describing is basic poor bed adhesion. This is sorted by making sure the print surface is thoroughly clean and having a properly dialled in live z setting.
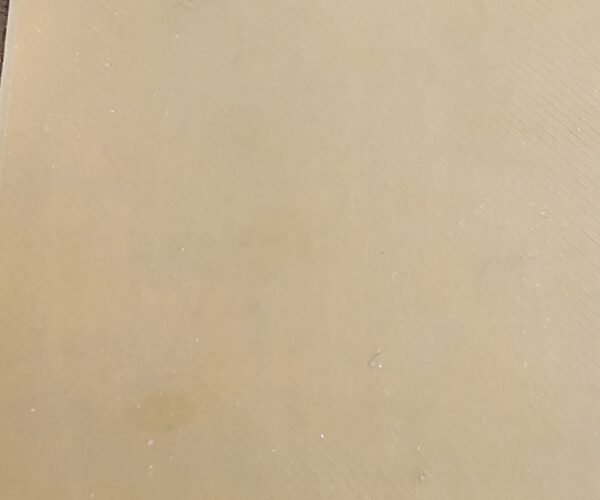
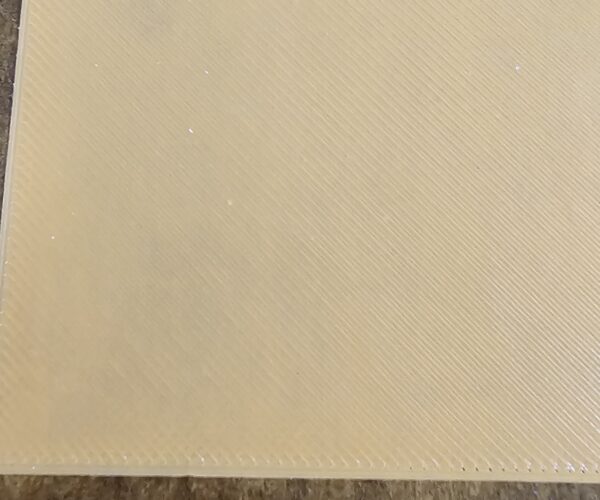
Please print a single layer thick square or similar and show the result on the print surface. That way people can see if your first layer needs adjusting. Something like https://www.printables.com/model/105404-calibration-strip-for-simple-live-zfirst-layer-cal for example.
Also clean the smooth pei sheet with plain detergent (dish washing liquid) and HOT water to rinse. That removes grease and other contaminants.
If you are worried about your print then a few settings is not anything to go on, save your project file from Prusa Slicer (file>Save project as) and ZIP up the 3mf and attach it. With the project we can see how you have oriented things, all your settings and check the slice preview etc.
RE: Need advice on tweaking some settings on a multi-part print
Thanks! I will run a first layer calibration and post up results.
RE: Need advice on tweaking some settings on a multi-part print
I don't think it has anything to do with print settings. Any of the standard profiles should be able to handle multi part prints. What you are describing is basic poor bed adhesion. This is sorted by making sure the print surface is thoroughly clean and having a properly dialled in live z setting.
Please print a single layer thick square or similar and show the result on the print surface. That way people can see if your first layer needs adjusting. Something like https://www.printables.com/model/105404-calibration-strip-for- uno online-simple-live-zfirst-layer-cal for example.
Also clean the smooth pei sheet with plain detergent (dish washing liquid) and HOT water to rinse. That removes grease and other contaminants.
If you are worried about your print then a few settings is not anything to go on, save your project file from Prusa Slicer (file>Save project as) and ZIP up the 3mf and attach it. With the project we can see how you have oriented things, all your settings and check the slice preview etc.
Hello, I have a wonder. How do I save a project file in Prusa Slicer?
RE: Need advice on tweaking some settings on a multi-part print
@doggiefizzle that is looking pretty good actually 🙂 So what does your print sheet look like ?
@danielleharms to save a Prusa Slicer project file it is just File>Save Project As from the menu. Getting into the habit of saving a project file is a good thing to do in general. It allows you to come back at a later date and adjust things much easier. As everything from part placement, modifiers as well as settings is stored.
It also has other advantages and you can load in settings from old projects into new ones using the Import from options on the file menu too. Projects also allow you to save your favourite combinations of Print/Filament/Printers. You may have noticed that PS only remembers your last used profile selections, having selected saved 'blank' projects allows you to load in your favourites. Especially useful if you have multiple printers or use a repeated set of filaments for a MMU for example.
Projects are also the best way to get help with something. By attaching a project to a 'help' post and giving all the information right from the start people can help quicker and debug easier. You just have to remember that the forum is pretty limited and to ALWAYS zip files up before attaching.
RE: Need advice on tweaking some settings on a multi-part print
This is a very typical occurrence. Some parts work and some do not on the same stl. S3x2-nut <--here is the zip from the project.
I let one of these go while I had to run an errand and it led to the destruction of my hot end. I'm keen to figure out what I'm doing wrong. That was an expensive blunder.
RE: Need advice on tweaking some settings on a multi-part print
I don't see anythign wrong with the 3mf and would expect those models to print fine, with properly cleaned sheet and good live Z calibration. If those are fine, the most likely cause for parts to get loose it for the nozzle to hit curling overhangs, or maybe infill.
Formerly known on this forum as @fuchsr -- https://foxrun3d.com/
RE: Need advice on tweaking some settings on a multi-part print
Ugh, It happened again today.
I even rebuilt my hot end and the enclosure paying careful attention to the wires that could hand a little low. Everything is in it's optimal position.
RE: Need advice on tweaking some settings on a multi-part print
You might try adding a 3 or 4mm brim to those parts, and see if that helps.
RE: Need advice on tweaking some settings on a multi-part print
I haven't added a brim. I see 3 options, brim type, width and separation gap. What would you recommend?
RE:
For Brim type choose "outer brim", for Brim width I would use between 3 or 4 mm. That's based on the images you provided above, and for separation gap, on my MK3's I use 0.03 some people like to use 0.05, it depends on how you have your fist layer set. I would try the separation gap set at 0.03 first, if you find the brim not so easy to remove then increase the separation gap until it prints to your liking.
Regards
RE:
I added the outer brim at 3mm thick and separation gap of .3. I printed this STL dragon-v2 , you can see the settings. I printed 4 of the same dragon and 3 out of the 4 were fine, but one got messed up and destroyed the rest. What can I tweak to try again?
Edit - I think I see my problem! I set the separation as .3 and it should have been .03. Big difference!! I'm changing the width to 4 and separation gap will be .05


