Loose bridges and other issues
Notes about the parts in these pics:
1) The red is Inland PLA+ that has been in and out of a ziplock bag with descant for a month.
2) Most of the black part is the black spool I bought with the printer (just the regular PLA, not Prusament). It has only been opened for a week.
3) The last 8ish layers of the black part are from 2 separate Amazon PLA samples.
4) I used about half the Prusa black roll printing other parts with the same settings as the black part here and all look perfect (only one small bridge).
5) The red was used for a POC/test and is using 2 perimeters and a 20% gyroid infil.
6) The black is using 7 (or was it 9) perimeters and a 50% gyroid infill (same as the other parts I printed from the black spool).
7) Adhesion to the base plate was good.
8) Air temp at the printer for both prints stayed in the 72-75f range the whole time with a 20-22% humidity.
9) They were printed with a small foot on the plate and lots of support structure to keep the top finish consistent with the other parts previously printed.
10) 2 of the black parts were printed at the same time and both are equally terrible.
11) Both prints were at 0.2mm with a 0.4mm nozzle running at 215/60 degree temps.
I've had issues with the first layer of large bridges being nothing but loose strands, tough it hasn't impacted the results of the overall print. I found that Slic3r was defaulting to not supporting bridges and disabled that option. That has helped quite a bit, but I am still having issues as shown here. Any ideas what my issue might be? Also note that the Prusa black is a lot worse than the Inland.
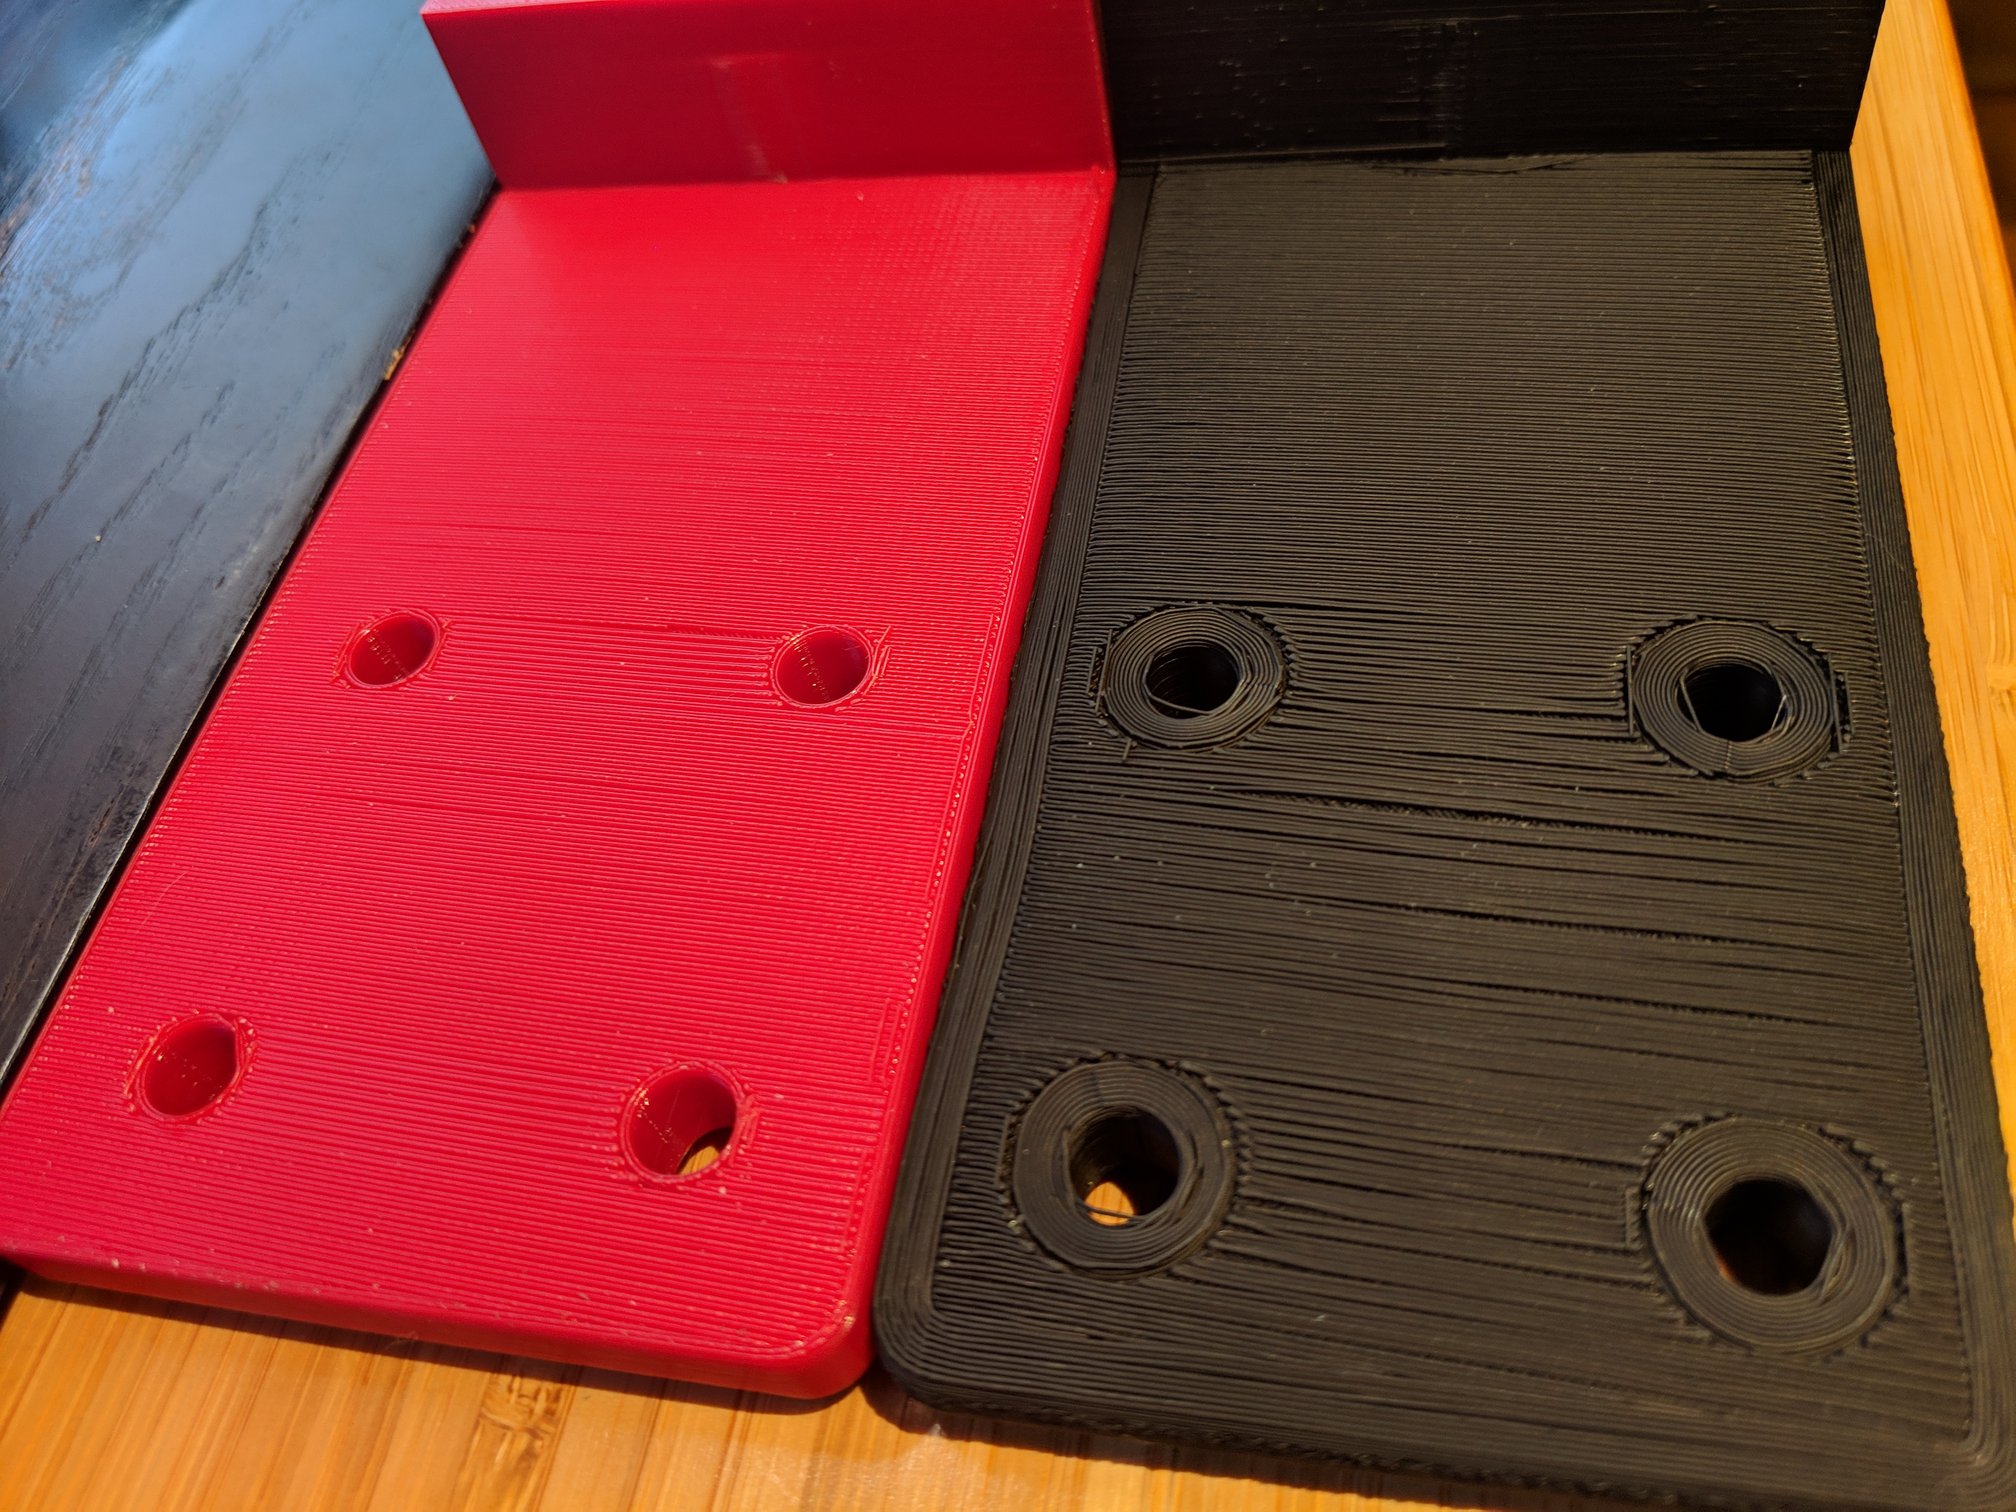
The second issue is that first layers (looks like all the perimeter layers) are messed up. If that area was flat on the build plate I'd say it was poor plate adhesion. You can see in the second pic that the distortion carries around on the front where supports wasn't used. The red part shows what looks kinda like a layer shift in the same place on the front, but it's much less obvious (due to only 2 perimeters?). Any ideas about what happened here?
Re: Loose bridges and other issues
No fact based ideas about the infill; I'd guess the filament extrusion rate was marginal for the red, and way too low for the black. Did you measure the filament diameter?
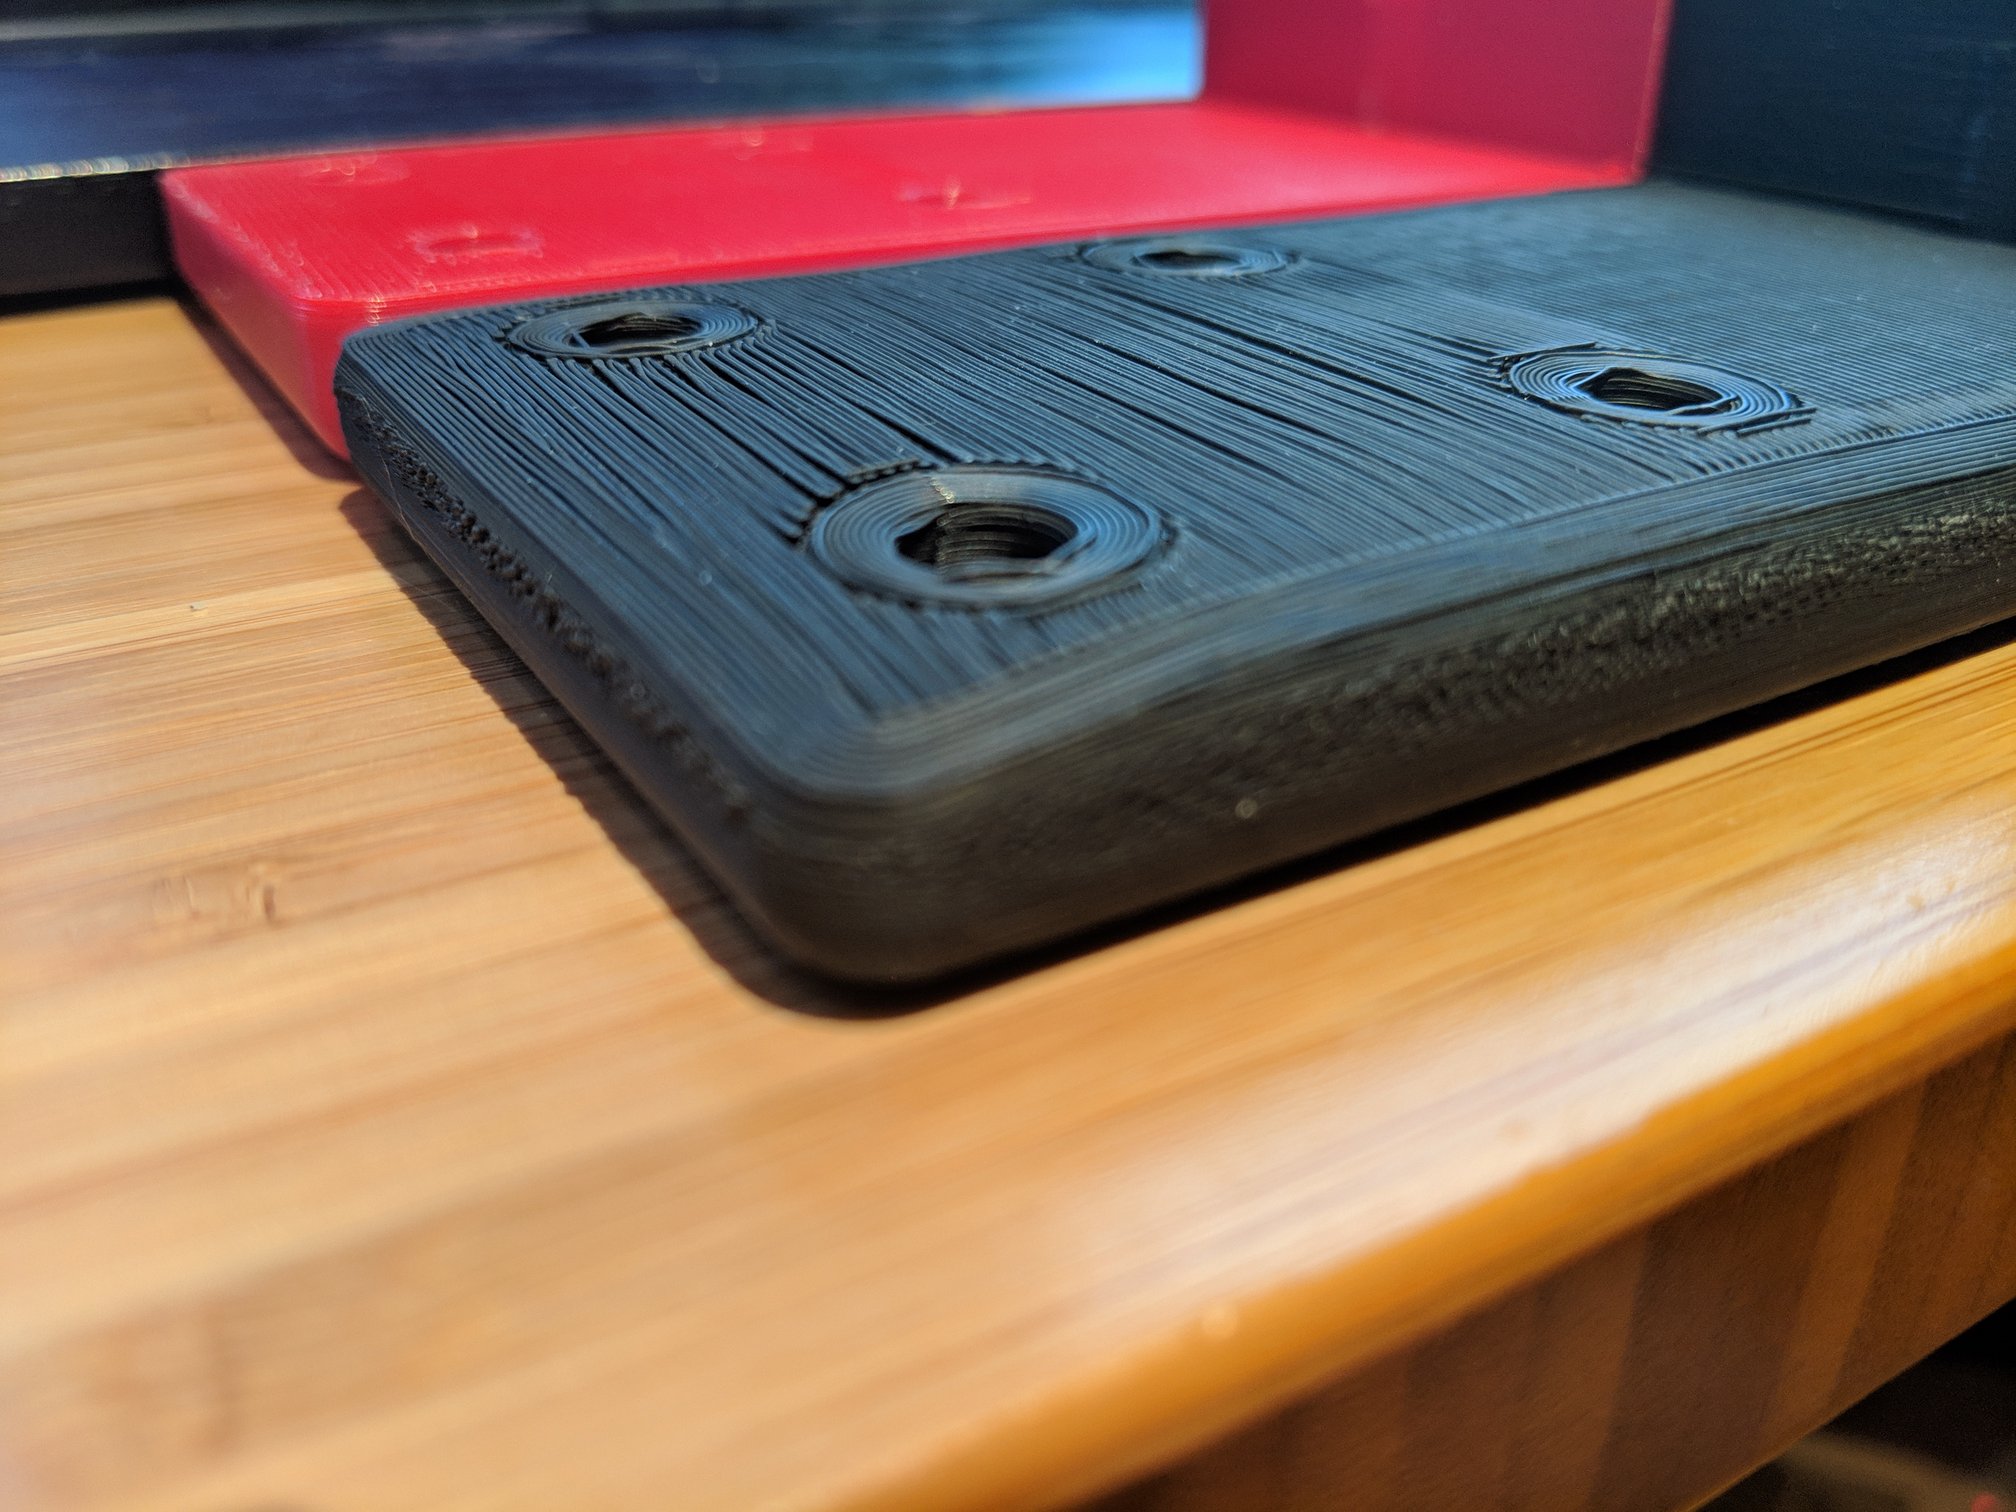
However, in the side views, sides look as if the black part lifted from the bed, or warped, during printing; causing all that extruded goop on the edges.
Re: Loose bridges and other issues
Picked up fresh rolls of Inland's PLA+ in black (same stuff as the red) and re-ran the print and both parts came out on par with the red part shown above (first layer after the support was still very "thready", but they seem to be fixed in place better). This print was done with the same gcode file that produce the above disaster in black. No other prints were done in between and nothing was changed on the printer.
No fact based ideas about the infill; I'd guess the filament extrusion rate was marginal for the red, and way too low for the black. Did you measure the filament diameter?
Nope, but this was "fresh". I ordered it with the printer (arrived mid Dec) and had just opened it earlier in the week. When not printing (while I designed and test printed the red part) it was stored in a ziplock with descant. The parts printed with the first part of the roll (same settings) all came out fine, though none of them had supports.
Additionally the humidity has been low lately where the printer is (20%-ish), so I don't think it's a hygroscopy issue.
What are the odds that half the roll was good and the other half was bad?
However, in the side views, sides look as if the black part lifted from the bed, or warped, during printing; causing all that extruded goop on the edges.
Nope. In the first 2 pics the parts are upside down. In the 3rd pic you are looking at them right side up. It's only that little bit at the front that was touching the plate (and both had good adhesion). What looks like an adhesion problem is actually from where the part (didn't) interfaced with the support material.
Re: Loose bridges and other issues
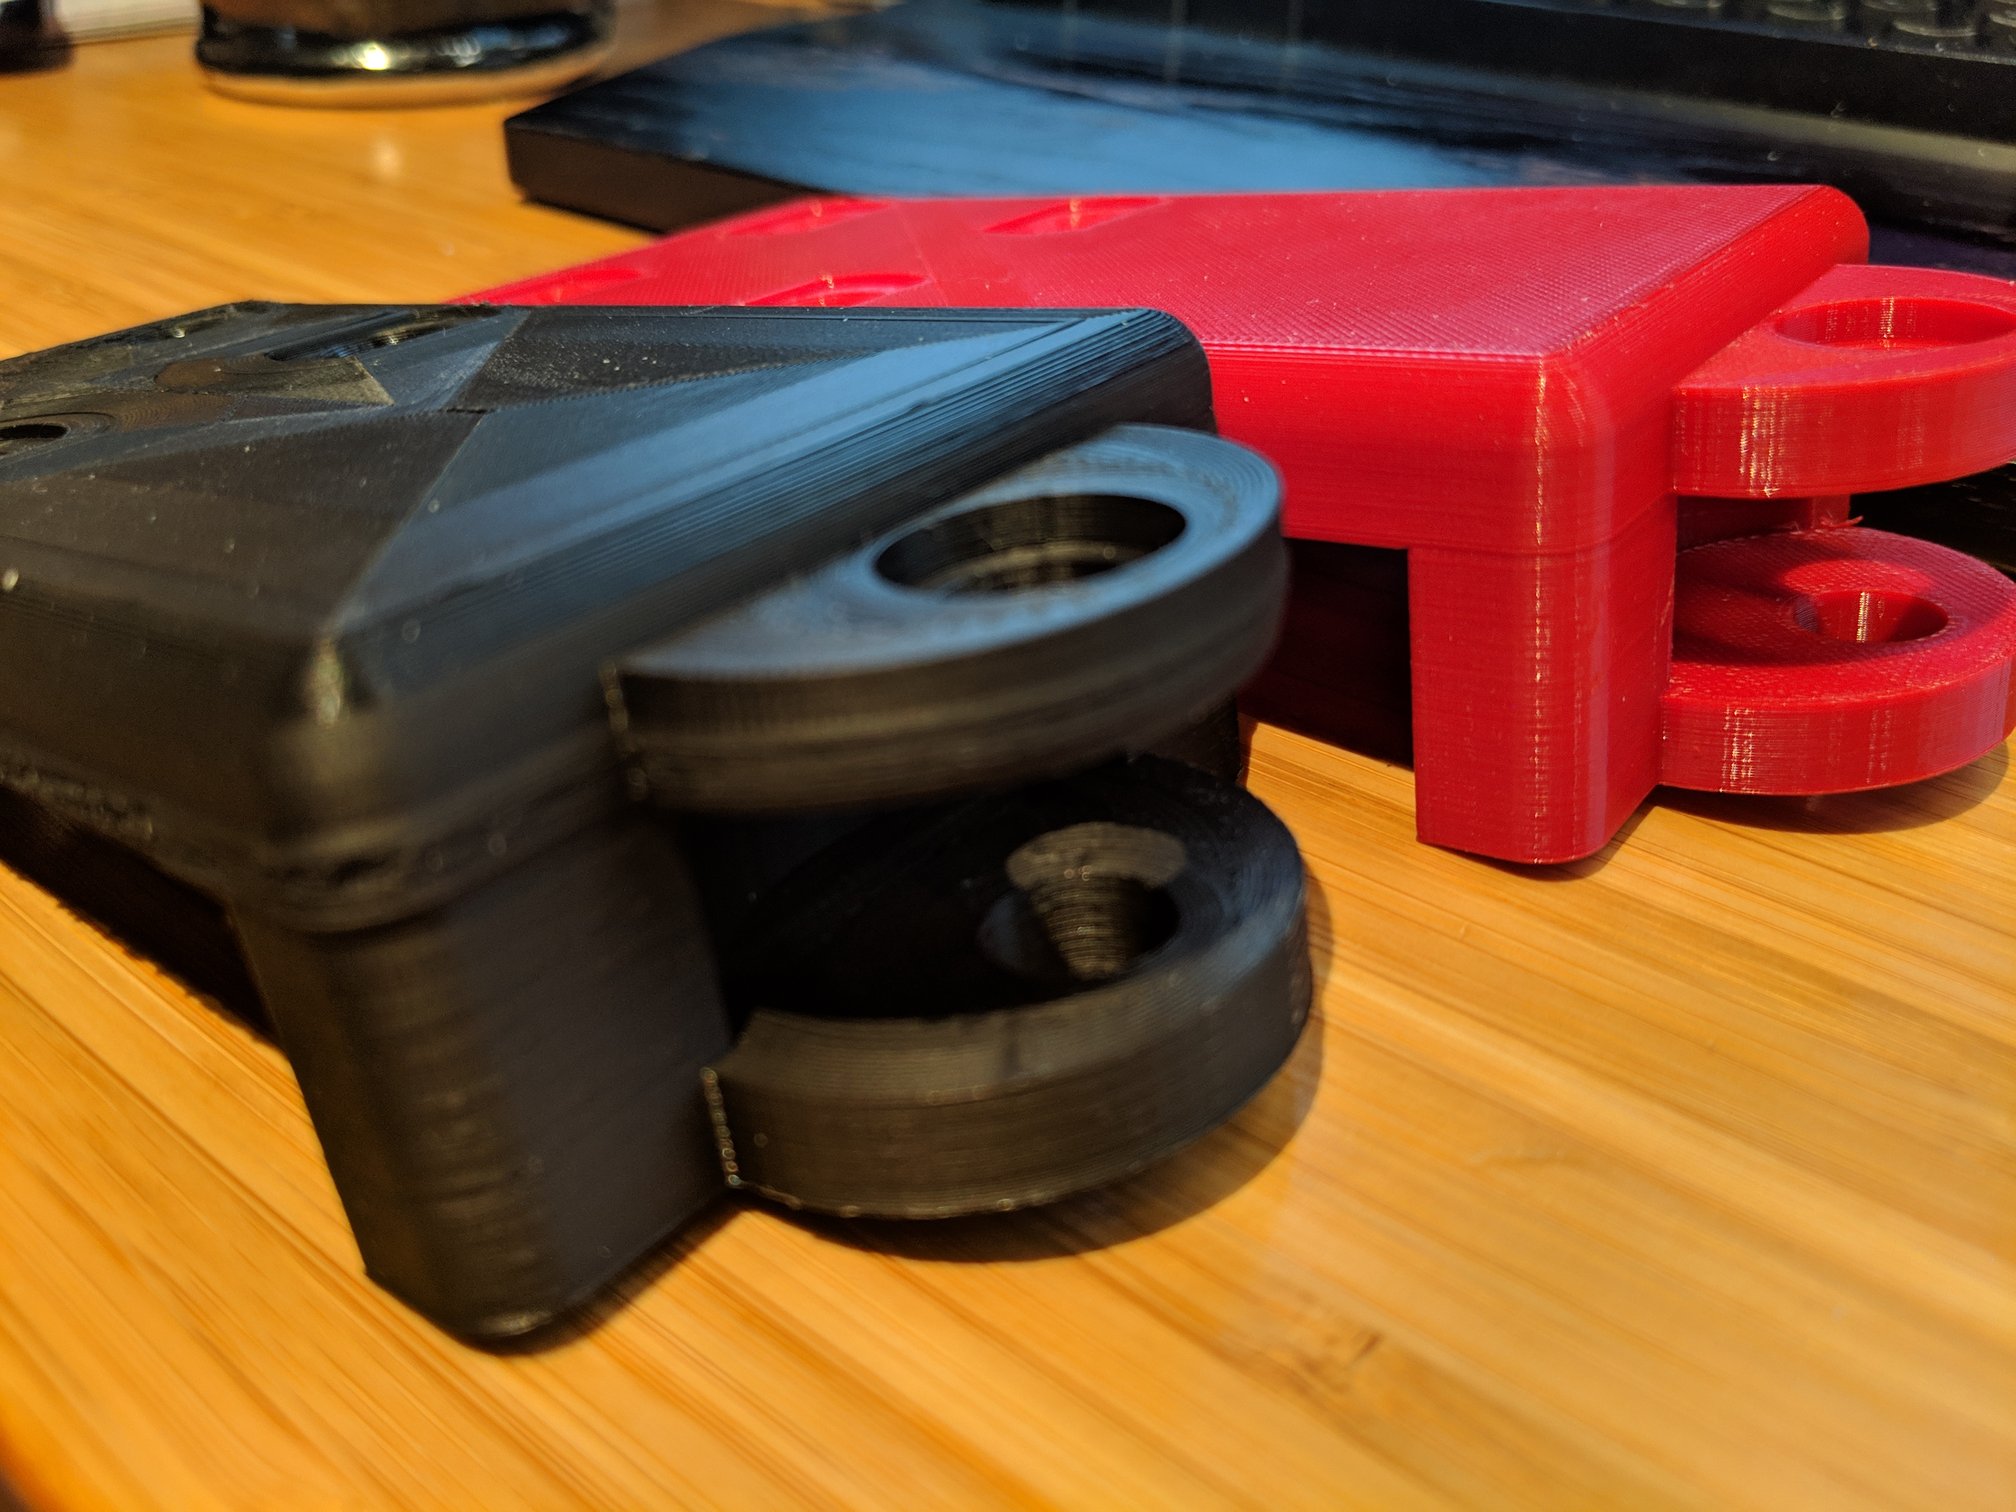
The yellow area looks like squishing that is common when a part lifts. If not lifting, then the part was flexing more than the red; which stands to reason since the material wasn't bonding. btw - my earlier comments had nothing to do with filament moisture, my concern was filament volume/diameter: some filament is on the small side and extrusion feed rates needs correction.
I am a bit surprised the printer was able to print an overhang as large as this. With that in mind, the red filament print is impressive. I'd love to see the end of the red gcode file to look at your settings (if sliced in Slic3r). In my experience, any time I try to print anything large like this the slicer decides to start a layer at an unsupported corner - and I've learned to not attempt this.
Re: Loose bridges and other issues
The yellow area looks like squishing that is common when a part lifts. If not lifting, then the part was flexing more than the red;
Yeah there was definitely lifting and you can see the warping on the black piece in the first pic. The oddity here (to me) is that the lifting was off the support structure (same material as the part) rather than the typical lifting on the PEI sheet. I didn't measure, but I'd eyeball the gap better the support structure and the corner of the black part in the foreground of the first pic was probably in the 3mm+ range. I'm rather shocked that it didn't have any collisions actually.
btw - my earlier comments had nothing to do with filament moisture, my concern was filament volume/diameter: some filament is on the small side and extrusion feed rates needs correction.
Ah. I've never had need to measure the filament so it's not something I regularly do. Except for this print I just feed it in, let it go, and have had success (Prusa, Amazon, and Inland).
I am a bit surprised the printer was able to print an overhang as large as this
Why would this be a surprise? it had 100% support material coverage (turned off "detect bridging" or whatever the setting is that causes it to just do a perimeter of support and leave a wide space open in the center.
I don't think I have the gcode from the test print (red) any more, but I'll try to remember to post the info later that was used for the pictured black print as well as for the re-print with the Inland PLA that was successful.
Re: Loose bridges and other issues
If your bridging is loose, try enabling Detect Bridging (There is a tick box somewhere), and bridging flow turn it down , try 0.85.
If you want to test quickly, on Thingiverse find Fast informative Temperature Tower: https://www.thingiverse.com/thing:3127899
Use Slicer at 0.2mm setting to split the model exactly with one layer of the first bridge and export this as an STL.
Discard the rest.
This one section model is quick at getting first layer, elephants foot, detail, temperature, stringing and bridging dialled in.
You will find as you test at a hotter extrusion temp and not enough cooling, the round tower will start to wobble and deform, also the small middle spike is very good for getting the settings just right for best detail, you can adjust settings to reduce stringing as you will get some esp. from the small cone to the round tower, and most importantly, you can get bridging setting set up ideally.
If you go too cool you will find your bridging failing, but there will be less stringing and better detail, but also a weaker print, it's all about finding the best balance of all the elements. It's rare to find everything ideal (Or so I thought until I tried Technology Outlet Advanced PETG (Black), this stuff prints really well and is amongst the cheapest filaments on Amazon.co.uk!).
And it all takes just 5 minutes!.
I start with the manufacturers recommended temperature, then reduce to improve detail and reduce stringing, whilst still being able to get the first bridging connection made and not dropping, then alter the bridging flow value to get nice tight bridges without breaking.
If you have a filament that shrinks, it makes a right mess of the hollow square tower and is so much harder to dial in so I would maybe not recommend this method unless you are really really patient!.
Once printed and cooled, I pull apart the model and snap the cylinder etc to check for strength and adhesion and use a USB microscope to check the corners for issues. like I stated, filament that shrinks, oh boy, trying to get a non curling corner!
I find this to be a really good way of quickly dialling in new filaments, before trying something a bit more challenging and time consuming like overhangs.
Normal people believe that if it is not broke, do not fix it. Engineers believe that if it is not broke, it does not have enough features yet.
Re: Loose bridges and other issues
If your bridging is loose, try enabling Detect Bridging (There is a tick box somewhere), and bridging flow turn it down , try 0.85.
Yeah I had to change the detect bridging setting to get it to fully support the large bridge. Otherwise only the outer 3-5mm was supported leaving a ~60mm unsupported span in the middle.
I did not know there was a bridging flow option (still finding options as I learn). I'll poke around and give it a try.
Thanks for the link to the test piece too.