Large PETG printed box
Hi there,
I'm trying to print a box, it's basically a shoes box, the base is 150*247mm so I'm in the limits of the MK3...
in a first attempt I tried with PLA 2 times, but I had some warping in the middle (and not on the corners) then the nozzle crashed.
Now I'm trying with PETG, but I have a fair amount of warp on the corners....
Any tips?
I'm using PRUSA PETG, prusaslic3r PET default profile, 0.3 layer height and textured steel sheet.
MK3 updated to MK3S / mainly textured steel sheet (also have a smooth one) / PLA and PETG
RE: Large PETG printed box
On full plate petg parts, i add brim or pads. I also try to round the corners of the design if possible.
I have an enclosure that helps too.
Then when there are high lift up forces, i add diy clips on the edge of the plates to maintain the steel sheet flat as the magnets are not strong enough.
RE: Large PETG printed box
I put a small brim on this PETG box in Prusaslicer and wound up with a small 1-2mm lift on each corner. The final print is about 85mm tall. I have had some success in the past with just modeling brim tabs where I want them in Fusion 360. The only way I have been able to completely stop is it was by enclosing the printer and having the ambient temp at about 100F for a pla print.
RE: Large PETG printed box
Let me just add printing a big box is hard.
It has a lot of mass, and cools down a lot as it goes up. That is a lot of shrinkage force at the corners.
If brim does not work, you need something to reduce cooling. Maybe a temporary tent over the printer.
RE: Large PETG printed box
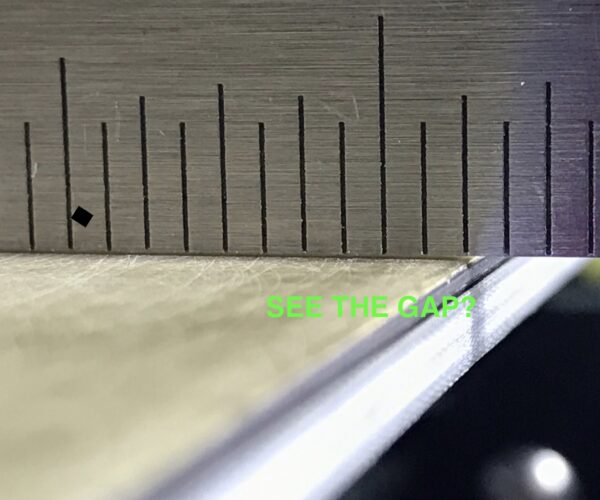
I've also run into this issues with large parts and the corners coming off the build plate and warping on the outer edges. When your heat bed is up to printing temperature just a straight edge and see how flat your bed is. If I had to guess the left and right outer edges will be lower than the middle of the bed. So between the stress for cooling in the corners and not the best adhesion your are getting the warping. Also try to reduce drafts and cooling like @robert-rmm200 said above.
RE: Large PETG printed box
Thank you all for your replies.
Some update from my side,
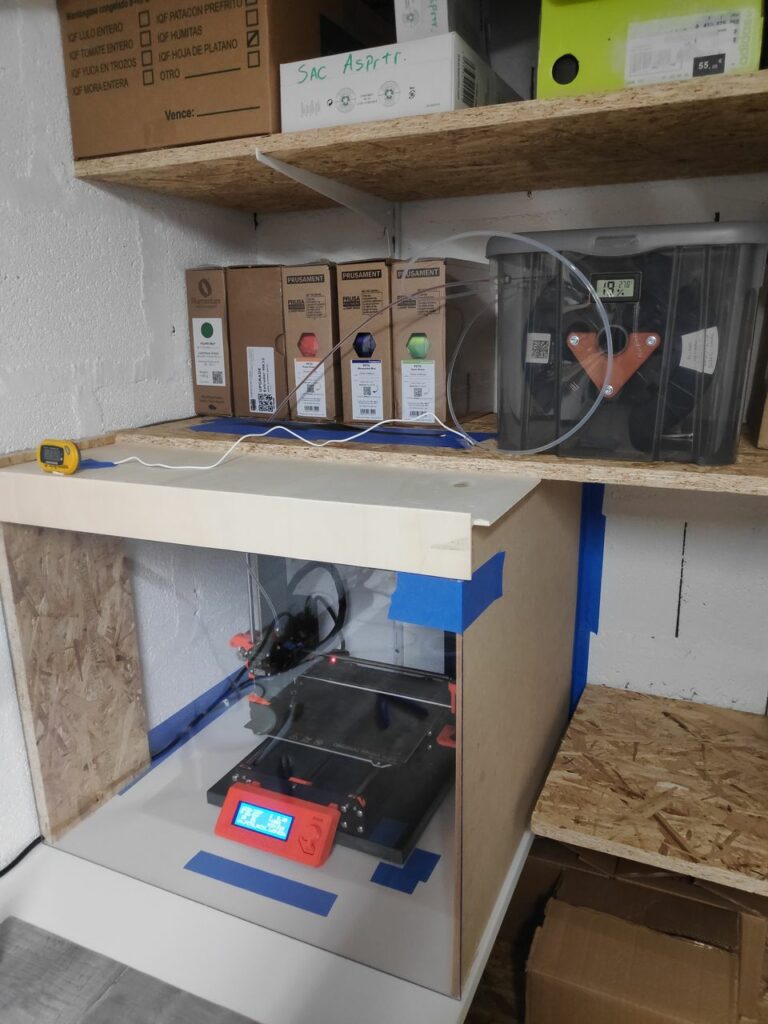
- I built a temporary enclosure (with wood and acrylic leftovers)? It kept the temperature at 35.5°C (measured on the "roof" on the enclosure).
and
- I added some "brim tabs" on fusion (0.4mm/2 layers). only in one direction, since I was at the maximum of the bed dimensions.
Results:
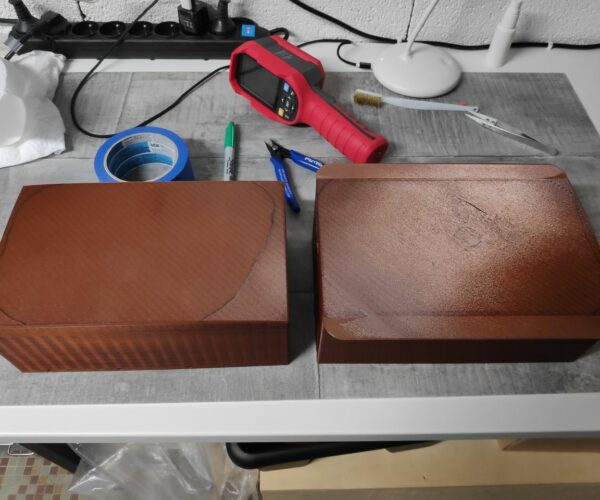
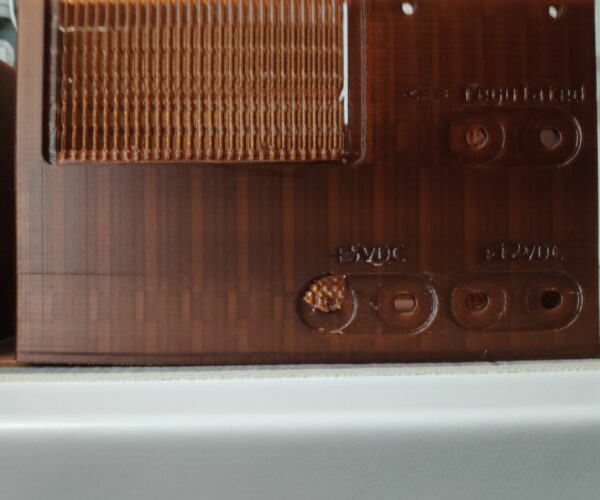
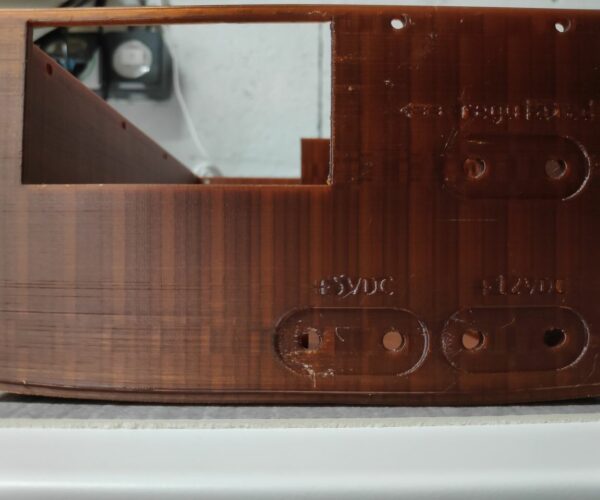
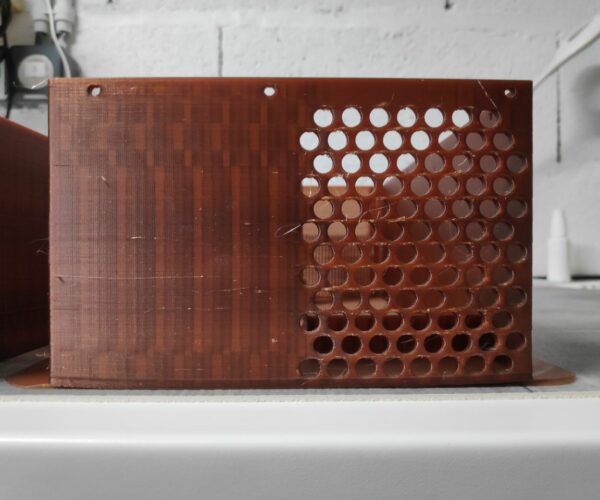
I still got some warping on the corners, probably about 2mm, but the box I believe will be quite usable.
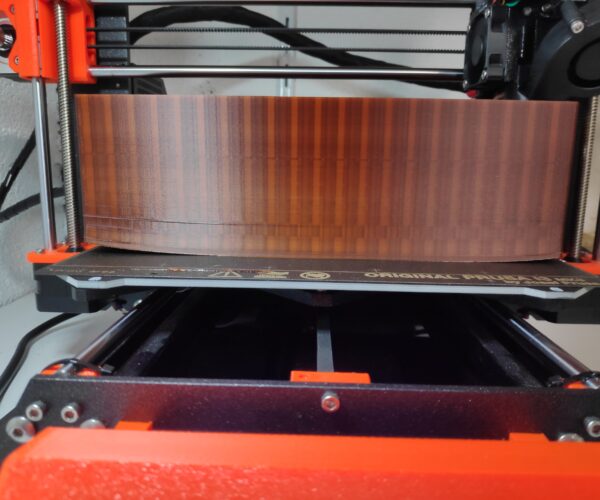
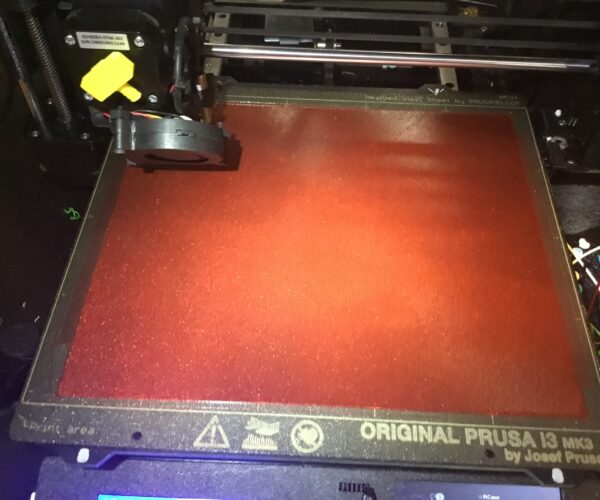
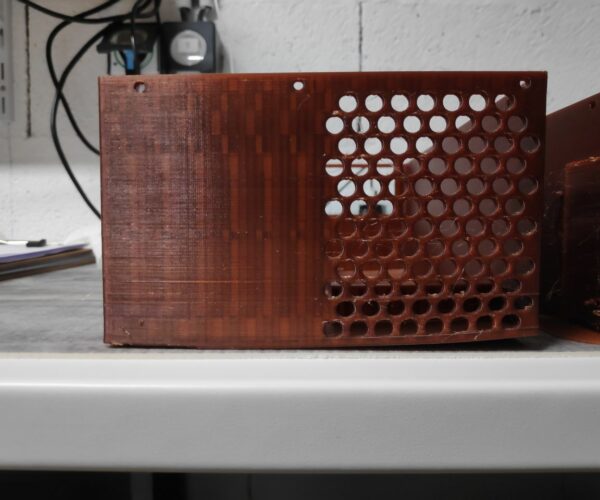
here some pictures of the old vs. new print (at the bottom I draw with a marker the edges of the areas that lost adhesion with the bed)
MK3 updated to MK3S / mainly textured steel sheet (also have a smooth one) / PLA and PETG
RE: Large PETG printed box
The image of the printer enclosure gets weirdly distorted... still, if you open it it will show fine, and on th post preview shows fine as well....
MK3 updated to MK3S / mainly textured steel sheet (also have a smooth one) / PLA and PETG
RE: Large PETG printed box
Persistence pays off in the end. Glad you succeeded!
RE: Large PETG printed box
Nice improvement.
Two other things came to my mind (if don' already do it) because I think you can achieve better. It is quite a lot of material to test, may be next time:
- 7x7 bed leveling instead of 3x3.
- I prefer the powder coated sheet, it is more reliable for that case. But you may not like the surface finish. PETG sticks too well to the Smooth Double-sided PEI if properly cleaned or not enough if not cleaned.
When I do something like you (120mm tall), it is the magnets that are not strong enough to retain the sheet. I have to add some clip. It is not the part corners that detached and I use some copolymer that is more sensible to warping than standard PETG.
RE: Large PETG printed box
Glad to see you're making progress.
If you plan to print with the enclosed I would recommend relocating the power supply and even the display outside the enclosure. My display started displaying 🙂 weird behaviors when I first started using mine in an enclosure only reaching around 90 - 100℉ (32.2 - 37.7℃). You don't have to, but the extra heat will degrade the electronics at a faster pace.
RE: Large PETG printed box
- 7x7 bed leveling instead of 3x3.
How/where do I get to choose?
- I prefer the powder coated sheet, it is more reliable for that case. But you may not like the surface finish. PETG sticks too well to the Smooth Double-sided PEI if properly cleaned or not enough if not cleaned.
I'm printing on the powder coated sheet. I haven't had any success on the smooth PEI sheet and PETG.
Glad to see you're making progress.
If you plan to print with the enclosed I would recommend relocating the power supply and even the display outside the enclosure. My display started displaying 🙂 weird behaviors when I first started using mine in an enclosure only reaching around 90 - 100℉ (32.2 - 37.7℃). You don't have to, but the extra heat will degrade the electronics at a faster pace.
I don't plan to.... I'm new to PETG and with small parts I don't seem to need the enclosure. But just in case I would like to be prepared... so:
1) how do you extend the display cables?
2) how do you extend the "power panic" cables on the power supply?
3) I haven't seen anything about putting the RAMBO board outside the enclosure, no need to?
4) would it be wise to put some aluminium heatsinks on the top of the TMC chips inside the RAMBO? (even if I continue to work without enclosure)
MK3 updated to MK3S / mainly textured steel sheet (also have a smooth one) / PLA and PETG
RE: Large PETG printed box
@jorgemarmo
It is somewhere in the settings of the printer. I'm not in front of an idle printer to tell you the path to that settings with the knob.
It should help to better find the altitude of the corners of the plate.
And you could preheat the plate for 10-15 minutes to stabilise its deformation before the mesh levelling.
It was introduce with firmware 3.7.0:
https://github.com/prusa3d/Prusa-Firmware/releases/tag/v3.7.0-RC1
RE: Large PETG printed box
That my Start G-code for almost all my parts, I wait for the PINDA to reach 35°C:
; START G-code
M862.3 P "[printer_model]" ; printer model check
M862.1 P[nozzle_diameter] ; nozzle diameter check
G90 ; use absolute coordinates
M83 ; extruder relative mode
;
M104 S{first_layer_temperature[initial_tool]-50} ; set extruder temp
M140 S{max(70,first_layer_bed_temperature[initial_tool])} ; set bed temp
G28 W ; +home all without mesh bed level
G1 Z50 ; raise extruder before preheat
M190 S{max(70,first_layer_bed_temperature[initial_tool])} ; wait for bed temp
M109 S{first_layer_temperature[initial_tool]-50} ; wait for extruder temp
G0 X50 Y50 Z0.15 ; this is a good PINDA heating position
M860 S35 ; the new code - wait until PINDA is >= 35C
M140 S{first_layer_bed_temperature[initial_tool]} ; set bed temp
M190 S{first_layer_bed_temperature[initial_tool]} ; wait for bed temp
M104 S{first_layer_temperature[initial_tool]} ; set extruder temp
G80 ; mesh bed leveling
M109 S{first_layer_temperature[initial_tool]} ; wait for extruder temp
;
G1 X75.0 Y-3.0 F1000.0 ; go outside print area
G92 E0.0
; prime line [filament_type]
{if filament_type[initial_tool]!="FLEX"}
G1 X125.0 E9.0 F1000.0
G1 X200.0 E12.5 F1000.0{endif}
; end prime line
G92 E0.0
M92 X100.15 Y100.25 ; echelle
M221 S100 ;M221 S{if layer_height<0.075}100{else}95{endif}
RE: Large PETG printed box
@jorgemarmo
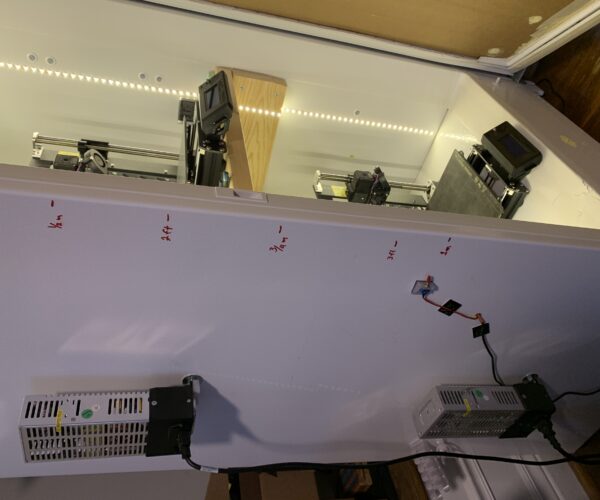
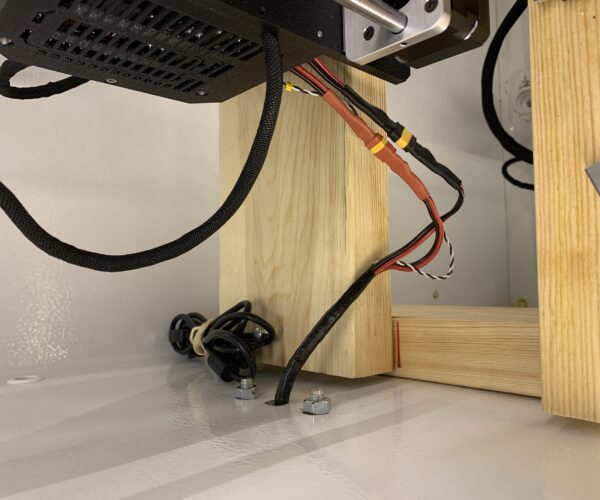
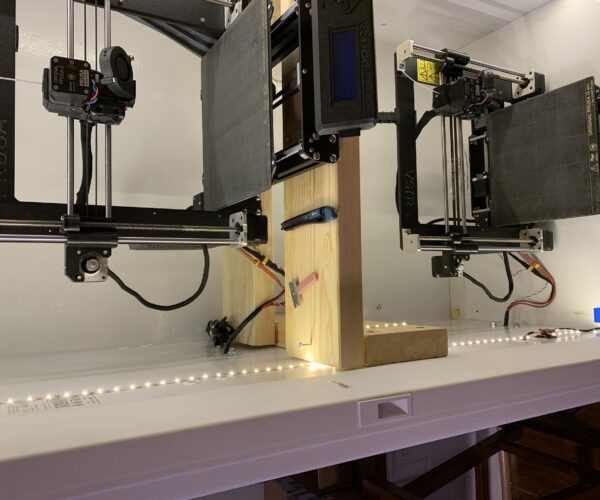
I didn't end up moving my display after finding out my enclosure was getting so warm. For me the main reason for the enclosure is to keep the sound down, not heat in. So with that enclosures I added a temperature controlled exhaust fan. The other enclosure I just keep the door cracked about an inch. If I keep the door shut with one printer going with PETG it will warm up to around 32℃, with both printers going around 43℃. I didn't need to extend any of the power or power panic wires. I mounted the power supply on the same side as the rambo board (see photos). The enclosure was a broken repurposed upright stander size freezer, this should give you a reference of size. I removed everything having to do with the refrigerant system and just kept the frame.
I haven't heard any issue with keeping the rambo board inside or the need for heatsinks, but they can't hurt. I know some people add a fan to the rambo board enclosure. If you are considering moving power supply, display or rambo board I'm sure there's forums that go into that subject.
I don't know why it rotated my photos.
