Imperfections in the surface of a Katana // Slicer Gaps
Hey Guys,
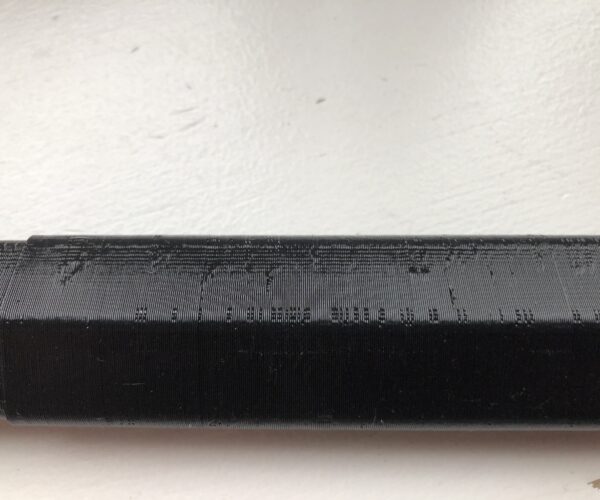
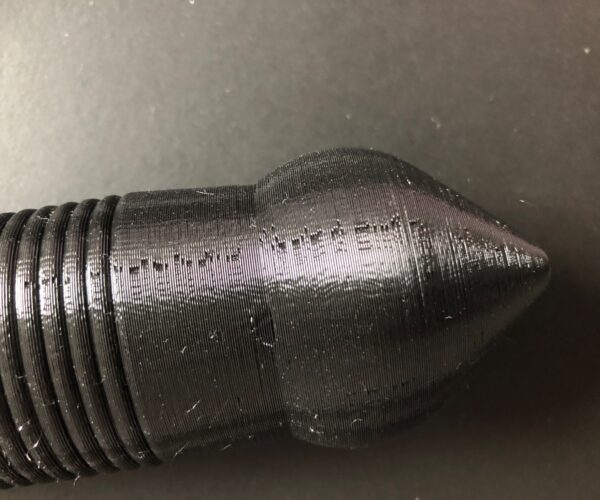
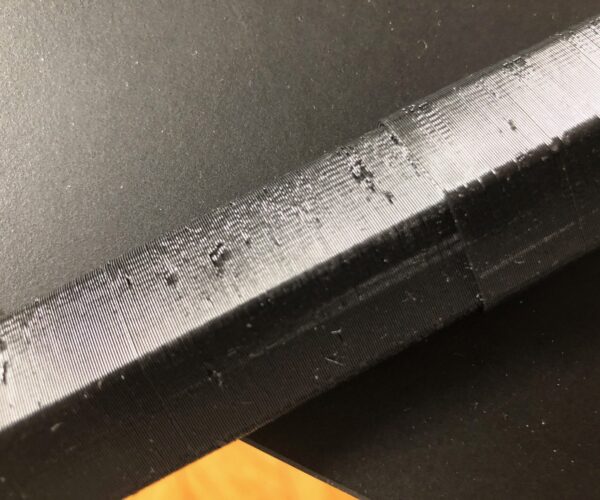
I just came to a collapsable Katana I printed over night and I do have a lot of imperfections in the surface resulting in it mechanical barely working. I Printed this one with Prusament Jet Black PETG. It seems there are two problems:
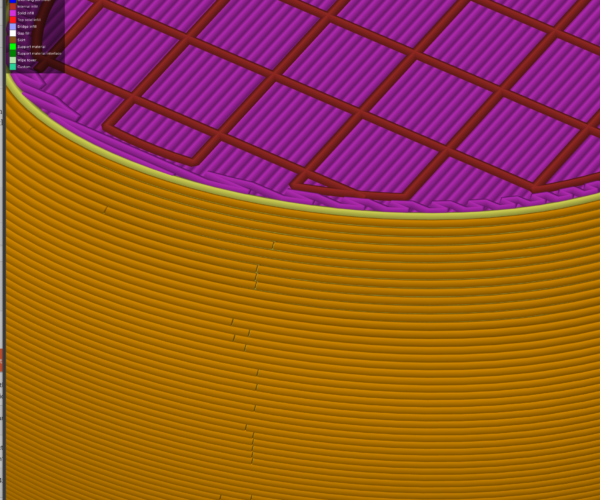
1.) In the slicer at the seams of the perimeters there is this little gaps that result in way bigger gaps in reality.
How can I avoid that?
2.) Especially in the inner part (which consist basically only of 1 perimeter) there is a lot of little bumps followed by little dents in the layers.
Settings:
Standard Prusament PETG Profil
0,2mm Speed settings printer profile modified for 0.3mm layer height, Speed reduced on printer to 90%
0.4mm Platted Copper Nozzle
Volcano Hotend
Flow 95%, Standard extrusion width according to filament profile, Temp 235 Nozzle.
Thank you for your help.
RE: Imperfections in the surface of a Katana // Slicer Gaps
Those gaps on the preview visualiser are the seams, where a perimeter starts and ends. Unless printing in vase mode (which is a single perimeter with no infill process) you cant remove them. Its a natural artefact of printing with fdm printers. You can tune things to minimise them by tuning your settings, especially filament and extruder settings to minimise them but doing that with a volcano is probably going to be harder than with a normal v6 (which isn't easy anyway). Basically you make sure the steps per mm on the extruder is correct (should be on a stock printer but you are running a modified hotend so could need checking). Setting the filament diameter to exactly match your measure filament in reality etc.
You can also play around with the retraction settings, distance, retraction speed, extra length after retraction etc. There are lots of variables all of which needs a tweak and print process to get dialled in right. Other slicers have a method called 'coasting' which can work well but that is not as yet supported in Prusa Slicer.
The one thing you can do is control where they are placed somewhat by setting slicer to either rear or aligned seams. The default setting basically tries hide them in corners and mostly does an ok job. However on round objects there are no corners to hide them in. My usual preference is rear and then rotate the part to put the seam in a line where I want it. That way they are easier to post process remove via sanding etc.
RE: Imperfections in the surface of a Katana // Slicer Gaps
Thank you @neophyl.
I´ll try to tweak the settings aiming at minimising the effects.
Remain the bumps and dents I got. Is there a common explanation for this? Like wet filament or anything else?
RE: Imperfections in the surface of a Katana // Slicer Gaps
@alex_sc
The bumps and dents could also be the seam from your description. As its a single perimeter it can behave slightly differently. I cant tell from the pics but if the bump/dent occurs in only one place at each layer then its likely. The seam nearest alignment will tend to move it around until you use one of the aligned/rear option. Id do a new print and see if they go away too.
Uneven extrusion can be caused if the nozzle isn't fitted correctly. But that is also usually in tandem with a leaking hot end with plastic working its way up and down the threads and eventually dropping off on to the print. If you don't have that then its unlikely to be that. A little gap between the nozzle and heat break inside of the heater block forms a small reservoir of plastic which means the actual extrusion is slightly out of sync with what the printer is expecting to happen. It pushes more in but instead of flowing out the nozzle it first has to fill up the gap so you get less extruded. When it stops feeding the reservoir carries on letting the plastic out where it shouldn't = uneven extrusion.
First indication of wet filament is it produces a lot more stringing when printing. If the stringing is more than I'm expecting then I'll dry it out otherwise its usually not that. If you hear a popping sound as its printing then its got really wet as the moisture boils off in short bursts.


