How can I print a thin water-soluble ring around my object's edges?
Printer: MK3S+
Attachment: MMU3
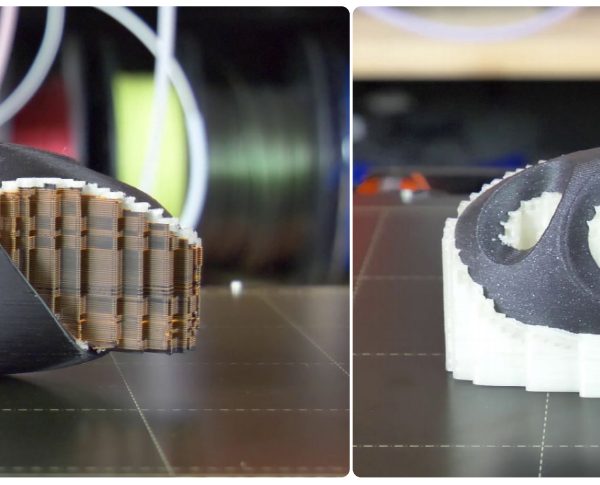
I saw in the Prusa eBook "Basics of 3D Printing" of a picture showing a 3D printed object with a thin PVA (water-soluble) ring around it. The rest of the supports were printed in PLA with the goal being to submerge the print in warm water easily removing all supports (PVA/PLA) at the same time. Unfortunately, the eBook didn't go into details about how to accomplish this.
I'm very interested in doing this myself, but I'm stumped as to how this can be achieved. Is this something that can be achieved in the Slicer "Expert" settings? Or do I have to build this into my model somehow?
Any advice would be greatly appreciated.
Best Answer by Bob Lewis:
hello
Creating a thin water-soluble ring around your object's edges can indeed be achieved using slicer settings. In PrusaSlicer, you can enable "Seam position" under Printer Settings > Extruder 2. This allows you to control where the water-soluble PVA will be placed. You can set it to the outer wall or perimeter of your model.
Ensure your model has sufficient wall thickness to accommodate the water-soluble ring. Keep in mind that precise tuning and experimentation might be needed to achieve the desired result. Testing with a small print can help you fine-tune the settings before attempting a larger project.
RE: How can I print a thin water-soluble ring around my object's edges?
(Pg. 49 in the eBook)
Set the tool numbers in:
Print Settings > Multiple Extruders > Support material/raft interface extruder
&
Print Settings > Multiple Extruders > Support material/raft/skirt extruder
Cheerio,
RE: How can I print a thin water-soluble ring around my object's edges?
hello
Creating a thin water-soluble ring around your object's edges can indeed be achieved using slicer settings. In PrusaSlicer, you can enable "Seam position" under Printer Settings > Extruder 2. This allows you to control where the water-soluble PVA will be placed. You can set it to the outer wall or perimeter of your model.
Ensure your model has sufficient wall thickness to accommodate the water-soluble ring. Keep in mind that precise tuning and experimentation might be needed to achieve the desired result. Testing with a small print can help you fine-tune the settings before attempting a larger project.
