Headband [rinting issue
Hello:
Can anyone make a suggestion?
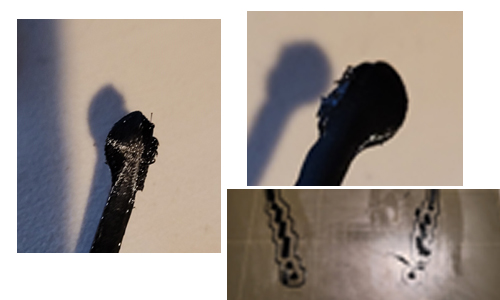
I am trying to print a headband but the two ear sections keep failing. The ear sections are being grabbed and pulled up by the extruder or the end sections do not print with any definitive shape. (I got one print to actually finish printing but the others failed about 15 to 30 mins in the print). See attached photo. The rest of the headband prints perfect.
PETG
70 speed (that speed is where I got 1 to print but the ear sections look terrible as the photo displays).
Speeds of 60 and 50 failed within 15 to 30 mins.
Auto support activated.
Any suggestions?
Thanks in advance.
Tom
Tom Rauscher
RE: Headband [rinting issue
I can't see your pic. Try dragging & dropping the image into the edit area or using the Add Media button above.
From your description, it sounds like narrow parts of the print are coming loose. This is usually due to poor adhesion. Here's an info dump on the subject:
-
A dirty PEI print surface. Even if you don't think this is the cause, it's always a good idea to make sure your PEI surface is clean before trying any other fixes. If it's a smooth PEI sheet, take it to the kitchen sink and give it a good dunk with Dawn (original formula, no vinegar or hand softener variants) dishwashing soap or your local equivalent (e.g. Fairy in UK). Use a clean paper towel to clean it off, and another to dry it. Avoid using any sponge or cloth that has been in contact with grease. Above all else, avoid touching the PEI print surface. Once it's good and clean, you should be able to use 91%+ isopropyl alcohol between prints, 100% acetone when that fails , and another dunk when acetone fails. Worst-case, use a 3M 7445 ScotchBrite (1200-1500 grit) pad or equivalent on smooth PEI to give it a very light buff, but only infrequently. If you've got a textured powder-coated PEI print surface, the official instructions are to use 91%+ isopropyl alcohol on it only. Rumors persist that some have had good luck getting started with these sheets by giving them a wipe with 100% acetone and a dunk with Dawn. Either way, there's no real warranty on these sheets. YMMV.
-
If you have not already done so, try using Jeff Jordan's "Life Adjust" procedure for calibrating your Live-Z setting. It is much easier to use and understand than the onboard routine and much easier to make mid-print adjustments accurately with. In general, start high (less negative) and work lower (more negative) in large increments (e.g. 0.1mm) until the filament starts to stick on its own. When you've got your Live-Z setting adjusted properly, you should be able to gently rub the extruded lines on the PEI surface without dislodging them. Then start lowering (more negative) the level until there are no gaps between layers. You should not be able to peel the lines apart after printing, but the top should be regular.
Headband printing issue
@bobstro
Hello:
Thanks for all the info. I am up on most of it.
Tom
Tom Rauscher
RE: Headband [rinting issue
head band shapes can be difficult to print because of something called warping - it is due to long linear shapes that build up many layers in the same direction. The problem is linear shrinkage. It builds up layer after layer imparting a shrinking force at each horizontal layer. As the layers grow taller, the forces from each layer combine and have a vertical element, that results in the ends of your print part separating from the bed before them other parts. for a linear part (and curves don't change the rules) this means the ends typically start lifting up and separating from the bed mid-print - which causes all kinds of mischief.
Learn about - Brim. This is a 102 to 204 level learning element (out of 440 as top difficulty learning curve stuff) - so freshman year.
Learn about mouse ears (330 - 402)
RE: Headband [rinting issue
@dan-rogers
Dan - thank you. Going back to school to learn. 🙂
Tom
Tom Rauscher