First layer issue after calibration
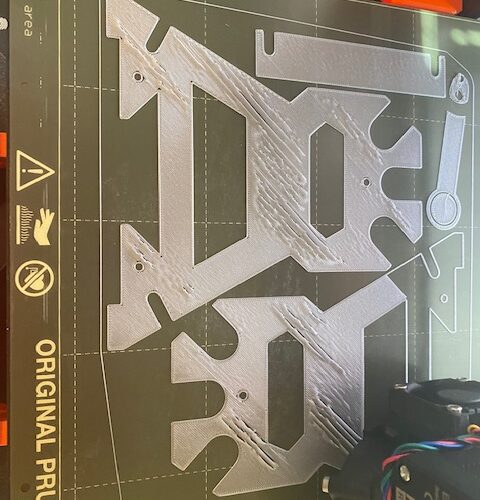
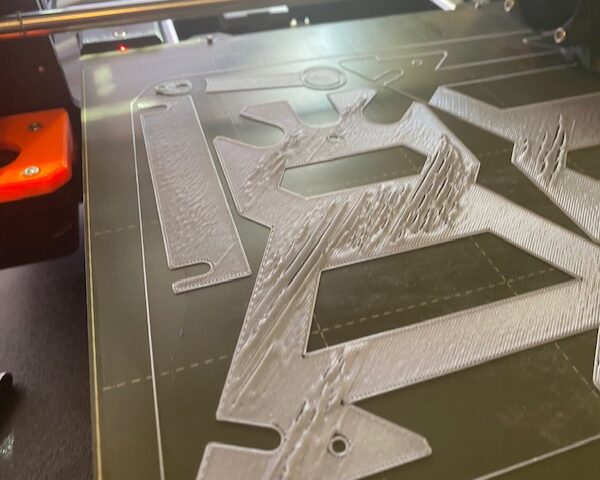
I am new to 3d printing. I am using Prusament PLA to print parts for reel rewinder and I keep getting these bubbles. I think my calibration is good. Some parts are fine in the photo. I have not adjusted any slicer settings in PrusaSlicer. I have tried generic filament with the same problem. Any guidance is appreciated.
RE: First layer issue after calibration
Your sheet looks dirty which might be causing adhesion problems just in certain areas. Try cleaning with dish washing detergent and plenty of hot water.
Mk3S+,SL1S
That and your Z is too low (that distortion is very too-low-z looking)
Wavy like water = z too low. Causes blobs of filament to build up onto the nozzle, and on some prints that blob then drips off, and may cause a crash later in the print.
RE: First layer issue after calibration
I adjust Z to -0.855 on the standard calibration and cleaned the bed. PLA 215 / Bed 60
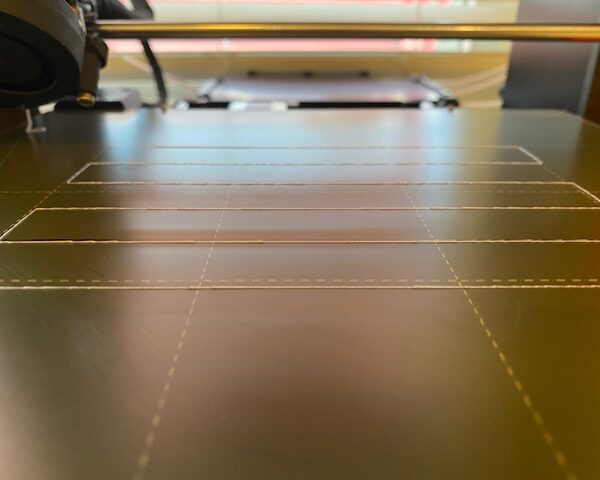
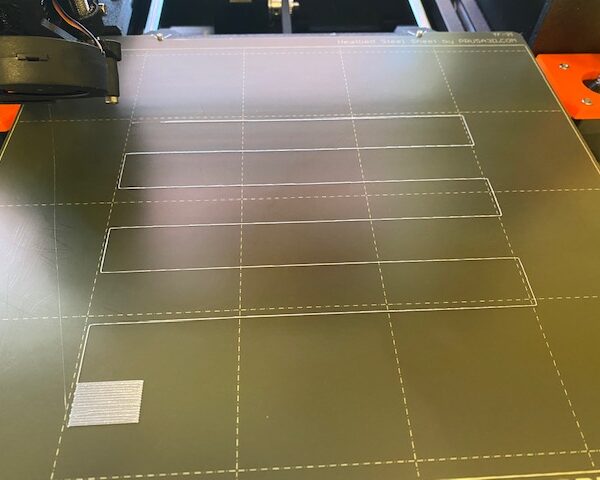
I can see the filament looks wavy and lifted from the bed in spots. When the final square is complete it looks good and has adhesion to the bed, but the lines are not sticking.
Almost there - go lower
The tell (poker term) in your description and pictures is that the square traces sometimes skip (not adhering) and the final square looks good but the lines are not bonded to each other (not enough squish) give the high confidence solution of the first layer Z (aka live Z) is too high.
Clear the bed, repeat the first layer calibration and while in Z adjustment mode turn your control knob counter-clockwise until it's around -1.00 - a 20 micron downward move. Do that adjustment while the squares are drawing - you are looking for the lines to change from round/rounded to square. You should see an improvement with the final interline overlap as well - the goal is to be able to peel up a corner and then pull up a whole sheet.
Advice to go along with the recommendation above - don't be afraid to keep repeating this until your squares are square, and your final sheet is a sheet. if the final sheet starts to look like it has little ripples in it, go back up 10 microns and call it a day.


