CPE warping off the bed
I've tried changing how I clean the bed
I've tried hair spray, glue stick, no bed treatment, used alcohol (not recommended bla bla it will stick TOO hard.. ya..didn't stick)
I've moved the temps from 255 / 75 to 260 / 80 .. no effect.
What if I built things on a 4-5 layer raft? I tried with a cell phone case and it failed 2-3 times.
I built a enclosure around the whole printer to help stabilize the temp/reduce wasted energy on heating.
Should I turn down bed temp after the first hour? crank it up even higher?
The parts seem to generate a little bit of a lip on the surface that was in contact with the bed. I tried adjusting my Z axis up a little more, it looks like a clean first layer.
I really want some CPE structural awsome parts for projects but I don't know what direction to go with settings here..
-Jesse
Re: CPE warping off the bed
First clean the bed with detergent and warm water. It is by far better than the chemicals you have used.
Then prepare the bed with the glue stick that came with the printer.
Bear MK3 with Bondtech extruder
Re: CPE warping off the bed
I have printed a lot of PETG and also rather bigger parts without any issues.
With PETG I didn't even use any cleaning agent, at the contrary I gently swiped the heat bed with my hand to dust off partcles and use skin oils to prevent the print from sticking too well.
What I found critical is the first layer height. I need to increase the liveZ value from about -460 for PLA to about -510...520 for PETG, i.e. lower the nozzle a bit. A test I am using is to print only the first layer, then stop the print and scrape off the layer with my fingernails, checking for good bond between the individual extrusion strands. It took me some time to find the sweet spot, but now I can quickly change between PLA and PETG, just changing the live Z value.
Another lesson I learned was that PETG sticks very well to the hot and cold print bed, but can be removed easily at an intermediate temperature (around 40°C)
I need to correct my statements about Z level for PETG.
I found out that my PLA settings at -460 were not ideal. I found the best PLA setting at -500 with the "large square" printing method.
And I had difficulties getting PETG to stick, but when I succeeded it was again with -500...-520.
Re: CPE warping off the bed
I too am trying to built parts for my printer with Fillamentum CPE, also RED. I'm getting similar warping and wonder how others were able to print all parts in blue CPE without such issues with Prusa settings for CPE. My printer is about a month old. Installed springs to get bed variance low < 0.03mm. No drafts. No adhesion issues to bed. Parts just warp. All parts except Y idler and motor mount are stock.
Seems like a great filament option to avoid ABS fumes and enclosure needs, but now wonder why we're seeing this? Is it the new fan duct? Have the CPE settings in Slicer PE changed from earlier this year.
Re: CPE warping off the bed
Could you share you print settings?
perimeters
top, bottom
fan speed
infil percentage and type (read somewhere last night that too high an infit could be the cause) . I was using 40 to 80%
Re: CPE warping off the bed
Clean your bed with IPA 99% and let it dry. Then wipe on a liberal coat of Windex Original and let it dry. It hard to remove the first wipe and thin prints, even with the Windex.
Re: CPE warping off the bed
For PET-G I have been using gluestick with denatured alcohol for my bed prep. The parts stick perfectly and come off easily - just like PLA.
The process is to smear a good amount of gluestick onto the bed, and then take a disposable kitchen towel wet with alcohol and wipe the glue around until it's a very thin coat all over the build area. By the time the bed is hot, it's dried out and the prints are perfect. They pop right off by simply flexing the metal sheet when it's cool enough to hold.
Easy, perfect, repeatable.
RE:
Today's experience with CPE. I had previously printed a set of parts for MMU3 Buffer unit using CPE HG100 (because of y'know, looks!). and they all printed just fine on my MK3S+ inside Prusa Enclosure. So today I wanted to print just one of them, because I needed another leg part. I resliced it for my MK4, which is not currently in an enclosure, and both times I tried (same roll of filament !), it warped, and the first one popped off the bed during print, and caused a birds nest. I tried both Textured and Satin beds, both warped. So, I'd say the difference is in having/not having the enclosure. It stands to reason, but I guess I felt bullet proof, since the MK4 is just so great, I thought nothing could break it.
RE: CPE warping off the bed
To improve CPE 3D printing:
Use a raft for better adhesion.Maintain a stable enclosure temperature.Adjust bed temperature within the 70-85°C range.Ensure correct Z-axis height.Print at a slightly slower speed.Control cooling settings.Experiment with print orientation.Store filament properly to prevent moisture.Verify slicer settings for CPE.Document changes for fine-tuning.
RE: CPE warping off the bed
Oh hey! CPE is actually one of my favorite materials to print with. Unfortunately, it has some specific quirks.
- It is HIGHLY temperature sensitive
- Larger nozzles are easier to print with (0.6mm is my go-to, 0.4mm is an absolute pain)
- Bed temperature needs to be 100c
Best bed adhesion is achieved with the smooth PEI sheet and gluestick. 100c is the magic temperature. Can start with 95c for the first layer.
If you're using transparent filament, you can dial in the temperature by looking at the clarity. If it's cloudy, it's too cold. If it's blobby/stringy, it's too hot. It's got about a 10c band that it likes to be at, which can make things very difficult. If it has good clarity, that also means layer adhesion is good.
Dial back Max Volumetric Speed. 7 mm^3/sec is the absolute max. The goal is to have steady flow rate so there's no temperature variation. Check the volumetric speed option in the top-left after it's sliced to see how uniform it is.
Printing with a larger nozzle will help to normalize print tempreatures. 235c has been the sweet spot for me with a 0.6mm Revo nozzle. YMMV. It is possible to print with a 0.4mm nozzle (expect to be ~250c), but you need to be very careful with the tuning.
Even with all of this, it will still warp like crazy for larger prints (not ABS level thankfully), so the use of a brim and helper pads is still highly recommended.
RE:
My filament is: Fiberlogy CPE HT
recommended settings:
- nozzle temp: 260°C- 280°C
- bed temp: 110°C-120°C
- fan: 0%-25%
I dried the filament just before printing.
My bed is the satin coated one with dblac (with all other methods even the first layer was not sticking)
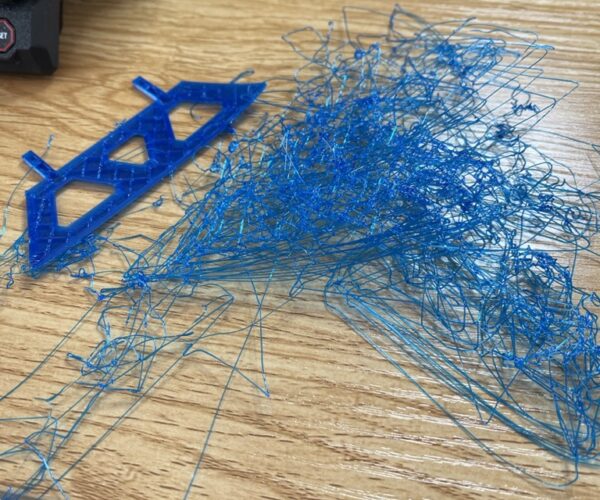
The picture shows heavy warping:
- nozzle temp: 280°C
- bed temp: 115°C
- fan: 10%
My idea resp. reasoning about this:
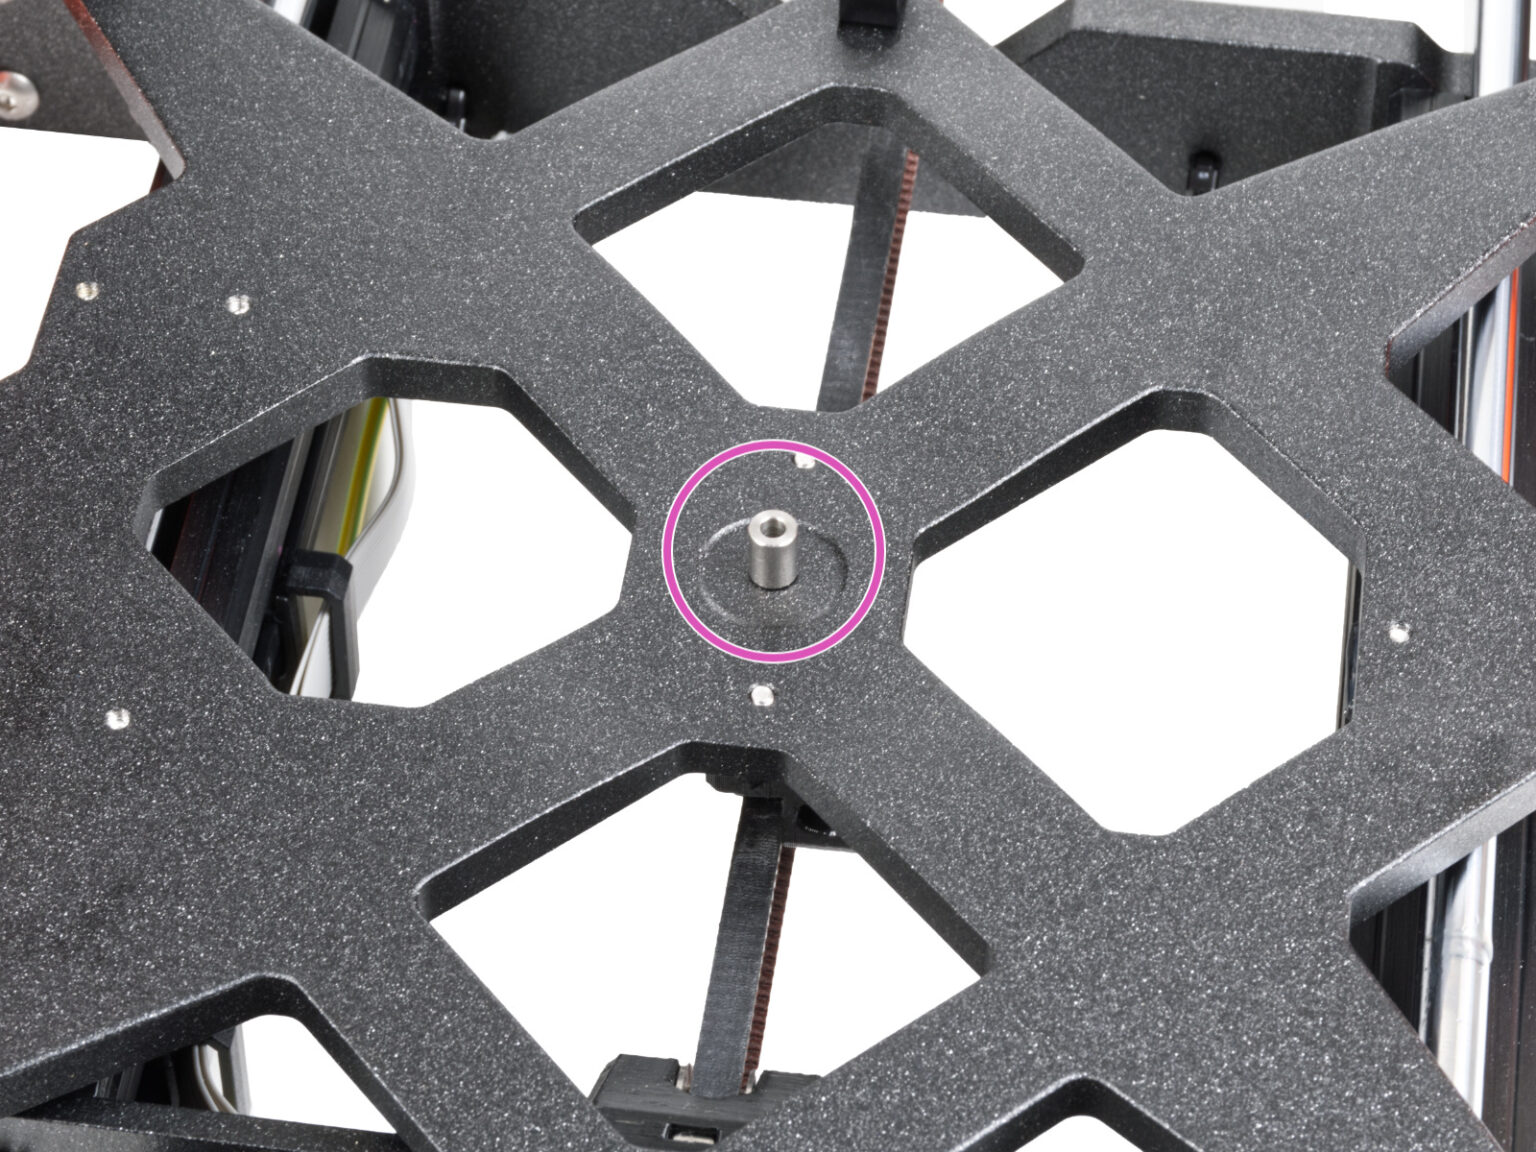
Since only the piece in the middle shows this extreme warping and because the only remarkable difference in the printer assembly is the central heatbed mount (exactly beneath this piece), I think at such high temperatures the mount contributes to a uneven heat distribution in such a way, that I get this warping...
...so a thermal image would be great, to identify heat distribution of he bed and then one could place parts on different locations to confirm the theory...
RE: CPE warping off the bed

RE: CPE warping off the bed
Hi Oliver,
If you think the spacer is the problem, why don't you move the models off the centre of the build plate in Slicer?
regards Joan
I try to make safe suggestions,You should understand the context and ensure you are happy that they are safe before attempting to apply my suggestions, what you do, is YOUR responsibility.Location Halifax UK
RE: CPE warping off the bed
Yeah... I did it in my last print and it was a success... also lowered bed temp to 100°C and nozzle to 270°C.
Was also researching for carbon fiber m3 screws without success and thinking of replacing the spacer with a piece of Pertinax
RE: CPE warping off the bed
might be able to get Nylon Screws.
regards Joan
I try to make safe suggestions,You should understand the context and ensure you are happy that they are safe before attempting to apply my suggestions, what you do, is YOUR responsibility.Location Halifax UK
RE: CPE warping off the bed
uhhh... now you brought some light... I found some PEEK screws which seem superior in terms of heat resistance and their thermal conductivity is also a little lower:
...will try it out ... thanks for your assistance 🙂
RE:
I sparked your thoughts, and you found another option to address the situation.
I Would never have thought of PEEK...
I was thinking towards the revised bed mountings as used on Mk3.5, mk3.9 and mk4, where plastic flex spacers are used allow thermal expansion. but I believe they still use a single rigid mounting in the centre of the bed
https://help.prusa3d.com/guide/7-y-carriage-heatbed-assembly_438310
Step 37 onwards
regards Joan
I try to make safe suggestions,You should understand the context and ensure you are happy that they are safe before attempting to apply my suggestions, what you do, is YOUR responsibility.Location Halifax UK
