Can't find the right settings for this part
Hello,
I am new to 3D printing and designed this part for a RC model.
Now I have tried printing it multiple times with different settings with various degrees of failure.
At times the printed material would lift on the slope wich made the surface on the bottom really bad. Other times the support would stick
The part has to be aestetically okay on the outside. I am printing black Prusament PLA


RE: Can't find the right settings for this part
Attach a zipped up .3mf project file: otherwise help will be unreliable.
RE: Can't find the right settings for this part
Without seeing the 3mf... if you need good looks on the outside why not print it upside down. Sure you'll need a lot of supports on the inside but the outside should be fine.
Formerly known on this forum as @fuchsr -- https://foxrun3d.com/
RE: Can't find the right settings for this part
I'd try it with the open side down. I start with the following settings for PLA removable supports:
- Contact Z distance: 0.25mm
- Pattern spacing: 3mm
- Interface layers: 4
- Interface pattern spacing: 0.2mm
- XY separation: 75%
- Don't support bridges: enabled
Keep in mind, the resulting supported inside surfaces will be very rough after support removal. You might get away with some clever angles if you're willing to experiment.
RE: Can't find the right settings for this part
I hope this is right. I haven't tried it like this yet as I am kind of tired of wasting filament with this part. Hopefully you guys can give me some valuable help.
Cheers
RE: Can't find the right settings for this part
Many here don't use or even have 7zip installed, nor rar, nor tar, and can't open the file.
That's why we ask for ZIP files.
RE: Can't find the right settings for this part
@tim-2
Un7zipped and rezipped
@mini-trucker
You can choose "ZIP" as archive format instead of 7Z
Prusa i3 MK3S+ FW 3.11.0 (kit dec -20), PrusaSlicer 2.6.1+win64, Fusion 360, Windows 10
RE: Can't find the right settings for this part
@ringarn67
Thanks!
RE: Can't find the right settings for this part
@mini-trucker
After looking at the project, I suggest you read Bob's reply and follow his suggestions.
RE: Can't find the right settings for this part
@mini-trucker
Hi Mini Trucker...
I couldn't unzip your file, so I made an analogue file for demonstration
everyone has their own way of dealing with overhangs
this is what I would do with a file like yours

building the model at 45 degrees means that it pretty much supports it's self, so the supports are largely there to stop it falling over during printing.
I painted supports to hold the back edge in place, and give stability during printing, this method increases the print tine but usually means that you do not get defects where the supports are. if you are not confident in your adhesion, it may be wise to make the centre support on the slope, longer... regards Joan
I try to make safe suggestions,You should understand the context and ensure you are happy that they are safe before attempting to apply my suggestions, what you do, is YOUR responsibility.Location Halifax UK
RE: Can't find the right settings for this part
Here's what I'd try:
- DodgeCharger Speakerbox - Modified Supports 16-May-2021.3mf - This version is sliced with the open side down with conventional removable supports. They should remove easily, but the inside surface will be rough.
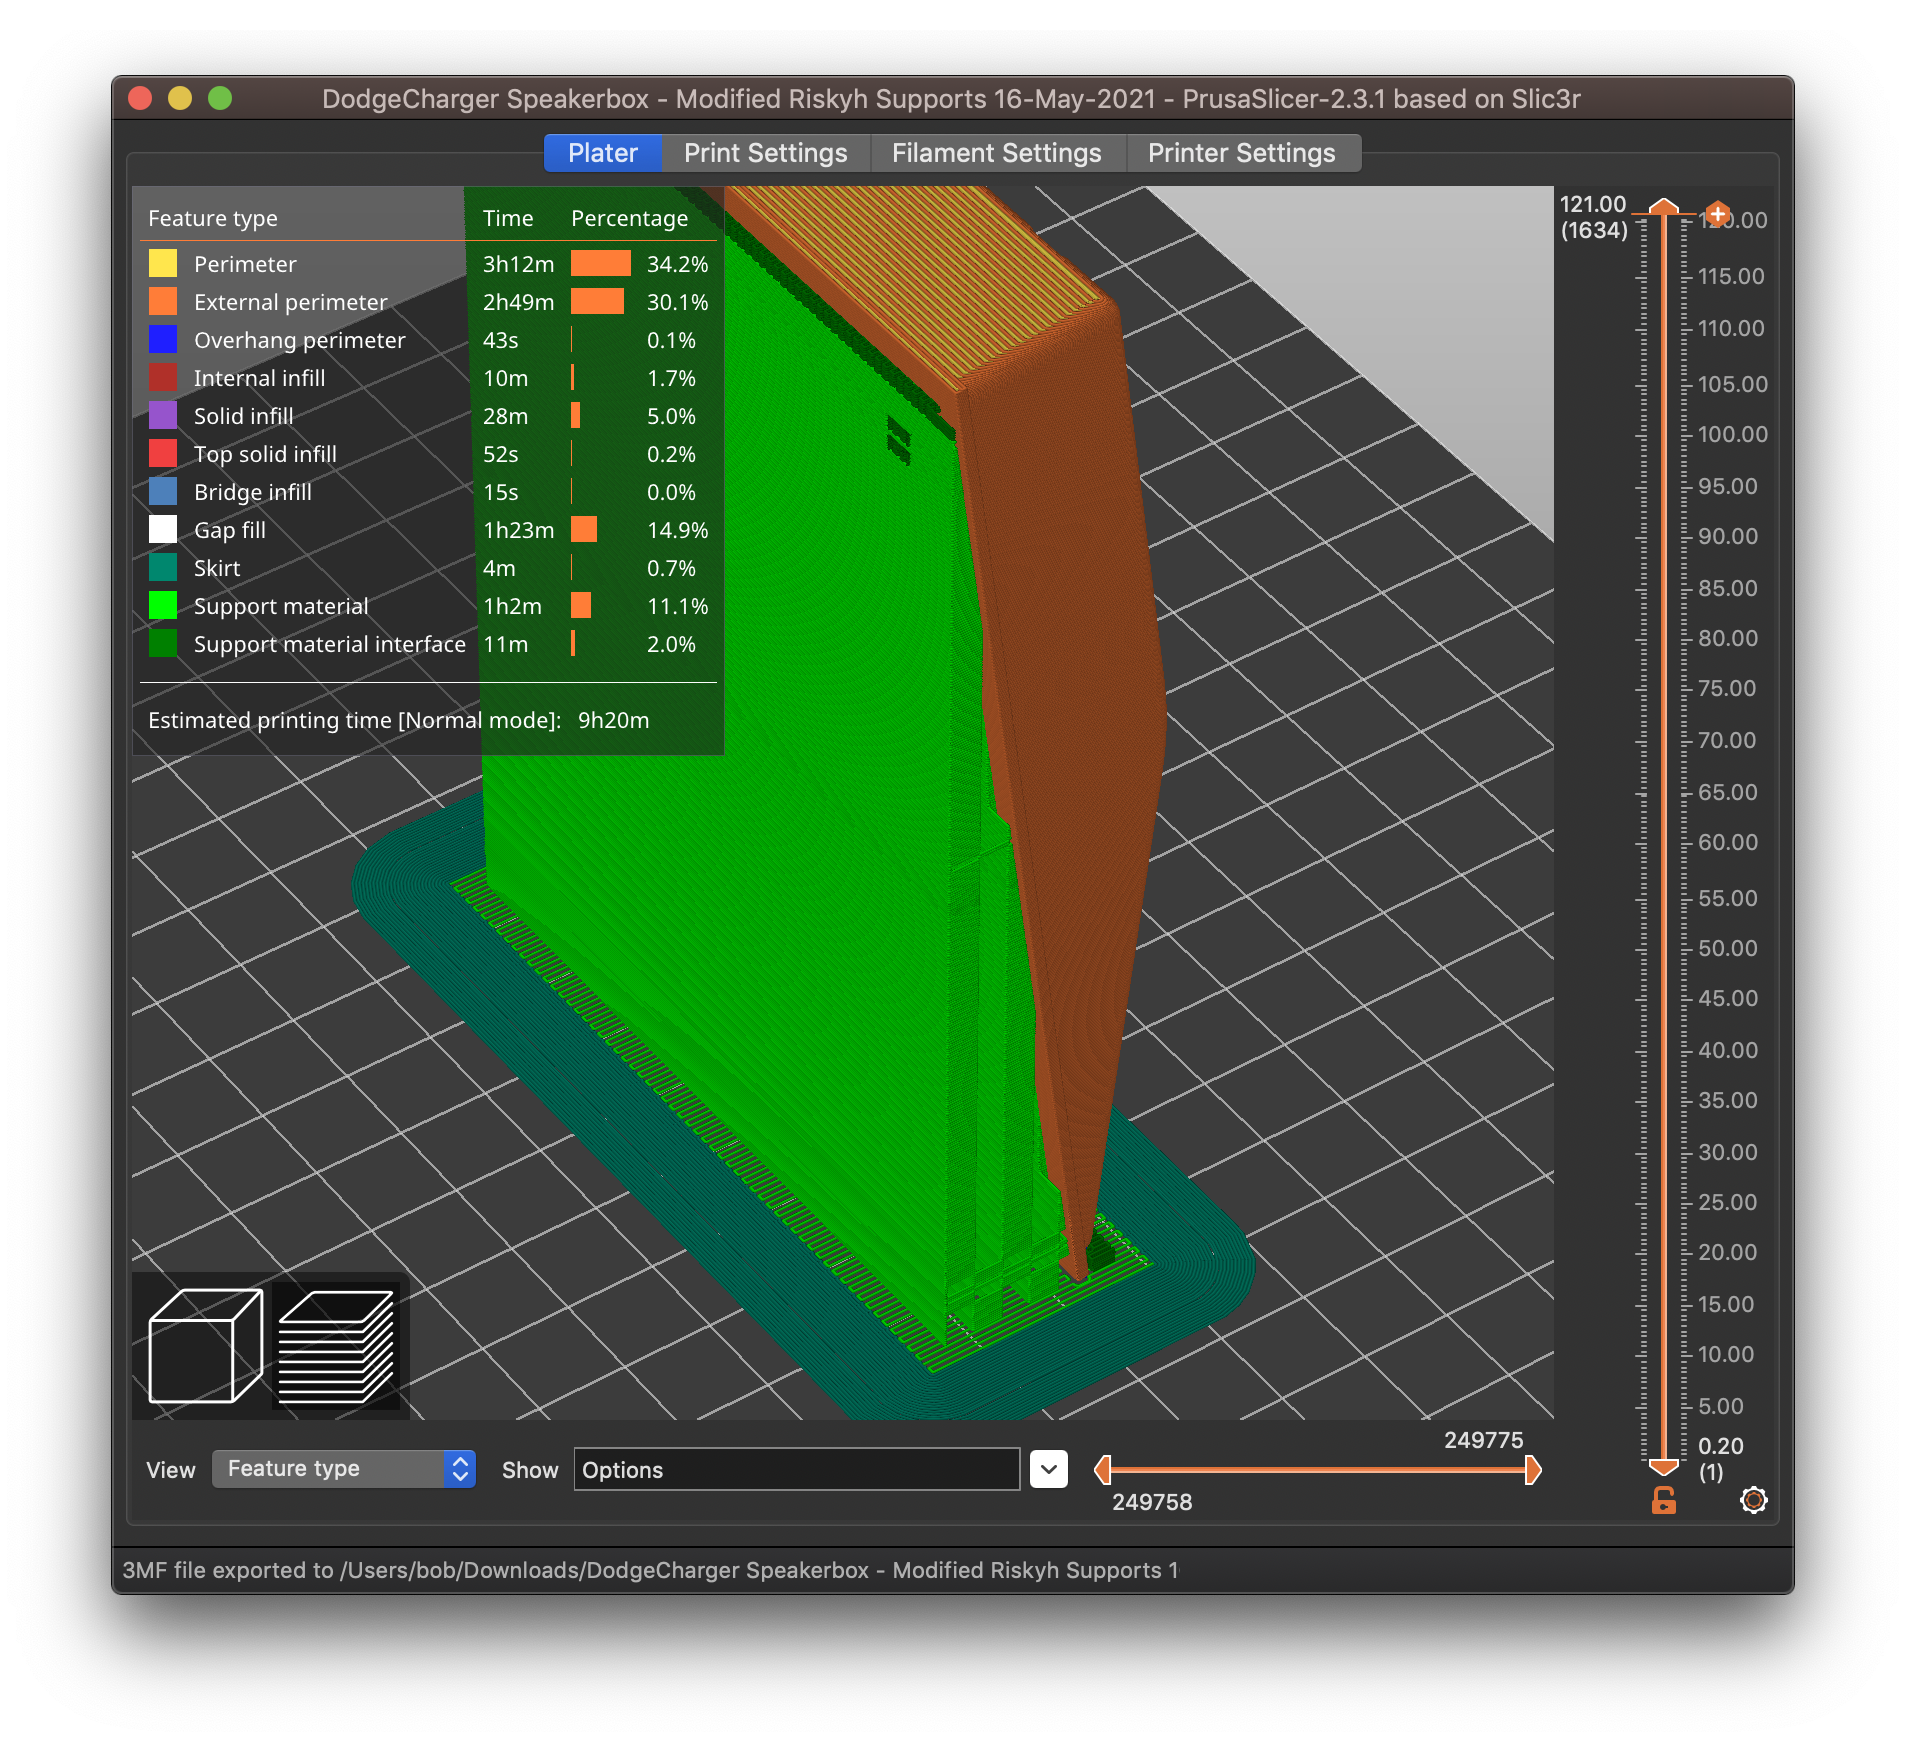
- DodgeCharger Speakerbox - Modified Riskyh Supports 16-May-2021.3mf - This version is sliced with the part positioned mostly vertical to reduce support contact. It's a "high risk" print in that you need to have your bed adhesion under control. The amount of support in contact with the exterior is minimized and inside and outside surfaces should look better.
Be aware that PrusaSlicer does not produce the best-looking supports. Here's a comparison with a 2mm horizontal surface generated with other popular slicers (left-t0-right, top-to-bottom: ideaMaker, Simplify3D, PrusaSlicer, Cura):

Looks like Joan posted as I was composing mine. I angled mine so supports are on the inside. The idea of angling parts to reduce supports is always worth a shot.
RE: Can't find the right settings for this part
@bobstro
Link didn't come through.

RE: Can't find the right settings for this part
Wups - Here are the files I meant to attach.
RE: Can't find the right settings for this part
The supports are a bit more convincing with the honeycomb pattern.

RE: Can't find the right settings for this part
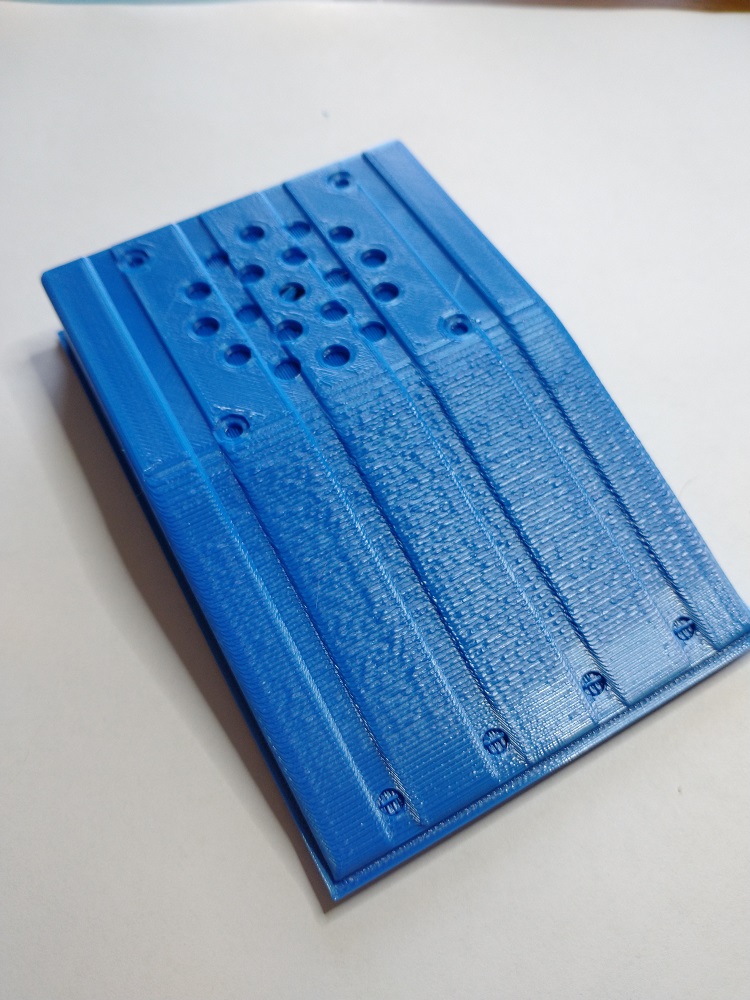
A longish print ... using my cheapest $10 filament. Spider webs came along for free... lol. Printed using the concept above.
Support only in contact with a few places on lower lip and screw mounts.


RE: Can't find the right settings for this part
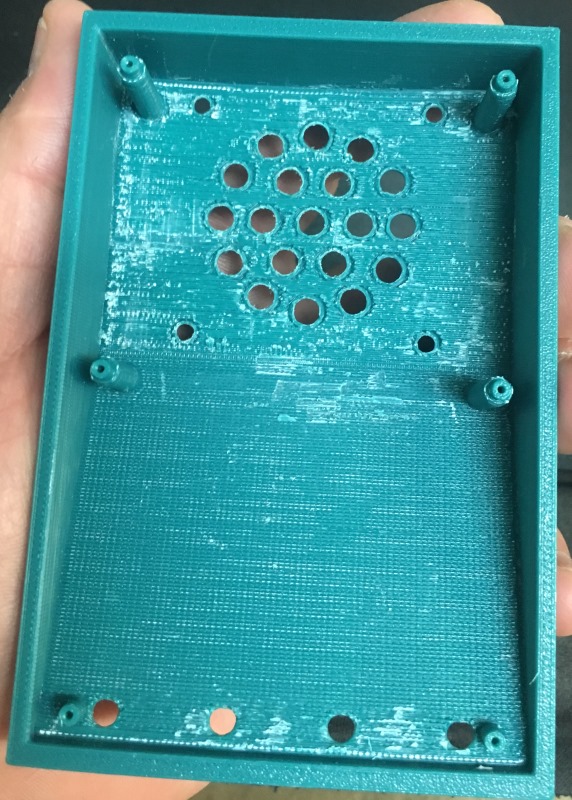
@mini-trucker
I printed your part this afternoon in the orientation you shown in your .3mf, However I printed it out of ABS I used the default support settings and a layer height of 0.15 in 5 hours 30min. no warping no issues to speak of other then the supports didn't release as easy as I would have liked them to, But they were default with a Z separation of 0.1
I used ABS because it's stronger, lightweight and offers the ability to give the part an Acetone vapor bath and make it look very nice and smooth.
that was my choice, however I'm sure it can be printed with PLA in this same orientation and come out functional and looking great, I also see that Tim has printed a PLA version in a different orientation that looks very doable also.

The whitish area you see is where I used my pocket knife to remove the more stubborn ares of support.
I made an effort to show closeups so you can get a good idea of the detail.
I also took the liberty of adding modifiers to the four long standoffs, I made them four perimeters
with a small halo core for more strength and I embedded them into the the top layers as apposed to
allowing the layers to just print over top of the posts this also should offer a measure of improved strength.

I'm going to vapor smooth this one I'll post images when its done.
If your interested let me know I'll post the .3mf with modifiers, converted to PLA for you.
Enjoy
Swiss_Cheese
The Filament Whisperer
RE: Can't find the right settings for this part
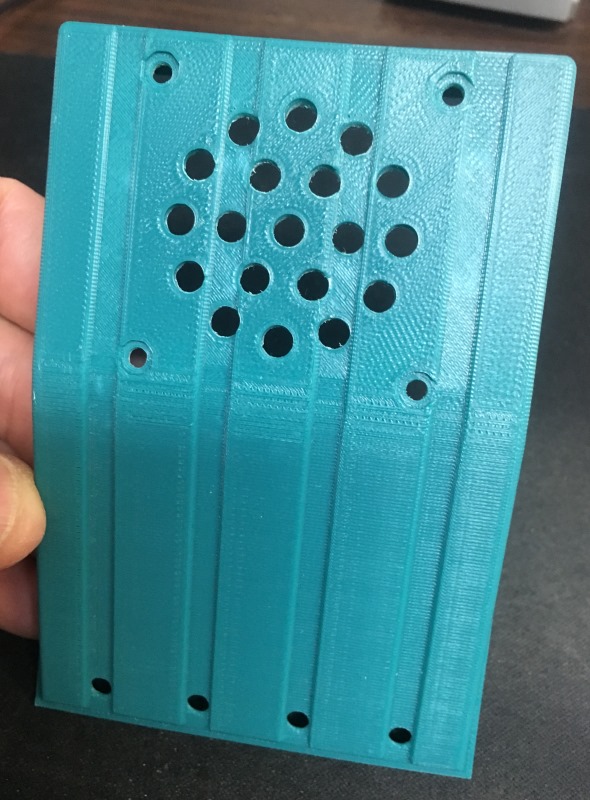
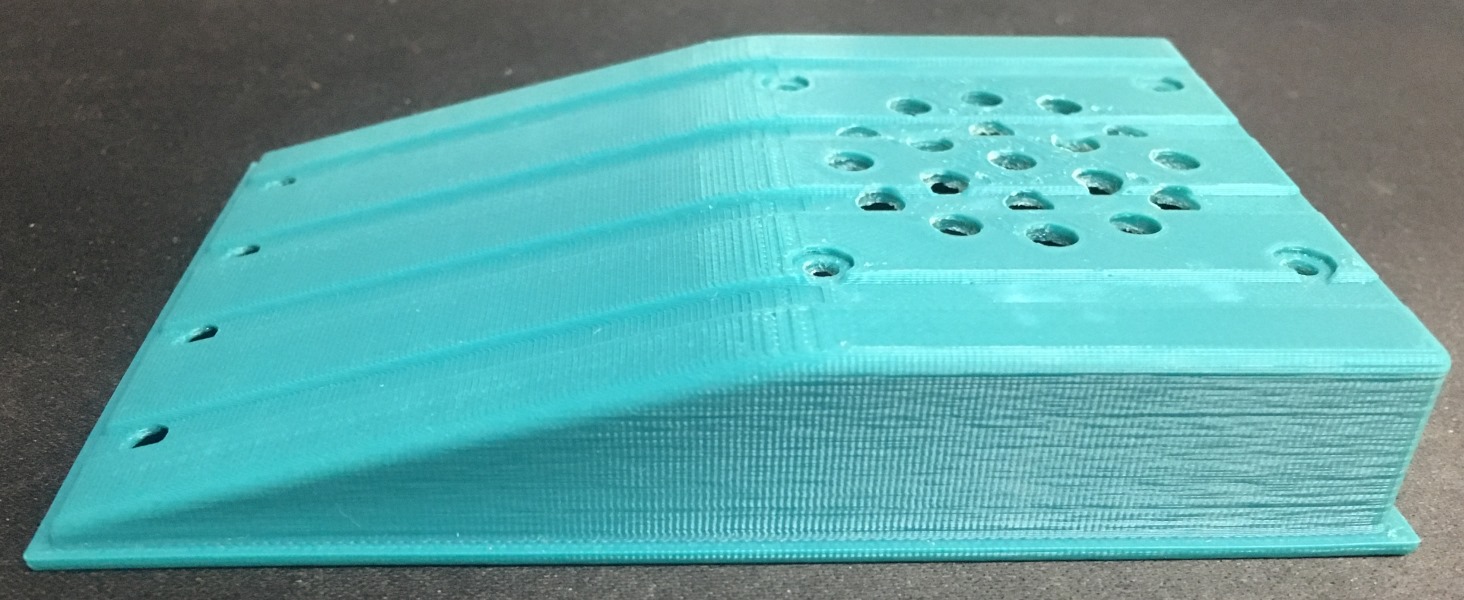
Here's the face down print - I gave up trying to remove the supports (used the defaults, and this PLA is really wet). The part needs a few more layers since the un-support is punching through. Printing at a 45 makes for a much nicer surface quality and finished print.