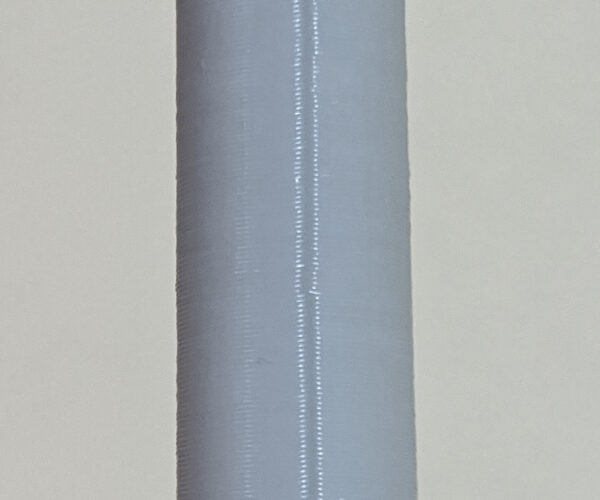
RE: Any tips to get rid of the bulge?
@jweaver -- Just one last thing to check. What happens if you try PrusaSlicer with the following settings:
- Print settings->Layers and perimeters->Vertical shells->Perimeters 5 or 6.
- Print settings->Advanced->Default extrusion width, Perimeters & External perimeters set to 0.4mm.
That seems to yield narrower extrusions with a varying amount of gap fill all the way up (no layers without gap fill) at least above the casing part of the print. There's a transition on the upper bullet part, but I'm curious if that will show with the sloping walls.
I'm testing but don't have a 0.4mm nozzle mounted (still).
and miscellaneous other tech projects
He is intelligent, but not experienced. His pattern indicates two dimensional thinking. -- Spock in Star Trek: The Wrath of Khan Unfortunately,…
RE: Any tips to get rid of the bulge?
@bobstro Will check now...
RE: Any tips to get rid of the bulge?
Another data point. I just printed the bullet part with PrusaSlicer 2.2. with:
- Print settings->Layers and perimeters->Vertical shells->Perimeters 6.
- Print settings->Advanced->Default extrusion width, Perimeters & External perimeters set to 0.4mm.
The result is pretty good (click to see full print):
The z-seam is barely noticeable at 100% scale. There are slight layer deviations, but again, not perceptible in the hand. The key seems to be to either use no gap fill, or gap fill on every layer for consistency.
I'm going to file this under: "Can be worked around. Submit to GitHub." Being able to point the devs straight to SuperSlicer is a bonus.
and miscellaneous other tech projects
He is intelligent, but not experienced. His pattern indicates two dimensional thinking. -- Spock in Star Trek: The Wrath of Khan Unfortunately,…
RE: Any tips to get rid of the bulge?
Those settings worked better.. But they are far from perfect. It might be OK for the bullet (will check tomorrow), but on my test model, I still have a significant bulge at 6 sections up.. Which is 0.75mm.
The good news is that the bulge where the wall was 1.5mm thick has almost entirly gone..
Attached is a photo (I wish I could work out how to insert it inline like yours).
I will try using SS tomorrow.. What are the "magic" settings I need?
RE: Any tips to get rid of the bulge?
The way I add pictures is to use the add media button, then add files to the media library. You can then select he ones you want to insert and choose a preview size.
RE: Any tips to get rid of the bulge?
I have just setup a print from SS to do tomorrow.. Based on the feedback from @Neophyl, the best settings were:
Gapfill = on
Thin walls = on
Overlapping perimeters =off
These are already set by default so do I need to do anything else?
Jon
RE: Any tips to get rid of the bulge?
The way I add pictures is to use the add media button, then add files to the media library. You can then select he ones you want to insert and choose a preview size.
Ah, so THAT'S why you do it with add media. I didn't see any advantage over dragging the pic in directly. I didn't realize you could adjust the size that way. Will have to play with that next time.
and miscellaneous other tech projects
He is intelligent, but not experienced. His pattern indicates two dimensional thinking. -- Spock in Star Trek: The Wrath of Khan Unfortunately,…
RE: Any tips to get rid of the bulge?
I printed one of my bullets today using the SS default settings and it came out fine... If anything the 'bulge' is inverse.. So where as in PS it was about 0.1mm wider than the rest of the body.. Using SS its about 0.01mm narrower.
But its perfectly fine.. I just hope that PS improves in this area, as whilst I like SS, I like the fact that I am using the "official" Prusa software.
RE: Any tips to get rid of the bulge?
Has this issue been raised on Github yet? If not, i dont mind doing it, but i am not sure i fully understand the issue to document it.
RE: Any tips to get rid of the bulge?
@jweaver
I went poking around github and overlapping perimeters resulting in overextrusion is a known issue. The final comment on the issue points out that slic3r++ aka SuperSlicer doesn't have this problem.
RE: Any tips to get rid of the bulge?
Further reading of documentation shows us this is intentional. The slic3r docs explicitly state that overlap is internally set to the maximum amount. They intentionally err on the side of over extrusion!
The PrusaSlicer docs deal with this issue thusly: PrusaSlicer tells the modeler which wall thickness to use for given print settings. This is of dubious value in my opinion. The minimum wall size changes too much based on print settings, and we are not always the modeler, sometimes we just want to print other people's designs. But, at least they tried.
