Re: Playing with the air nozzle design
has anyone tried this Berd-Air MAX-24 approach to part cooling? the main + for me would be getting better view of what is happening at the nozzel as the plastic is extruded the system has been gaining popularity with the delta folks but it looks like it might work with the Prusa.
http://www.themakerhive.com/shop/viewitem.php?productid=75

Some people have - but this is out of scope of this thread. We are trying to come by without an aquarium pump beside the printer:-)
Re: Playing with the air nozzle design
I use a 30 day free test version of Autodesk CFD (Computational fluid dynamics software), and now after two weeks of use, I start to understand the program 😀
http://help.autodesk.com/view/SCDSE/2019/ENU/?guid=GUID-193CE8EA-EA64-41E9-8D52-F5387CC928D3
Then 15 days left....
Re: Playing with the air nozzle design
After some less than perfect results with my previous settings based on Metacolling PC configs, I simply modified the standard Prusa PC settings and got a pretty much perfect print. Attaching the config.ini and the Gcode used.
It turned out that there were mainly 2 issues, primarily the way Slic3r sliced the model with the modified extrusion width, and I needed to activate auto cooling for bridges, overhangs and layers with short print time.
Print bed preparation is a thin layer of glue stick.
I have the printer in a passive LACK enclosure that heats up to about 27-29 deg C.
Printer is updated with R3 parts set and nickel plated copper nozzle 0,4mm.
Re: Playing with the air nozzle design
I do not claim that Prusa Nozzle R3 is a bad air nozzle, but I think the air flow should be more concentrated to the tip of the nozzle.
The pictures show a clear difference in how the air is distributed between the different air nozzles.
Feel free to come up with comments and ideas about how a nozzle should look.
Attached ZIP file contains STL files for testing.
Rotate the details in Slic3r 90 degrees (X-axis). I unfortunately wrote them on the wrong work plan.
No need for support material. Nozzle ABS, nozzle support PETG, 0.20 or 0.15 mm.
Replaced the file with Rev. 2
Hi RHDreambox,
I am about to print your nozzle. Is it still the most recent revision you can share?
Best regards!
Re: Playing with the air nozzle design
Hi Stahlfabrik
Well, I have done a little wider model that Michael.m63 had wishes for.
He, like many others, has problems with the left front of the nozzle softening and hanging down after a while. Michael thought it would help if there was a little more distance between the nozzle and the heater.
Because the problem only occurs on one side, I think it is caused by a higher thermal radiation from the cable connection of the heater.
The air outlets on the sides are also slightly larger on this nozzle.
I use this model myself and I have not planned to make more modifications to the nozzle. I'm out of ideas there.
Perhaps I'll draw up a brand new model with only outlets on the sides for test.
The nozzle files attached is optimized for ABS 0.15 mm and the support PETG 0.20 mm. The support is the same as before.
Happy printing!
Bear MK3 with Bondtech extruder
Re: Playing with the air nozzle design
Super nice! Today my polycarbonate arrived, so I can test it with the wider model. Thanks a lot for your research and all the time you put into this project.
Will you publish it in thingiverse?
Re: Playing with the air nozzle design
I have not had an account at Thingiverse, so I tried to create one.
But I do not know if I understood the process of publish my projects. We'll see in 24 hours 😮
The project I called "MK3 Nozzle RHD".
Bear MK3 with Bondtech extruder
Re: Playing with the air nozzle design
Happy printing!
Hi!
So I got some results in:
Your nozzle performed best I would say in my unscientific comparison.
But I would like it even more, if the "connection" to the fan's hole/shroud would seat the fan better. That is the stock R3's nozzle biggest complaint I think. And with yours it is very similar. That thingiverse nozzle on the other hand has that point covered perfectly. It sits like a glove around the fan.
I printed with each nozzle two overhang tests using the same gcode. On towards the front, one towards the back.
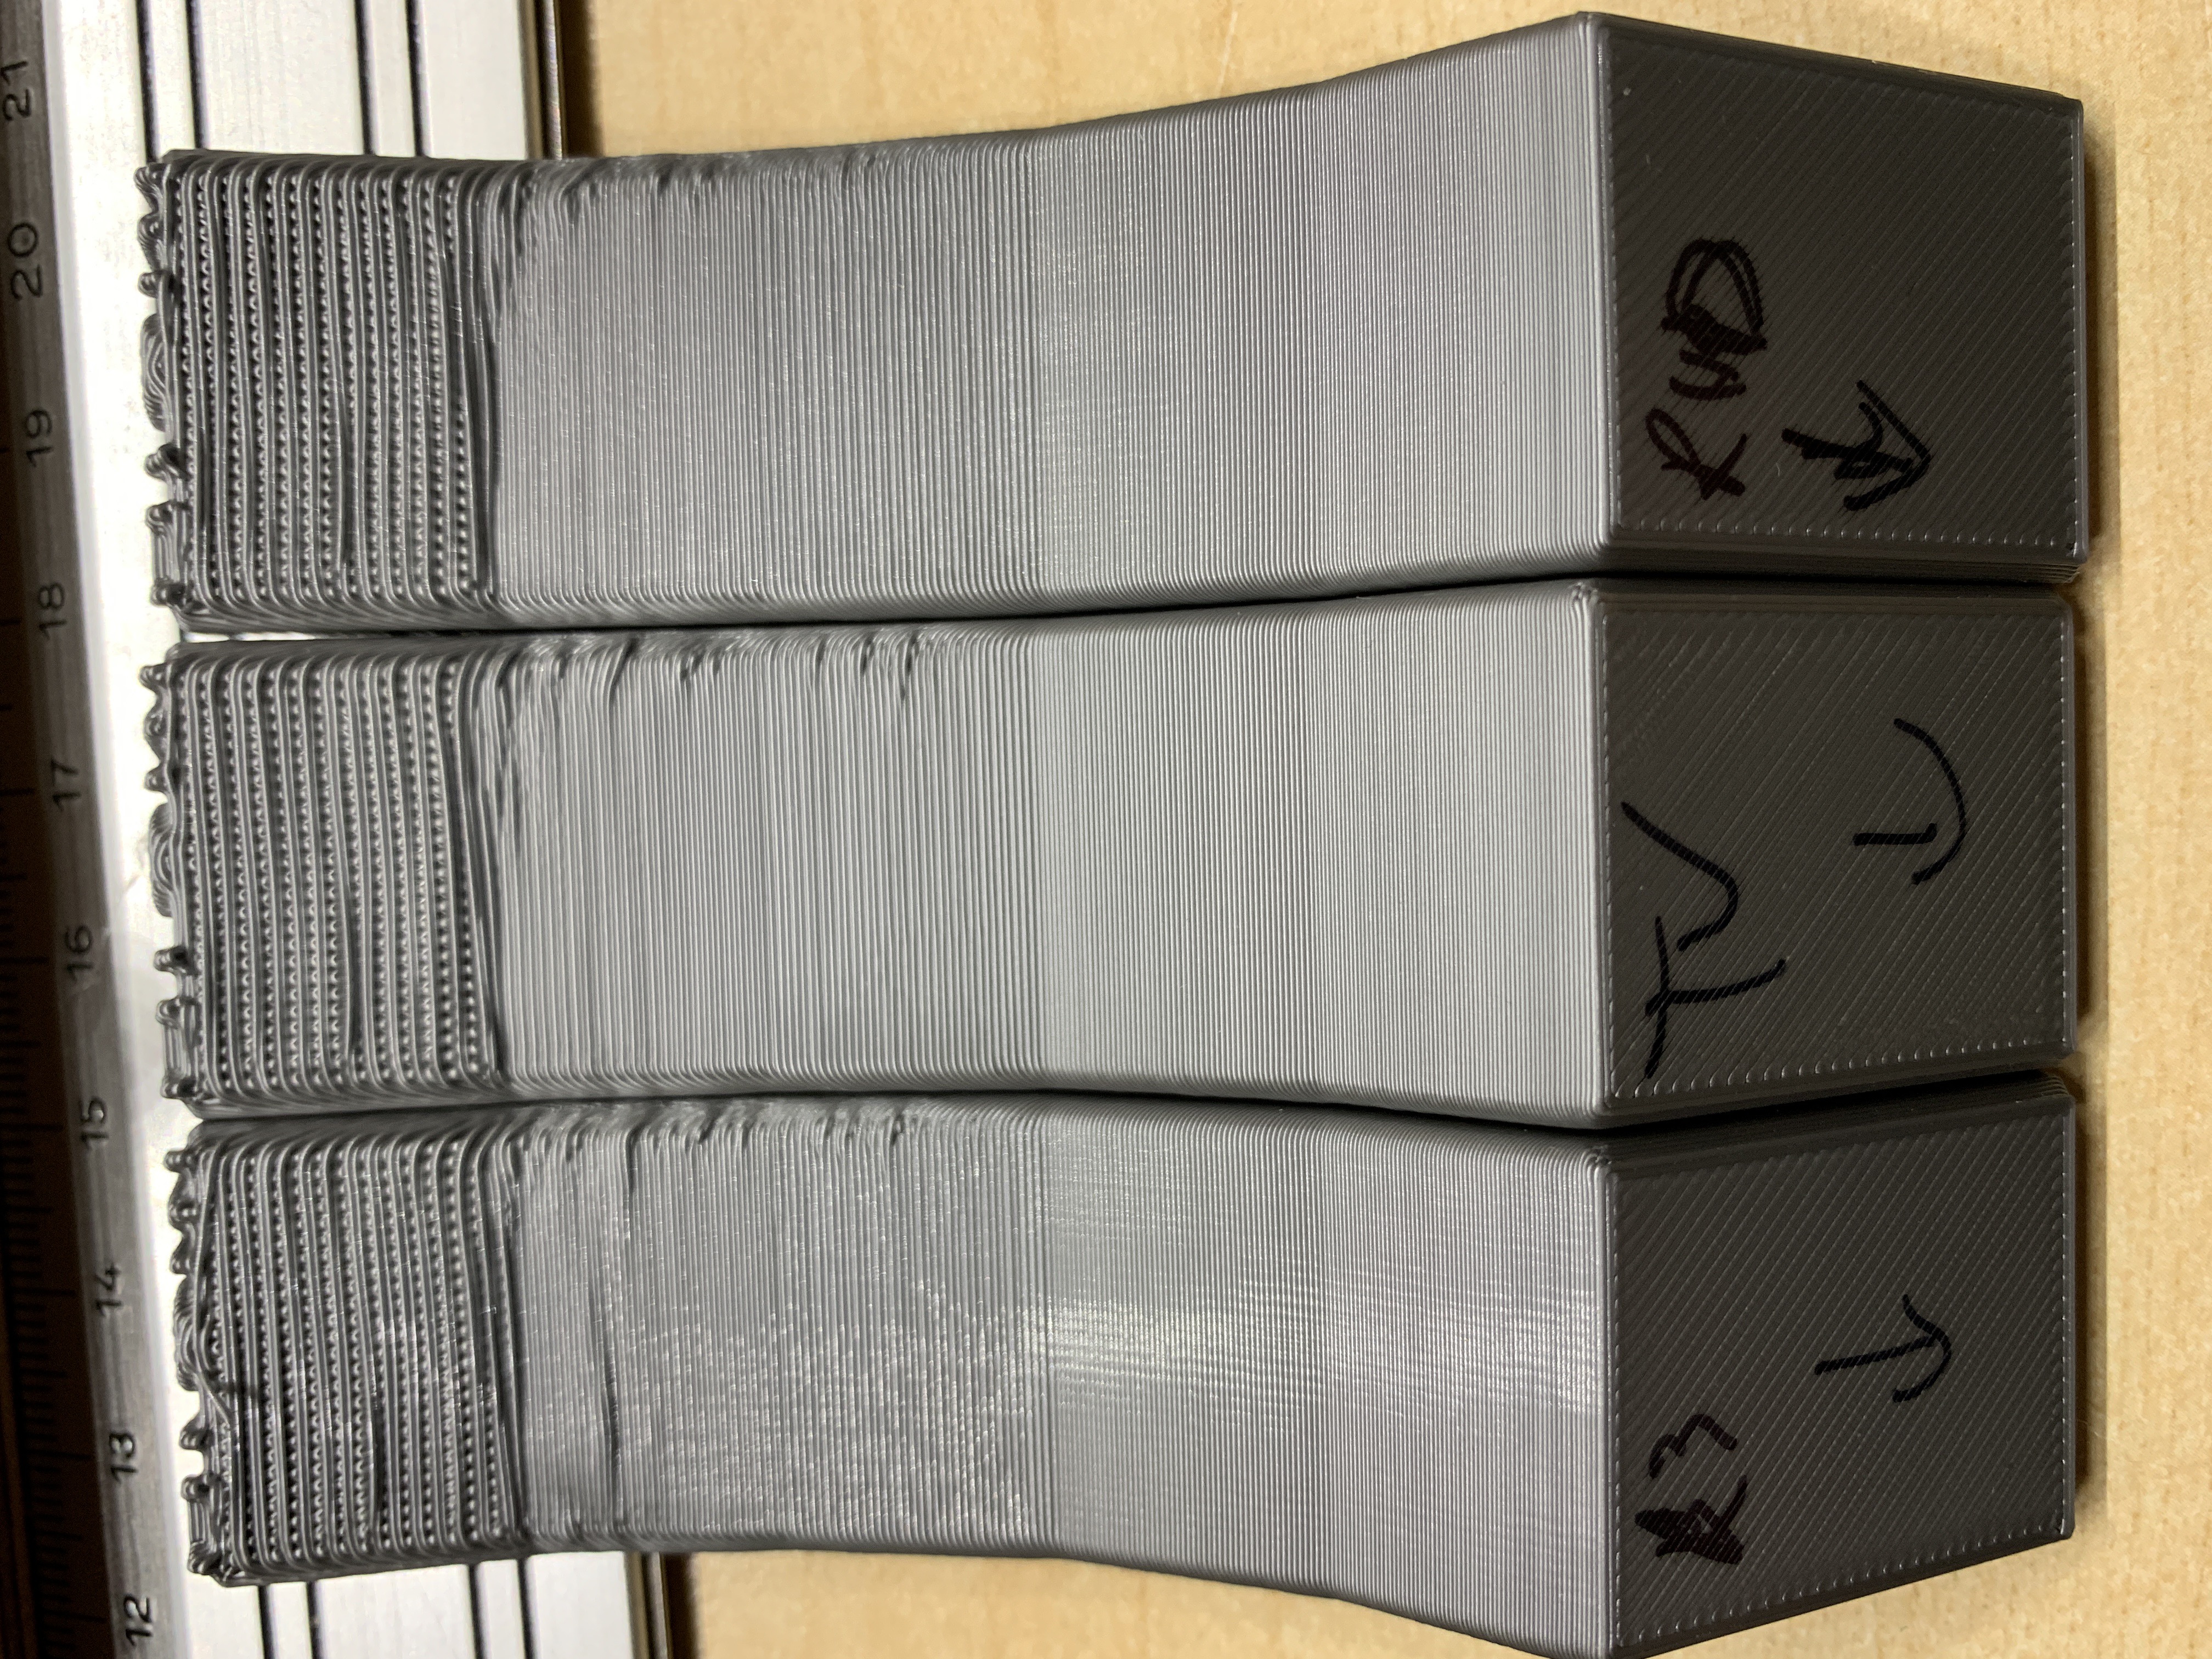

I might repeat the test with another object that lets me judge the sides also.
Good job!!
Best regards,
Stahlfabrik!
Re: Playing with the air nozzle design
And here are the Vape-results 😀
I printed the fanduct in PC and got no problems with melting any more.
And i also printed a vape mount for my healthcare 😆
Re: Playing with the air nozzle design
And here are the Vape-results 😀
I printed the fanduct in PC and got no problems with melting any more.
And i also printed a vape mount for my healthcare 😆
That is plainly awesome!
Is the smoke coming out the vape with force? Or is the smoke propelled alone by the fan?
Re: Playing with the air nozzle design
That is plainly awesome!
Is the smoke coming out the vape with force? Or is the smoke propelled alone by the fan?
Thanks a lot.
The steam is pulled out of the vape by the fan. Nothing comes out of it by itself. There are no mechanical components in the vape.
Re: Playing with the air nozzle design
Hi!
So I got some results in:
Your nozzle performed best I would say in my unscientific comparison.
But I would like it even more, if the "connection" to the fan's hole/shroud would seat the fan better. That is the stock R3's nozzle biggest complaint I think. And with yours it is very similar. That thingiverse nozzle on the other hand has that point covered perfectly. It sits like a glove around the fan.
I printed with each nozzle two overhang tests using the same gcode. On towards the front, one towards the back.
I might repeat the test with another object that lets me judge the sides also.
Best in test! It was amazing fun! Now I was looking forward to improving it a bit 😀
Regarding the collar of the fan, it was more tight earlier. But I was afraid someone would have a problem with my fit so I made the collar bigger.
But I'll see if I can make it a bit more tight again.
https://www.thingiverse.com/thing:3249344
Bear MK3 with Bondtech extruder
Re: Playing with the air nozzle design
And here are the Vape-results 😀
I printed the fanduct in PC and got no problems with melting any more.
And i also printed a vape mount for my healthcare 😆
It was a really professional video! I hope this commercial will not be too expensive for me 🙂
Another thing that would be interesting to know is how the air / smoke behaves in the extruder's cooling channel.
There is a small hole on the side of the canal where it is thought that more air will be supplied through the injector effect.
My opinion is that it does not work as it was supposed, so I've placed a tape over that hole.
Do you have the opportunity to test this too?
Bear MK3 with Bondtech extruder
Re: Playing with the air nozzle design
I've tried to use the airflow to push a small, light leaf.
Re: Playing with the air nozzle design
Another thing that would be interesting to know is how the air / smoke behaves in the extruder's cooling channel.
There is a small hole on the side of the canal where it is thought that more air will be supplied through the injector effect.
My opinion is that it does not work as it was supposed, so I've placed a tape over that hole.
Do you have the opportunity to test this too?
When I installed the R3 upgrade I simply held my hand close to the side air intake and could feel an air flow.
@Michael: really cool and very, very informative videos!
Could you do another clip moving your vaporizer close to the side air intake?
That should confirm whether the side intake sucks in additional air or not.
Re: Playing with the air nozzle design
@Michael: really cool and very, very informative videos!
Could you do another clip moving your vaporizer close to the side air intake?
That should confirm whether the side intake sucks in additional air or not.
Take this:
Re: Playing with the air nozzle design
Brilliant! 😀
Mike, you are amazing! Grat job!
Looking at individual frames I see some flow into the side air intake, but not that much.
I guess any little bit helps though, so I'll certainly keep it open.
Cheers!
Re: Playing with the air nozzle design
Brilliant! 😀
Mike, you are amazing! Grat job!
Looking at individual frames I see some flow into the side air intake, but not that much.
I guess any little bit helps though, so I'll certainly keep it open.
Cheers!
looks similar to me. it give just 2 maybe 4 percent bonus air...
😕 pretty annoying but yeah, let us keep it open! 😀
Re: Playing with the air nozzle design
When I tested with a thin toilet paper at the air intake on the side I felt it blew air there. The paper was not sewn against the hole but it blew away from the hole. Therefore, I mounted a piece of tape over the hole in order not to "drain" some cooling air.
Now there is an updated version of the air nozzle (Rev.B) at Thingiverse. The collar against the fan is higher and more tight. A smaller adjustment of the internal channels has smoothed out the front air outflow slightly.
https://www.thingiverse.com/thing:3249344
Bear MK3 with Bondtech extruder
Re: Playing with the air nozzle design
Regarding the collar of the fan, it was more tight earlier. But I was afraid someone would have a problem with my fit so I made the collar bigger.
But I'll see if I can make it a bit more tight again.
https://www.thingiverse.com/thing:3249344
Hi RHDreambox
I just installed the new revision B. I generally like the higher collar, but still I think it could be more airtight and better fitting. The problem is on the left side of the fan, where the top and bottom case of the fan are clipped together. The bulge that this part makes generates a slit on the whole left side between fan and your nozzle. I attach a pic to show what I mean.
Also I had some trouble while printing with bridging below the area of the attachment. The top of the nozzle is sagging a little there and I had to cut away several loose filament strands inside the left channel.
Anyways - I start another test with that new revision now:-)
Best regrads,
Stahlfabrik
