Layer Shifting on tall skinny part
Hello all,
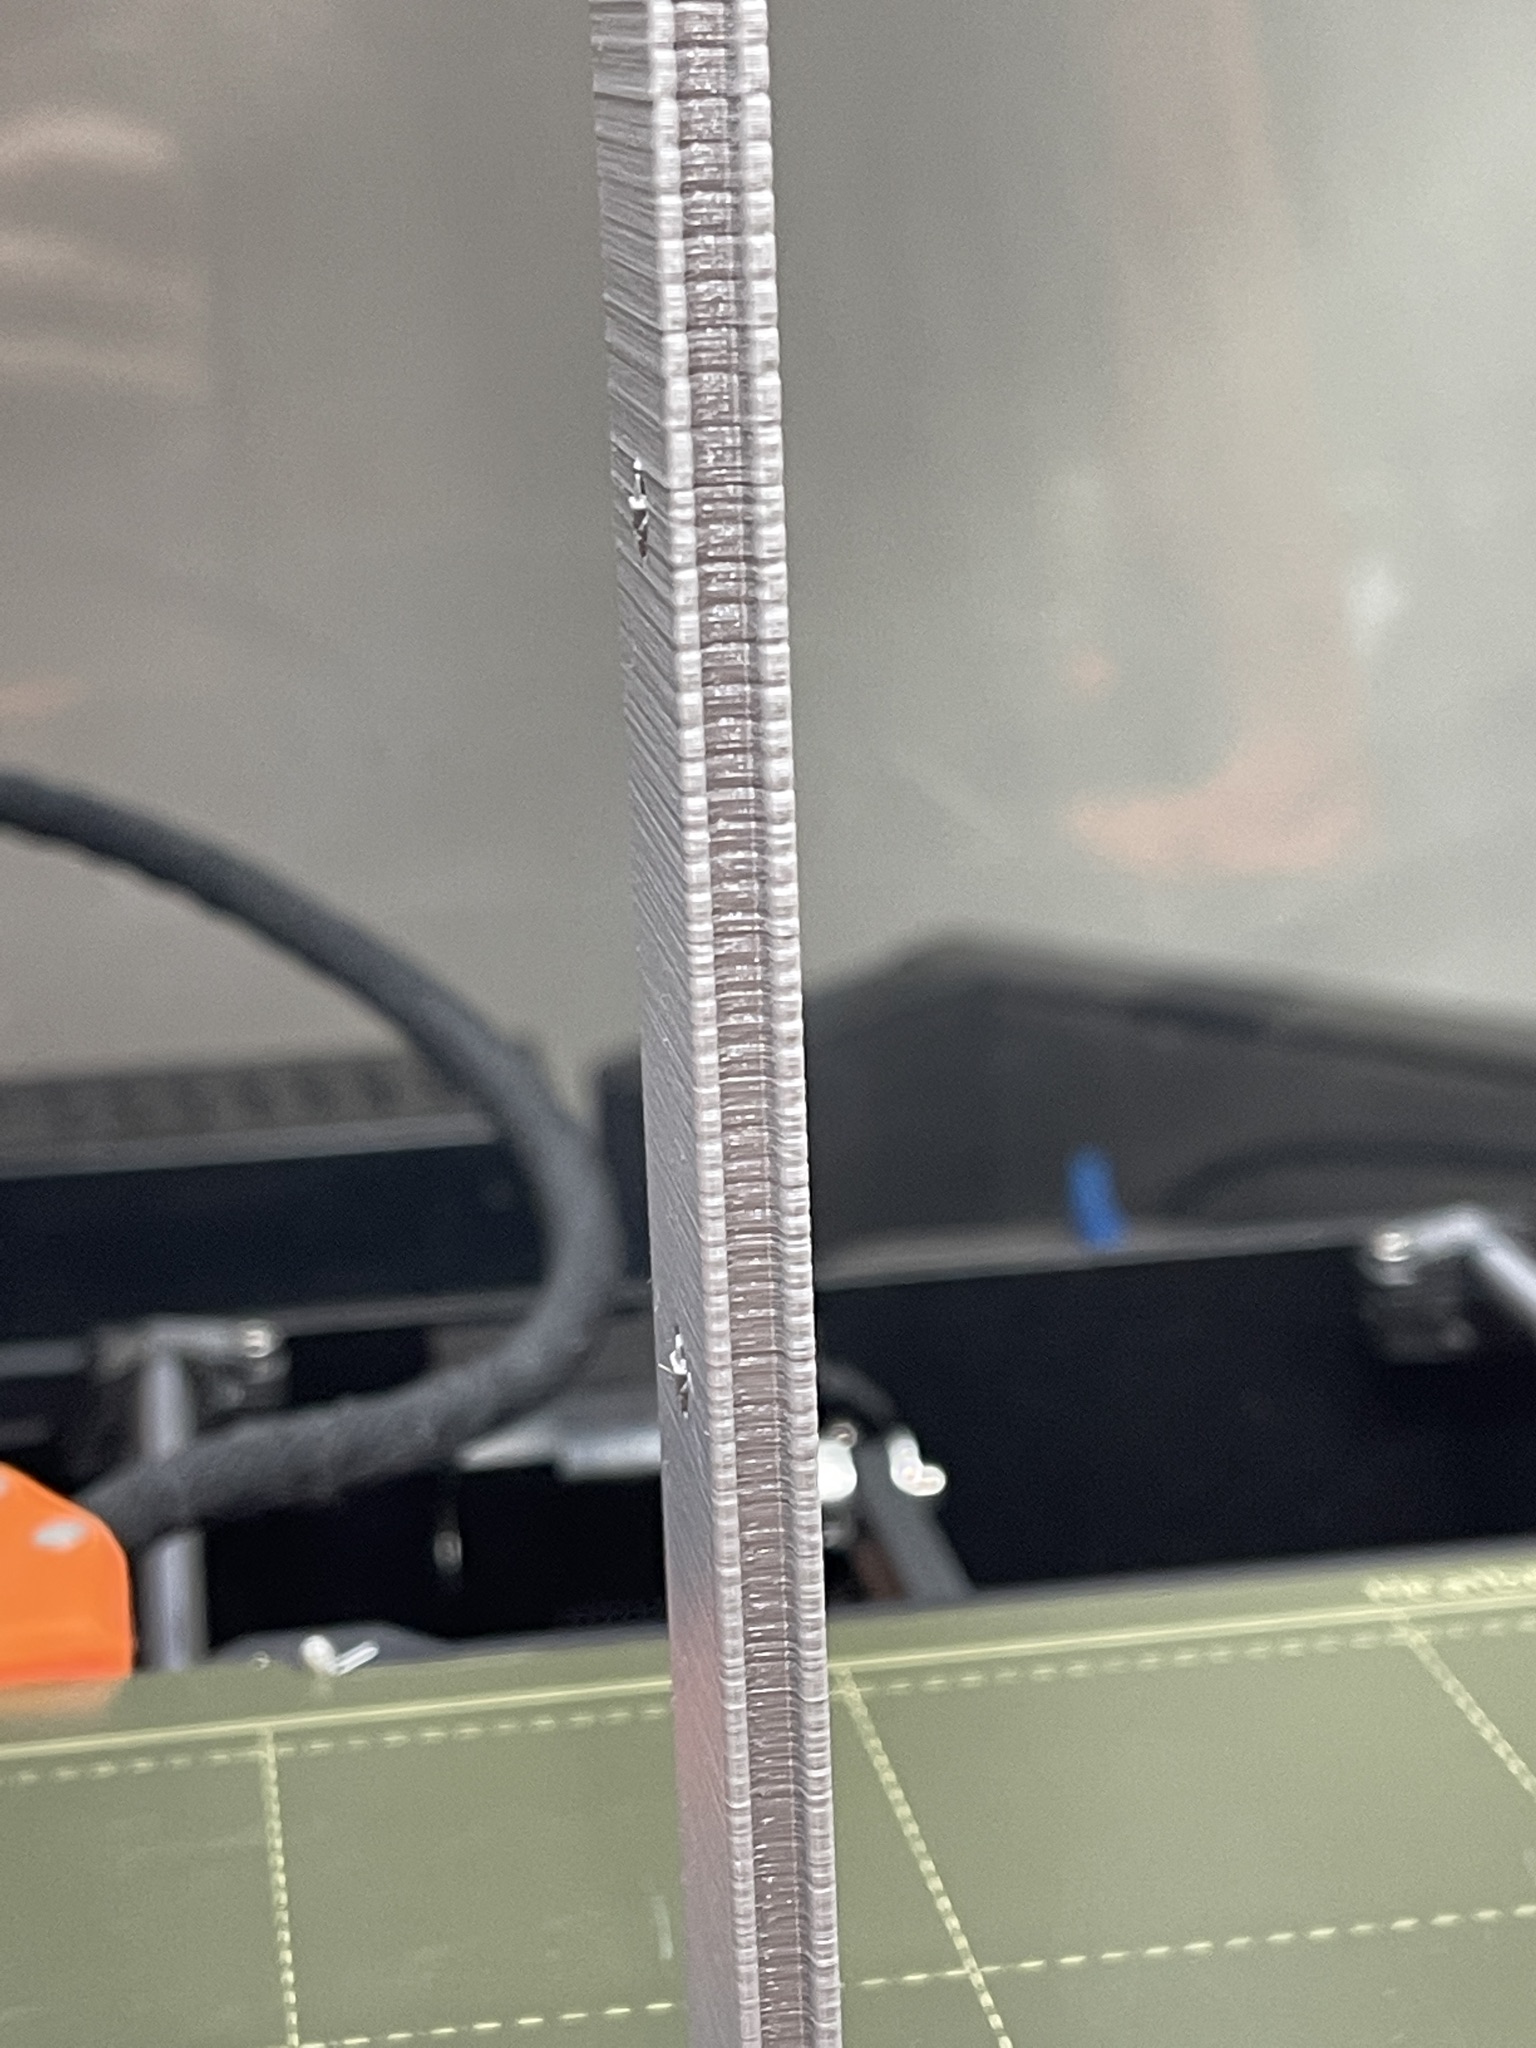
I replaced the X and Z bearings about a month ago, using IGUS drylin bearings, and I recently noticed some regular, repeating layer shifting on a few tall narrow parts I printed. See photos. Is this just to be expected with a part this tall and narrow? I haven't seen this on parts I printed that were shorter. Could this be the result of using IGUS bearings?


RE: Update...
I just printed the BELT GT2 tension gauge and tightened the X axis belt (which was showing almost exactly at the low end), and reprinting another part from the same file to see if this helps.
Y-axis belt was probably about 60% of the scale (from min to max), so I didn't adjust that one.
I am still not sure if the bearing change might be contributing. If next print still has the issue, I might have to swap the X bearings out for some of the standard linear ball bearings (not excited about having to tear it down again, but if I can't fix this by adjusting the belt tension)...
EDIT: I might also try rotating the part 90 degrees on the bed and see if the shift remains in the X direction. I oriented the longer direction of the part cross section to be aligned with X to better withstand the Y direction moves of the print bed. Maybe the part is just flexing in the weaker direction (X) and causing the shifts? If they shift in Y after the rotation proposal, that might be an indicator of the part flexing...
Z banding
This is Z banding. Google can reveal a few solutions to try.
--------------------
Chuck H
3D Printer Review Blog
Try changing the print speed, the flaws may just move or you may be able to find a speed where they disappear.
Cheerio,
Z banding?
I will do some googling on that - thanks!
Is this really banding?
I am not sure this is the same "banding" issue I see when I googled this. The reports of banding seem to be more of a repetetive change in surface appearance (affecting multiple layers at once), while my issue is a repetetive shift in an entire layer (which increases with z-height), and the shift appears to correct itself for the next layer. This is what made me think maybe the tall part is flexing periodically and allowing this to happen? If this is meaningful, I have collision detection turned off in my settings because it seemed to generate a lot of false triggers.
Attaching one more image showing the top of the part...

Banding
Slow it down and see if it goes away. Then you will have rules out one cause.
--------------------
Chuck H
3D Printer Review Blog
thanks
I will try that after this test print is done in a few hours (tightened X axis belt)...
Adjusting bearing holder squeeze
Whether using drylins or not, there is such a thing as too tight in the bearing holders. Since the U bolts don't work with Drylins, I'm guessing you either have an MK3S+ (bearing clips) or printed your own drylin holders. On Y, getting those bearings to have just enough squeeze is your mission - there doesn't need to be much tension at all. The bed may even have play in it if you wiggle it - but that's not a factor unless you over-tighten the holders. Target just enough play that you can mentally tolerate. The play does not effect the prints unless you totally eliminate it - at which point the prints degrade.
On X, loosen your X carriage back screws. They are too tight. How do I know? You tightened them. Back each one out 3 turns.
Update after tightening X-axis belt
I forgot to post an update here after my last print...
The same issue was present after tightening the X-axis belt, unfortunately. I actually spent some time closely observing the print while in process - especially near the top of the print. I could clearly see the part was flexing in the X direction periodically, so I think the issue may just be with the part itself being too tall and narrow (flexible). I will run another test (as I suggested I would before) with the longer 25mm dimension of the cross section aligned with the X-direction.
Also, in response to Dan Rogers comment above - I did not replace the bearings on the Y-axis with the Drylins. I installed them initially, but there was way too much slop in them (the whole bed had noticeable rotation about Z). I pulled the Drylins out and installed new linear ball bearings in their place. I will take a look at the X carriage tightness...
H
After extensive testing - Z slop (hold the bed, wiggles slightly up and down) has no observable impact on print quality. When putting Drylins on the Y axis, you can tune the slop out - but you don't want to eliminate it * if you do the Y calibrations will start to fail *
Why? Because the Y axis never jumps up and down under normal use.
Y-axis slop clarification
After extensive testing - Z slop (hold the bed, wiggles slightly up and down) has no observable impact on print quality. When putting Drylins on the Y axis, you can tune the slop out - but you don't want to eliminate it * if you do the Y calibrations will start to fail *
Why? Because the Y axis never jumps up and down under normal use.
The issue I had with the Y-axis was not vertical slop - the entire platform could rotate noticeably clockwise/counterclockwise when viewing from above. This just didn't feel right, so I swapped them for the standard ball bearings (never even attempted to print with it this way).