Layer height table in Prusa Slicer
How can I change layer height for a specific range of Z values?
In Slic3r PE I could right click the model, click settings and then go to the layers tab and set what layer height to use for which range in Z; in Prusa Slicer I can't find that option. How can I do this?
Note: I do not want smooth variable layer height. This is a technical model. I need a specific layer height over a specific Z range and I don't care the surface won't look nice.
RE: Layer height table in Prusa Slicer
I also miss this functionality.
RE: Layer height table in Prusa Slicer
A simple work around: Cut the part at the desired levels to make separate shells, and then assign each shell it's own layer height.
RE: Layer height table in Prusa Slicer
How can I change layer height for a specific range of Z values?
I can't test right now, but you might be able to approximate this with a modifier part. You can set how high it is, not the layer number though, so it's not an exact match for what you're describing. But good enough?
RE: Layer height table in Prusa Slicer
A simple work around: Cut the part at the desired levels to make separate shells, and then assign each shell it's own layer height.
I wouldn't call that simple.
- I don't even know how to place one object on top of another. As separate objects Plicer won't allow me to move the parts upwards and I don't see an option to load one as part of the other (without exporting it to a new STL first).
- That would generate extra top and bottom layers. If I want to modify a single range, I'll have to set 0 top layers for the bottom part, 0 top and bottom layers for the middle and 0 bottom layers for the top. Pretty annoying.
- Will infill line up in separate objects like that?
I can't test right now, but you might be able to approximate this with a modifier part. You can set how high it is, not the layer number though, so it's not an exact match for what you're describing. But good enough?
Not working for me.
Right click -> add modifier -> slab, position, right click modifier -> layers and perimeters, set desired layer height in the right sidebar, slice.
All layers are still the same height. Did I do something wrong or is it not working?
RE: Layer height table in Prusa Slicer
Layer height control via modifiers isn't working ... oddly, changing perimeters is working with the same modifier. I don't see any bug reports, so I've added one.
Clipping a part into steps is pretty simple. Use CUT in Plicer, or Plane Cut in Meshmixer ... however just tried and even that isn't working as expected.
Seems the developers don't want people changing layer heights abruptly... lol (not really funny).

RE: Layer height table in Prusa Slicer
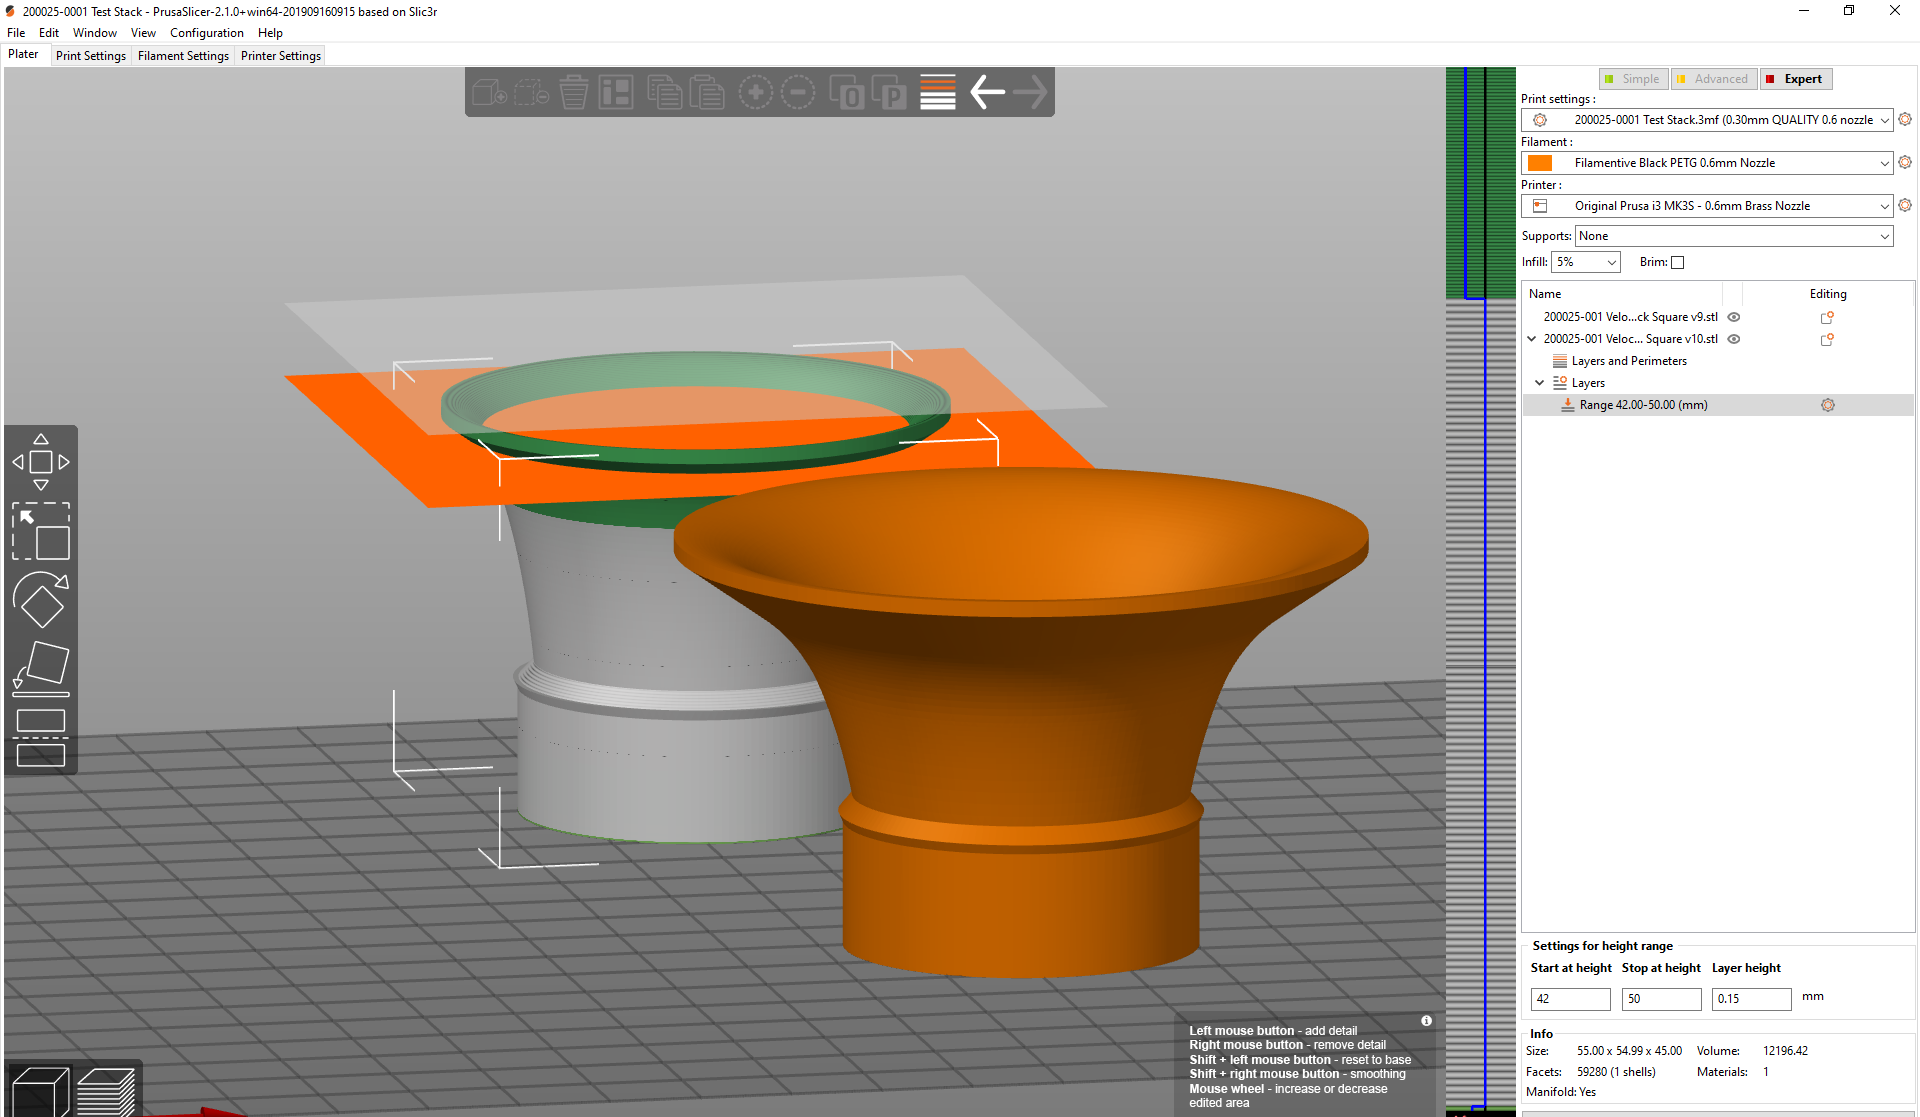
@tim-m30
I Know this is a bit old but this is the only thread i saw pop up when researching a similar issue i wanted to try and fix. If you add a range modifier then where you select the range you can also add what layer height you want for that range. You can see in bottom right of my screenshot. Hope this helps someone else if they are looking.