Re: Get rid of seam when printing a cylinder
Assuming you have more than one perimeter pass, there isn't any way to get rid of it, all you can do is to reduce it. The perimeter has to start and stop somewhere in the print.
A combination of printing outer perimeter first, retract amount, coasting, un-retract amount, extrusion multiplier, wipe while retract, and linear advance calibration, will probably get you there.
Since that looks like a shaft, you are going for minimizing the perturbation of the surface, not the visual impact.
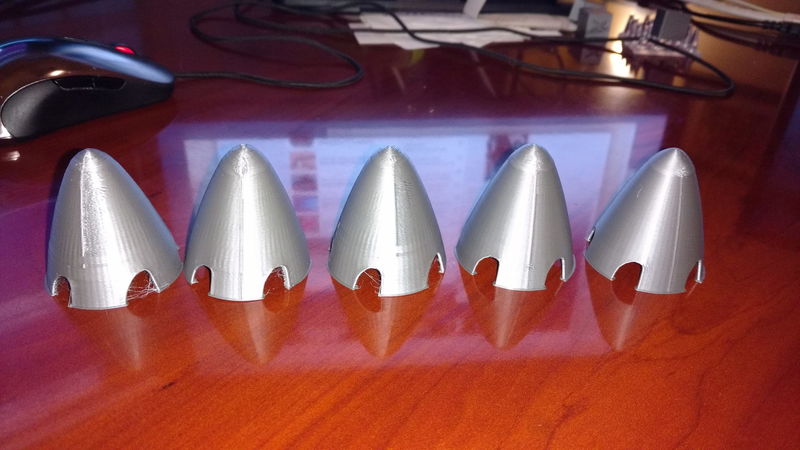
You can see the progression I went through while tuning things. On the far right, you can still see the seam, but you can only just feel it. As compared to the first one where is was a huge ridge in the surface. It might also be best to let a little bit of a ridge remain in the print and the take a small file to it to smooth it down.
if it is already smooth and its just the visuals that are bothering you, you can set the start/end location to random and the printer will start each layer in a different location and remove the visually obvious line. However, if the seem is raised, doing this makes smoothing more of a pain, unless you are already planning on sanding the entire shaft.
Re: Get rid of seam when printing a cylinder
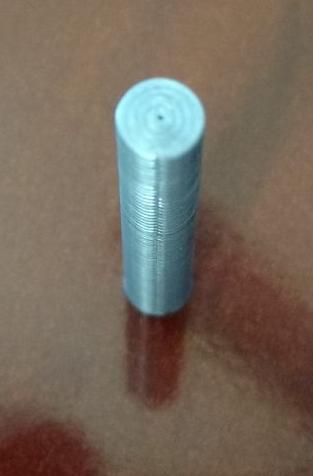
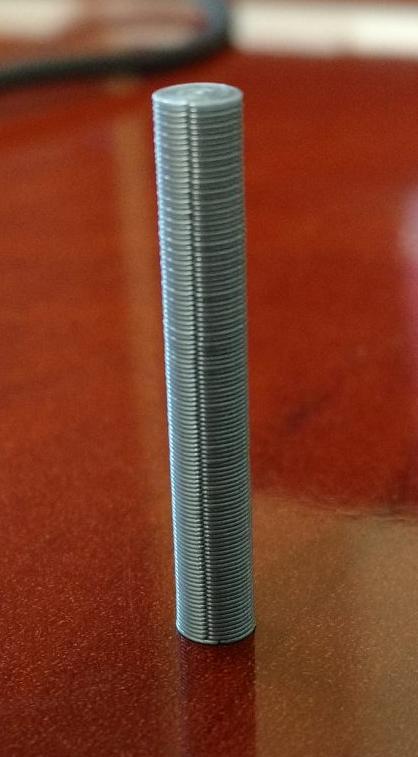
Just to follow up with an example closer to what you are printing. This an an ~5mm axle I printed today.
When viewed from the side, the seam is obvious.
However, I can't feel it if I run my finger over it. If I use my fingernail, I can just barely catch the seam. It doesn't impact rolling the axle across my desk at all. I could probably get it even smoother with some further, very fine, tuning. However, I decided it was good enough and that I wanted to get stuff printed rather than continue tweaking.
Re: Get rid of seam when printing a cylinder
Random start points?
Neal
Re: Get rid of seam when printing a cylinder
For my axle, random start points would probably have been a good idea. If you are in a situation where your seam protrudes slightly from the surface, random start points gives you little zits all over your print. Depending on what you plan on doing for a surface finish, one may be easier to address than the other. I find it a bit easier to take a file, or sanding board down a straight line seam than to try and deal with little bumps everywhere. In the case of a shaft, where you might be sanding the entire shaft a bit anyway, for clearance, it may not make a huge difference.
Re: Get rid of seam when printing a cylinder
Thank you for your help. I will try to use random start points.
Is there no other solution?
Re: Get rid of seam when printing a cylinder
Unless you are printing in vase mode, there will always be a start and end point for the layer. The extruded filament in round so you can't get a smooth transition where two ends of filament meet. There will always be some sort of visible joint, either a slight indent, or a slight bulge.
Re: Get rid of seam when printing a cylinder
Is it possible to print thick walls in vase mode?
Re: Get rid of seam when printing a cylinder
Is it possible to print thick walls in vase mode?
Thick-er, sure, but only up to a point. Using this doc: https://e3d-online.dozuki.com/Document/oALPlTAN3DpmeLYq/.pdf you can print a layer height up to about 80% of the nozzle diameter ("A") and an extrusion width to an absolute max of the "B" dim, although I'd recommend keeping the width to a bit less than "B" (haven't gone to that extent myself so no idea how good or bad it works). For example I've printed at 1.0mm width using a 0.6 nozzle without issue and it produced a nice, reasonably strong single wall object.
I believe the V6 on our MK3's can handle a 0.8mm nozzle but the largest I've personally used is a 0.6. You'll need to print slow due to the volume of plastic that can be melted by the V6 hotend though. Slic3r will handle this automatically with the Max Volumetric Speed filament setting.
Hopefully someone with more experience/knowledge will chime in since I'm still relatively new to this 3D printing obsession :).
Re: Get rid of seam when printing a cylinder
I did some experimentation using a single layer-thick print. Above 120% of the nozzle opening size, adjacent layers didn't adhere well. With a multi-layer or vase-mode print, this might be acceptable, but I'm sticking to the old 120% guidelines for extrusion width. Easier to swap on a new nozzle when doing vase mode prints.
[...] Thick-er, sure, but only up to a point. Using this doc: https://e3d-online.dozuki.com/Document/oALPlTAN3DpmeLYq/.pdf you can print a layer height up to about 80% of the nozzle diameter ("A") and an extrusion width to an absolute max of the "B" dim, although I'd recommend keeping the width to a bit less than "B" (haven't gone to that extent myself so no idea how good or bad it works).
[...] I believe the V6 on our MK3's can handle a 0.8mm nozzle but the largest I've personally used is a 0.6. You'll need to print slow due to the volume of plastic that can be melted by the V6 hotend though. Slic3r will handle this automatically with the Max Volumetric Speed filament setting.
The E3D V6 hotend can handle a 0.80mm or 1.00mm nozzle just fine. It will move slowly, but you're still shoving out the same amount of plastic, so print times might be the same or even much faster depending on your printing parameters. I've compiled all my notes on the relationship between nozzle sizes and print times here.
To answer the question on wall thickness in vase mode:
* A 0.40mm nozzle can print walls up to 0.48mm thick and 0.32mm layer height in vase mode at roughly 74mm/s
* A 0.80mm nozzle can print walls up to 0.96mm thick and 0.64mm layer height in vase mode at roughly 18mm/s
This assumes you're using the 120% extrusion width and 80% layer height guidelines. Scale each up accordingly if you use a larger multiplier for extrusion width or layer height versus nozzle size. The gist being that a larger nozzle size is going to let you print proportionally thicker walls and taller layers with a single extrusion in vase mode. The larger nozzle will move more slowly in vase mode, but the resulting walls will be much thicker and stronger.
and miscellaneous other tech projects
He is intelligent, but not experienced. His pattern indicates two dimensional thinking. -- Spock in Star Trek: The Wrath of Khan


