Gap in corner, only on one machine with same gcode.
Hey Everyone,
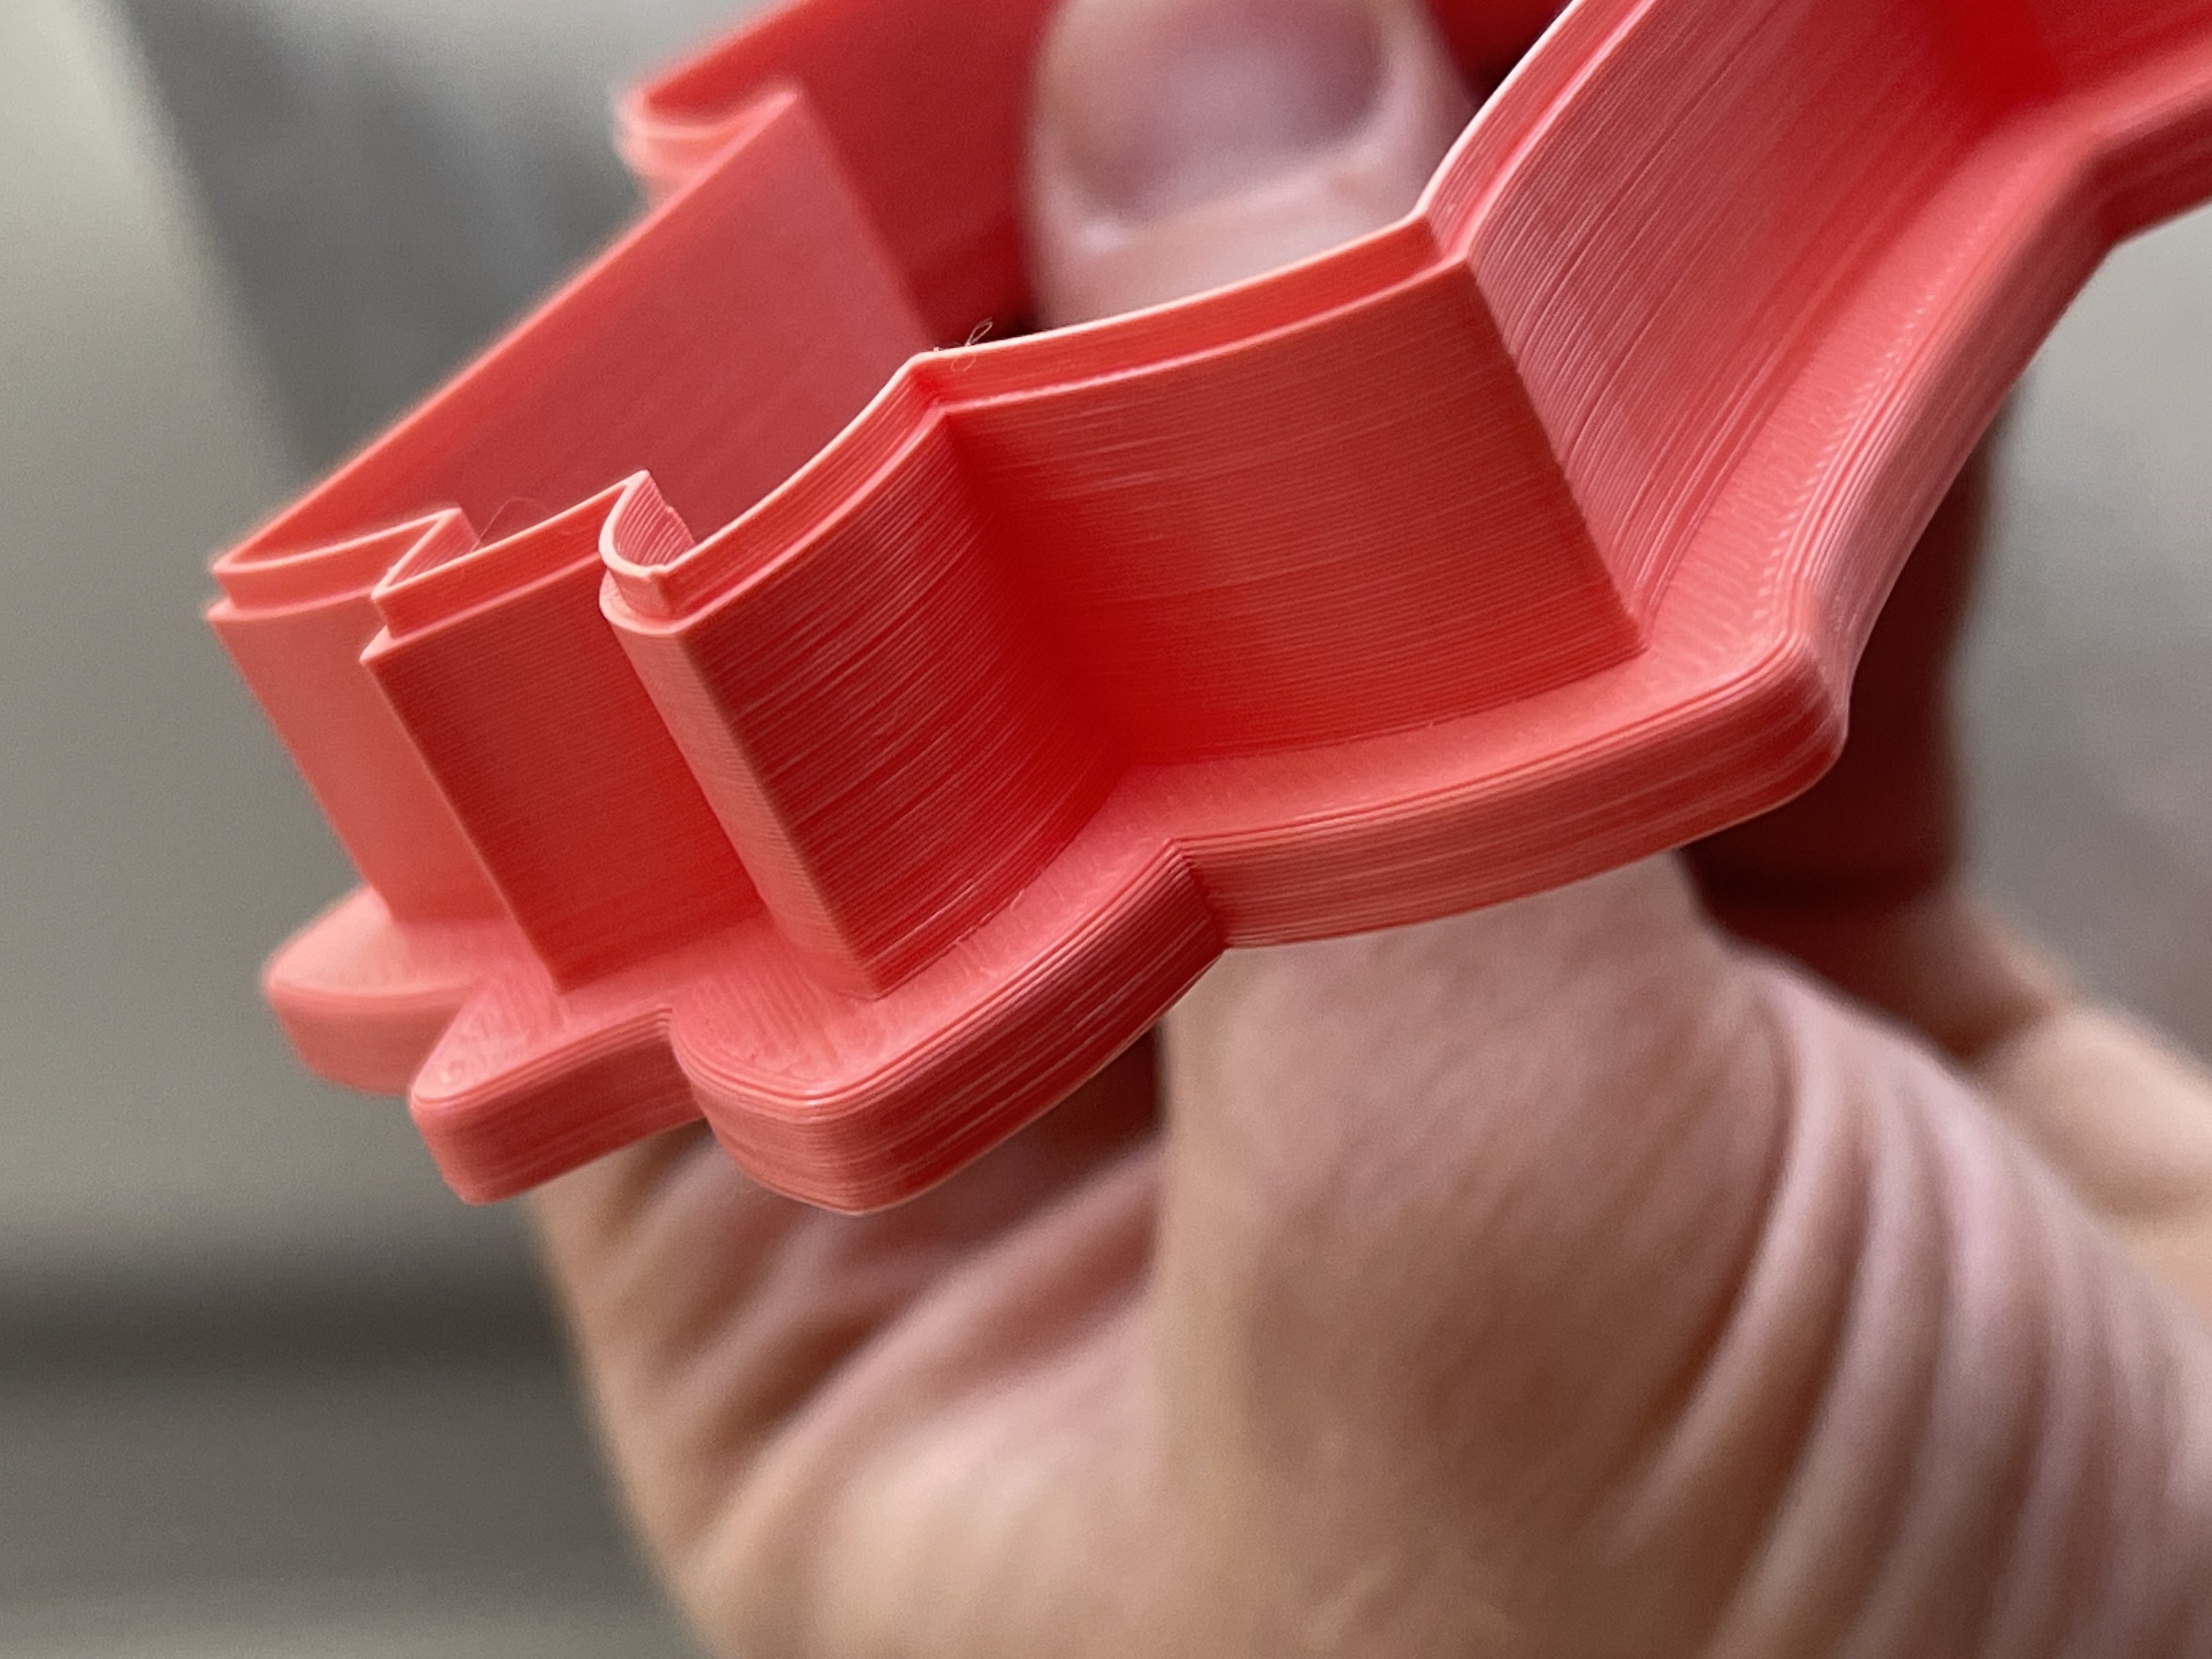
Any idea why this gapping in the corner would be happening? The photo show the same gcode on different machines (both I3 Mk3s) so I assume it’s not the slicer settings but maybe something lose/not adjusted on my machine? The machine in question has about 193 days of print time under it’s belt and the others are at about 40. Happens whether I print one item or multiples. Tried doing a cold pull to see if there was any stuck material but didn’t help.
Thank you!
RE: Gap in corner, only on one machine with same gcode.
@chef-pete
If you can post a zipped up .3mf project file that would allow us to look at the project and settings as they pertain to the model.
How-to-save-and-upload-a-project-file In case your unfamiliar how to.
In the mean time if you know that "detect thin walls" was ticked in your slicer settings you may want to try it without this setting ticked.
Good Luck
Swiss_Cheese
The Filament Whisperer
RE: Gap in corner, only on one machine with same gcode.
I do have "detect thin walls" activated. I tried to deactivate and print a model, but it won't print the thin wall on the top of my print. I have been using the same prusaslicer settings for over a year and only had this issue very sporadically, then it started occurring when I was printing multiple items on the same plater, but now its every print. The weird part is that its only on 2 out of 4 of my Prusa machines.... same gcode, so how could it be related to the gcode?
in the slicer preview I can see that its happening where the retractions/detractions are taking place.
Thanks
RE: Gap in corner, only on one machine with same gcode.
I can't tell what the picture is supposed to look like nor what the term "gapping" means.
RE: Gap in corner, only on one machine with same gcode.
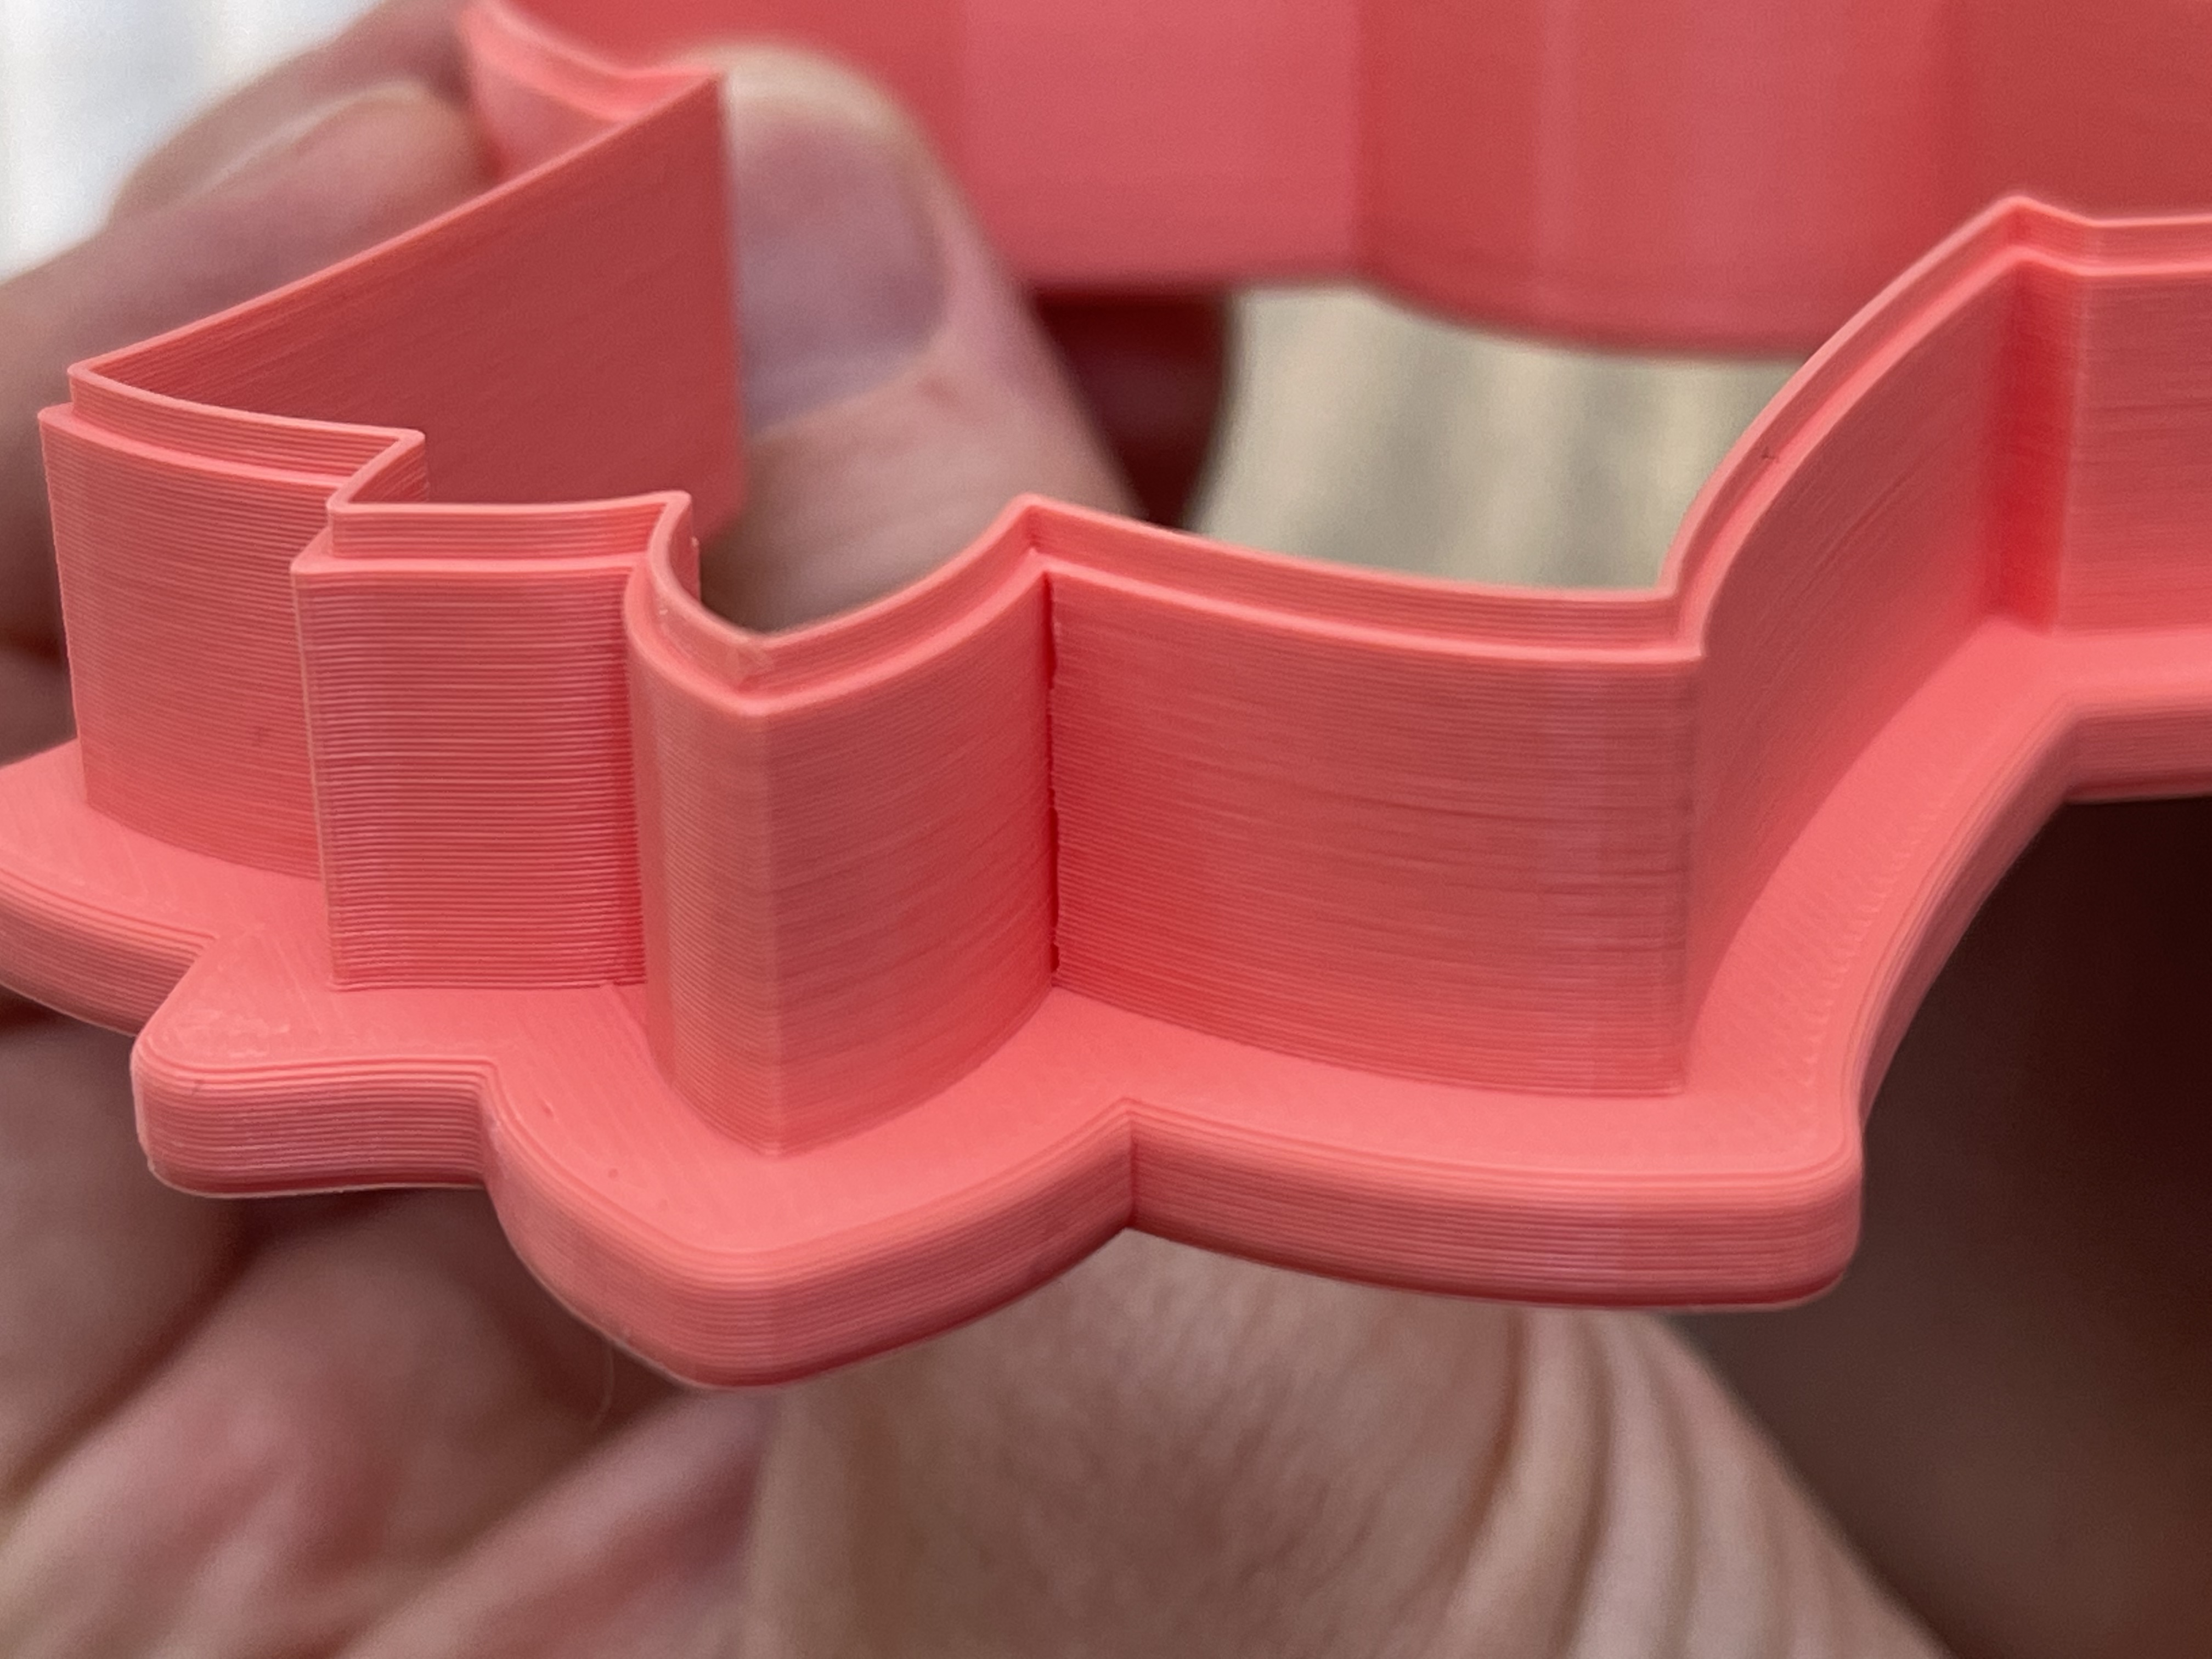
@dan-rogers the first picture is a good print. The second picture has gap, or space in the corner. It’s happening where the retractions/detractions are taking place. Outer perimeter not fully connecting basically.
RE: Gap in corner, only on one machine with same gcode.
@chef-pete
"Detect thin walls" (DTW) is causing problems for you, all be it sporadically. for those designs with the walls so thin the best thing to do it turn of DTW and use a height range modifier to adjust the extrusion width for the thinner walls on the top.
In the future if you post a project file as described in the How-to-save-and-upload-a-project-file we can offer better assistance.
Good luck,
Swiss_Cheese
The Filament Whisperer
Issue still not resolved, any other ideas?
Coming back to this post as I still haven't gotten the issue resolved. Been working with tech support but still no solution. Ive attached the file this time.
Its really not a sporadic problem, it's very consistent on two of my machines, the other two MK3s work fine with these settings, I also have 4 Ender 3 Pros that print this file great, obviously some setting are different but the general idea is the same. It would have to be something with the Printers right? the only weird thing with that is that one of the problem printers is my oldest, and the other is one of my MK3s+ that only has 5 days of printing on it. My other older Mk3s works great, as does my other new MK3s+. Could this really just be a glitch in prusa slicer?
I did try to increase the extrusion multiplier up to 1.15 and it takes care of the gap, but presents a host of other issues, thicker print (not consistent with my other machines) rough edges on some top surfaces, stringing etc...
I'm trying out working in Cura, which I'm not a fan of, but it does take care of the gap as well, just still don't have the rest of the model dialed in
Thanks for your help!
Same Idea I suggested a month ago
@chef-pete
A month ago almost to the day I suggested turning off DTW and using height range modifiers to adjust the wall thickness instead.
I'm looking over your .3mf and I see no sign of your trying this. I Have, since receiving your .3mf, tested this on your model specifically, I tested on both an MK3 & an MK3S. When I printed your .3mf I did get the poor seams as you did on both machines, after turning off DTW and moving the seam location on both the inner and outer sides of the cookie cutter and applying a height range modifier to adjust the extrusion width the problem went away.

Keeping in mind that these images are extremely close up, the naked eye can barley see the seam, it certainly
won't show up in cookie dough.
The Red circle marks the area I moved the inner seam, and the Oval marks the new location of the outer seam.
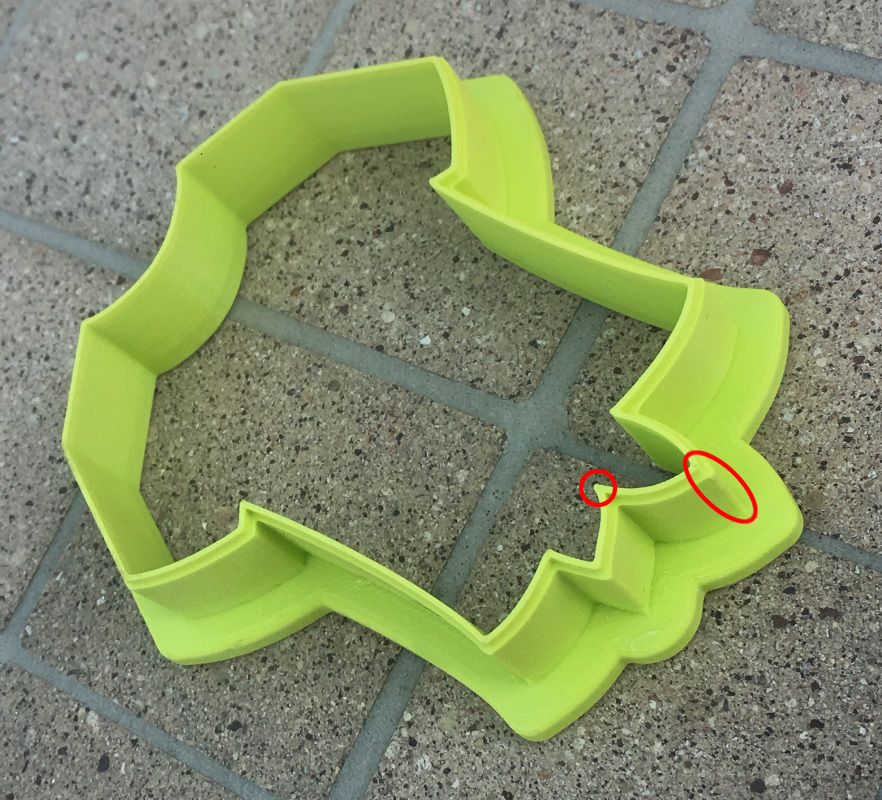
I used "Height Range"modifiers to set the perimeters and external perimeters to (0.35 2 perimeters) on the larger portion of the thin wall, and I used another to set the smaller area to (1 perimeter at 0.35). I did a few other little things to to further the cleanliness of the print.
the lower portion of the cutter was left at 2 perimeters and default extrusion width of 0.45 it prints in 1hour 10min.
Good Luck
Swiss_Cheese
The Filament Whisperer
Tighten the belts?
Just a wild guess -- could the machine with the flaw need to have its belts tightened?
Testing prints, a couple questions…
Thanks very much for help and testing! I’m working on some test prints to see if I can come up with that same result.
two questions.
1. Can you share the .3mf file so I can see exactly what you did?
2. If this does end up getting me the result I need, is there a way to replicate the height modifiers as a “preset” of sorts? It could add a lot of time to my workflow seeing that I have hundreds of different variations of these files to slice…
Thanks
Give a man a fish and you have fed him a meal, Teach a man to fish and you've fed him for a lifetime 🤔 Couldn't Help Myself 🤣
@chef-pete
If this does end up getting me the result I need, is there a way to replicate the height modifiers as a “preset” of sorts? It could add a lot of time to my workflow seeing that I have hundreds of different variations of these files to slice…
Yes there are several ways to do this:
(1) If your printing multiples of the same model on the same bed you can simply make instances of the tuned model and the settings will carry over to each, (printing them identically).
(2) In the case of height range modifiers, they are applied to each model individually, however as long as your other cookie cutters are the same height and the features are at the same heights from one cookie cutter to the next, you can copy and paste the setup from one model to another and expect the same result for each. the caveat being that if you want your seams to be in specific locations you will have to place them manually for each separate model, in this case I would suggest trying Random seam placement, if it works out to your liking it will be a great time saver.
Note: using this method you can save a copy of a .3mf project with a cookie cutter that has the settings applied, set it to not print, and use it as a placeholder for your settings to be copied and pasted to other imported models.
(3) This method is basically the same as (2) But using shape modifiers, these modifiers can also be copied to other objects, however the shape modifiers are prone to reposition themselves in somewhat unexpected ways when copied & pasted to new objects/models, their coordinates are based off of the object or model their linked to and while there are ways to work around this the bottom line is you will need to reposition them at the very least in the X & Y axis (0,X & 0,Y to center on new) each time you paste them.
Note: These modifiers do however offer a more point specific ability for your modifier needs as they work in all 3 axis.( great for delivering commands to very specific areas).
(4) You can actually use custom G-code to do this, the simplest method would be to use the(Add custom G-code) dialogue that appears in the layer height sidebar after slicing, if you select a layer and (right click) on the + sign you will have the option to select this for each layer, once the commands are set up any object/model you import will be effected by the commands at these heights, If your familiar with G-code this is going to be the best way for you to produce a template for cookie cutters of the same feature height.
Note: Method (4) becomes unavailable if you choose to print sequentially, then method (2) becomes more appealing.
(5) you simply putting the G-code in a text editor and keying it in.
As you appear to print for income I don't think it would be right for me to just hand my work over to you. however, I offer my advise and my test prints in solidarity.
Good Luck
Swiss_Cheese
The Filament Whisperer