Re: Broken Filament in Extruder – Please Advise
Making progress. Being brave helps ...
This document - old (actually in the "Obsolete Manuals" section) does provide some useful info:
https://manual.prusa3d.com/Guide/How+to+replace+PTFE+tube/82
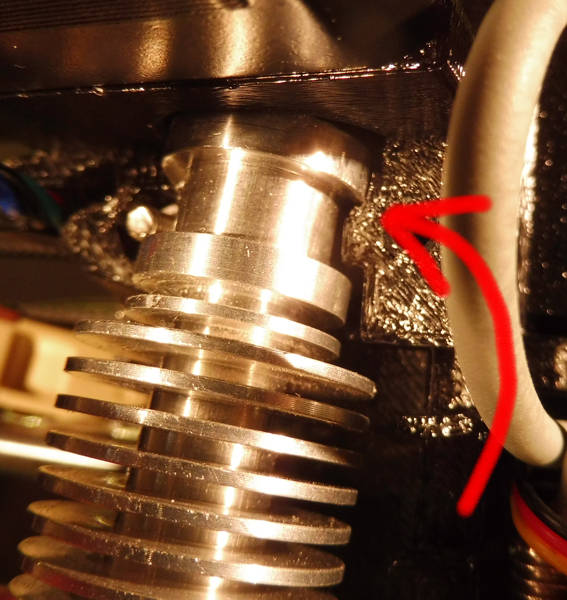
Cut all the ZIP ties and unwrapped the black spiral cable organizer to get wire slack to remove the HeatSink + HeatBlock. Could not pull them out, and it looked like the deformed top of the PTFE was blocking extraction, so I surgically snipped off ever more chunks of PTFE and removed them. Then I realized there is actually a tab on the printed part that forms the back of the HeatSink enclosure.
Not sure what to do now. Arrow shows the TAB that seems to block extraction.
There seems to be no way to pry the HeatSink forward enough to clear the TAB. I can't even imagine how I would re-install the HeatSink (if I ever do get this repaired).
Advice would be appreciated ...
-- Clint Goss
Re: Broken Filament in Extruder – Please Advise
That looks like a different printer in the manual. I'd go slow before doing too much not specifically intended for the Mk.3. I can't recall the exact steps, but at one point, I had the fans and front plate removed and my extruder more-or-less fell out. Scared the hell out of me.
and miscellaneous other tech projects
He is intelligent, but not experienced. His pattern indicates two dimensional thinking. -- Spock in Star Trek: The Wrath of Khan
Re: Broken Filament in Extruder – Please Advise
Found this video, which demonstrates how to pry the HeatSink from the plastic housing on the Extruder. I had to use some serious prying. You basically pry down (negative Z) for a bit until the HeatSink collar clears the plastic, then forward (negative Y) to clear the tab (the one pointed to by the arrow in my post above).
Onward ... (Are we having fun yet?)
-- Clint Goss
Re: Broken Filament in Extruder – Please Advise
I would try this process, recommended by Joan and Bobstro:
Oh crap :geek:
Well, guess I have to... would be nice to learn to change the nozzle if I ever would want to try smaller one (I'm printing 1:100 tabletop wargaming stuff). Found reasonable clear instructions (yes, the Prusa-leaflet has also instructions):
prusa-i3-kit-archive--f84/change-nozzle-t6626.html
Need to get that 7mm socket, after removing those fans there isn't that much room... wonder how I can hold the block if needed, without breaking the wires... But thats for tomorrow... getting the whole heatsink & block shouldn't be that hard, was easy to put together, and I assume that the reverse is not that hard either:
https://manual.prusa3d.com/Guide/5.+Extruder+Assembly/114?lang=en
Of course if your parts are deformed, it's another thing...
Re: Broken Filament in Extruder – Please Advise
Getting the hearsink out is particularly difficult when there is filament in the ptfe tube...
But it is do able
Good luck
If you can get a wrench on the front and back of the heatsink. The wires should be safe...
Regards Joan
I try to make safe suggestions,You should understand the context and ensure you are happy that they are safe before attempting to apply my suggestions, what you do, is YOUR responsibility.Location Halifax UK
Re: Broken Filament in Extruder – Please Advise
Found this video, which demonstrates how to pry the HeatSink from the plastic housing on the Extruder. I had to use some serious prying. You basically pry down (negative Z) for a bit until the HeatSink collar clears the plastic, then forward (negative Y) to clear the tab (the one pointed to by the arrow in my post above).
Onward ... (Are we having fun yet?)
I think it should be redesigned so that it's easier to dismantle.
A good thing to have on hand is replacements for all the printed parts, especially for the printhead. They are cheap to print, and you never know when someday you might need one. I once broke off the pinda holder by mistake, and I was glad to have a stash of replacement parts that I had printed.
Re: Broken Filament in Extruder – Please Advise
Success!!!
There are so many resources, and none of which (except folks on this forum) were an exact match for my situation. There's a lot of "oh it's just like this, except for X and Y and Z". In the end, you read it all, glean what you can, be brave, and ask questions when damage seems possible.
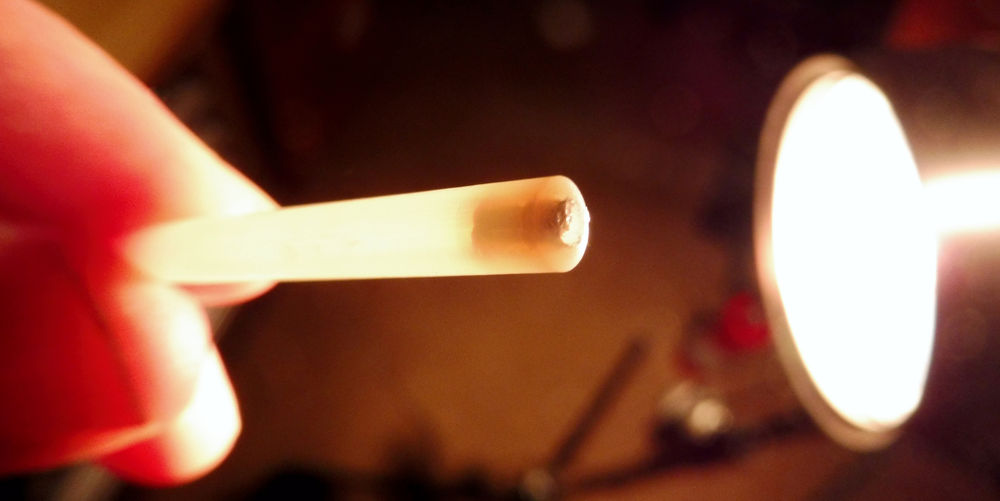
The culprit is shown here - a cog firmly jammed in what is probably a slight bulge in the PTFE tube, probably created by repeatedly ignoring the ultra-important, super-secret mantra: Extrude Before Unloading
After the repair, I went through Self Test, Calibrate XYZ, Calibrate Z, Mesh Bed Leveling, and First Layer Calibration. I'm not sure what parts of that sequence are redundant, or even if that is a complete "after major repair" checklist. First layer calibration worked out to almost exactly what it was before this sidetrip into hotend hell.
BTW, I use paper feeler gauges to check the Z-delta between the nozzle and the PINDA - that *really* helped to confirm that my nozzle was in reasonably the same Z-axis location as before.
Happily printing away now ...
Thanks to all for their suggestions and encouragement !!!
-- Clint Goss
Re: Broken Filament in Extruder – Please Advise
Yaaaaayyyyy...
welcome to tinkertown!
Joan
I try to make safe suggestions,You should understand the context and ensure you are happy that they are safe before attempting to apply my suggestions, what you do, is YOUR responsibility.Location Halifax UK
Re: Broken Filament in Extruder – Please Advise
... welcome to tinkertown!
With my hard won hardware skills, I'm now wondering ...
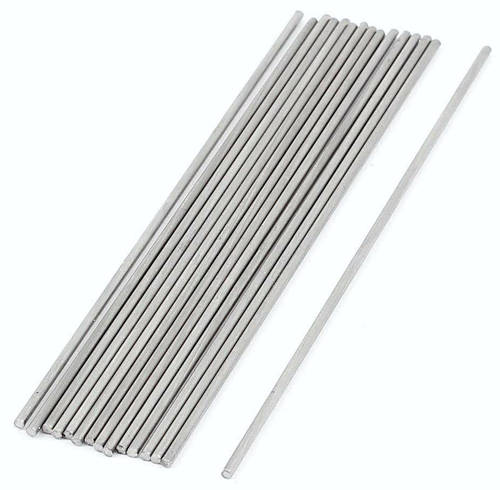
Would something like this might be a useful tool for potential future PTFE clogs. These are 1.5 mm, 100 mm long. They are available is Brass and Stainless Steel. Common parts for RC car axels and airplanes.
I’m thinking they may be better than a hex Allan wrench. No chance of damage from angular corners, and they are longer.
Maybe better than a then 100 mm long version would easily reach (by my calcs) from the heatblock up to the extruder gear chamber (that’s the “BondTech chamber”, yes).
Here’s the question: with the extruder idler door open, would it be possible to use this from the *top* of the extruder and get it past the gears into the PTFE tube? i.e. would the drive gear alone with no idler gear inhibit / deflect travel of a straight rod?
-- Clint Goss
Re: Broken Filament in Extruder – Please Advise
Easiest way to find out is fo try it
I try to make safe suggestions,You should understand the context and ensure you are happy that they are safe before attempting to apply my suggestions, what you do, is YOUR responsibility.Location Halifax UK
Re: Broken Filament in Extruder – Please Advise
It should work just fine. On my initial foray, I was trying to use stranded-core copper wire. It was too flexy, even stiffened with solder, although it was good at fishing out some accumulated gunk. Anything of the appropriate diameter and stiffness that won't melt should work. Perhaps watch out for plating that might flake.
With the extruder door open, you should have a clear path from the top of the extruder to the PTFE tube. Pushing filament down that same path is a common recommendation.
The only problem I see is quantity. You'll have a lot more than you need.
and miscellaneous other tech projects
He is intelligent, but not experienced. His pattern indicates two dimensional thinking. -- Spock in Star Trek: The Wrath of Khan
Re: Broken Filament in Extruder – Please Advise
With the extruder door open, you should have a clear path from the top of the extruder to the PTFE tube.
You don't think the drive gear would interfere with the path of a straight rod from the top down the PTFE tube??
-- Clint Goss
Re: Broken Filament in Extruder – Please Advise
I'm mid-print, so can't check now, but I think I was able to insert the 1.5mm wrench in from above. I was definitely able to poke some wire down through it without too much fuss (before I remembered the wrench.) A lot will depend on angles and flexibility of the rod. I certainly wouldn't force it, but it's worth a look. If they offer options, you might try a smaller diameter.
You don't think the drive gear would interfere with the path of a straight rod from the top down the PTFE tube??
and miscellaneous other tech projects
He is intelligent, but not experienced. His pattern indicates two dimensional thinking. -- Spock in Star Trek: The Wrath of Khan
Re: Broken Filament in Extruder – Please Advise
With the extruder door open, you should have a clear path from the top of the extruder to the PTFE tube.
You don't think the drive gear would interfere with the path of a straight rod from the top down the PTFE tube??
Filament is 1.75mm, and the the gear is fixed on fixed position only on the other side, pressure coming from the spring on the door. So if the door is open, the should be enough clearance to to push 1.5mm through, so that it doesn't hit the fixed gear teeths?
I ended up re-organizing my workshop instead of getting the nozzle out, but I did bought 7mm wrench with open and closed ends. Should be easy to take out the nozzle and maybe then clear the blockage...
Re: Broken Filament in Extruder – Please Advise
Sorry, Mike. I missed your earlier posts in this thread.
I ended up re-organizing my workshop instead of getting the nozzle out, but I did bought 7mm wrench with open and closed ends. Should be easy to take out the nozzle and maybe then clear the blockage...
I've found that this process works well for nozzle changes:
1. Raise Z up to give yourself room to work. Light it up so you can see clearly. If you've got some filament build up, it can be hard to make out details.
2. Remove the orange part cooling fan duct using the single screw on the front is sufficient for access to the heating block.
3. Heat the nozzle up to 250C so everything expands.
4. Grab the block with a wrench. My cheapie is an 18mm, although I believe (do check) the official size is 17mm. The main thing is to brace the block so it doesn't turn and damage the heatbreak above.
5. Use the 7mm socket to unscrew the nozzle. Avoid touching the hot nozzle. Avoid dropping a hot nozzle into your lap. If using a steel nozzle, avoid dropping it so it bounces oddly and sticks to a magnet on the underside of the heated bed. Trust me on these.
At this point, you should have good access. I used some threaded copper wire stiffened with some solder to clean out the hotend, then was able to poke the 1.5mm wrench up through the PTFE tube into the extruder without too much fuss. I can do the whole thing in a couple of minutes now.
Replacing the nozzle is pretty much just the reverse process. Again, be sure to brace the heatblock to avoid twisting, and don't over-tighten the nozzle. A bit of a gap between the nozzle and block is fine. Tighten snugly but not too tight. I use 2 fingers. There is a plastic wrench you can print that is supposed to ensure the proper torque (search for Olssen Ruby instructions).
I just read your note about printing 1:100 tabletop miniatures. I don't play anymore since my boys left the house, but I find the M4A1 a much more satisfying test print than Benchy. Here are comparisons at 0.10mm layer height using a 0.40mm and 0.25mm nozzles. Notice the bogey detail:


Paramount makes some PLA filaments in good gaming colors. I wish I'd had this thing back when I was building a Soviet horde and paying $10-20 per vehicle!
and miscellaneous other tech projects
He is intelligent, but not experienced. His pattern indicates two dimensional thinking. -- Spock in Star Trek: The Wrath of Khan
Re: Broken Filament in Extruder – Please Advise
Sorry, Mike. I missed your earlier posts in this thread.
Paramount makes some PLA filaments in good gaming colors[/url]. I wish I'd had this thing back when I was building a Soviet horde and paying $10-20 per vehicle!
Thanks! It's been a busy week, but tomorrow I have a day off, so we'll see how it goes... will post a report after that 🙂
Yeah, miniatyres are expensive... I have FoW / Tanks stuff, and find injection moulded plastic tanks by "plastic soldier" good and cheap, no need to print tanks - I will be using the printer to do scenery bits like houses, bunkers, ruins... I have designed a modular set and sort of "best way" to do these so that they are well detailed and fast to print.
It kind of helps that I have a B.A. in Architecture, and have been earning my living in the entertainment industry for the last 18 years as a 2D/3D graphic artist... so houses and 3D, no prob 🙂 ...Except when the printers jams...
I paint my models and use also laser-printed decals, just to speed up things. Painting small bricks and ads to a WWII French village house is too time consuming!
And yeah, I have spent a fortune on various tabletop wargaming games, especially WH40000 back in the days... FoW house scenerey bit can cost easily 20€ and it's not even that true to details and scale usually. 20€ is just a little under the price of 1kg filament, and for the 340m meters of it can can't print quite many houses. So saves money, and also I get to do what I love, model historical war stuff.
Re: Broken Filament in Extruder – Please Advise
Yes, success! Fixed the bastard 🙂
Was easy when I finally had time for that today... filament had two breaks, so I had to get small part of from the nozzle and then there's was also piece in the tube... wasn't visible from the top, luckily pushed 1.5mm hex through and pop, filament surfaced...
Will post pics and better explanation + tools used later after I take the photos out of the phone. It's printing a wall for a house now, and seems to go allright... I did Z-calibration, but nothing else after screwing the nozzle back again. Nothing seems to have broken too badly 😯
Re: Broken Filament in Extruder – Please Advise
...probably created by repeatedly ignoring the ultra-important, super-secret mantra: Extrude Before Unloading
Is there an easier way to "extrude before unloading" than by sending the right gcode command to the MK3 over a terminal connection?
Also, just curious: if it's so important, why isn't it built into the firmware's unload procedure? Anyone know?
Re: Broken Filament in Extruder – Please Advise
way to "extrude before unloading"
I do:
Settings => Temperature => Nozzle
to preheat, then
Settings => Move => Extruder
and advance 25mm (1") of filament, followed by the unload. I'm assuming that is immediate enough to do the job ...
-- Clint Goss
Re: Broken Filament in Extruder – Please Advise
I find 10mm on the extruder is enough. Probably all that is needed is 3mm just enough to put fresh filament into the transition part of the heat break. Also I have removed the massive retraction at the end of prints and my end of print g-code is the default script.
Regards,
Martin
Martin Wolfe


