Belt tensioning / belt status
Hi everyone. Long discussion ahead. I searched the board and the manual, but I wonder if there's any sort of tension measure I could use to check the status of the belts? In detail, I'd love to have some decent ballpark measure for the X belt.
Here's how I would calculate such measure in a reliable way:
- Push the extruder all the way to the left.
- Pick a spring dynamometer or digital scale
- Pull the lower part of belt up from the middle (use a ruler to find it), until it barely touches the upper part
- How many grams do you read?
I've read some suggesting tuning the belt to 220hz. I admit I also go by ear on other printers I've already setup, but without knowing the length and elasticity of the belt, such measure is useless. For example, what measure do you read if you do the following:
- Extruder fully to the left
- Pluck the higher part of the belt
The lower part has a partial obstruction under the extruder, so it's not free to oscillate reliably. If you have F-Droid, "Tuner" would be perfectly adequate to test the frequency. The accuracy of any phone is more than adequate for such frequencies. Just be sure to do it in a quiet situation and do it a couple of times. I'd be curious to know what people report.
During assembly of the kit I've followed the instructions religiously, but ended up with something which was clearly too loose from the start. I actually would have kept higher tension without any instruction, as I had experience with other printers and I know more or less what sort of tension to expect. But you know.. keep it safe.
Adjusting the Y belt is easy enough, but the external range of the X is limited, so I'd like to avoid opening the back of the extruder again... again.
After a tension re-adjustment, I ran the initial setup and re-checked the values for the belt status. Surprisingly, the value for the Y belt didn't change much, despite the tension being what I would consider quit a bit higher and in the "fine" range for the Y axis. Should these values be trusted? Is there a quicker way to re-test the belt tension without clearing the initial setup?
I also reduced the X belt by a full tooth. The belt status is now lower, but still at the higher-end of the range (it's ~280 from memory).
Looking at a test print, Y is now good despite showing ~270, but I can say I could cut X maybe another teeth... but unsleeving the pigtail of the extruder again is no fun.
Re: Belt tensioning / belt status
waste of effort trying to measure it with a tuner. the belt tension status (run the self test to update the values) is not always 100% consistent but its will get you very close.
you need proper tensioners on X and Y either way getting especially considering how much of a nightmare it is to redo X. i know that means a lot of work to print new X ends, but it will save you a lot of heartache in the long run.
Re: Belt tensioning / belt status
I tried to convince people to hang a can of soft drink from the X-axis belt, then measure the deflection. Seemed like an easy way to validate belt numbers. Unfortunately there was little useful response.
Re: Belt tensioning / belt status
I agree "sounding" the belt is difficult to do properly, especially if the tension is low. But I don't see a problem with the first proposed method.
Here's what I read:
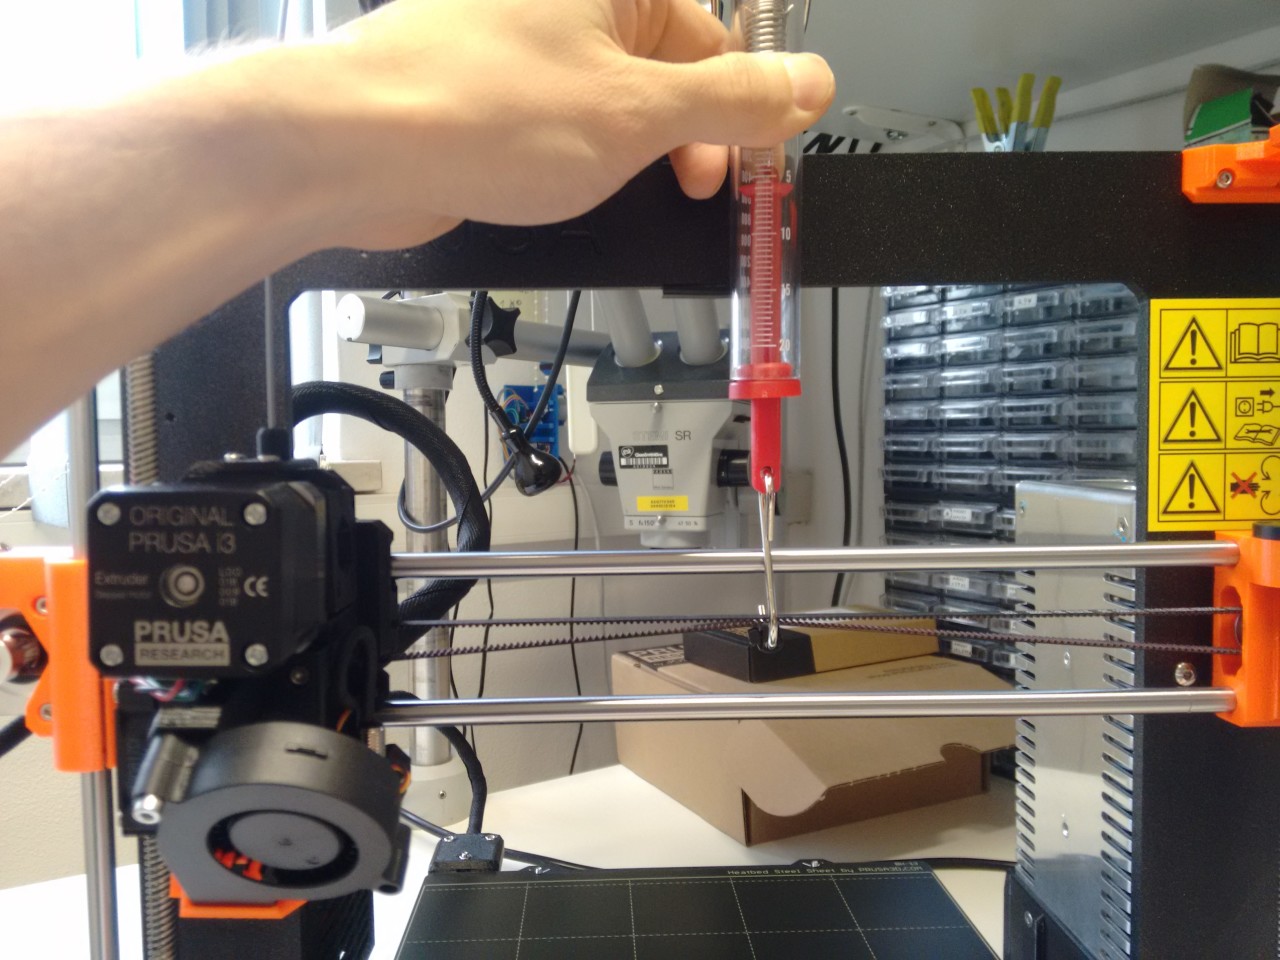
5.1N to the teeth just touching in the perfect center, belt status: X 276
To squeeze the belt just right I added this little spacer:
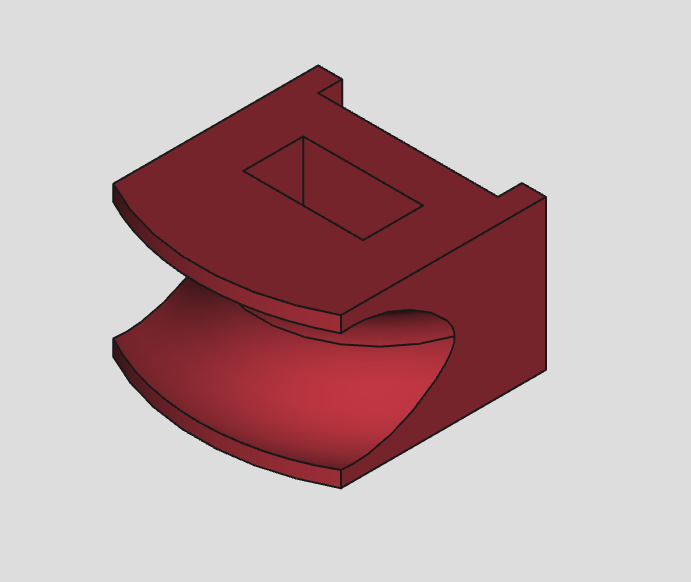
however it doesn't really make a difference.
Re: Belt tensioning / belt status
For example, what measure do you read if you do the following:
- Extruder fully to the left
- Pluck the higher part of the belt
74Hz.
See also https://shop.prusa3d.com/forum/others-archive--f66/use-free-span-frequency-hz-to-check-and-set-belt-t-t12576-s10.html#p73398 .
Re: Belt tensioning / belt status
At 5.1N as shown, I have 87HZ on the upper X belt, extruder pushed all the way to the left.
Re: Belt tensioning / belt status
Just to continue, I noted that the initial tension I had during the build (when I put the belt for the first time) got definitely lost by some amount the end of the build. I attribute this to the horizontal rods getting properly seated. Also, when you first put in the belt, the horizontal axis is still not perfectly planar.
I'll keep the belt as it is for now and re-check the tension after some more printing. The tension I've got now is "in line" with my existing judgement. I'll refrain from adding more given your readings.
Your reference was very informative. I expected the status to be determined somehow by the repositioning accuracy of the end-stop, but the motor load makes more sense. In this context, it's more an indication of the overall axis movement.
Re: Belt tensioning / belt status
I agree "sounding" the belt is difficult to do properly, especially if the tension is low. But I don't see a problem with the first proposed method.
there's no problem, its just not needed.
also, your belt is touching the groove with that much deflection which will affect your results.
Re: Belt tensioning / belt status
also, your belt is touching the groove with that much deflection which will affect your results.
Can you expand on this? I'm not sure I follow this point.
Re: Belt tensioning / belt status
also, your belt is touching the groove with that much deflection which will affect your results.
Can you expand on this? I'm not sure I follow this point.
jltx said it best in the other thread : "Problem with X belt is the "free" span can hit the carriage channel if you pluck it. So you likely won't get a good reading." with the amount of deflection in the picture i'd say its definitely touching somewhere. I'd sooner spend more effort observing the real effects of belt tension on actual prints under certain circumstances rather than simply declaring that 220hz is the "correct" value.
there's a large margin where it just doesn't matter, period. if its too loose you'll skip or see ghosting/overshoot and if its too tight your motors will stall. In between those two ends, thousands of people have printed successfully without it for a decade or more.
if you can feel your carriage move with the drive pulley locked, then its too lose.
Re: Belt tensioning / belt status
jltx said it best in the other thread : "Problem with X belt is the "free" span can hit the carriage channel if you pluck it. So you likely won't get a good reading."
This is why I explicitly mention sounding the upper section of the belt. I don't know if the extruder assembly changed significantly, but there's no channel in the upper section: the belt starts from the extruder's attachment and goes over the pulley *only*. I get extremely consistent results: moving the extruder from and back to the left or clamping the lower belt (in the channel) changes the frequency by <1hz.
with the amount of deflection in the picture i'd say its definitely touching somewhere. I'd sooner spend more effort observing the real effects of belt tension on actual prints under certain circumstances rather than simply declaring that 220hz is the "correct" value.
I don't think you get the point of the test/picture here. This is intended.
What am I doing here is to deflect the belt until it reaches the upper one and observe the required force to do so. The X assembly provides the fixed distances required, which I think is a great simplification to mk3 owners to compare. What you need to do is to just pull the belt with a scale and read.
It's also not intended to be an absolute metric and/or set point. Like I said, I also judge the tension by the print. The problem with the X carriage is that the current tensioning mechanism is +/- one tooth of the belt. If I knew the tension ballpark from the manual with an easy test such as either one of those, I could have went for an almost ideal trimming from the get go and avoid opening the extruder again.
I mean, the manual mentions that pinching the belt sections together requires little force. Well.. that means next to nothing to me :/. I routinely handle smd components with tweezers and there's a world of difference between little and "little". I've seen similar comments in both X/Y sections of the online manual saying something in the lines of "well.. just go for it".
And also, it's nice to know irregardless 🙂
I'd love to know how people typically drive their axis.
Re: Belt tensioning / belt status
the current tensioning mechanism is +/- one tooth of the belt
really everyone should install a real tensioner. 1 belt tooth is a pretty big difference.
https://www.thingiverse.com/thing:2846079
Re: Belt tensioning / belt status
The built-in belt status slackness figure is only a proxy for belt tension. The hardware can only obtain information about how hard it is for the motors to move the axes. It's not a direct measurement of belt looseness or tightness. It's somewhat related but also affected by how well your rods and bearings slide. If we all had average resistance for our axes sliding, the slackness figure could be better relied upon, but we don't. It's still a useful figure for support to obtain because it does indicate if the motor is forced to worked too hard or something is ridiculously loose.
If you have a super slick sliding axis, your going to keep get a high "slackness" figure from belt status even when the belt is already tight enough. In that situation, the belt status figure won't go down much until you over-tension to the point of side loading the motor bearing enough to make spinning the shaft harder.
On the other hand, if you have an axis that binds more, your belt status figure will be lower at the same degree of belt tension.
For an average build machine, the "sweet spot" figure will end up somewhere near the Prusa specified range.
For a superior built machine, the belt status will be higher than spec when the belt is at sufficient tension.
On a bad machine with poorly sliding axes, the belt status will be at the lower end of the range.
Measuring belt deflection / known force and distance is a nice objective means of actually measuring belt tension. That will also be affected by belt manufacturer, but it's probably more reproducible than the belt status slackness figure. A trigger pull gauge is perfect for this, but not something most have in their shop.
I aim for the just enough tension that taking up the belt slack but just starting stretching to stretch results in the rule-of-thumb 1/64 inch deflection / inch span. That's about 0.2 inches deflection for our belts. You can feel a difference between just taking up slack and beginning to stretch if you don't do it directly with your fingers. Directly pushing with a finger doesn't give you enough sensation difference between taking up slack and stretching the belt. How do you make it easier to feel? Depress the mid-point of the belt with the far end of a pencil while holding the other end of the pencil between index finger and thumb. The long level gives you more resolution for feeling the tension change. Taking up the slack will take very little force/distance. As you depress further, the force mildly increases until you reach the point of stretching the belt. At that point, you'll notice additional changes in deflection need palpably more force than when you were just taking up slack.
Re: Belt tensioning / belt status
The built-in belt status slackness figure is only a proxy for belt tension. The hardware can only obtain information about how hard it is for the motors to move the axes. It's not a direct measurement of belt looseness or tightness. It's somewhat related but also affected by how well your rods and bearings slide. If we all had average resistance for our axes sliding, the slackness figure could be better relied upon, but we don't. It's still a useful figure for support to obtain because it does indicate if the motor is forced to worked too hard or something is ridiculously loose.
I see the point. I wouldn't probably call it "belt status", though. Axis load would be more telling.
I had some weird resonance under the build plate in rare occasions and decided to check the status of the U bolts and the spacers, since I noticed one of the "end stop" bearings moved slightly compared to it's original position.
After doing so, I re-ran the wizard and the Y belt measure went up even higher (I'm now in the ~290 range), with the actual belt tension not being changed.
Taking up the slack will take very little force/distance. As you depress further, the force mildly increases until you reach the point of stretching the belt. At that point, you'll notice additional changes in deflection need palpably more force than when you were just taking up slack.
That's a nice method to sense slack. Probably something I'll remember for long belts.
I normally did this purely by ear so far, as a minimal amount of slack will prevent the belt to resonate nicely under a fixed frequency.
Incidentally, I now noticed pretty much the same discussion in another thread: